2009 VOLKSWAGEN GOLF warning
[x] Cancel search: warningPage 17 of 516
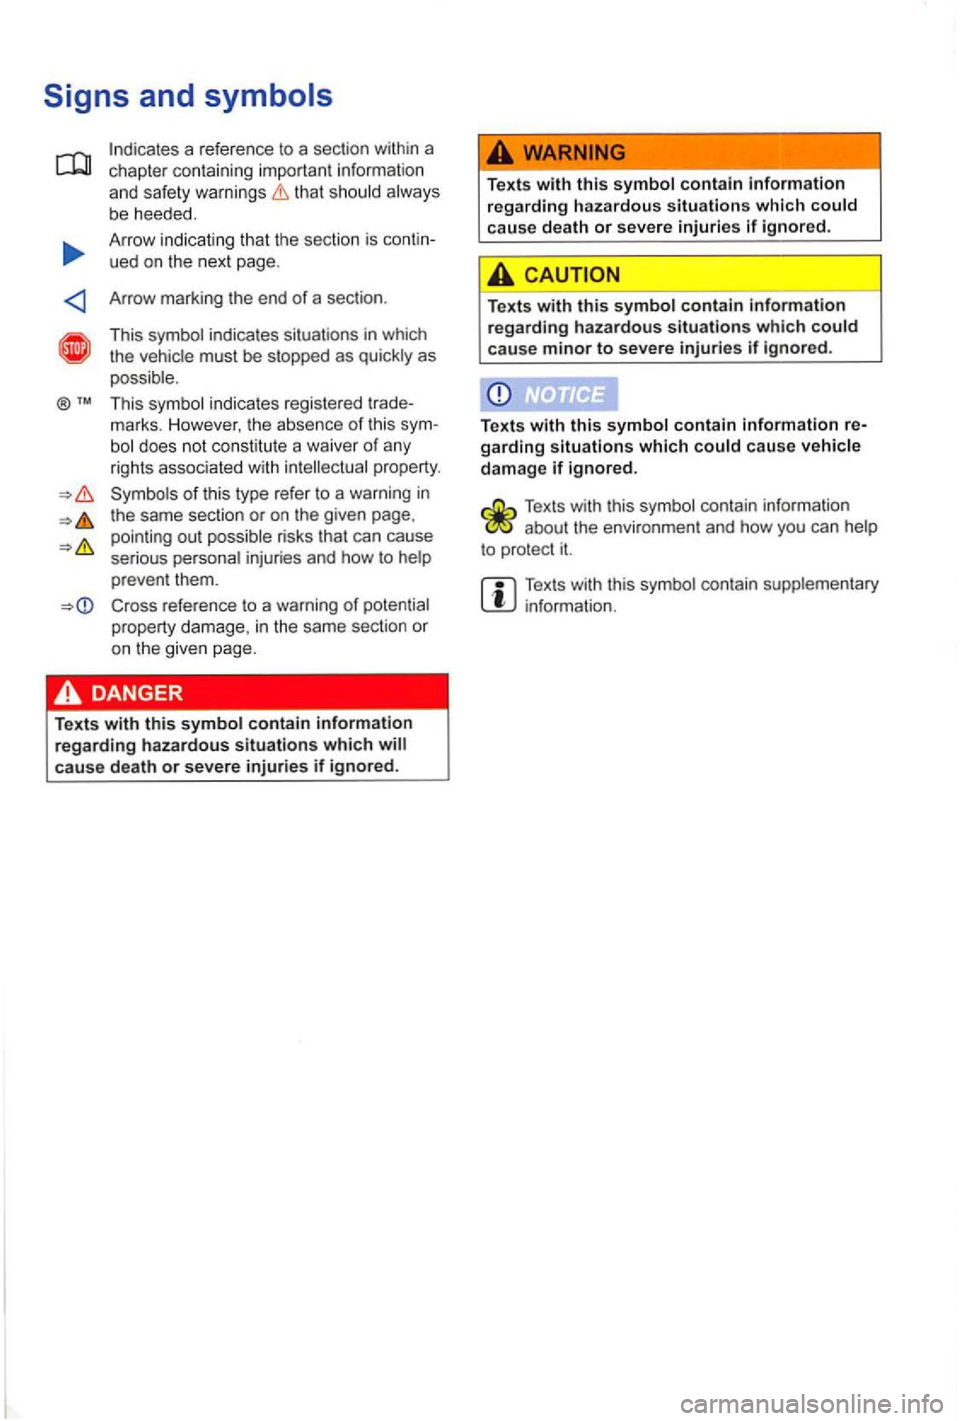
that should always
b e heeded.
A rrow indicating that the section is contin
ued on the next page .
Arrow marki
ng the end of a sec tio n .
This symb ol ind icates situa tions in which
t he vehicle must be stopped as quic kly as
possible.
Thi s sym bol indica tes regist ered trade
mark
s. H owever, the absence of this sym-does not const itut e a wa iver of any
rights associated with intellectual property.
Cross referen ce to a warning of poten tial
property damage, in the same sec tion or
on the given page.
T ex ts
with this symbol contain information regarding hazardous situations which cause death or severe injuries if ignored.
Texts with this symbol contain information
regarding hazardous situations which could
cau se death or severe injuries if ignored.
Texts with this symbol contain information regarding hazardous situations which could cause minor to severe injuries if ignored .
Texts with this symbol contain information re
garding situation s which could cause vehicle damage if ignored.
Texts with this symbol contain informa tion about the envi ronmen t and how you can
Texts wit h this symb ol co ntain supplementary info rmati on.
Page 41 of 516
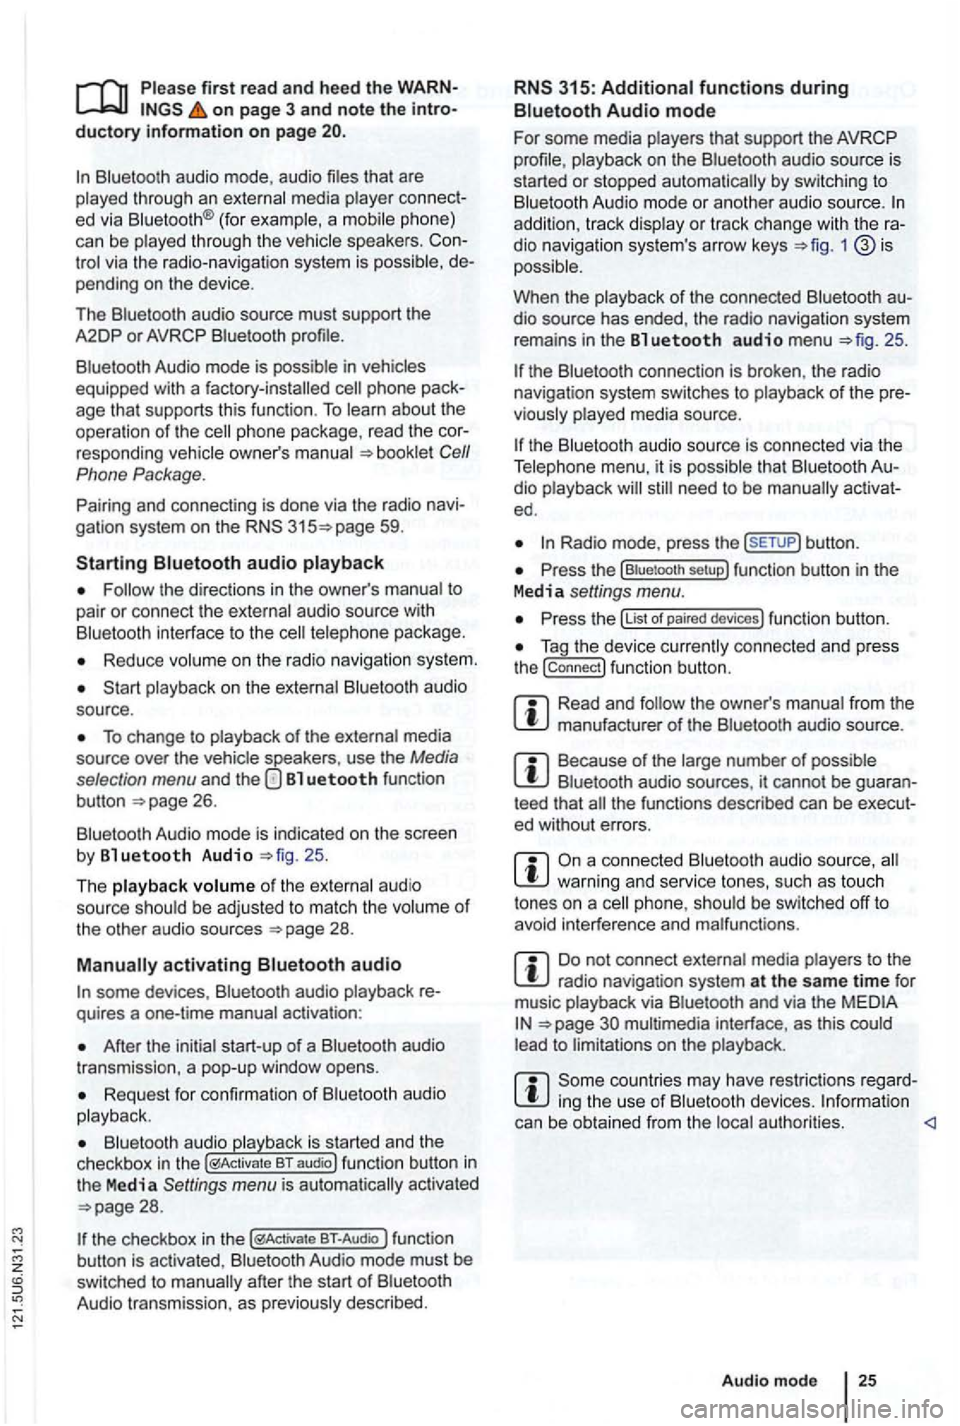
first read and heed the on page 3 and note the ductory information on page
through an ed via (for a phone)
can be through the speakers. via the radio-navigation system is
audio source must support the
A2DP or AVRCP
in equipped with a factory -installed phone age that supports this function . To
responding owner's Cell
Phone Package.
Pairing and connec ting is done via the radio
audio
the directions in the owner 's
Redu ce
To change to
Bl uetooth function
button 26.
Aud io mode is indicated on the screen
by Bl uetooth Audio 25 .
The
o f t he be adjusted to match the of the other audio sources
activating audio
some devices ,
After the audio
transmission , a pop-up window opens.
Request fo r confir mation of aud io
BT-Audio Audio mode must be
swi tched to
Audio transmission, as
audio source is
started or s topped automatically by switc hing to
addition , track dio navigation system 's arrow keys 1
25.
the connection is broken . the radio
navigation system switches to
media source.
th e that dio ed .
Radio mode, press the sETUP) button .
Press the
Press the
Tag the device connected and press
the connect) funct ion butt on.
Read and manufacturer of the
Because of the number of audio sources , it canno t be teed that
audio source, warning and service tones, suc h as touch
tones on a
Do not connect radio nav igation system at the same time for
music
interface , as this to on the
ing the use of can be obtained from the
Page 78 of 516
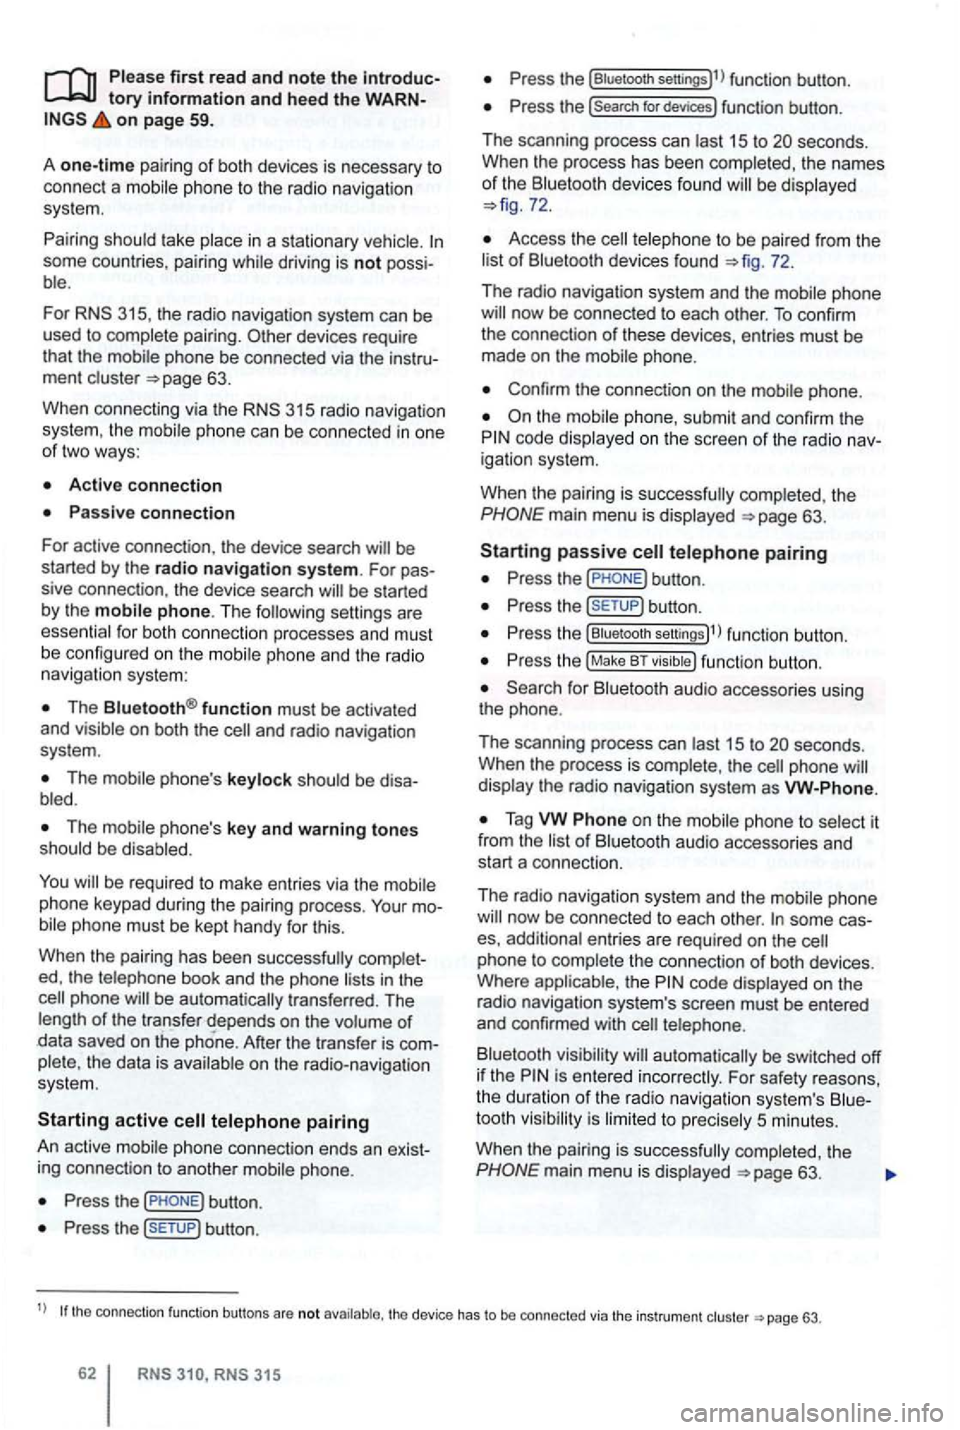
Please first read and note the introductory information and hee d the WARN on page 59.
A
one-time pairi ng of both devices is necessary to
connect a
some countries , pairing driving is not possi
For 315, the radio navigation system can be
used to complete pairing.
63.
When connecting via the
315 radio navigation
system , the mobile ph one can be connected in one
of two ways :
Active connection
The Bluetooth® function must be activated
and v isible on both the
The should be disa
The phone's key and warning tones should be disabled .
You
phone be automatically transferred . T he
length of the transfer depends on the volume of data saved on the phone . After the transfer is com
p lete , the data is
active telephone pairing
An active mobile phone connection ends an exist
ing connection to anot her mobile phone.
Press the button.
Press the (SETUP ) button.
Press the [Biuetooth settings)l l func tion button .
Press the [search for devices) function button.
T he scan ning process can
15 to seconds .
When the process has bee n comple ted, the names
o f t he Bluetoot h devices f ound
72.
Access the telephone to be paired from the 72.
T he radio navigation system and the mobile phone
code displaye d on th e screen of th e rad io nav
i gation system.
When the pairing is successfully completed, the
63 .
passive telephone pairing
Press the button.
Press button.
Press th e [Biuetooth settings)1l funct ion button.
Press the (Make BT fu nc tion butto n .
15 to phone
of Bluetooth audio accesso ries and
start a connec tion.
T he radio naviga tio n system and the
some cases, additional entries are required on the phone to complete the connection of both devices.
Where the code displayed on the
radio navigation system's screen must be entered
and confirmed with
is entered inco rrectly. For safety reasons ,
t h e duration of the radio navigatio n system's toot h visibil ity is li m ited to precisely 5 min utes.
When the pairing is successfully completed, the
63 .
tho connection function butto ns are not the d evice has to be connected via the instrument p age 63.
Page 96 of 516
Route List
b locki ng s ectio ns . . . . . . . . . . . . . . . . . . 56
Routing criteria . . . . . . . . . . . . . . . . . . . . . . . 51
Routing options . . . . . . . . . . . . . . . . . . . . . 5 1
5
Safety instructions . . . . . . . . . . . . . . . . . . . . 3
acti vation . . . . . . . . . . . . . . . . . . . . . . . . 17
see: . . . . . . . . . . . . . . . . . . . . . . . 17 radio mode
see: . . . . . . . . . . . . . . . . . . . . . . . . . 17 Saving rece nt de stin ations . . . . . . . . . . . . . . . . 47
displa y . . . . . . . . . . . . . . . . . . . . . . . . . 74
................ ............ 28
M edia . . . . . . . . . . . . . . . . . . . . . . . 28 14 (s can) . . . . . . . . . . . . . . . . . . . . . 14
Scan/Mix/Re pea t . . . . . . . . . . . . . . . . . 28
gas s tatio n . . . . . . . . . . . . . . . . . . . . 44
........................... 64
. . . . . . . . . . . . . . . . . . . . . . 72
Bala nce . . . . . . . . . . . . . . . . . . . . . . . . . 72
. . . . . . . . . . . . . . . . . . . . 28
navigation . . . . . . . . . . . . . . . . . . . . . . . . . . 58 pre se ts . . . . . . . . . . . . . . . . . . . . . . . . . . . . 72 radio . . . . . . . . . . . . . . . . . . . . . . . . . . . . . . 19
so und . . . . . . . . . . . . . . . . . . . . . . . . . . . . 72
S ettings ............................ 7 3
see :
Route List . . . . . . . . . . . . . . . . . . . . . . . . . 55
. . . . . . . . . . . . . . . . . . . . . . . . . . . . . . 28 . . . . . . . . . . . . . . . . . . . . . . . . . . . . . . . 17 browsing ch ann els . . . . . . . . . . . . . . . . . 18
iTun es Tagging . . . . . . . . . . . . . . . . . . . . . . 32
l a u nch ing
rad io . . . . . . . . . . . . . . . 17
ma in menu ...... ......... ... ...... .
s avi ng t rack in format ion .............. . ............ ....... ......... .
selecting stat ions
. . . . . . . . . . . . . . . . . . . . . . . . . . . . . . . 18
swi tching on . . . . . . . . . . . . . . . . . . . . . . . . 17
a sta tio n b y ca te gory . . . . . . . . . 19
Function Buttons . . . . . . . . . . . . . . . .
............................. 72
Station preset buttons . . . . . . . . . . . . . . . . 15
Stopping ro ute gui dance . . . . . . . . . . . . . . . . . . . . . 54
Switching off . . . . . . . . . . . . . . . . . . . . . . . . . . 8
Switching on . . . . . . . . . . . . . . . . . . . . . . . . . . 8
T
Tel ephone see : . . . . . . . . . . . . . . . . . . . . . . . 59 Text input cursor cursor . . . . . . . . . . . . . . . . . . . . . . . . . . . 41
Time d ela y (Timeout) . . . . . . . . . . . . . . . . . . . . 8 T im eout ............................... 8
.................•..•............ 75
Touc h scree n . . . . . . . . . . . . . . . . . . . . . . . . .
Treble . . . . . . . . . . . . . . . . . . . . . . . . . . . . . . . 72
Trip destination R efe r to des tinatio n . . . . . . . . . . . . . . . . . 42 Tunin g knob (operati on) .........•....... 11
u
Unit s y ste m
met ric o r Ang lo-Am eri can . . . . . . . . . . . . . 74
v
VBR .................... ............. 22
VHF ............ ...... .. ...•......... 75
Volume volum e . . . . . . . . . . . . . . . . . . . . . . 72
in pu t volume (A U X. BT aud io) . . . . . . 29 n avigation announce ments . . . . . . . . . . . . 72
P D C audio reduc tion . . . . . . . . . . . . . . . . . 72
playb ack volume (A U X, BT audio ) . . 29 see : C han ging the default vo lum e . . . . . . . . 9
Spe ed-depe nde nt vo lume ad jus tme nt .......................... 72
traffic ann ouncemen ts . . . . . . . . . . . . . . . . 72
w
Warnings ............... .............. 3 Wire less communication interfac e . . . . . . 24
Page 100 of 516
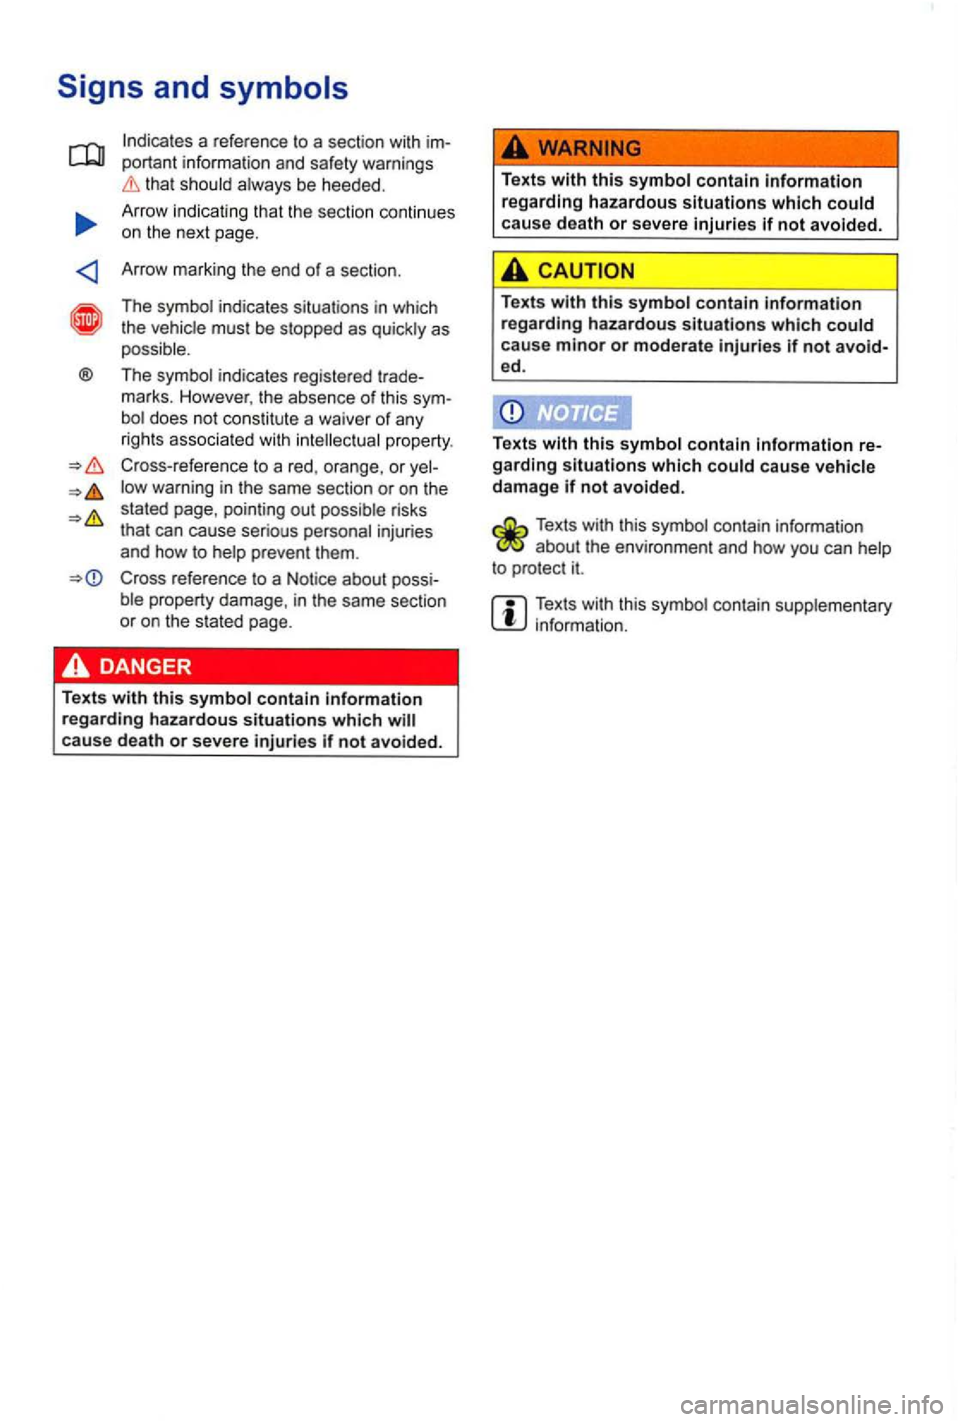
a reference to a section with im
p orta nt informat ion
and safety warnings that sh ould always be heeded.
Arrow indicating that the sect
ion conti nues
on the next page .
Arrow marking the end
of a section.
The symbol indicates situat ions in which
the vehicle must be stopped as quickly as
possible.
Th e symbol indicates registered trade
marks. Howe ver, the absence of this sym-
bol does not constitute a waiver of any
rights associated with intellec tua l property .
Cross-reference
to a red , o range, or yel
low warning in the same section or on the
s tated page, pointing out possible risks
that can cause serious personal injuries
and how to help prevent them.
Cross reference to a Notice about possi
ble property damage, in the same section
o r on the stated page.
Texts
with this symbol contain information regarding hazardous situations which cause death or severe if not avo ided.
Texts with this symbol contain information regarding hazardous situations which could
cause death or severe injuries if not avoide d.
Texts with this symbol contain information regarding hazardous situations which could cause minor or moderate injuries if not avoid-ed .
Texts with this symbol contain information re
garding situations which could cause vehicle damage if not avoided .
Texts with this symbol contain information about the envi ronment and how you can help to protect it.
Texts with this symbol contain supplementary information .
Page 102 of 516
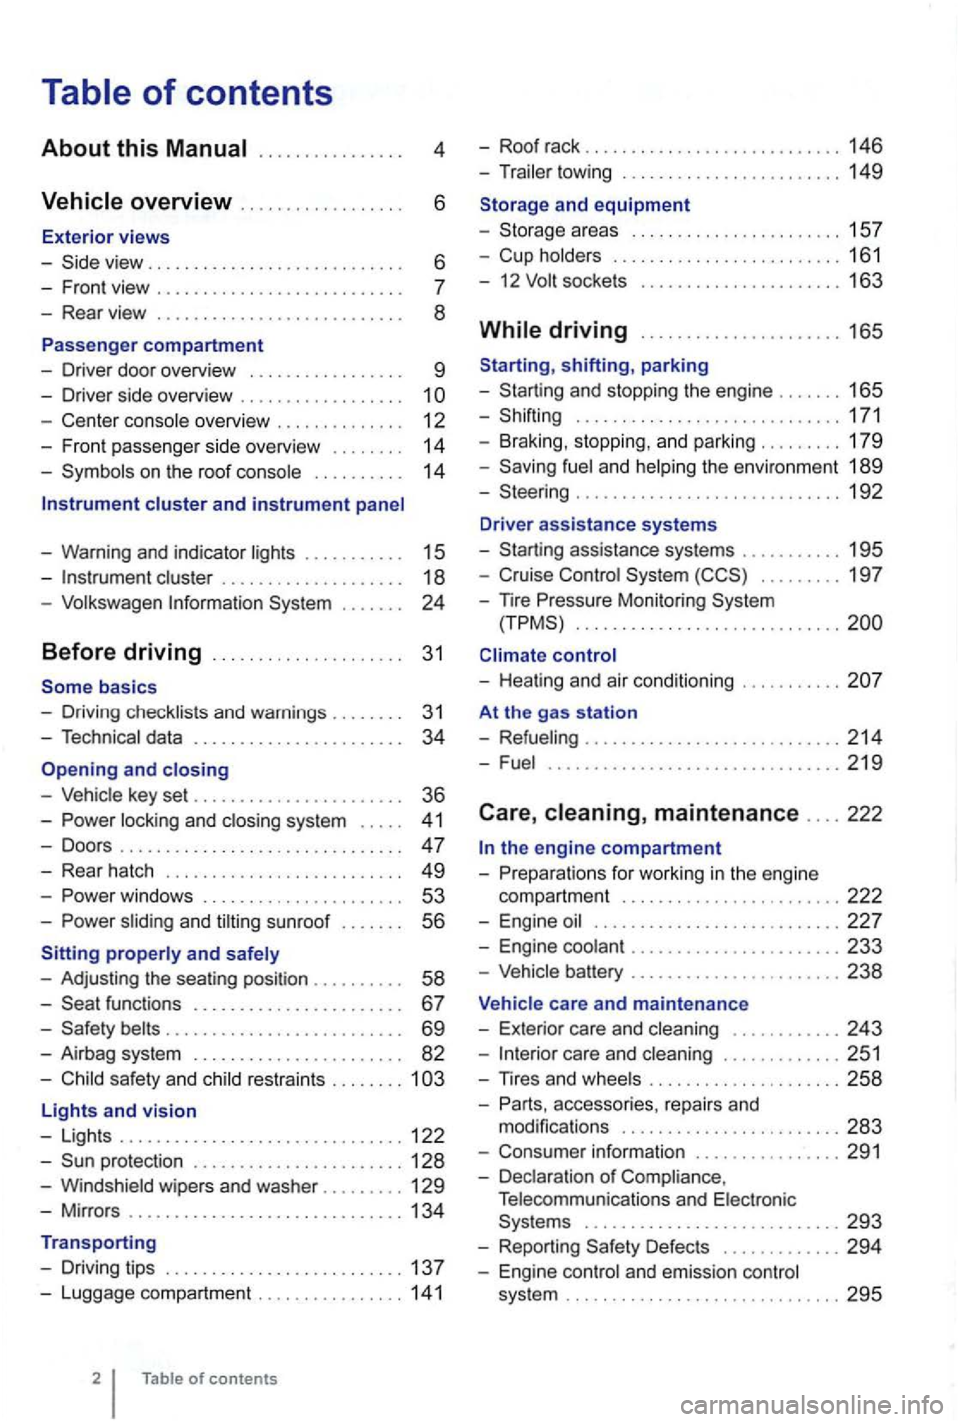
4
. . . . . . 6
- Front view . . . . . . . . . . . . . . . . . . . .
- Center console overview . . . . . . . . . . . . . . 12
- Fron t pa sse nger side overvi ew . . . . . . . .
14
- Symbo ls o n the roo f console . . . . . . . . . . 14
Instrument cluster and instrument panel
- Warning and indica tor
lights . . . . . . . . . . 15
-cluster . . . . . . . . . . . . . . . . . . . 18
-Volk swage n Information System . . .
basics
- Driv ing check lists and warnings .
....... 31
- Techn ical data . . . . . . . . . . . . . . . . . . . . . . . 34
and closing
- Vehic le key set . . . . . . . . . . . . . . . . . . . . . . . 36
-locking and closing system . . . . . 4 1
- Doo rs . . . . . . . . . . . . . . . . . . . . . . . . . . . . . . . 47
- Rear hatch . . . . . . . . . . . . . . . . . . . . . . . . . 49
-. . . 53
-s lidin g and sunroof . . . . . . . 56
properly and safely
- Adjusting the sea ting position . . . . . . .
. . 58
-functions . . . . . . . . . . . . . . . . . . . . . . 67
- Safety . . . . . . . . . . . . . . . . . . . . . . . . . . 69
- Airbag system . . . . . . . . . . . . . . . . . . . . . . . 82
-Child sa fety and child restraints ........ 1
Lights and vision
- Lights ............................... 122
-protectio n ....................... 128
-Windshield wipers and washer ......... 129
-Mir ro rs .............................. 134
Transporting
- Driving tips
.......................... 137
-Luggage compa rtment ................ 141
of contents
- Roof rack . . . . . . . . . . . . . . . . . . . . . . . . . 146
- Trailer towing ...... ............•. .... 149
1 5 7
- Cup holders
......................... 161
- 12
sockets . . . . . . . . . . . . . . . . . . . . . 163
shifting, park ing
- Sta rting and stoppin g
the engin e ....... 165
- Shifting ................... .......... 171
- Brak ing , stop ping , and park ing
......... 179
- Sav ing
fuel a nd helping the environm ent 189
-Steering ............................. 192
Driver assistance systems
- Starting assistance systems
........... 195
-Cruise Control System ......... 19 7
-
nre Mo nitori ng System .............................
control
- Healing and air cond itioning
At the gas station
- Refueling
........................ .... 214
-Fuel ...........................•.... 2 19
Care , maintenance .... 222
fo r work ing in the engin e
compartment
................... ..... 222
- Engine oil ........................... 227
- Engine coolant ....................... 233
-Vehicle battery ....................... 238
Vehicle care and maintenance
- Exteri or
care and cleaning ............ 243
-care and cleaning ............. 251
-
accesso ries, repa irs and
modi fications ........................ 283
- Consumer information ................ 291
- Declaration
of Complia nce,
T elecomm unicat ions and Electro nic
Systems
............................ 293
- Report ing Safe ty Defects ............. 294
- Engin e con trol and emission control
system .............................. 295
Page 114 of 516
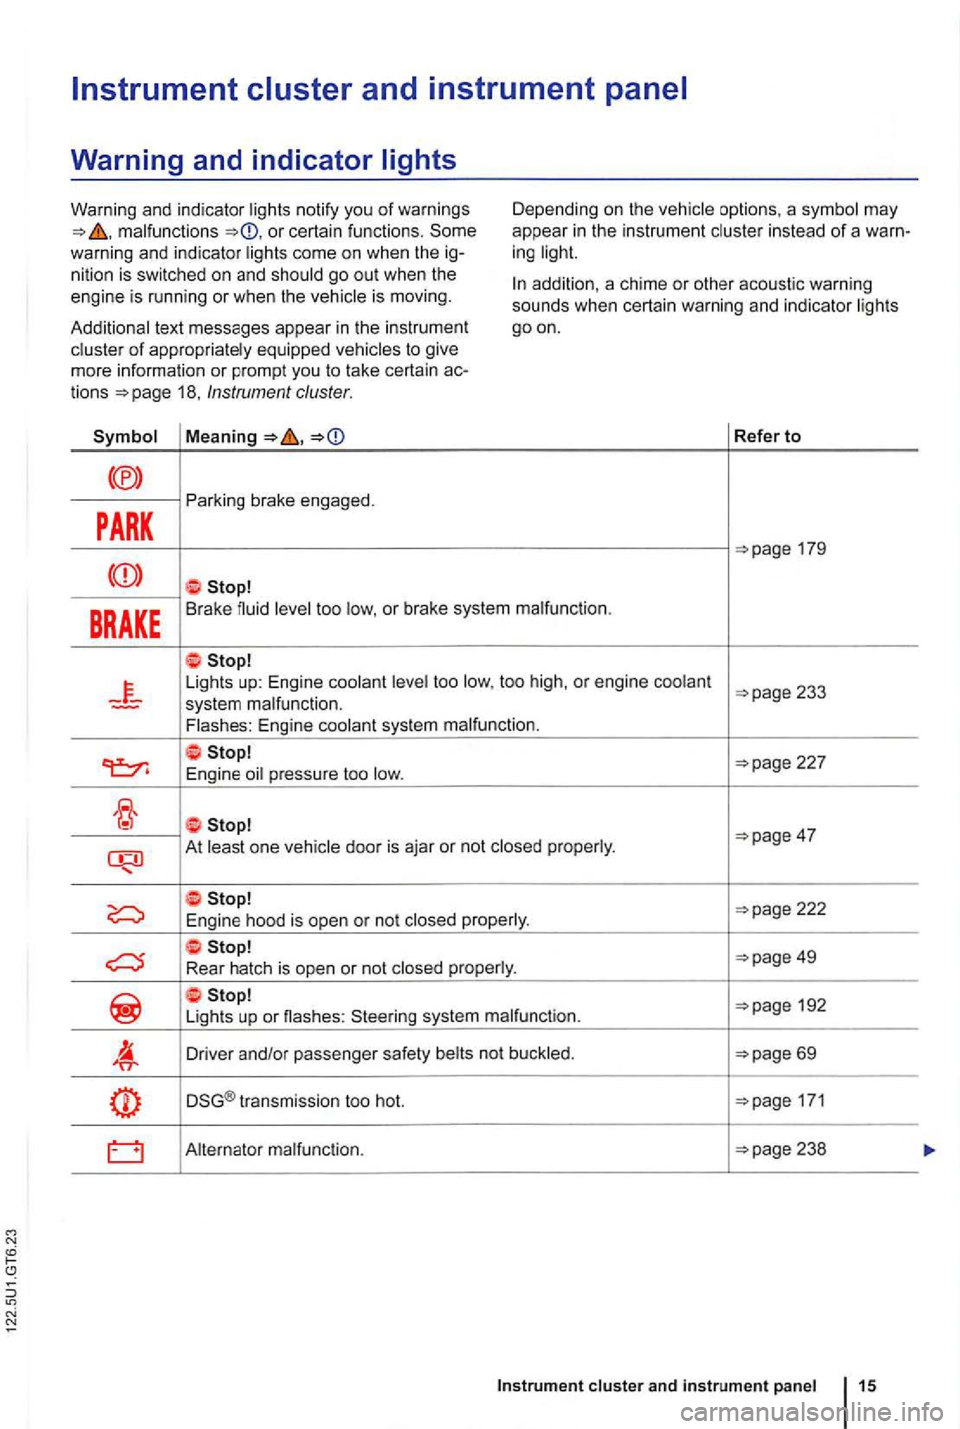
malfunctions or certain functions . Some
warning and indicator ligh ts come on when the ig
nition is swi tched on and shou ld go out when the
engine is running or when the vehicle is moving. D
epending on the vehicle options, a symbol may
appea r
in the instrum en t cluster in stead of a warn
ing light.
Additional text messages appear in th e instrumen t
cluster
of appropriately equipped vehicles to give
mo re information or prompt you to take certain actions 18, Instrument cluster.
addition, a chime or other acoustic warning
sounds when certain warning and indicator lights
goon.
Refer to
PARK
Parking brake engaged.
BRAKE Brake fluid level too low, o r brake system malfunction .
Lights up: Engine coolant level too low, too high , or engine coolant
227
E ngine oil pressure too low.
At least one vehicle door is aja r or not closed properly .
192
Li gh ts up or nashes : Steering system malfunction.
Driver and/or passenger safety belts not buckled .
DSG® transmission too hot. 171
Alternator malfunction.
cluster and instrument panel 15
Page 117 of 516
Instrument cluster
Introduction
this section find information about:
overview . . . . . . . . . . . . . . . . . . . . . 18
Displays . . . . . . . . . . . . . . . . . . . . . . . . . . .
. . . 19
Compass . . . . . . . . . . . . . . . . . . . . . . . . . . . . . .
21 Service reminder display . . . . . . . . . . . . . . . . . 22
More information:
Warning and indicator
Display of the selected gears (automatic transmiss ion ) 171
Service reminder inform ation Warranty and Maintenance.
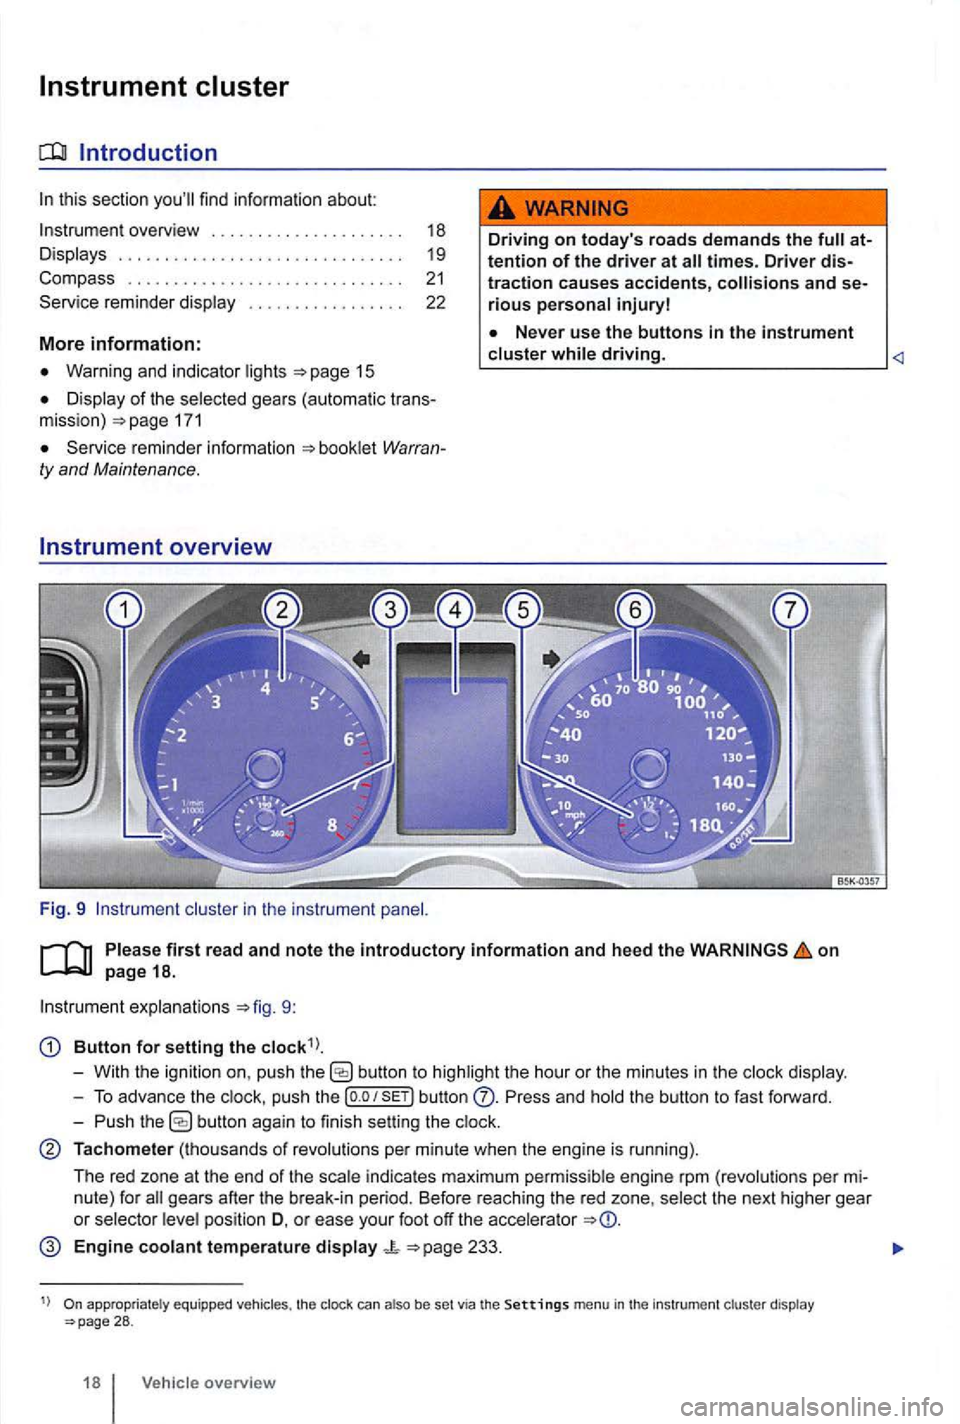
overview
Fig. 9 cluster in the instrument
Driving on today 's roads demands the attention of the driver at
driving.
explanations 9:
Button for setting the
butto n to highlight the hour or the minutes in the
push the button Press and the button to fast forward.
- Push
button again to finish setting the
Tachometer (thousands of revolutions per minute when the engine is running).
The red zone at the end of the
indi cates maximum pe rmi ssibl e engi ne rpm (revolution s pe r
pos ition D, o r ease your foot off the accele rator
Engine coolant temperature display 233.
appropriate ly equ ippe d vehicles , the clock can also be set via the Settings menu in the instrumen t cl uster display 28 .
18 Vehicle overview