Page 68 of 672
68
1-3. Adjustable components (seats, mirrors, steering wheel)
Driving position memor y system (if equipped)
Your preferred driving position (the position of the driver’s seat,
steering wheel and outside rear view mirrors) can be entered into the
computer’s memory and recalle d with the touch of a button.
Two different driving positions can be entered into memory.
■ Entering a position into memory
Check that the shift lever is set in P.
Turn the engine switch to the ON position.
Adjust the driver’s seat, steering wheel, and outside rear
view mirrors to the desired positions.
While pushing the SET button,
push button “1” or “2” until the
signal beeps.
If the selected button has
already been preset, the previ-
ously recorded position will be
overwritten.
■Recalling the memorized position
Check that the shift lever is set in P.
Turn the engine switch to the ON position.
Push button “1” or “2” to recall
the desired position.
Page 167 of 672
When driving2
167
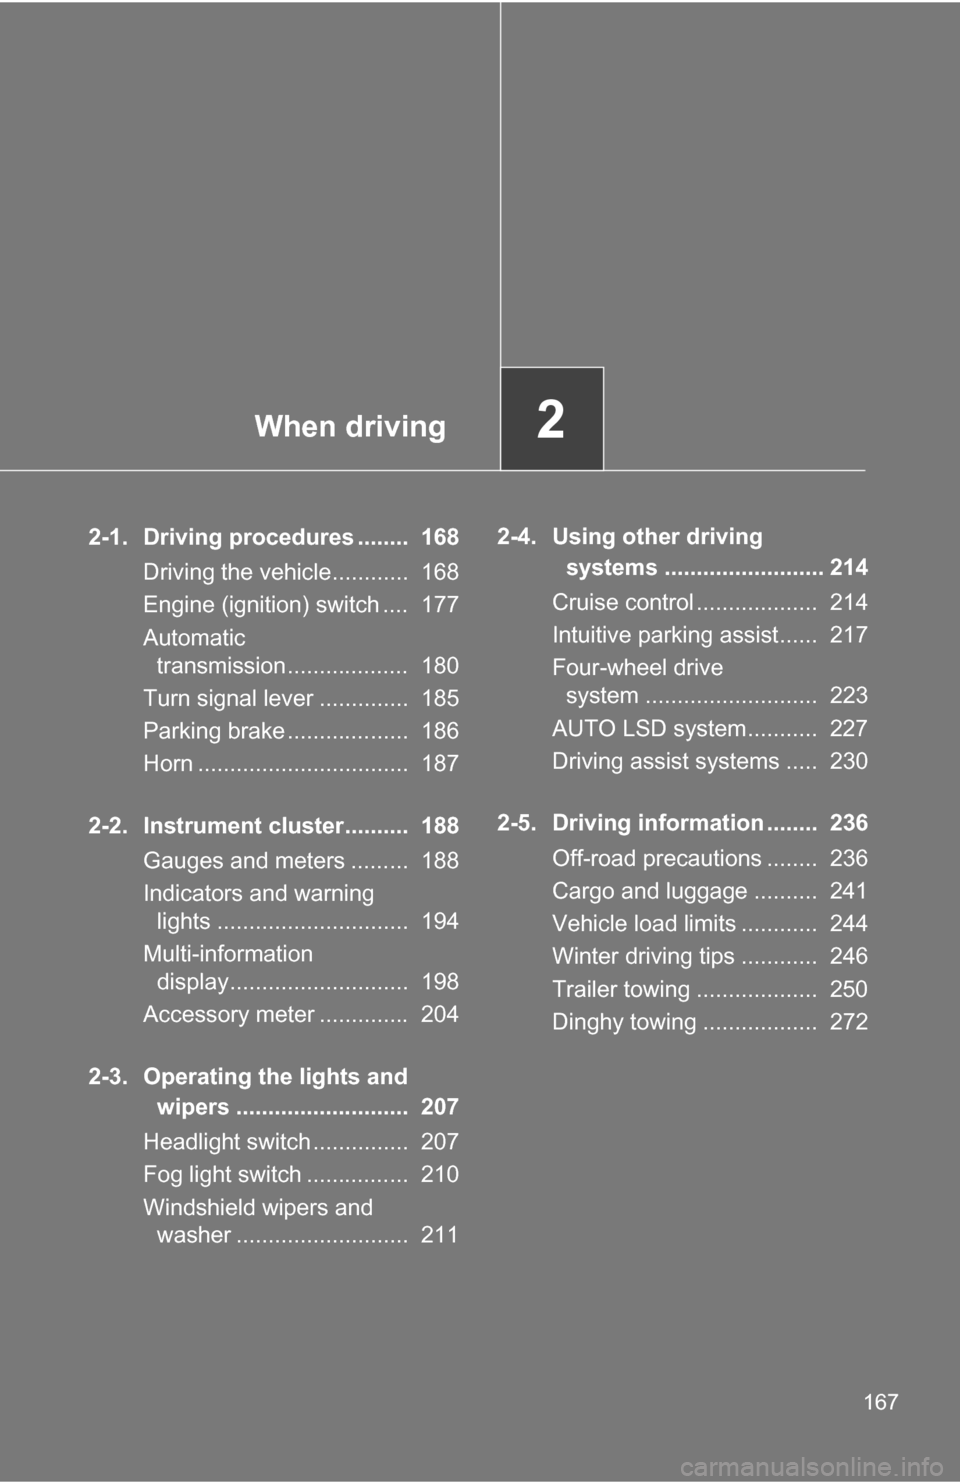
2-1. Driving procedures ........ 168Driving the vehicle............ 168
Engine (ignition) switch .... 177
Automatic transmission................... 180
Turn signal lever .............. 185
Parking brake ................... 186
Horn ................................. 187
2-2. Instrument cluster.......... 188 Gauges and meters ......... 188
Indicators and warning lights .............................. 194
Multi-information display............................ 198
Accessory meter .............. 204
2-3. Operating the lights and wipers ........................... 207
Headlight switch ............... 207
Fog light switch ................ 210
Windshield wipers and washer ........................... 211 2-4. Using other driving
systems ......................... 214
Cruise control ................... 214
Intuitive parking assist...... 217
Four-wheel drive system ........................... 223
AUTO LSD system........... 227
Driving assist systems ..... 230
2-5. Driving information ........ 236 Off-road precautions ........ 236
Cargo and luggage .......... 241
Vehicle load limits ............ 244
Winter driving tips ............ 246
Trailer towing ................... 250
Dinghy towing .................. 272
Page 185 of 672
185
2-1. Driving procedures
2
When driving
Tur n signal lever
■Turn signals can be operated when
The engine switch is in the ON position.
■ If the indicators flash faster than usual
Check that a light bulb in the front or rear turn signal lights has not burned
out.
Left turn
Right turn
Move and hold the lever
partway to signal a lane
change.
The left hand signal will flash
until you release the lever.
Move and hold the lever
partway to signal a lane
change.
The right hand signal will flash
until you release the lever.
Page 196 of 672
196 2-2. Instrument cluster
■Indicators
The indicators inform the driver of the operating state of the
vehicle’s various systems.
Turn signal indicator
(P. 185)
(U.S.A.)
Headlight indicator
( P. 207)
Headlight high beam
indicator ( P. 207)
(Canada)
Tail light indicator
(P. 207)
(If equipped)
Security indicator
(P. 108)*1
AUTO LSD indicator
( P. 227, 232)
Shift position and shift
range indicators
(P. 180)
*1RSCA OFF indicator
( P. 129)
*1AIR BAG ON indicator
(P. 131)
*1AIR BAG OFF indicator
(P. 131)
(If equipped)
Cruise control indicator
(P. 214)
(4WD models)
4HI indicator ( P. 223)
*1,5
Slip indicator
( P. 227, 232, 233)
(4WD models)
4LO indicator ( P. 223)
*1
VSC OFF indicator
(P. 227, 232, 233)
(If equipped)
TOW HAUL indicator
( P. 183)
Page 208 of 672
208 2-3. Operating the lights and wipers
■Daytime running light system (if equipped)
To make your vehicle more visible to other drivers, the front turn signal lights
turn on automatically whenever the engine is started and the parking brake
is released. Daytime running lights are not designed for use at night.
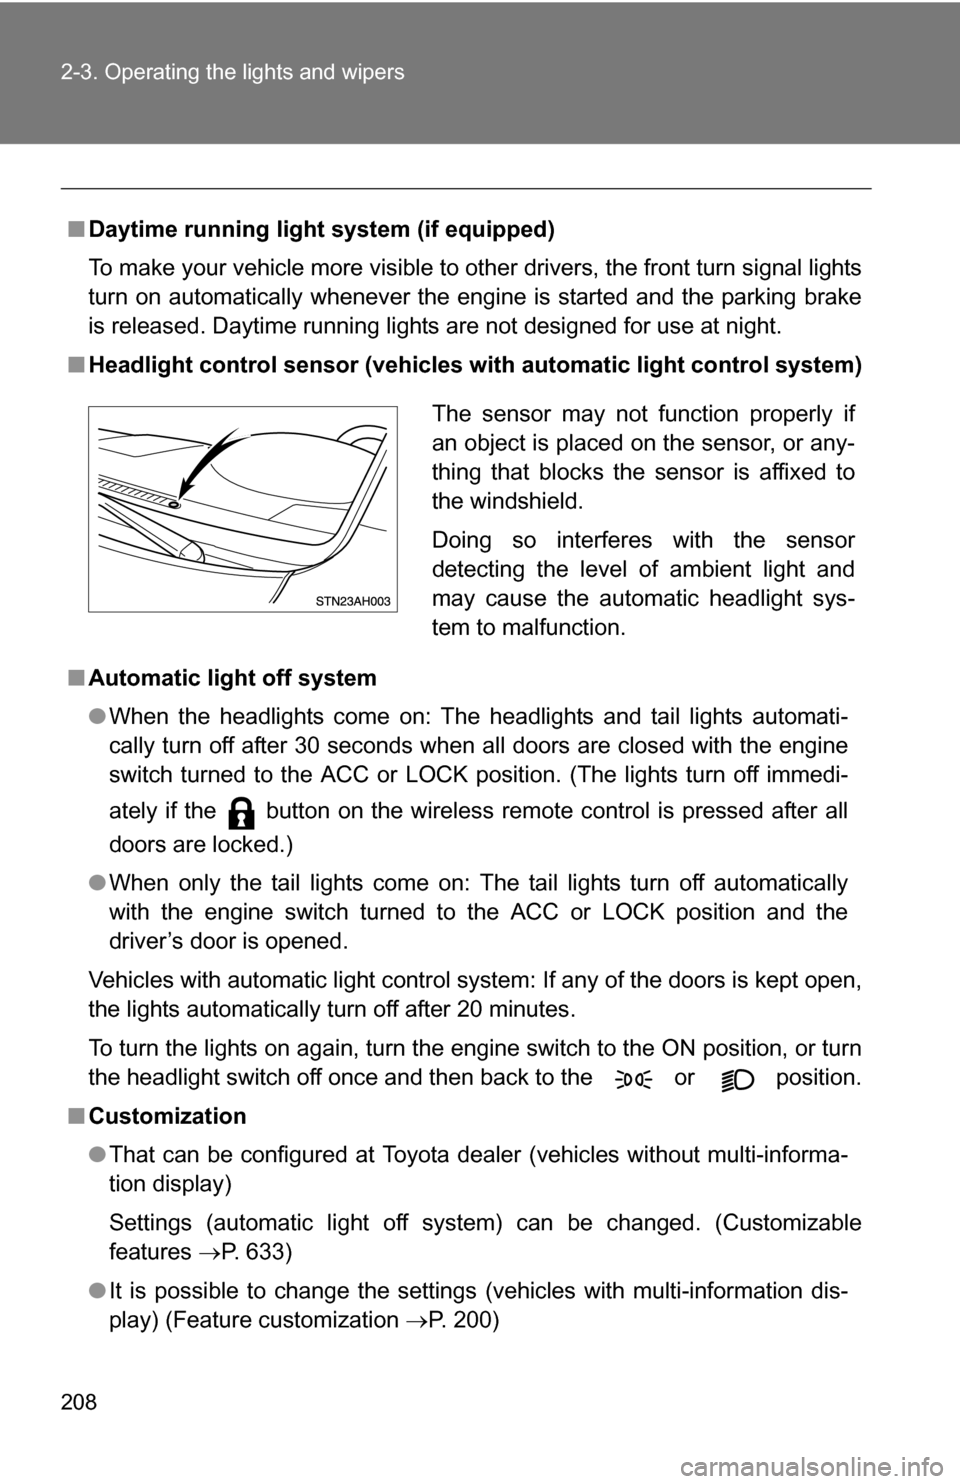
■ Headlight control sensor (vehicles wi th automatic light control system)
■ Automatic light off system
●When the headlights come on: The headlights and tail lights automati-
cally turn off after 30 seconds when all doors are closed with the engine
switch turned to the ACC or LOCK position. (The lights turn off immedi-
ately if the button on the wireless remote control is pressed after all
doors are locked.)
● When only the tail lights come on: The tail lights turn off automatically
with the engine switch turned to the ACC or LOCK position and the
driver’s door is opened.
Vehicles with automatic light control system: If any of the doors is kept open,
the lights automatically turn off after 20 minutes.
To turn the lights on again, turn the engine switch to the ON position, or turn
the headlight switch off once and then back to the or position.
■ Customization
●That can be configured at Toyota dealer (vehicles without multi-informa-
tion display)
Settings (automatic light off system) can be changed. (Customizable
features P. 633)
● It is possible to change the settings (vehicles with multi-information dis-
play) (Feature customization P. 200)
The sensor may not function properly if
an object is placed on the sensor, or any-
thing that blocks the sensor is affixed to
the windshield.
Doing so interferes with the sensor
detecting the level of ambient light and
may cause the automatic headlight sys-
tem to malfunction.
Page 304 of 672
304 3-2. Using the audio system
The display changes as follows each time the button is pressed.
●CH NAME
● TITLE (SONG/PROGRAM TITLE)
● NAME (ARTIST NAME/FEATURE)
● CH NUMBER
■When the battery is disconnected
Stations presets are erased.
■ Reception sensitivity
●Objects, especially metal objects, such as cargo, a camper, or a truck
rack, may adversely affect the reception of XM
® Satellite Radio.
● Maintaining stable radio reception at all times is difficult due to the contin-
ually changing position of the antenna and differences in signal strength
and surrounding objects, such as trains, transmitters, etc.
● The radio antenna is mounted on the right-side front fender. The antenna
can be removed from the base by turning it.
■ XM
® Satellite Radio (type B and C)
An XM
® Satellite Radio is a tuner designed exclusively to receive broadcasts
provided under a separate subscription. Availability is limited to the 48 con-
tiguous states and 10 Canadian provinces.
● XM
® subscriptions
For detailed information about XM® Satellite Radio or to subscribe:
U.S.A.—
Visit on the web at www.xmradio.com
or call 1-800-967-2346.
Canada—
Visit on the web at www.xmradio.ca
or call 1-877-438-9677.
● Radio ID
You will need the radio ID when activating XM
® service or reporting a
problem. Select “CH000” using , and the receiver’s 8-character
ID number will appear.
Page 305 of 672
305
3-2. Using the audio system
3
Interior and exterior features
●
Satellite tuner
The tuner supports only Audio Services (Music and Talk) and the accom-
panying Text Information of XM
® Satellite Radio.
*:Terms and services provided by XM® Satellite Radio are subject to change
without notice.
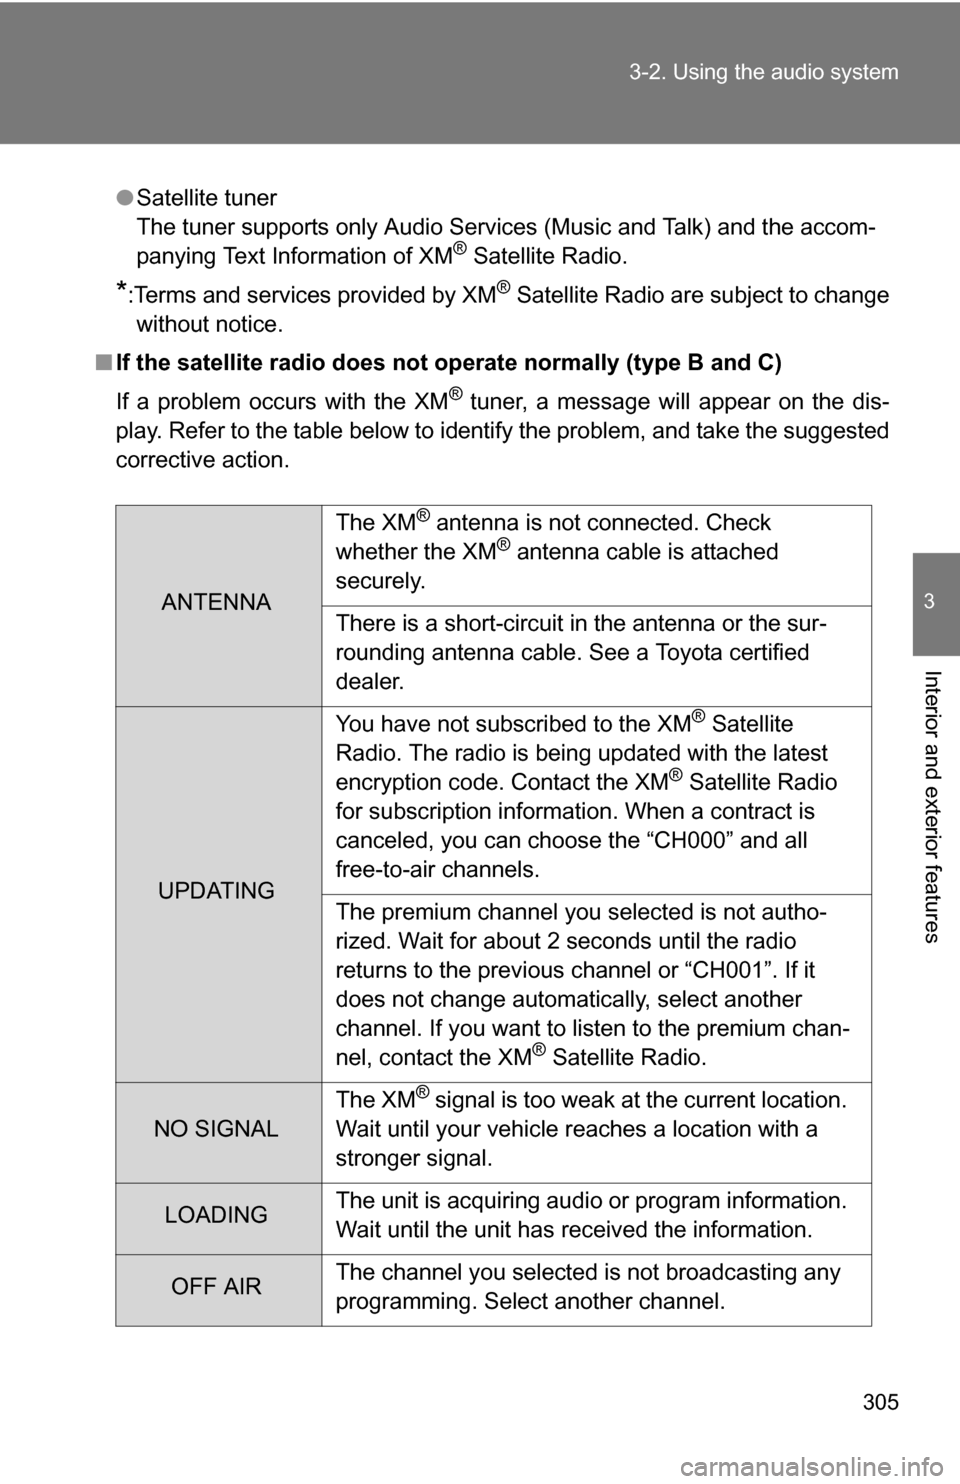
■ If the satellite radio does not operate normally (type B and C)
If a problem occurs with the XM
® tuner, a message will appear on the dis-
play. Refer to the table below to identify the problem, and take the suggested
corrective action.
ANTENNA The XM
® antenna is not connected. Check
whether the XM® antenna cable is attached
securely.
There is a short-circuit in the antenna or the sur-
rounding antenna cable. See a Toyota certified
dealer.
UPDATING You have not subscribed to the XM
® Satellite
Radio. The radio is being updated with the latest
encryption code. Contact the XM
® Satellite Radio
for subscription information. When a contract is
canceled, you can choose the “CH000” and all
free-to-air channels.
The premium channel you selected is not autho-
rized. Wait for about 2 seconds until the radio
returns to the previous channel or “CH001”. If it
does not change automatically, select another
channel. If you want to listen to the premium chan-
nel, contact the XM
® Satellite Radio.
NO SIGNAL The XM
® signal is too weak at the current location.
Wait until your vehicle reaches a location with a
stronger signal.
LOADING The unit is acquiring audio or program information.
Wait until the unit has received the information.
OFF AIRThe channel you selected is not broadcasting any
programming. Select another channel.
Page 453 of 672
453
3-7. Other interior features
3
Interior and exterior features
When the indicator on the HomeLink® compatible transceiver
start to flashing rapidly, release the buttons.
Test the operation of the HomeLink
® by pressing the newly
programmed button. Check to see if the gate/device operates
correctly.
Repeat the steps above to program another device for each of
the remaining HomeLink
® buttons.
■ Programming other devices
To program other devices such as home security systems, home
door locks or lighting, contact your authorized Toyota dealer for
assistance.
■ Reprogramming a button
The individual HomeLink
® buttons cannot be erased but can be
reprogrammed. To reprogram a button, follow the programming
instructions.
Operating the HomeLink®
Press the appropriate HomeLink® button. The HomeLink® indicator
on the HomeLink® transceiver should turn on.
The HomeLink® continues to send a signal for a maximum of 20 seconds
if the button is held in.
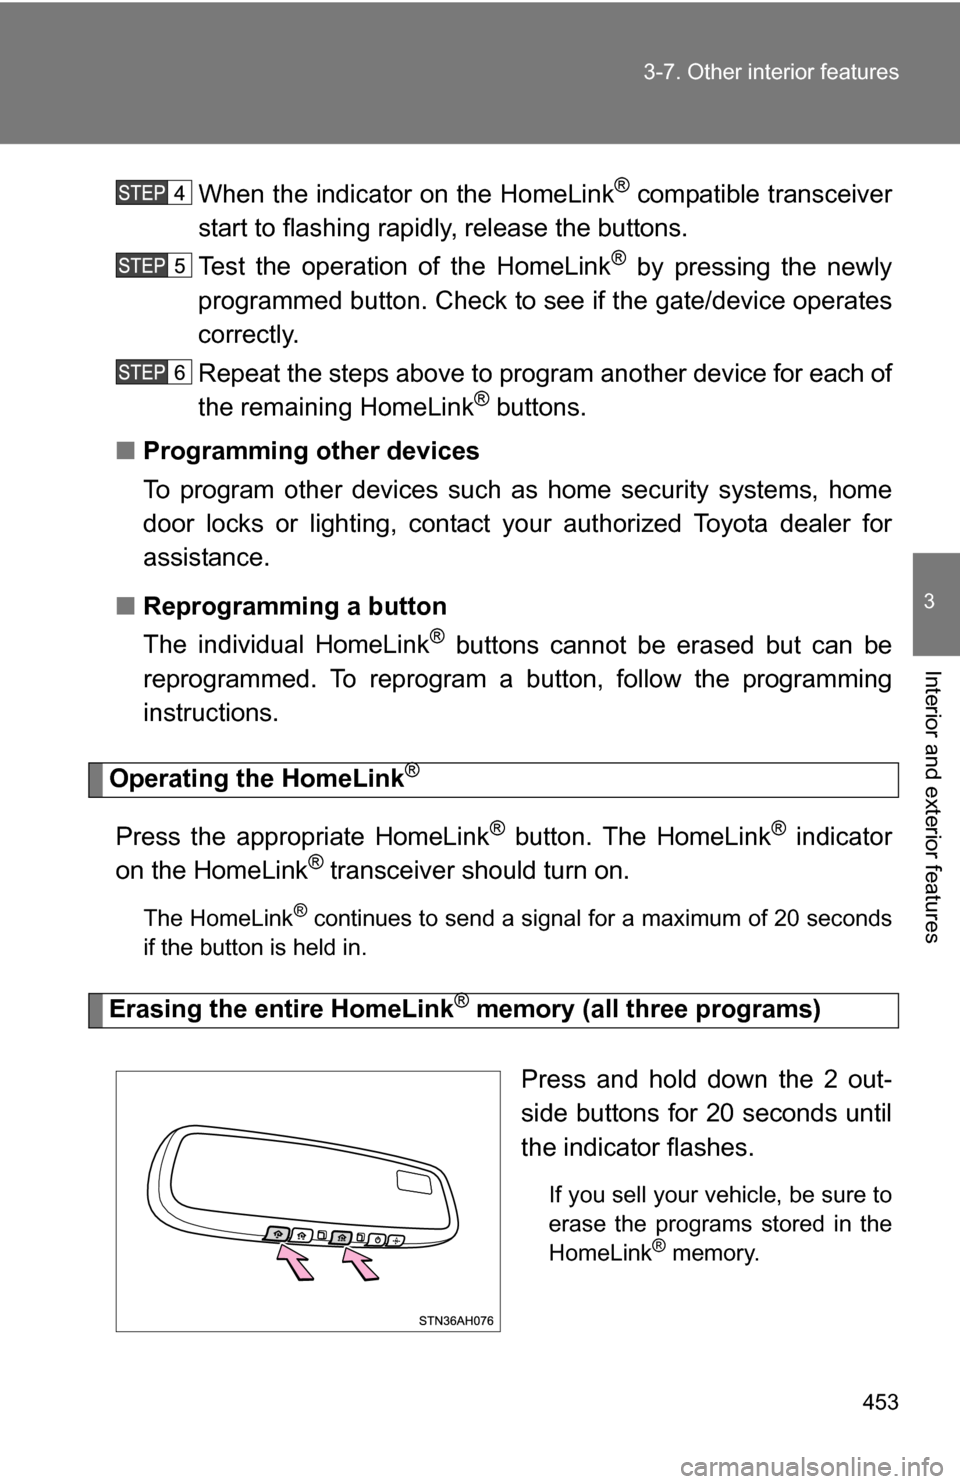
Erasing the entire HomeLink® memory (all three programs)
Press and hold down the 2 out-
side buttons for 20 seconds until
the indicator flashes.
If you sell your vehicle, be sure to
erase the programs stored in the
HomeLink
® memory.