Page 329 of 447

9-4In case of emergency
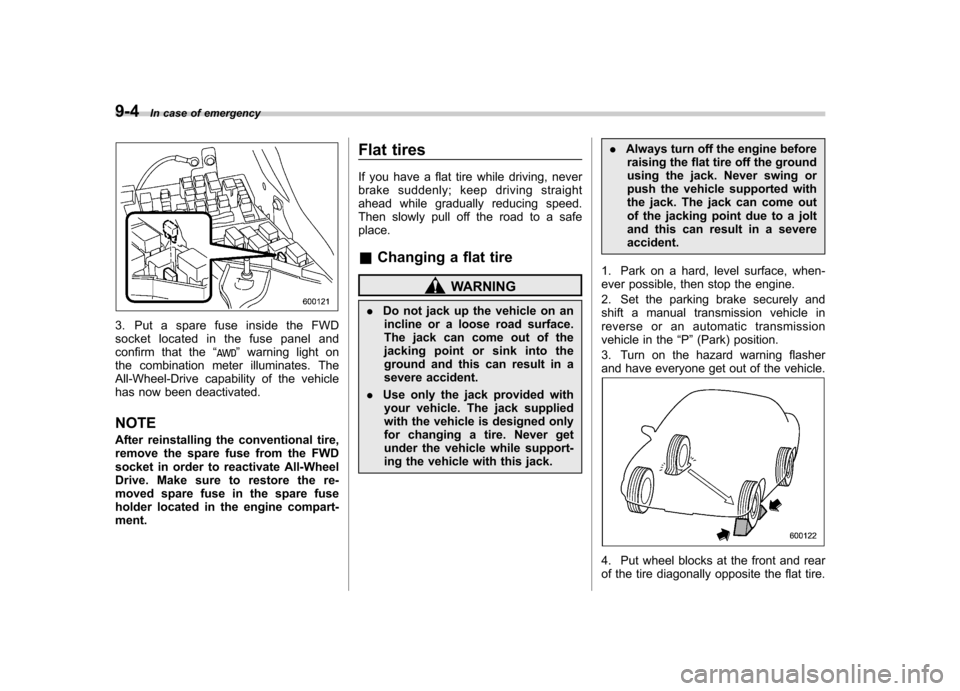
3. Put a spare fuse inside the FWD
socket located in the fuse panel and
confirm that the “
”warning light on
the combination meter illuminates. The
All-Wheel-Drive capability of the vehicle
has now been deactivated.
NOTE
After reinstalling the conventional tire,
remove the spare fuse from the FWD
socket in order to reactivate All-Wheel
Drive. Make sure to restore the re-
moved spare fuse in the spare fuse
holder located in the engine compart-ment. Flat tires
If you have a flat tire while driving, never
brake suddenly; keep driving straight
ahead while gradually reducing speed.
Then slowly pull off the road to a safeplace. &
Changing a flat tire
WARNING
. Do not jack up the vehicle on an
incline or a loose road surface.
The jack can come out of the
jacking point or sink into the
ground and this can result in a
severe accident.
. Use only the jack provided with
your vehicle. The jack supplied
with the vehicle is designed only
for changing a tire. Never get
under the vehicle while support-
ing the vehicle with this jack. .
Always turn off the engine before
raising the flat tire off the ground
using the jack. Never swing or
push the vehicle supported with
the jack. The jack can come out
of the jacking point due to a jolt
and this can result in a severeaccident.
1. Park on a hard, level surface, when-
ever possible, then stop the engine.
2. Set the parking brake securely and
shift a manual transmission vehicle in
reverse or an automatic transmission
vehicle in the “P ”(Park) position.
3. Turn on the hazard warning flasher
and have everyone get out of the vehicle.
4. Put wheel blocks at the front and rear
of the tire diagonally opposite the flat tire.
Page 352 of 447

Maintenance and serviceTire pressure monitoring system (TPMS)(if equipped) ................................................... 11-34
Tire inspection ................................................. 11-35
Tire pressures and wear ................................... 11-36
Wheel balance .................................................. 11-38
Wear indicators ................................................ 11-38
Tire rotation direction mark .............................. 11-38
Tire rotation ..................................................... 11-39
Tire replacement .............................................. 11-39
Wheel replacement ........................................... 11-40
Aluminum wheels ............................................. 11-40
Windshield washer fluid .................................. 11-41
Replacement of wiper blades .......................... 11-42
Windshield wiper blade assembly ..................... 11-42
Windshield wiper blade rubber ......................... 11-43
Rear window wiper blade assembly .................. 11-44
Rear window wiper blade rubber ....................... 11-45
Battery. .............................................................. 11-46 Fuses
................................................................ 11-47
Main fuse .......................................................... 11-49
Installation of accessories .............................. 11-49
Replacing bulbs ............................................... 11-50
Headlight ......................................................... 11-51
Front turn signal/Parking and front side marker light .............................................................. 11-53
Front fog light (if equipped) .............................. 11-53
Rear combination lights ................................... 11-53
Back-up light (Station wagon) .......................... 11-56
License plate light ........................................... 11-56
Dome light ....................................................... 11-57
Map light ......................................................... 11-57
Vanity mirror light ............................................ 11-58
Door step light ................................................. 11-58
Cargo area light (Station wagon) ... ................... 11-59
Trunk light (Sedan) .......................................... 11-59
High mount stop light (Sedan) .......................... 11-59
Page 356 of 447
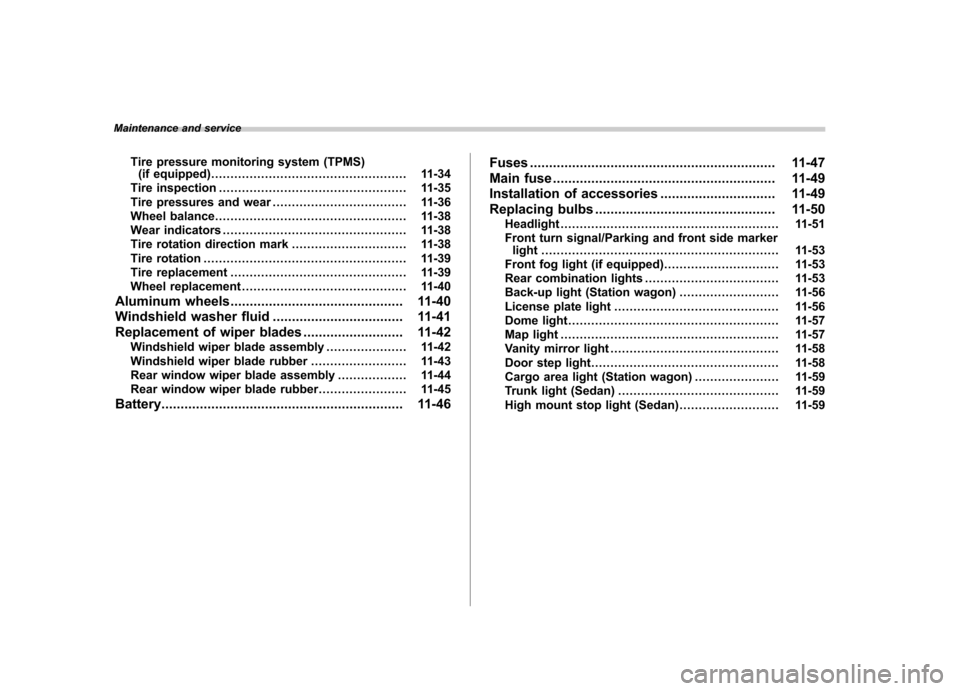
11-6Maintenance and service
Engine compartment overview &2.5 L non-turbo models1) Power steering fluid reservoir
(page 11-27)
2) Manual transmission oil level gauge (MT) (page 11-21) or Differential gear oil level
gauge (AT) (page 11-24)
3) Clutch fluid reservoir (page 11-29)
4) Automatic transmission fluid level gauge (page 11-22)
5) Brake fluid reservoir (page 11-28)
6) Fuse box (page 11-47)
7) Battery (page 11-46)
8) Windshield washer tank (page 11-41)
9) Engine oil filler cap (page 11-9)
10) Engine coolant reservoir (page 11-14)
11) Radiator cap (page 11-14)
12) Engine oil level gauge (page 11-9)
13) Air cleaner element (page 11-17)
Page 357 of 447
&2.5 L turbo models1) Power steering fluid reservoir
(page 11-27)
2) Manual transmission oil level gauge (MT) (page 11-21) or Differential gear oil level
gauge (AT) (page 11-24)
3) Clutch fluid reservoir (page 11-29)
4) Brake fluid reservoir (page 11-28)
5) Automatic transmission fluid level gauge (page 11-22)
6) Fuse box (page 11-47)
7) Battery (page 11-46)
8) Windshield washer tank (page 11-41)
9) Engine oil filler cap (page 11-9)
10) Engine coolant reservoir (page 11-14)
11) Engine oil level gauge (page 11-9)
12) Radiator cap (page 11-14)
13) Air cleaner element (page 11-17) Maintenance and service
11-7
– CONTINUED –
Page 358 of 447
11-8Maintenance and service
& 3.0 L models
1) Power steering fluid reservoir
(page 11-27)
2) Differential gear oil level gauge (AT) (page 11-24)
3) Automatic transmission fluid level gauge (page 11-22)
4) Brake fluid reservoir (page 11-28)
5) Fuse box (page 11-47)
6) Battery (page 11-46)
7) Windshield washer tank (page 11-41)
8) Engine oil filler cap (page 11-9)
9) Engine coolant reservoir (page 11-14)
10) Radiator cap (page 11-14)
11) Engine oil level gauge (page 11-9)
12) Air cleaner element (page 11-17)
Page 364 of 447

11-14Maintenance and service
Cooling system
WARNING
Never attempt to remove the radia-
tor cap until the engine has been
shut off and has cooled down
completely. Since the coolant is
under pressure, you may suffer
serious burns from a spray of boil-
ing hot coolant when the cap isremoved.
CAUTION
. Vehicles are filled at the factory
with SUBARU Super Coolant that
does not require the first change
for 11 years/137,500 miles (11
years/220,000 km). This coolant
should not be mixed with any
other brand or type of coolant
during this period. Mixing with a
different coolant will reduce the
life of the coolant. Should it be
necessary to top off the coolant
for any reason, use only
SUBARU Super Coolant.
If the SUBARU Super Coolant is
diluted with another brand or
type, the maintenance interval is shortened to that of the mixingcoolant.
. Do not splash the engine coolant
over painted parts. The alcohol
contained in the engine coolant
may damage the paint surface.
& Cooling fan, hose and con- nections
Your vehicle employs an electric cooling
fan which is thermostatically controlled to
operate when the engine coolant reaches
a specific temperature.
If the radiator cooling fan does not operate
even when the engine coolant tempera-
ture gauge exceeds the normal operating
range, the cooling fan circuit may be
defective. Check the fuse and replace it
if necessary. If the fuse is not blown, have
the cooling system checked by your
SUBARU dealer.
If frequent addition of coolant is neces-
sary, there may be a leak in the engine
cooling system. It is recommended that
the cooling system and connections be
checked for leaks, damage, or looseness. &
Engine coolant
! Checking the coolant level
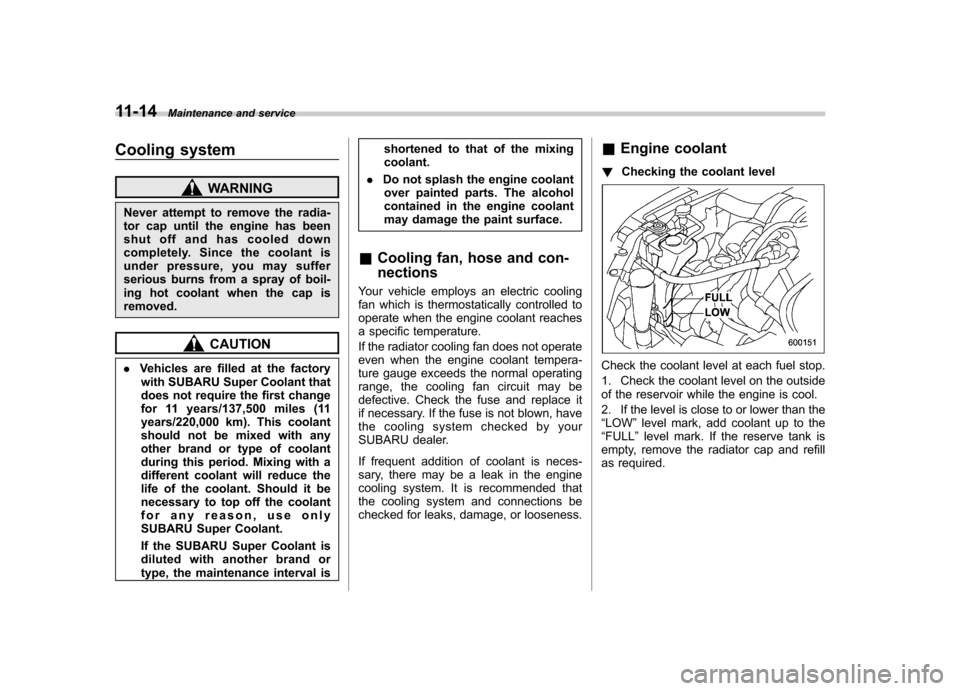
Check the coolant level at each fuel stop.
1. Check the coolant level on the outside
of the reservoir while the engine is cool.
2. If the level is close to or lower than the “LOW ”level mark, add coolant up to the
“ FULL ”level mark. If the reserve tank is
empty, remove the radiator cap and refill
as required.
Page 397 of 447
distilled water.Fuses
CAUTION
Never replace a fuse with one hav-
ing a higher rating or with material
other than a fuse because serious
damage or a fire could result.
The fuses are designed to melt during an
overload to prevent damage to the wiring
harness and electrical equipment. The
fuses are located in two fuse boxes. One
is located under the instrument panel
behind the fuse box cover on the driver ’s
seat side.
Open the lid that is located above the
hood release knob and pull it toward you
to remove it.
The other one is housed in the engine compartment. Maintenance and service
11-47
– CONTINUED –
Page 398 of 447
11-48Maintenance and service
The spare fuses are stored in the main
fuse box cover in the engine compart-ment.
The fuse puller is stored in the main fuse
box in the engine compartment.
1) Good
2) Blown
If any lights, accessories or other electrical
controls do not operate, inspect the
corresponding fuse. If a fuse has blown,
replace it.
1. Turn the ignition switch to the “LOCK ”
position and turn off all electrical acces- sories.
2. Remove the cover.
3. Determine which fuse may be blown.
The back side of each fuse box cover andthe “Fuses and circuits ”section in chapter
12 in this manual show the circuit for eachfuse.4. Pull out the fuse with the fuse puller.
5. Inspect the fuse. If it has blown,
replace it with a spare fuse of the samerating.
6. If the same fuse blows again, this
indicates that its system has a problem.
Contact your SUBARU dealer for repairs.