2009 SUBARU LEGACY warning
[x] Cancel search: warningPage 31 of 447
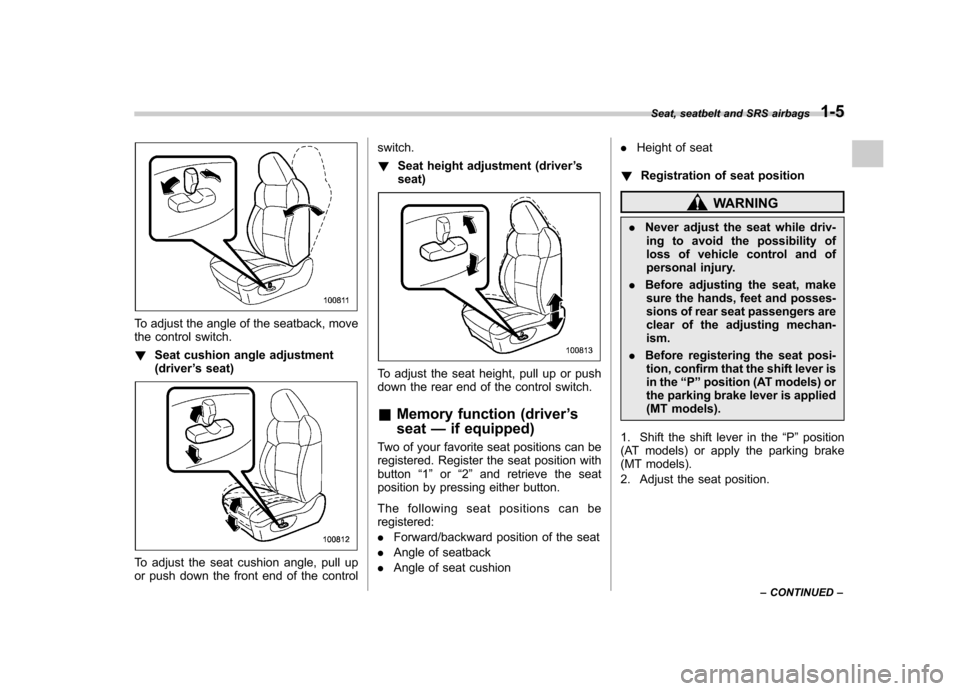
To adjust the angle of the seatback, move
the control switch. !Seat cushion angle adjustment (driver ’s seat)
To adjust the seat cushion angle, pull up
or push down the front end of the control switch. !
Seat height adjustment (driver ’s
seat)
To adjust the seat height, pull up or push
down the rear end of the control switch. & Memory function (driver ’s
seat —if equipped)
Two of your favorite seat positions can be
registered. Register the seat position withbutton “1 ” or “2 ” and retrieve the seat
position by pressing either button.
The following seat positions can be registered: . Forward/backward position of the seat
. Angle of seatback
. Angle of seat cushion .
Height of seat
! Registration of seat position
WARNING
. Never adjust the seat while driv-
ing to avoid the possibility of
loss of vehicle control and of
personal injury.
. Before adjusting the seat, make
sure the hands, feet and posses-
sions of rear seat passengers are
clear of the adjusting mechan-ism.
. Before registering the seat posi-
tion, confirm that the shift lever is
in the “P ” position (AT models) or
the parking brake lever is applied
(MT models).
1. Shift the shift lever in the “P ” position
(AT models) or apply the parking brake
(MT models).
2. Adjust the seat position. Seat, seatbelt and SRS airbags
1-5
– CONTINUED –
Page 32 of 447
1-6Seat, seatbelt and SRS airbags
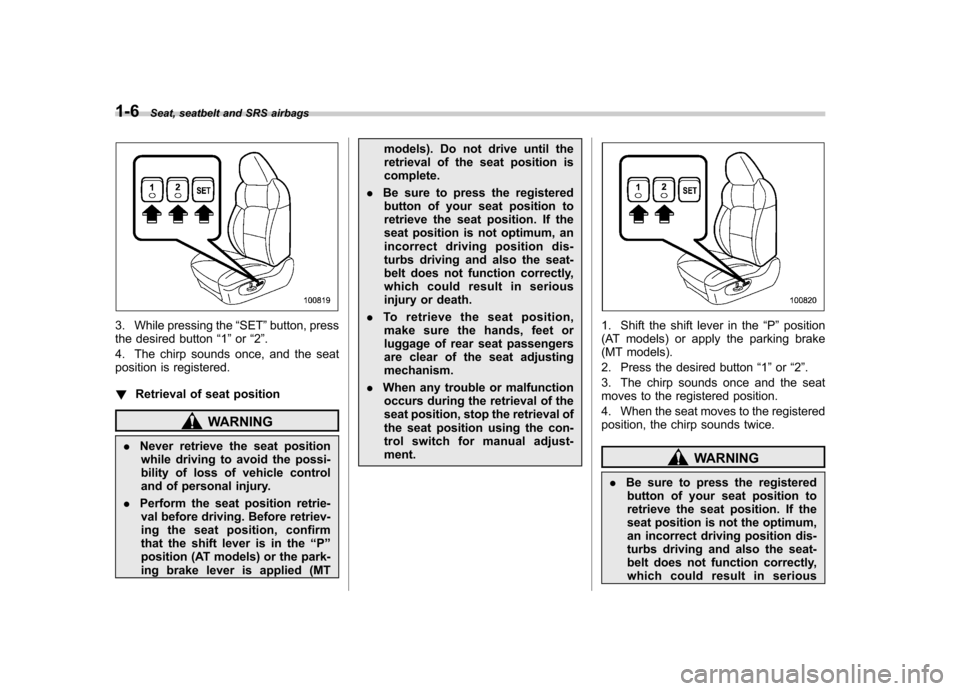
3. While pressing the “SET ”button, press
the desired button “1 ” or “2 ”.
4. The chirp sounds once, and the seat
position is registered. ! Retrieval of seat position
WARNING
. Never retrieve the seat position
while driving to avoid the possi-
bility of loss of vehicle control
and of personal injury.
. Perform the seat position retrie-
val before driving. Before retriev-
ing the seat position, confirm
that the shift lever is in the “P ”
position (AT models) or the park-
ing brake lever is applied (MT models). Do not drive until the
retrieval of the seat position iscomplete.
. Be sure to press the registered
button of your seat position to
retrieve the seat position. If the
seat position is not optimum, an
incorrect driving position dis-
turbs driving and also the seat-
belt does not function correctly,
which could result in serious
injury or death.
. To retrieve the seat position,
make sure the hands, feet or
luggage of rear seat passengers
are clear of the seat adjustingmechanism.
. When any trouble or malfunction
occurs during the retrieval of the
seat position, stop the retrieval of
the seat position using the con-
trol switch for manual adjust-ment.
1. Shift the shift lever in the “P ” position
(AT models) or apply the parking brake
(MT models).
2. Press the desired button “1 ” or “2 ”.
3. The chirp sounds once and the seat
moves to the registered position.
4. When the seat moves to the registered
position, the chirp sounds twice.
WARNING
. Be sure to press the registered
button of your seat position to
retrieve the seat position. If the
seat position is not the optimum,
an incorrect driving position dis-
turbs driving and also the seat-
belt does not function correctly,
which could result in serious
Page 33 of 447
injury or death.
. To retrieve the seat position,
make sure the hands, feet or
luggage of rear seat passengers
are clear of the seat adjustingmechanism.
NOTE . If a new position is registered for the
same button, the previous seat posi-
tion is deleted.. If the battery is disconnected, the
registered seat position is not deleted. & Head restraint adjustment
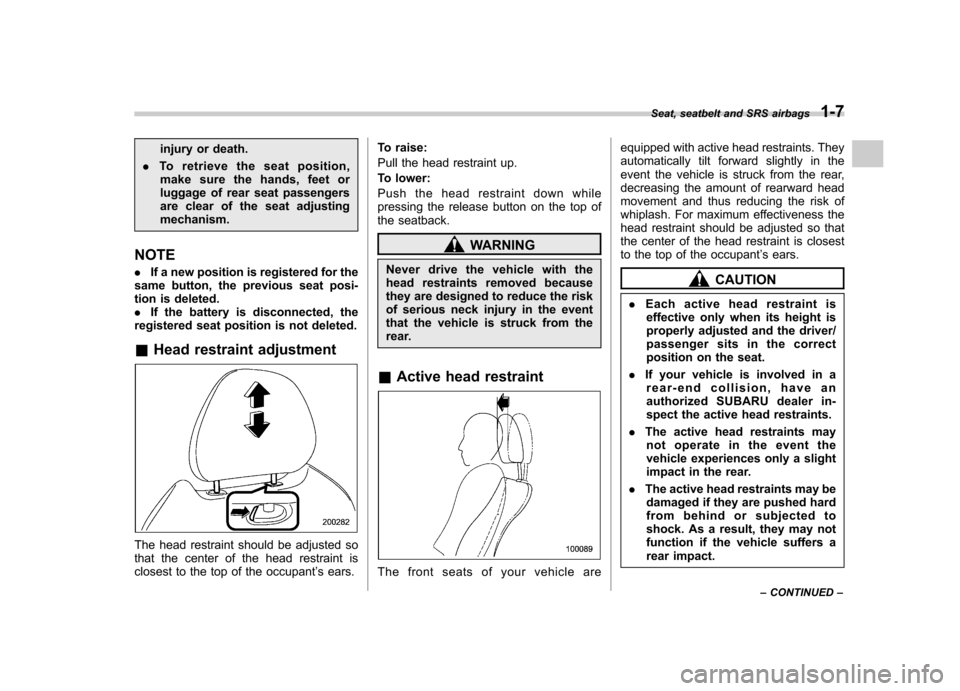
The head restraint should be adjusted so
that the center of the head restraint is
closest to the top of the occupant ’s ears. To raise:
Pull the head restraint up.
To lower:
Push the head restraint down while
pressing the release button on the top of
the seatback.
WARNING
Never drive the vehicle with the
head restraints removed because
they are designed to reduce the risk
of serious neck injury in the event
that the vehicle is struck from the
rear.
& Active head restraint
The front seats of your vehicle are equipped with active head restraints. They
automatically tilt forward slightly in the
event the vehicle is struck from the rear,
decreasing the amount of rearward head
movement and thus reducing the risk of
whiplash. For maximum effectiveness the
head restraint should be adjusted so that
the center of the head restraint is closest
to the top of the occupant
’s ears.
CAUTION
. Each active head restraint is
effective only when its height is
properly adjusted and the driver/
passenger sits in the correct
position on the seat.
. If your vehicle is involved in a
rear-end collision, have an
authorized SUBARU dealer in-
spect the active head restraints.
. The active head restraints may
not operate in the event the
vehicle experiences only a slight
impact in the rear.
. The active head restraints may be
damaged if they are pushed hard
from behind or subjected to
shock. As a result, they may not
function if the vehicle suffers a
rear impact. Seat, seatbelt and SRS airbags
1-7
– CONTINUED –
Page 35 of 447
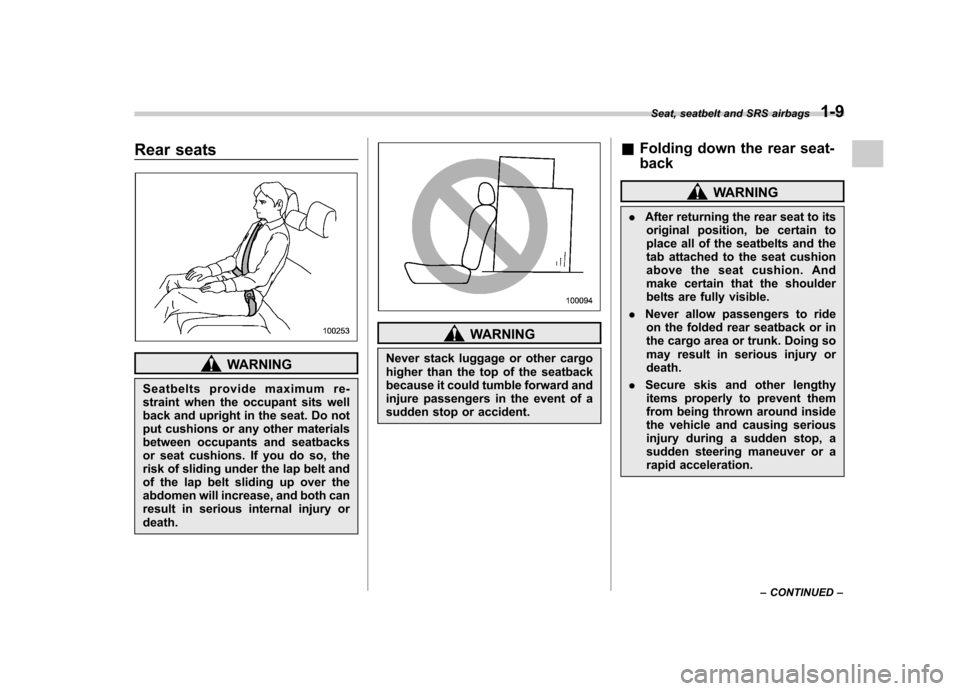
Rear seats
WARNING
Seatbelts provide maximum re-
straint when the occupant sits well
back and upright in the seat. Do not
put cushions or any other materials
between occupants and seatbacks
or seat cushions. If you do so, the
risk of sliding under the lap belt and
of the lap belt sliding up over the
abdomen will increase, and both can
result in serious internal injury ordeath.
WARNING
Never stack luggage or other cargo
higher than the top of the seatback
because it could tumble forward and
injure passengers in the event of a
sudden stop or accident. &
Folding down the rear seat- back
WARNING
. After returning the rear seat to its
original position, be certain to
place all of the seatbelts and the
tab attached to the seat cushion
above the seat cushion. And
make certain that the shoulder
belts are fully visible.
. Never allow passengers to ride
on the folded rear seatback or in
the cargo area or trunk. Doing so
may result in serious injury ordeath.
. Secure skis and other lengthy
items properly to prevent them
from being thrown around inside
the vehicle and causing serious
injury during a sudden stop, a
sudden steering maneuver or a
rapid acceleration. Seat, seatbelt and SRS airbags
1-9
– CONTINUED –
Page 36 of 447

1-10Seat, seatbelt and SRS airbags
!Sedan models
1) Lock
2) Unlock
3) Release button
Insert the key into the key cylinder on the
seatback, unlock the seatback by turning the key counterclockwise, and then fold
the seatback down while pushing the
release button.
To return the seatback to its original
position, raise the seatback until it locks
into place and make sure that it is securelylocked. !
Wagon models
Unlock the seatback by pushing the
release button and then fold the seatbackdown.
To return the seatback to its original
position, raise the seatback until it locks
into place and make sure that it is securelylocked. &
Head restraint adjustment
WARNING
Never drive the vehicle with the
head restraints removed because
they are designed to reduce the risk
of serious neck injury in the event
that the vehicle is struck from the
rear.
! Rear windows side seating position
CAUTION
The head restraint is not intended to
be used at the lowest position.
Before sitting on the seat, raise the
head restraint to the click position.
Page 38 of 447

1-12Seat, seatbelt and SRS airbags
When the seat is occupied:
Raise the head restraint to the click
position by pulling it up.
When the seat is not occupied:
To improve rearward visibility, push the
head restraint down while pressing the
release button on the top of the seatback. !Rear center seating position (Se- dan)
The head restraint for the rear center seat
cannot be adjusted. Armrest (if equipped)
Sedan
Station wagonTo lower the armrest, pull on the top edge
of the armrest.
WARNING
To avoid the possibility of serious
injury, passengers must never be
allowed to sit on the center armrest
while the vehicle is in motion.
& Loading long objects (Sedan)
1) Lock
2) Unlock
Folding down the armrest and opening the
seatback panel affords a loading space for
long objects.
To open the seatback panel, unlock with
the key lock and pull the seatback panel
Page 39 of 447

down while pulling the release tab.
WARNING
. Secure long objects properly to
prevent them from shooting for-
ward and causing serious injury
during a sudden stop or sharp
cornering. Tie long objects down
with a rope or something equiva-lent.
. Avoid loading objects longer
than 6.6 ft (2 m) and heavier than
55 lbs (25 kg). Such objects can
interfere with the driver ’s proper
operation of the vehicle, possibly
causing an accident and serious
injury.
NOTE
To protect your belongings in the trunk
from theft, it is recommended that you
lock the seatback panel. Seatbelts &
Seatbelt safety tips
WARNING
. All persons in the vehicle should
fasten their seatbelts BEFORE
the vehicle starts to move. Other-
wise, the possibility of serious
injury becomes greater in the
event of a sudden stop or acci-dent.
. All belts should fit snugly in order
to provide full restraint. Loose
fitting belts are not as effective in
preventing or reducing injury.
. Each seatbelt is designed to
support only one person. Never
use a single belt for two or morepersons –even children. Other-
wise, in an accident, serious
injury or death could result.
. Replace all seatbelt assemblies
including retractors and attach-
ing hardware worn by occupants
of a vehicle that has been in a
serious accident. The entire as-
sembly should be replaced even
if damage is not obvious.
. Put children aged 12 and under in
Seat, seatbelt and SRS airbags
1-13
– CONTINUED –
Page 41 of 447
&Emergency Locking Retrac-
tor (ELR)
The driver ’s seatbelt has an Emergency
Locking Retractor (ELR).
The emergency locking retractor allows
normal body movement but the retractor
locks automatically during a sudden stop,
impact or if you pull the belt very quickly
out of the retractor. & Automatic/Emergency Lock-
ing Retractor (A/ELR)
Each passenger ’s seatbelt has an Auto-
matic/Emergency Locking Retractor (A/
ELR). The Automatic/Emergency Locking
Retractor normally functions as an Emer-
gency Locking Retractor (ELR). The A/
ELR has an additional locking mode“ Automatic Locking Retractor (ALR)
mode ”intended to secure a child restraint
system. When the seatbelt is once drawn
out completely and is then retracted even
slightly, the retractor locks the seatbelt in
that position and the seatbelt cannot be
extended. As the belt is rewinding, clicks
will be heard which indicate the retractor
functions as ALR. When the seatbelt is
retracted fully, ALR mode is released.
When securing a child restraint system on
the passengers ’seats, the seatbelt must
be changed over to the Automatic Locking Retractor (ALR) mode.
When the child restraint system is re-
moved, make sure that the retractor is
restored to the Emergency Locking Re-
tractor (ELR) function by allowing the
seatbelt to retract fully.
For instructions on how to convert the
retractor to the ALR mode and restore it to
the ELR mode, refer to the
“Child restraint
systems ”section in this chapter.
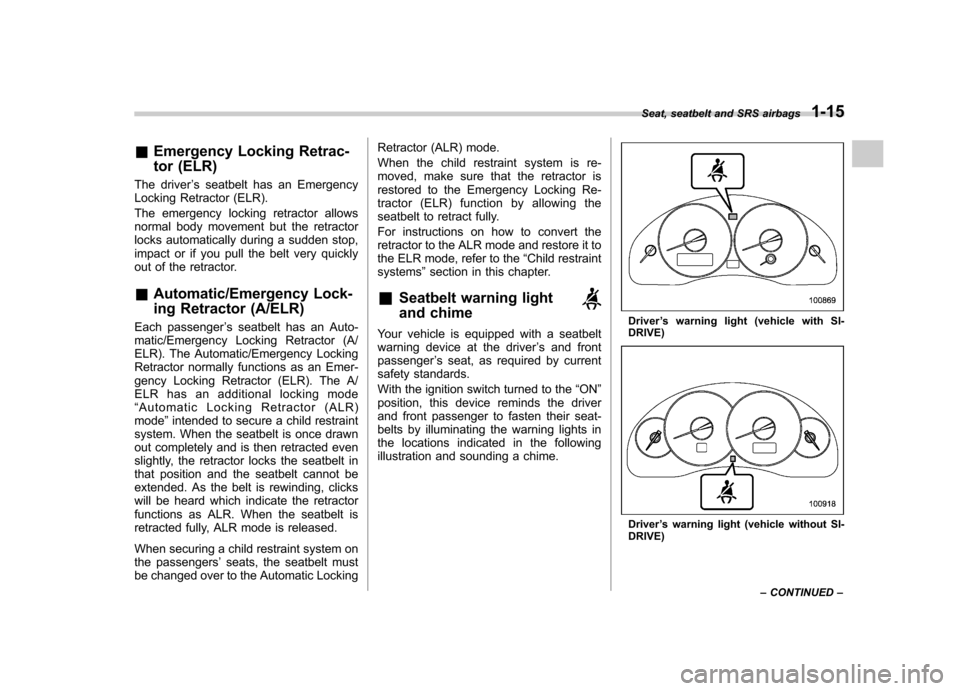
& Seatbelt warning light
and chime
Your vehicle is equipped with a seatbelt
warning device at the driver ’s and front
passenger ’s seat, as required by current
safety standards.
With the ignition switch turned to the “ON ”
position, this device reminds the driver
and front passenger to fasten their seat-
belts by illuminating the warning lights in
the locations indicated in the following
illustration and sounding a chime.Driver ’s warning light (vehicle with SI-
DRIVE)
Driver ’s warning light (vehicle without SI-
DRIVE) Seat, seatbelt and SRS airbags
1-15
– CONTINUED –