2009 SUBARU LEGACY warning
[x] Cancel search: warningPage 187 of 447

!Air conditioner button
The air conditioner operates only when
the engine is running.
Push the air conditioner button while the
fan is in operation to turn on the air
conditioner. The indicator light will illumi-nate.
Push it again to turn off the air conditioner. !
Air inlet selection buttonON position (Recirculation): Interior air is
recirculated inside the vehicle.
Push the air inlet button to the ON
position. The indicator light will illuminate.
Place this button in the ON position when
you wish to cool the cabin quickly (in a
vehicle with an air conditioner) or are
driving on a dusty road.
OFF position (Outside air): Outside air is
drawn into the passenger compartment.
Push the air inlet button again to the OFF
position. The indicator light will go off.
Place this button in the OFF position when
you reach a road that is not dusty and
when you wish to achieve a comfortable
temperature in the cabin.
WARNING
Continued operation in the ON posi-
tion may fog up the windows. Switch
to the OFF position as soon as the
outside dusty condition clears.
& Heater operation
! Defrosting or defogging the wind-shield
To direct warm air to the windshield and
front door windows:
1. Set the air inlet selection button to the
OFF position.
2. Set the air flow control dial to the “
”
position.
3. Turn the temperature control dial all
the way to the right.
4. Set the fan speed control dial to the
highest speed.
NOTE . In a vehicle equipped with an air
conditioner, when the dial is placed in the “
”position or “”position the
air conditioner compressor automati-
cally operates to quickly defog the
windshield. However the indicator on
the air conditioner button will not Climate control
4-5
– CONTINUED –
Page 189 of 447

2. Set the air flow control dial to the“”
position.
3. Set the temperature control dial all the
way left.
4. Set the fan speed control dial to the
desired speed.
When driving on a dusty road, set the air
inlet control button to the ON position.
WARNING
Continued operation in the ON posi-
tion may fog up the windows. Switch
to the OFF position as soon as the
outside dusty condition clears.
& Air conditioner operation
! Cooling or dehumidifying
For cooling and dehumidification of the
passenger compartment, air flows through
the instrument panel outlets:
1. Set the air inlet selection button to the
OFF position.
2. Set the air flow control dial to the “
”
position.
3. Set the air conditioner button to the “ ON ”position.
4. Set the temperature control dial to the
blue side.
5. Set the fan speed control dial at the desired speed. !
Defrosting or defogging
To direct warm air to the windshield and
front door windows:
1. Set the air outlet control dial to the “
” position.
2. Set the temperature control dial to the
red side.
3. Set the fan speed control dial at the
highest speed. NOTE
In a vehicle equipped with an air
conditioner, when the dial is placed inthe “
”position or “”position the
air conditioner compressor automati-
cally operates to quickly defog the
windshield. However the indicator on
the air conditioner button will not
illuminate. At the same time, the air
inlet selection is automatically set to“ outside air ”mode.
In this state, you cannot select “recir-
culation ”mode by manually pressing
the air inlet selection button.
Also, you cannot stop the air condi-
tioner compressor by pressing the air
conditioner button. Automatic climate control
system (if equipped) NOTE .
Operate the automatic climate con-
trol system when the engine is running. . The blower fan rotates at a low
speed when the engine coolant tem-
perature is low.
For efficient defogging or dehumidify-
ing in cold weather, press the “A/C ”
button.. Even when cooling is not necessary,
setting the temperature much lower
than the current outlet air temperature
turns on the air conditioner compres-
sor automatically and the “A/C ”indi-
cator light on the control panel illumi-nates.
The automatic climate control system
automatically controls outlet air tempera-
ture, fan speed, air flow distribution air-
inlet control, and air conditioner compres-
sor operation. It activates when the“ AUTO ”button is pressed, and is used to
maintain a constant, comfortable climate
within the passenger compartment.
The temperature can be set within a range
of 65 to 85 8F (18 to 32 8C).
Climate control
4-7
– CONTINUED –
Page 193 of 447

When the temperature control dial is
turned fully counterclockwise, the recircu-
lation mode is automatically selected.)
When the outside air mode is selected, a“
”indicator light appears on the dis-
play.
WARNING
Continued operation in the “
”
position may fog up the windows.
Switch to the “
”position as soon
as the outside dusty condition clears.
NOTE
When driving on a dusty road or behind
a vehicle that emits unpleasant exhaust
gases, set the air inlet selection button
to the “
”position.
From time to time, return the air inlet
selection button to the “
”position
to draw outside air into the passenger compartment. &
Temperature sensors
1) Solar sensor
2) Interior air temperature sensor
The automatic climate control system
employs several sensors. These sensors
are delicate. If they are treated incorrectly
and become damaged, the system may
not be able to control the interior tempera-
ture correctly. To avoid damaging the
sensors, observe the following precau-tions: – Do not subject the sensors to impact.
– Keep water away from the sensors.
– Do not cover the sensors.
The sensors are located as follows:– Solar sensor: beside windshield
defroster grille –
Interior air temperature sensor: on the
side of the driver-side part of the center panel – Outside temperature sensor: behind
front grille. Climate control
4-11
Page 234 of 447

position.
To use the cigarette lighter, push in the
knob and wait a few moments. It will
automatically spring up when ready foruse.
WARNING
To avoid being burned, never grasp
the lighter by the end with the
heating element. Doing so could
result in injury and could also
damage the heating element.
CAUTION
. Do not hold the lighter pushed in,
because it will overheat.
. The accessory power outlet lo-
cated next to the front pocket is
originally designed to use a gen-
uine SUBARU cigarette lighter
plug. Do not use a non-genuine
cigarette lighter plug in the sock-
et. Doing so may cause a short-
circuit and overheating, resulting
in a fire.
. If the socket is ever used for a
plug-in accessory such as a cell
phone, that may damage the
portion of the socket ’s internal mechanism that causes a cigar-
ette lighter plug to
“pop out ”
after its lighter element is heated.
Therefore, do not place a cigar-
ette lighter plug in a socket that
has been used, even once, to
power a plug-in accessory. Doing
so may cause the plug to stick
and overheat, creating a potential
fire hazard. Ashtray (Canada only
—if
equipped)
CAUTION
Do not use ashtrays as waste re-
ceptacles or leave a lighted cigarette
in an ashtray. This could cause afire.
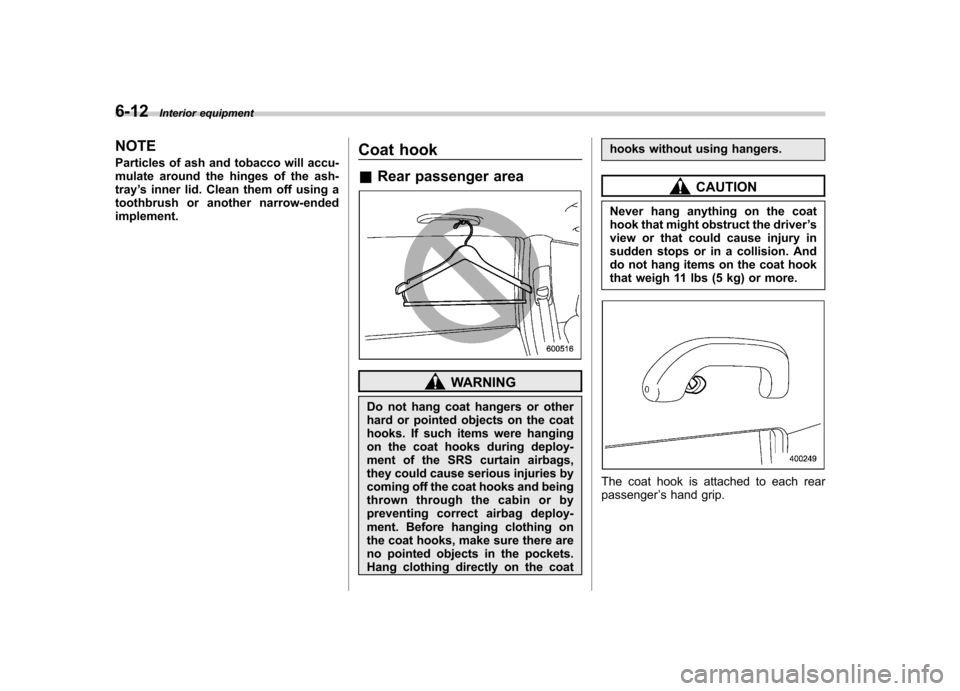
A portable front ashtray is available from
your SUBARU dealer. It fits into one of the
cup holders built into the center console.
When using the ashtray, open the ashtray
lid. Fully close the lid after using it to help
reduce residual smoke. Interior equipment
6-11
– CONTINUED –
Page 235 of 447

6-12Interior equipment
NOTE
Particles of ash and tobacco will accu-
mulate around the hinges of the ash-tray’s inner lid. Clean them off using a
toothbrush or another narrow-endedimplement. Coat hook &
Rear passenger area
WARNING
Do not hang coat hangers or other
hard or pointed objects on the coat
hooks. If such items were hanging
on the coat hooks during deploy-
ment of the SRS curtain airbags,
they could cause serious injuries by
coming off the coat hooks and being
thrown through the cabin or by
preventing correct airbag deploy-
ment. Before hanging clothing on
the coat hooks, make sure there are
no pointed objects in the pockets.
Hang clothing directly on the coat hooks without using hangers.
CAUTION
Never hang anything on the coat
hook that might obstruct the driver ’s
view or that could cause injury in
sudden stops or in a collision. And
do not hang items on the coat hook
that weigh 11 lbs (5 kg) or more.
The coat hook is attached to each rear passenger ’s hand grip.
Page 237 of 447

6-14Interior equipment
CAUTION
Make sure the driver ’s floor mat is
placed back in its proper location
and correctly secured on its retain-
ing pin. Also, do not use more than
one floor mat. If the floor mat slips
forward and interferes with the
movement of the pedals during
driving, it could cause an accident. Cargo area cover
(if equipped)
The cargo area cover is provided for
covering the cargo area and to protect its
contents from direct sunlight. This cover is
detachable to make room for additionalcargo. &
Using the cover
To extend the cover, pull the end of the
cover out of the housing, then insert its
hooks into the catches as shown. To
rewind it, unhook it from the catches and
it will rewind automatically. You should
hold on to the cover and guide it back into
the cover housing while it is rewinding.
WARNING
Do not place anything on the ex-
tended cover. Putting excessive
weight on the extended cover can
break it and an object on the cover
could tumble forward in the event of
a sudden stop or collision. This
could cause serious injury.
& To remove the cover housing
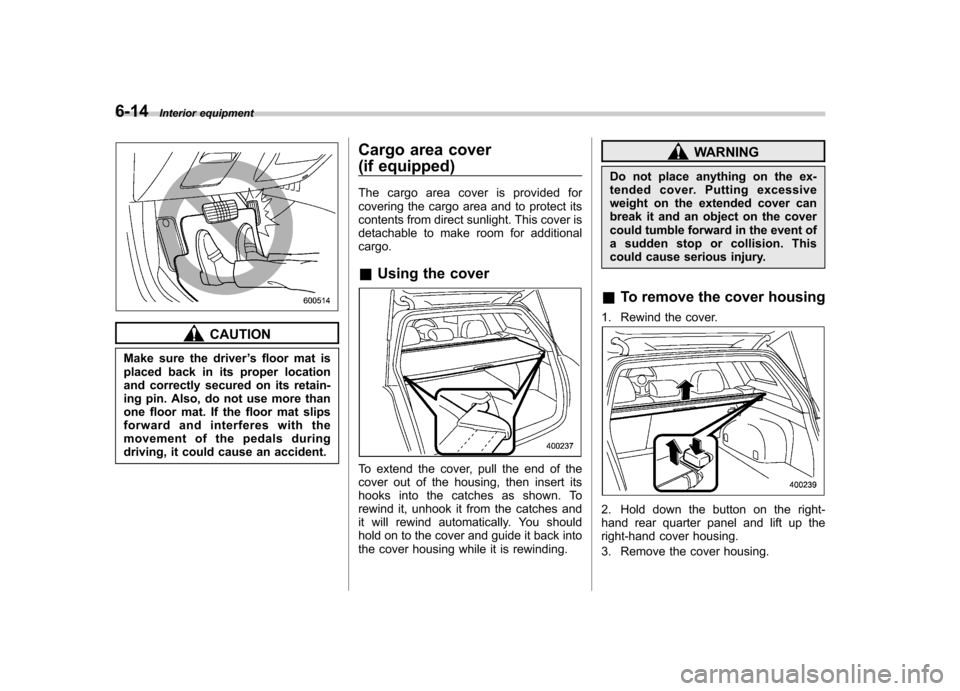
1. Rewind the cover.
2. Hold down the button on the right-
hand rear quarter panel and lift up the
right-hand cover housing.
3. Remove the cover housing.
Page 242 of 447

HomeLink®Wireless Control
System (if equipped)
1) HomeLink® buttons
2) Indicator light
3) Hand-held transmitter* * Not part of your vehicle ’s remote
keyless entry system but of a
HomeLink®-compatible device.
The HomeLink® Wireless Control System,
located on the driver ’s sun visor, is a
handy way to operate, from inside of your
vehicle, up to three remote-controlled
indoor and outdoor devices, such as
garage door openers, entrance gates,
door locks, home lighting, and security
systems. There are three HomeLink®
buttons on the sun visor, each of which
you can program for operation of one desired device. For details on the device
types which can be operated by this
system, consult the HomeLink website at
www.homelink.com or call 1-800-355-3515.
Note the following about this system:
Ifyourvehicleisequippedwiththe
HomeLink® Wireless Control System, it
complies with Part 15 of the Federal
Communication Commission Rules in the
U.S. and the RSS-210 of Industry Canada
in Canada. Its operation is subject to the
following two conditions:
(1) this device may not cause harmful
interference, and (2) this device must
accept any interference received, includ-
ing interference that may cause undesiredoperation.
Changes and modifications to this system
by anyone other than an authorized
service facility could void authorization to
use this equipment.
HomeLink and the HomeLink house are
registered trademarks of Johnson Con-
trols, Inc.
WARNING
. When programming the
HomeLink ®Wireless Control
System, you may be operating a garage door opener or other
device. Make sure that people
and objects are out of the way
of the garage door opener or
other device to prevent potential
harm or damage.
. Do not use the HomeLink ®Wire-
less Control System with any
garage door opener that lacks
the safety stop and reverse fea-
ture as required by applicable
safety standards. A garage door
opener which cannot detect an
object, signaling the door to stop
and reverse, does not meet these
safety standards. Using a garage
door opener without these fea-
tures increases risk of serious
injury or death. For more infor-
mation, consult the HomeLink
website at www.homelink.com
or call 1-800-355-3515.
CAUTION
When programming the HomeLink ®
Wireless Control System to operate
a garage door opener or an entrance
gate, unplug the device ’s motor
from the outlet during programming
to prevent motor burnout. Interior equipment
6-19
– CONTINUED –
Page 247 of 447

Fuel...................................................................... 7-3
Fuel requirements ............................................... 7-3
Fuel filler lid and cap ........................................... 7-5
State emission testing (U.S. only) ...................... 7-7
Preparing to drive ............................................... 7-8
Starting the engine .............................................. 7-9
Manual transmission vehicle ................................ 7-9
Automatic transmission vehicle .......................... 7-10
Stopping the engine ........................................... 7-11
Remote engine start system (dealer option) ................................................. 7-11
Starting your vehicle .......................................... 7-12
Remote start safety features ............................... 7-12
Entering the vehicle while it is running via remote start ................................................................. 7-12
Entering the vehicle following remote engine start shutdown ......................................................... 7-12
Pre-heating or pre-cooling the interior of the vehicle ............................................................. 7-13
Service mode ..................................................... 7-13
Remote transmitter programming and programmable feature option ............................ 7-13
System maintenance .......................................... 7-14
Manual transmission –5 speeds ...................... 7-15
Shifting speeds .................................................. 7-15
Driving tips ........................................................ 7-16
Manual transmission –6 speeds (2.5GT
spec.B) ............................................................. 7-17
Selecting reverse gear ........................................ 7-17
Shifting speeds .................................................. 7-17
Driving tips ........................................................ 7-18 Automatic transmission
–4-speed ................... 7-18
Selector lever .................................................... 7-19
Selector lever reverse inhibiting function ............ 7-20
Selection of manual mode .................................. 7-21
Maximum speeds ............................................... 7-22
Driving tips ........................................................ 7-23
SPORT mode ..................................................... 7-23
Shift lock release ............................................... 7-24
Automatic transmission –5-speed ................... 7-24
Selector lever .................................................... 7-25
Selector lever reverse inhibiting function ............ 7-26
Selection of manual mode .................................. 7-27
Maximum speeds ............................................... 7-29
Driving tips ........................................................ 7-29
Shift lock release ............................................... 7-30
SI-DRIVE (turbo and 3.0 L models) .................. 7-31
Intelligent (I) mode ............................................. 7-31
Sport (S) mode .................................................. 7-32
Sport Sharp (S#) mode. ...................................... 7-32
SI-DRIVE selector .............................................. 7-32
SI-DRIVE Sport Sharp (S#) switch ...................... 7-33
Rear viscous limited slip differential (LSD) (if equipped) .................................................... 7-33
Power steering ................................................... 7-34
Braking ............................................................... 7-34
Braking tips ....................................................... 7-34
Brake system .................................................... 7-34
Disc brake pad wear warning indicators ............. 7-35
ABS (Anti-lock Brake System) .......................... 7-35
ABS system self-check ...................................... 7-35
Starting and operating
7