2009 SUBARU LEGACY lock
[x] Cancel search: lockPage 216 of 447

If you accidentally press the button and
cancel the random mode, press it again
to reselect the random mode..Random playback will be cancelled
if you perform any of the followingsteps:
.Press the “RPT ”button
. Press the “
”or “”side of the
SEEK/SCAN button in the folder
random mode “F-RDM ”
. Press the “
”button
. Press the disc select button
. Select the radio or AUX mode
. Press the “LOAD ”button when
there is free space in the CD magazine. . Turn off the power of the audio
equipment.. Turn the ignition switch to the
“ LOCK ”position. &
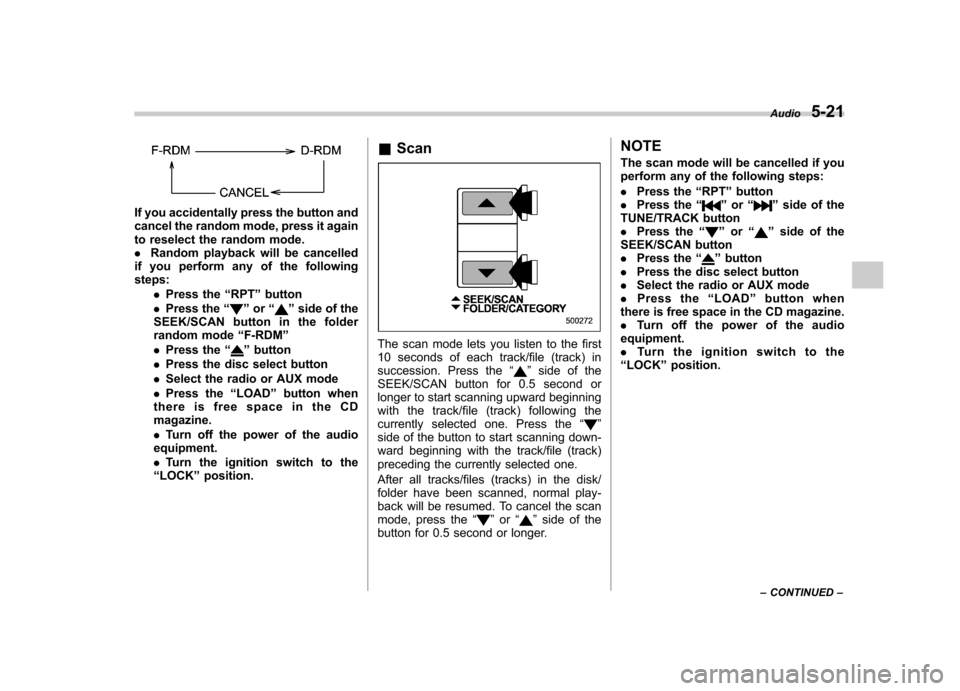
ScanThe scan mode lets you listen to the first
10 seconds of each track/file (track) in
succession. Press the “
”side of the
SEEK/SCAN button for 0.5 second or
longer to start scanning upward beginning
with the track/file (track) following the
currently selected one. Press the “
”
side of the button to start scanning down-
ward beginning with the track/file (track)
preceding the currently selected one.
After all tracks/files (tracks) in the disk/
folder have been scanned, normal play-
back will be resumed. To cancel the scan
mode, press the “
”or “”side of the
button for 0.5 second or longer. NOTE
The scan mode will be cancelled if you
perform any of the following steps: .
Press the “RPT ”button
. Press the “
”or “”side of the
TUNE/TRACK button . Press the “
”or “”side of the
SEEK/SCAN button . Press the “
”button
. Press the disc select button
. Select the radio or AUX mode
. Press the “LOAD ”button when
there is free space in the CD magazine. . Turn off the power of the audio
equipment.. Turntheignitionswitchtothe
“ LOCK ”position. Audio
5-21
– CONTINUED –
Page 227 of 447

6-4Interior equipment
Sun visors
To block out glare, swing down the visors.
To use the sun visor at a side window,
swing it down and move it sideways. &
Sun visor extension plateWith the sun visor positioned over the side
window, you can use the sun visor
extension plate to prevent glare through
the gap between the sun visor and center
pillar. To use the extension plate, pull it
toward the rear of the vehicle. When you
have finished using it, stow it by pushing it
toward the front of the vehicle.CAUTION
Do not pull out the extension plate
with the sun visor positioned over
the windshield. The extension plate
would obstruct your view of the
rearview mirror.
Page 228 of 447

&Vanity mirror with light
CAUTION
Keep the vanity mirror cover closed
while the car is being driven to avoiddazzle.
To use the vanity mirror, swing down the
sun visor and open the vanity mirror cover.
The light beside the vanity mirror illumi-
nates when the ignition switch is either inthe “Acc ”or “ON ”position and the mirror
cover is opened.
NOTE
Use of the vanity mirror light for a long
period of time while the engine is not
running can cause battery discharge. Storage compartment
CAUTION
. Always keep the storage com-
partment closed while driving to
reduce the risk of injury in the
event of sudden stops or anaccident.
. Do not store spray cans, contain-
ers with flammable or corrosive
liquids or any other dangerous
items in the storage compart-ment. &
Glove box
1) Lock
2) Unlock
To open the glove box, pull the handle. To
close it, push the lid firmly upward.
To lock the glove box, insert the key and
turn it clockwise. Interior equipment
6-5
– CONTINUED –
Page 229 of 447

6-6Interior equipment
&Center console box
Center console box (front)
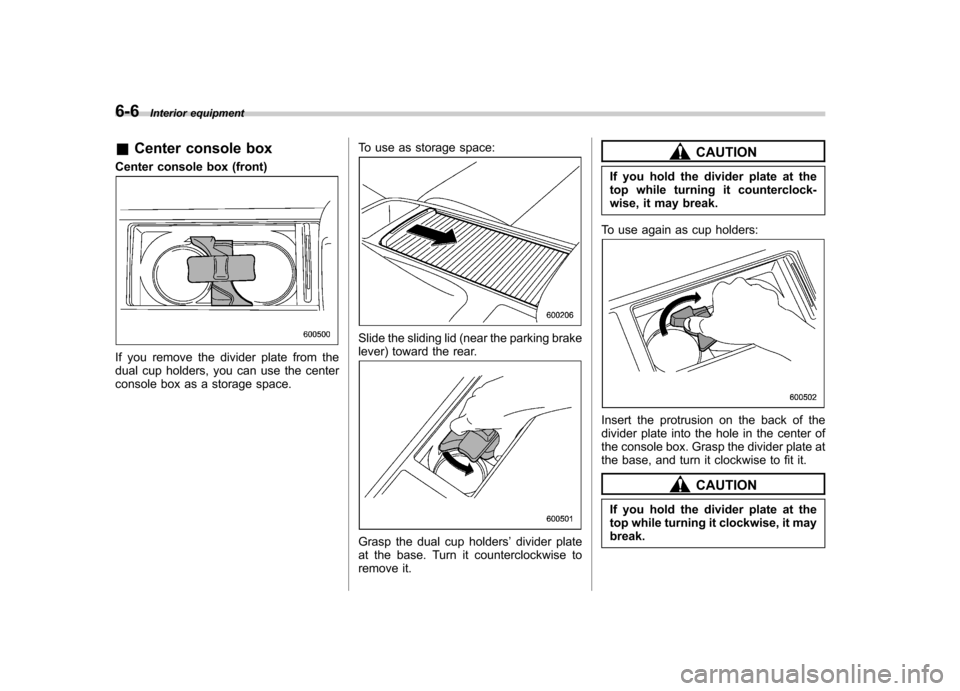
If you remove the divider plate from the
dual cup holders, you can use the center
console box as a storage space. To use as storage space:
Slide the sliding lid (near the parking brake
lever) toward the rear.
Grasp the dual cup holders
’divider plate
at the base. Turn it counterclockwise to
remove it.
CAUTION
If you hold the divider plate at the
top while turning it counterclock-
wise, it may break.
To use again as cup holders:
Insert the protrusion on the back of the
divider plate into the hole in the center of
the console box. Grasp the divider plate at
the base, and turn it clockwise to fit it.
CAUTION
If you hold the divider plate at the
top while turning it clockwise, it maybreak.
Page 230 of 447

Center console box (rear)
Pull up the lock release knob at the bottom
of the front edge of the lid. &Center panel compartment
(if equipped)
CAUTION
When your vehicle is parked in the
sun or a warm day, the inside of the
center panel heats up. Avoid storing
plastic or other heat-vulnerable or
flammable articles such as a lighter
in the center panel.
To open the center panel compartment,
pull up the edge of the bottom of the panellid. &
Overhead console
(if equipped)
To open the console, push on the lid lightly
and it will automatically open.
CAUTION
When your vehicle is parked in the
sun or on a warm day, the inside of
the overhead console heats up.
Avoid storing plastic or other heat-
vulnerable or flammable articles
such as a lighter in the overheadconsole. Interior equipment
6-7
– CONTINUED –
Page 242 of 447

HomeLink®Wireless Control
System (if equipped)
1) HomeLink® buttons
2) Indicator light
3) Hand-held transmitter* * Not part of your vehicle ’s remote
keyless entry system but of a
HomeLink®-compatible device.
The HomeLink® Wireless Control System,
located on the driver ’s sun visor, is a
handy way to operate, from inside of your
vehicle, up to three remote-controlled
indoor and outdoor devices, such as
garage door openers, entrance gates,
door locks, home lighting, and security
systems. There are three HomeLink®
buttons on the sun visor, each of which
you can program for operation of one desired device. For details on the device
types which can be operated by this
system, consult the HomeLink website at
www.homelink.com or call 1-800-355-3515.
Note the following about this system:
Ifyourvehicleisequippedwiththe
HomeLink® Wireless Control System, it
complies with Part 15 of the Federal
Communication Commission Rules in the
U.S. and the RSS-210 of Industry Canada
in Canada. Its operation is subject to the
following two conditions:
(1) this device may not cause harmful
interference, and (2) this device must
accept any interference received, includ-
ing interference that may cause undesiredoperation.
Changes and modifications to this system
by anyone other than an authorized
service facility could void authorization to
use this equipment.
HomeLink and the HomeLink house are
registered trademarks of Johnson Con-
trols, Inc.
WARNING
. When programming the
HomeLink ®Wireless Control
System, you may be operating a garage door opener or other
device. Make sure that people
and objects are out of the way
of the garage door opener or
other device to prevent potential
harm or damage.
. Do not use the HomeLink ®Wire-
less Control System with any
garage door opener that lacks
the safety stop and reverse fea-
ture as required by applicable
safety standards. A garage door
opener which cannot detect an
object, signaling the door to stop
and reverse, does not meet these
safety standards. Using a garage
door opener without these fea-
tures increases risk of serious
injury or death. For more infor-
mation, consult the HomeLink
website at www.homelink.com
or call 1-800-355-3515.
CAUTION
When programming the HomeLink ®
Wireless Control System to operate
a garage door opener or an entrance
gate, unplug the device ’s motor
from the outlet during programming
to prevent motor burnout. Interior equipment
6-19
– CONTINUED –
Page 245 of 447

6-22Interior equipment
trol System and your garage door opener
should activate when the HomeLink®
button is pressed. & Programming for entrance
gates and garage door open-
ers in Canada
1. Unplug the motor of the entrance gate
or garage door opener from the outlet.
2. Press and hold the two outside buttons
until the HomeLink® indicator light begins
to flash (after 20 seconds). Release bothbuttons. NOTE
If any of the HomeLink ®buttons are
already programmed for other devices,
skip step 2 because it clears the memory of all three buttons.
3. Hold the end of the entrance gate
’s/
garage door opener ’s hand-held transmit-
ter between 1 and 3 inches (25 and 76
mm) away from the HomeLink® buttons
on the driver ’s sun visor, keeping the
indicator light in view.
4. Press and hold the desired
HomeLink® button.
5. Press and release ( “cycle ”) the hand-
held transmitter button every 2 seconds
until step 6 is complete.
6. When the indicator light flashes slowly
and then rapidly after several seconds,
release both buttons.
7. Plug the motor of the entrance gate/
garage door opener to the outlet.
8. Test your entrance gate/garage door opener by pressing the programmed
HomeLink® button. &
Programming other devices
To program other devices such as door
locks, home lighting and security systems,
contact HomeLink at www.homelink.com
or call 1-800-355-3515. & Operating the HomeLink ®
Wireless Control System
Once programmed, the HomeLink® Wire-
less Control System can be used to
remote-control the devices to which its
buttons are programmed. To activate a
device, simply press the appropriate but-
ton. The indicator light illuminates, indicat-
ing that the signal is being transmitted. & Reprogramming a single HomeLink ®button
1. Press and hold the HomeLink® button
you wish to reprogram. DO NOT release
the button until step 4 has been com-pleted.
2. When the HomeLink® indicator light
begins to flash slowly (after 20 seconds),
position the hand-held transmitter of the
device for which you wish to program the
button at 1 to 3 inches (25 to 76 mm) away
from the HomeLink® button surface.
Page 247 of 447

Fuel...................................................................... 7-3
Fuel requirements ............................................... 7-3
Fuel filler lid and cap ........................................... 7-5
State emission testing (U.S. only) ...................... 7-7
Preparing to drive ............................................... 7-8
Starting the engine .............................................. 7-9
Manual transmission vehicle ................................ 7-9
Automatic transmission vehicle .......................... 7-10
Stopping the engine ........................................... 7-11
Remote engine start system (dealer option) ................................................. 7-11
Starting your vehicle .......................................... 7-12
Remote start safety features ............................... 7-12
Entering the vehicle while it is running via remote start ................................................................. 7-12
Entering the vehicle following remote engine start shutdown ......................................................... 7-12
Pre-heating or pre-cooling the interior of the vehicle ............................................................. 7-13
Service mode ..................................................... 7-13
Remote transmitter programming and programmable feature option ............................ 7-13
System maintenance .......................................... 7-14
Manual transmission –5 speeds ...................... 7-15
Shifting speeds .................................................. 7-15
Driving tips ........................................................ 7-16
Manual transmission –6 speeds (2.5GT
spec.B) ............................................................. 7-17
Selecting reverse gear ........................................ 7-17
Shifting speeds .................................................. 7-17
Driving tips ........................................................ 7-18 Automatic transmission
–4-speed ................... 7-18
Selector lever .................................................... 7-19
Selector lever reverse inhibiting function ............ 7-20
Selection of manual mode .................................. 7-21
Maximum speeds ............................................... 7-22
Driving tips ........................................................ 7-23
SPORT mode ..................................................... 7-23
Shift lock release ............................................... 7-24
Automatic transmission –5-speed ................... 7-24
Selector lever .................................................... 7-25
Selector lever reverse inhibiting function ............ 7-26
Selection of manual mode .................................. 7-27
Maximum speeds ............................................... 7-29
Driving tips ........................................................ 7-29
Shift lock release ............................................... 7-30
SI-DRIVE (turbo and 3.0 L models) .................. 7-31
Intelligent (I) mode ............................................. 7-31
Sport (S) mode .................................................. 7-32
Sport Sharp (S#) mode. ...................................... 7-32
SI-DRIVE selector .............................................. 7-32
SI-DRIVE Sport Sharp (S#) switch ...................... 7-33
Rear viscous limited slip differential (LSD) (if equipped) .................................................... 7-33
Power steering ................................................... 7-34
Braking ............................................................... 7-34
Braking tips ....................................................... 7-34
Brake system .................................................... 7-34
Disc brake pad wear warning indicators ............. 7-35
ABS (Anti-lock Brake System) .......................... 7-35
ABS system self-check ...................................... 7-35
Starting and operating
7