2009 SUBARU FORESTER child lock
[x] Cancel search: child lockPage 88 of 384
Keys..................................................................... 2-2
Key number plate ................................................ 2-2
Immobilizer .......................................................... 2-2
Security ID plate .................................................. 2-3
Security indicator light ........................................ 2-3
Key replacement ................................................. 2-4
Door locks ........................................................... 2-4
Locking and unlocking from the outside .. ............ 2-4
Locking and unlocking from the inside ................ 2-5
Battery drainage prevention function ................... 2-5
Power door locking switches ............................. 2-6
Key lock-in prevention function ........................... 2-6
Remote keyless entry system ............................ 2-7
Locking the doors ............................................... 2-8
Unlocking the doors ............................................ 2-8
Unlocking the rear gate ....................................... 2-9
Illuminated entry ................................................. 2-9
Vehicle finder function ......................................... 2-9
Sounding a panic alarm ....................................... 2-9
Selecting audible signal operation ....................... 2-9
Replacing the battery ......................................... 2-10 Replacing lost transmitters
................................ 2-10
Alarm system ..................................................... 2-14
System operation ............................................... 2-14
Activating and deactivating the alarm system ..... 2-14
If you have accidentally triggered the alarm system ............................................................ 2-14
Arming the system ............................................ 2-15
Disarming the system ........................................ 2-16
Valet mode ........................................................ 2-16
Passive arming .................................................. 2-16
Tripped sensor identification .............................. 2-17
Shock sensors (dealer option).. .......................... 2-18
Child safety locks .............................................. 2-18
Windows ............................................................. 2-19
Power windows ................................................. 2-19
Rear gate ............................................................ 2-21
Moonroof (if equipped) ...................................... 2-22
To open the moonroof ....................................... 2-23
To close the moonroof ....................................... 2-23
Anti-entrapment function .................................... 2-23
Sun shade ......................................................... 2-23 Keys and doors
2
Page 92 of 384
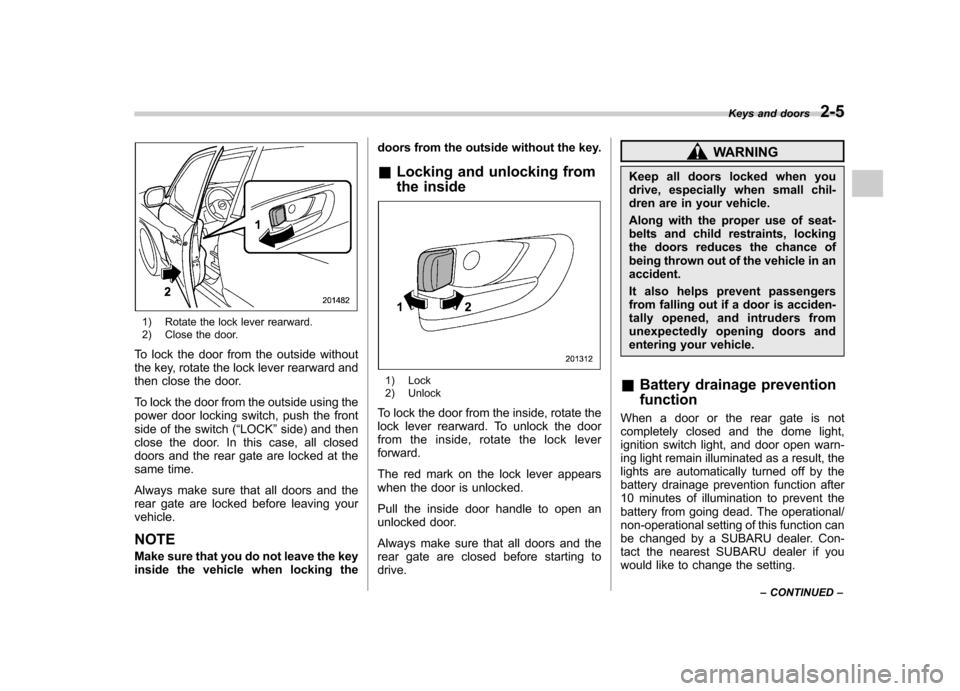
1) Rotate the lock lever rearward.
2) Close the door.
To lock the door from the outside without
the key, rotate the lock lever rearward and
then close the door.
To lock the door from the outside using the
power door locking switch, push the front
side of the switch ( “LOCK ”side) and then
close the door. In this case, all closed
doors and the rear gate are locked at the
same time.
Always make sure that all doors and the
rear gate are locked before leaving yourvehicle. NOTE
Make sure that you do not leave the key
inside the vehicle when locking the doors from the outside without the key.
& Locking and unlocking from
the inside
1) Lock
2) Unlock
To lock the door from the inside, rotate the
lock lever rearward. To unlock the door
from the inside, rotate the lock leverforward.
The red mark on the lock lever appears
when the door is unlocked.
Pull the inside door handle to open an
unlocked door.
Always make sure that all doors and the
rear gate are closed before starting todrive.
WARNING
Keep all doors locked when you
drive, especially when small chil-
dren are in your vehicle.
Along with the proper use of seat-
belts and child restraints, locking
the doors reduces the chance of
being thrown out of the vehicle in anaccident.
It also helps prevent passengers
from falling out if a door is acciden-
tally opened, and intruders from
unexpectedly opening doors and
entering your vehicle.
& Battery drainage prevention function
When a door or the rear gate is not
completely closed and the dome light,
ignition switch light, and door open warn-
ing light remain illuminated as a result, the
lights are automatically turned off by the
battery drainage prevention function after
10 minutes of illumination to prevent the
battery from going dead. The operational/
non-operational setting of this function can
be changed by a SUBARU dealer. Con-
tact the nearest SUBARU dealer if you
would like to change the setting. Keys and doors
2-5
– CONTINUED –
Page 105 of 384
2-18Keys and doors
&Shock sensors (dealer op- tion)
The shock sensors trigger the alarm
system when they sense impacts applied
to the vehicle and when any of their
electric wires are cut. The alarm system
causes the horn to sound and the turn
signal lights to flash for a short time when
the sensed impact is weak, but it warns of
a strong impact or multiple impacts by
sounding the horn and flashing the turn
signal lights, both lasting approximately 30seconds.
If you desire, your SUBARU dealer can
connect them and set them for activation
or deactivation. NOTE . The shock sensors are not always
able to sense impacts caused by break-
ing in, and cannot sense an impact that
does not cause vibration (such as
breaking the glass using a rescuehammer).. The shock sensors may sense vi-
bration as indicated in the following
examples and trigger the alarm system.
Select the settings of the alarm system
and shock sensors appropriately de-
pending on where you usually park
your vehicle. Examples:
Vibration from a construction site
Vibration in a multistory car park
Vibration from trains
. You can have the sensitivity of the
shock sensors adjusted to your pre-
ference by your SUBARU dealer. Child safety locks
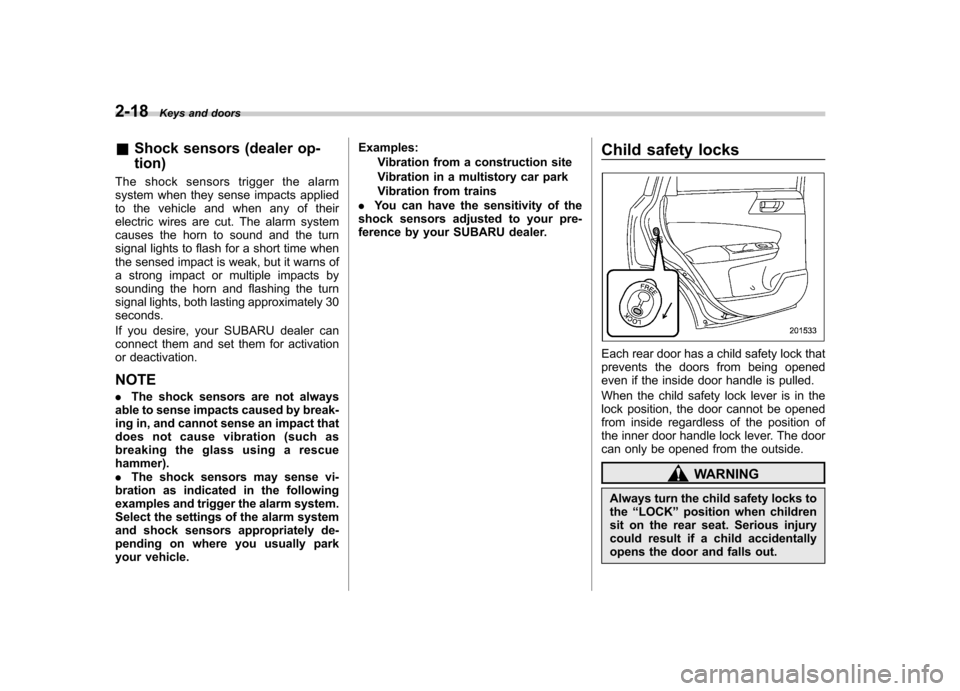
Each rear door has a child safety lock that
prevents the doors from being opened
even if the inside door handle is pulled.
When the child safety lock lever is in the
lock position, the door cannot be opened
from inside regardless of the position of
the inner door handle lock lever. The door
can only be opened from the outside.
WARNING
Always turn the child safety locks to the “LOCK ”position when children
sit on the rear seat. Serious injury
could result if a child accidentally
opens the door and falls out.
Page 106 of 384
Windows &Power windows
WARNING
To avoid serious personal injury
caused by entrapment, you must
do the following. . When operating the power win-
dows, be extremely careful to
prevent anyone ’s fingers, arms,
neck or head from being caught
in the window.
. Always lock the passengers ’win-
dows using the lock switch when
children are riding in the vehicle.
. Before leaving the vehicle, al-
ways remove the key from the
ignition switch for safety and
never allow an unattended child
to remain in the vehicle. Failure
to follow this procedure could
result in injury to a child operat-
ing the power window.
The power windows operate only when
the ignition switch is in the “ON ”position. !
Driver ’s side switches
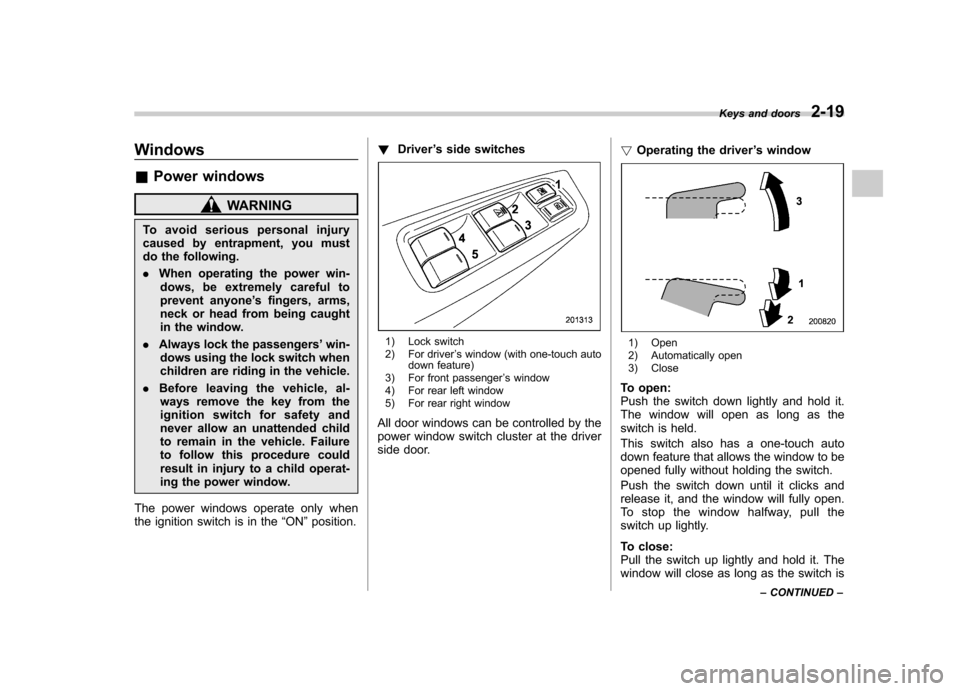
1) Lock switch
2) For driver ’s window (with one-touch auto
down feature)
3) For front passenger ’s window
4) For rear left window
5) For rear right window
All door windows can be controlled by the
power window switch cluster at the driver
side door. !
Operating the driver ’s window1) Open
2) Automatically open
3) Close
To open:
Push the switch down lightly and hold it.
The window will open as long as the
switch is held.
This switch also has a one-touch auto
down feature that allows the window to be
opened fully without holding the switch.
Push the switch down until it clicks and
release it, and the window will fully open.
To stop the window halfway, pull the
switch up lightly.
To close:
Pull the switch up lightly and hold it. The
window will close as long as the switch is Keys and doors
2-19
– CONTINUED –
Page 114 of 384
Ignition switch
WARNING
. Never turn the ignition switch to
“ LOCK ”while the vehicle is
being driven or towed because
that will lock the steering wheel,
preventing steering control. And
when the engine is turned off, it
takes a much greater effort than
usual to steer.
. Before leaving the vehicle, al-
ways remove the key from the
ignition switch for safety and
never allow an unattended child
to remain in the vehicle. Failure
to follow this procedure could
result in injury to a child or
others. Children could operate
the power windows, the moon-
roof or other controls or even
make the vehicle move.
CAUTION
Do not attach a large key holder or
key case to either key. If it banged
against your knees or hands while
you are driving, it could turn the
ignition switch from the “ON ”posi- tion to the
“Acc ”or “LOCK ”posi-
tion, thereby stopping the engine.
Also, if the key is attached to a
keyholder or to a large bunch of
other keys, centrifugal force may act
on it as the vehicle moves, resulting
in unwanted turning of the ignitionswitch.
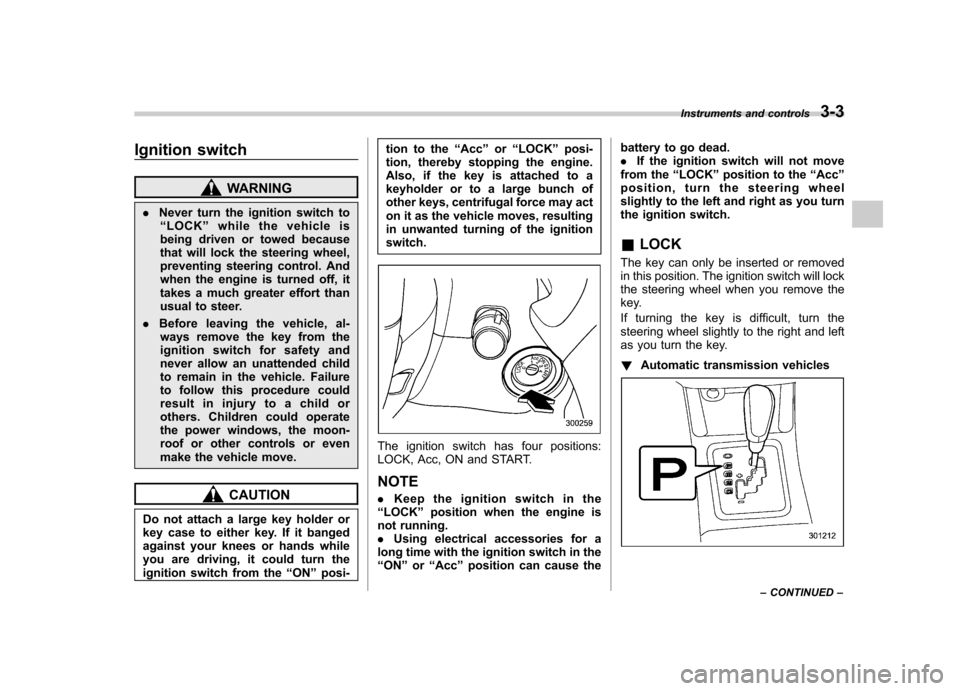
The ignition switch has four positions:
LOCK, Acc, ON and START. NOTE . Keep the ignition switch in the
“ LOCK ”position when the engine is
not running. . Using electrical accessories for a
long time with the ignition switch in the“ ON ”or “Acc ”position can cause the battery to go dead..
If the ignition switch will not move
from the “LOCK ”position to the “Acc ”
position, turn the steering wheel
slightly to the left and right as you turn
the ignition switch. & LOCK
The key can only be inserted or removed
in this position. The ignition switch will lock
the steering wheel when you remove the
key.
If turning the key is difficult, turn the
steering wheel slightly to the right and left
as you turn the key. ! Automatic transmission vehicles
Instruments and controls 3-3
– CONTINUED –
Page 121 of 384
3-10Instruments and controls
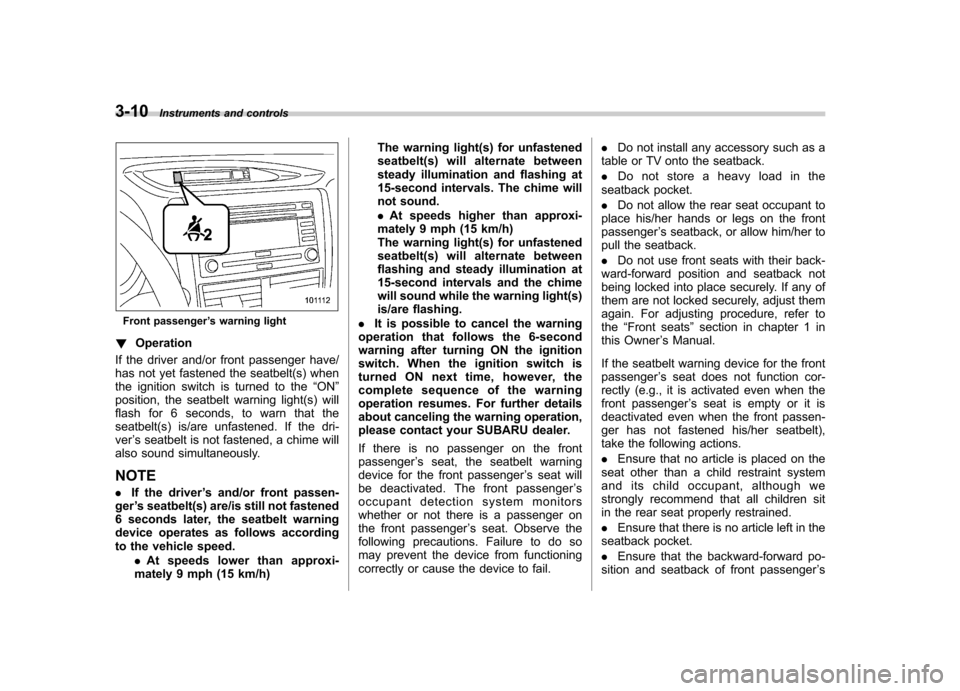
Front passenger ’s warning light
! Operation
If the driver and/or front passenger have/
has not yet fastened the seatbelt(s) when
the ignition switch is turned to the “ON ”
position, the seatbelt warning light(s) will
flash for 6 seconds, to warn that the
seatbelt(s) is/are unfastened. If the dri-ver ’s seatbelt is not fastened, a chime will
also sound simultaneously.
NOTE . If the driver ’s and/or front passen-
ger ’s seatbelt(s) are/is still not fastened
6 seconds later, the seatbelt warning
device operates as follows according
to the vehicle speed.
.At speeds lower than approxi-
mately 9 mph (15 km/h) The warning light(s) for unfastened
seatbelt(s) will alternate between
steady illumination and flashing at
15-second intervals. The chime will
not sound. .
At speeds higher than approxi-
mately 9 mph (15 km/h)
The warning light(s) for unfastened
seatbelt(s) will alternate between
flashing and steady illumination at
15-second intervals and the chime
will sound while the warning light(s)
is/are flashing.
. It is possible to cancel the warning
operation that follows the 6-second
warning after turning ON the ignition
switch. When the ignition switch is
turned ON next time, however, the
complete sequence of the warning
operation resumes. For further details
about canceling the warning operation,
please contact your SUBARU dealer.
If there is no passenger on the front passenger ’s seat, the seatbelt warning
device for the front passenger ’s seat will
be deactivated. The front passenger ’s
occupant detection system monitors
whether or not there is a passenger on
the front passenger ’s seat. Observe the
following precautions. Failure to do so
may prevent the device from functioning
correctly or cause the device to fail. .
Do not install any accessory such as a
table or TV onto the seatback. . Do not store a heavy load in the
seatback pocket.. Do not allow the rear seat occupant to
place his/her hands or legs on the front passenger ’s seatback, or allow him/her to
pull the seatback. . Do not use front seats with their back-
ward-forward position and seatback not
being locked into place securely. If any of
them are not locked securely, adjust them
again. For adjusting procedure, refer tothe “Front seats ”section in chapter 1 in
this Owner ’s Manual.
If the seatbelt warning device for the front passenger ’s seat does not function cor-
rectly (e.g., it is activated even when the
front passenger ’s seat is empty or it is
deactivated even when the front passen-
ger has not fastened his/her seatbelt),
take the following actions. . Ensure that no article is placed on the
seat other than a child restraint system
and its child occupant, although we
strongly recommend that all children sit
in the rear seat properly restrained. . Ensure that there is no article left in the
seatback pocket.. Ensure that the backward-forward po-
sition and seatback of front passenger ’s
Page 167 of 384
5-2Audio
Antenna system &Roof antenna
CAUTION
. Be sure to lower the antenna rod
before entering garages, parking
towers and other locations with
low ceilings.
. Remove the antenna rod before
washing your car at a car wash. If
the antenna rod is left attached, it
may scratch the roof.
. When reinstalling the removed
antenna rod, be sure to fully
tighten it.
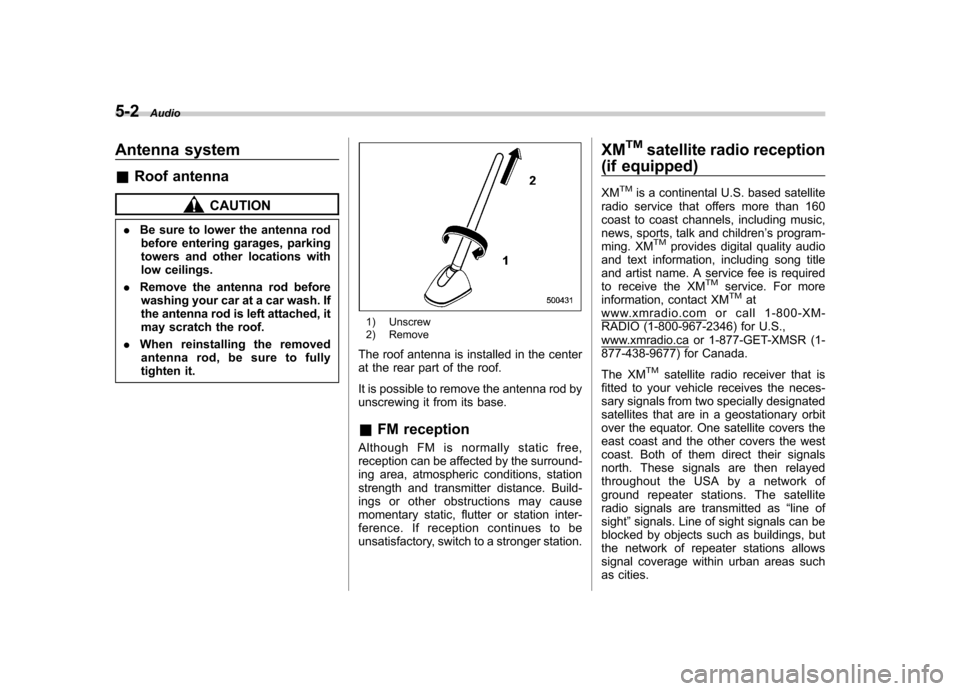
1) Unscrew
2) Remove
The roof antenna is installed in the center
at the rear part of the roof.
It is possible to remove the antenna rod by
unscrewing it from its base. & FM reception
Although FM is normally static free,
reception can be affected by the surround-
ing area, atmospheric conditions, station
strength and transmitter distance. Build-
ings or other obstructions may cause
momentary static, flutter or station inter-
ference. If reception continues to be
unsatisfactory, switch to a stronger station. XM
TMsatellite radio reception
(if equipped)
XM
TMis a continental U.S. based satellite
radio service that offers more than 160
coast to coast channels, including music,
news, sports, talk and children ’s program-
ming. XM
TMprovides digital quality audio
and text information, including song title
and artist name. A service fee is required
to receive the XM
TMservice. For more
information, contact XMTMatwww.xmradio.com or call 1-800-XM-
RADIO (1-800-967-2346) for U.S.,
www.xmradio.ca or 1-877-GET-XMSR (1-
877-438-9677) for Canada.
The XM
TMsatellite radio receiver that is
fitted to your vehicle receives the neces-
sary signals from two specially designated
satellites that are in a geostationary orbit
over the equator. One satellite covers the
east coast and the other covers the west
coast. Both of them direct their signals
north. These signals are then relayed
throughout the USA by a network of
ground repeater stations. The satellite
radio signals are transmitted as “line of
sight ”signals. Line of sight signals can be
blocked by objects such as buildings, but
the network of repeater stations allows
signal coverage within urban areas such
as cities.
Page 374 of 384

C Capacities................................................................. 12-4
Cargo area
Cover ................................................................... 6-12
Light ....................................................................... 6-3
Tie-down hooks ..................................................... 6-13
Catalytic converter ....................................................... 8-3
Center Console .................................................................. 6-5
Ventilators ............................................................... 4-3
Center and side ventilators ............................................ 4-3
Changing Flat tire ................................................................... 9-4
Oil and oil filter ...................................................... 11-9
Charge warning light .................................................. 3-13
CHECK ENGINE warning light/Malfunction indicator lamp ...................................................................... 3-12
Checking Brake pedal free play ............................................ 11-28
Brake pedal reserve distance ................................. 11-28
Clutch function ...................................................... 11-28
Clutch pedal free play ............................................ 11-29
Engine oil level ...................................................... 11-8
Fluid level ............................... 11-20, 11-24, 11-25, 11-26
Gear oil level ........................................................ 11-22
Child restraint systems ............................................... 1-22
Installation with A/ELR seatbelt ................................ 1-25
Lower and tether anchorages .................................. 1-29
Top tether anchorages ............................................ 1-32
Child safety .................................................................... 5
Locks ................................................................... 2-18 Chime
Key........................................................................ 3-5Seatbelt. ......................................................... 1-12, 3-9
Cleaning Aluminum wheels ................................................... 10-3
Interior .................................................................. 10-5
Ventilation grille ...................................................... 4-12
Climate control system
Automatic ............................................................... 4-8
Manual ................................................................... 4-3
Clock ........................................................................ 3-21
Clutch Fluid ................................................................... 11-26
Pedal .................................................................. 11-28
Coat hook. ................................................................. 6-11
Coin tray .................................................................... 6-7
Coolant ................................................................... 11-13
Coolant temperature high warning light. ......................... 3-13
Coolant temperature low indicator light .......................... 3-13
Cooling system ........................................................ 11-12
Corrosion protection ............................................ 8-10, 10-4
Cruise control ............................................................ 7-34
Indicator light ................................................. 3-20, 7-37
Set indicator light ............................................ 3-21, 7-38
Cup holder ................................................................. 6-7
Front passenger ’s.................................................... 6-7
Rear passenger ’s .................................................... 6-8 Index
14-3