2009 SUBARU FORESTER clock
[x] Cancel search: clockPage 66 of 384
warning light will illuminate. Have the
system inspected by your SUBARU deal-
er immediately if the SRS airbag system
warning light illuminates.
If your vehicle has sustained impact, this
may affect the proper function of the
SUBARU advanced frontal airbag system.
Have your vehicle inspected at your
SUBARU dealer. NOTE
The front passenger’s SRS side airbag,
SRS curtain airbag and seatbelt pre-
tensioner are not controlled by the
SUBARU advanced frontal airbag sys-tem. !
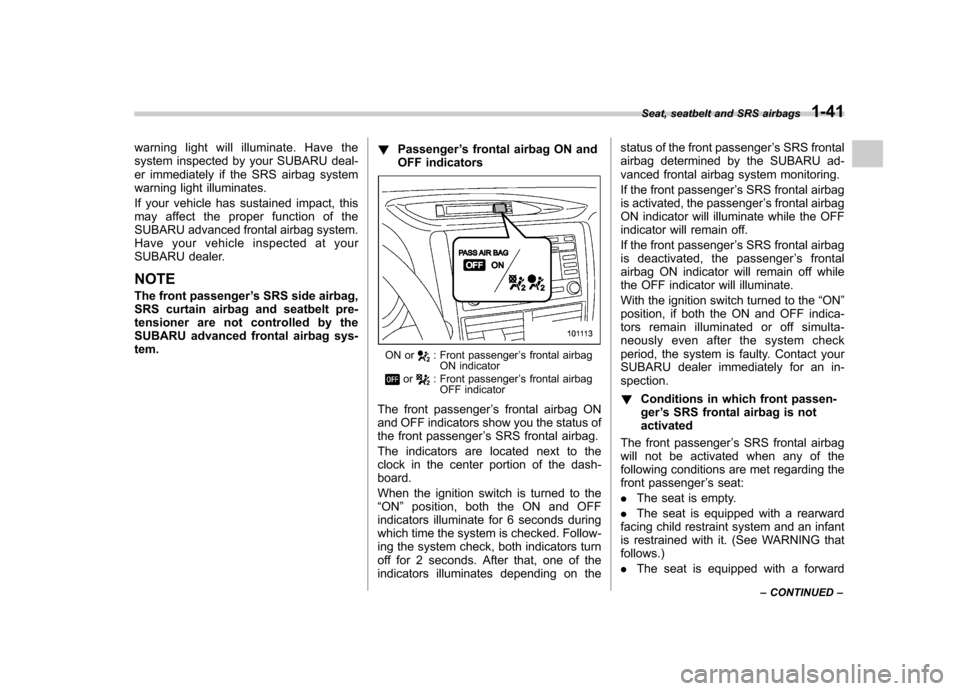
Passenger ’s frontal airbag ON and
OFF indicators
ON or: Front passenger ’s frontal airbag
ON indicator
or: Front passenger ’s frontal airbag
OFF indicator
The front passenger ’s frontal airbag ON
and OFF indicators show you the status of
the front passenger ’s SRS frontal airbag.
The indicators are located next to the
clock in the center portion of the dash-board.
When the ignition switch is turned to the “ ON ”position, both the ON and OFF
indicators illuminate for 6 seconds during
which time the system is checked. Follow-
ing the system check, both indicators turn
off for 2 seconds. After that, one of the
indicators illuminates depending on the status of the front passenger
’s SRS frontal
airbag determined by the SUBARU ad-
vanced frontal airbag system monitoring.
If the front passenger ’s SRS frontal airbag
is activated, the passenger ’s frontal airbag
ON indicator will illuminate while the OFF
indicator will remain off.
If the front passenger ’s SRS frontal airbag
is deactivated, the passenger ’s frontal
airbag ON indicator will remain off while
the OFF indicator will illuminate.
With the ignition switch turned to the “ON ”
position, if both the ON and OFF indica-
tors remain illuminated or off simulta-
neously even after the system check
period, the system is faulty. Contact your
SUBARU dealer immediately for an in- spection. ! Conditions in which front passen- ger’s SRS frontal airbag is not
activated
The front passenger ’s SRS frontal airbag
will not be activated when any of the
following conditions are met regarding the
front passenger ’s seat:
. The seat is empty.
. The seat is equipped with a rearward
facing child restraint system and an infant
is restrained with it. (See WARNING thatfollows.) . The seat is equipped with a forwardSeat, seatbelt and SRS airbags
1-41
– CONTINUED –
Page 112 of 384

Ignition switch..................................................... 3-3
LOCK .................................................................. 3-3
Acc..................................................................... 3-4
ON...................................................................... 3-4
START ................................................................ 3-4
Key reminder chime ............................................ 3-5
Ignition switch light ............................................. 3-5
Hazard warning flasher ....................................... 3-5
Meters and gauges. ............................................. 3-5
Combination meter illumination ........................... 3-5
Canceling the function for meter/gauge needle movement upon turning on the ignition switch ............................................................... 3-6
Speedometer ....................................................... 3-6
Odometer/Trip meter ............................................ 3-6
Tachometer ......................................................... 3-7
Fuel gauge .......................................................... 3-8
Warning and indicator lights .............................. 3-9
Seatbelt warning light and chime ......................... 3-9
SRS airbag system warning light ........................ 3-11
Front passenger ’s frontal airbag ON and OFF
indicators ......................................................... 3-11
CHECK ENGINE warning light/Malfunction indicator lamp .................................................. 3-12
Coolant temperature low indicator light/Coolant temperature high warning light ......................... 3-13
Charge warning light .......................................... 3-13
Oil pressure warning light .................................. 3-13
AT OIL TEMP warning light (AT vehicles).. ........... 3-14
Low tire pressure warning light (U.S.-spec. models) .......................................... 3-14 ABS warning light
.............................................. 3-15
Brake system warning light ................................ 3-16
Low fuel warning light ....................................... 3-17
Hill start assist warning light (MT vehicles) .... ..... 3-17
Door open warning light .................................... 3-17
All-Wheel Drive warning light (AT vehicles) .... ..... 3-17
Vehicle Dynamics Control operation indicator light ................................................................ 3-18
Vehicle Dynamics Control warning light/Vehicle Dynamics Control OFF indicator light ............... 3-18
Security indicator light ....................................... 3-19
SPORT mode indicator light (AT vehicles) ..... ..... 3-20
Selector lever and gear position indicator (AT vehicles) .................................................... 3-20
Turn signal indicator lights ................................. 3-20
High beam indicator light ................................... 3-20
Cruise control indicator light .............................. 3-20
Cruise control set indicator light ........................ 3-21
Front fog light indicator light (if equipped) ..... ..... 3-21
Headlight indicator light ..................................... 3-21
Clock .................................................................. 3-21
Information display ............................................ 3-22
Outside temperature indicator .. .......................... 3-22
Average fuel consumption ................................. 3-23
Light control switch ........................................... 3-24
Headlights ......................................................... 3-24
High/low beam change (dimmer) ........................ 3-25
Headlight flasher ............................................... 3-25
Daytime running light system ... .......................... 3-25
Automatic headlight beam leveler (vehicles with HID headlights) ................................................ 3-26
Instruments and controls
3
Page 122 of 384
seat are locked into place securely by
moving the seat back and forth.
If still the seatbelt warning device for front passenger’s seat does not function cor-
rectly after taking relevant corrective ac-
tions described above, immediately con-
tact your SUBARU dealer for an inspec-tion. & SRS airbag system
warning light
When the ignition switch is turned to the “ON ”position, the SRS airbag system
warning light will illuminate for approxi-
mately 6 seconds and turn off. This shows
that the SRS airbag, SRS side airbag,
SRS curtain airbag and seatbelt preten-
sioners are operating normally.
WARNING
If the warning light exhibits any of
the following conditions, there may
be a malfunction in the seatbelt
pretensioners and/or SRS airbag
system. Immediately take your vehi-
cle to your nearest SUBARU dealer
to have the system checked. Unless
checked and properly repaired, the
seatbelt pretensioners and/or SRS
airbag will not operate properly in the event of a collision, which may
increase the risk of injury. .
Flashing or flickering of the warn-
ing light
. No illumination of the warning
light when the ignition switch is
first turned to the “ON ”position
. Continuous illumination of the
warning light
. Illumination of the warning light
while driving &
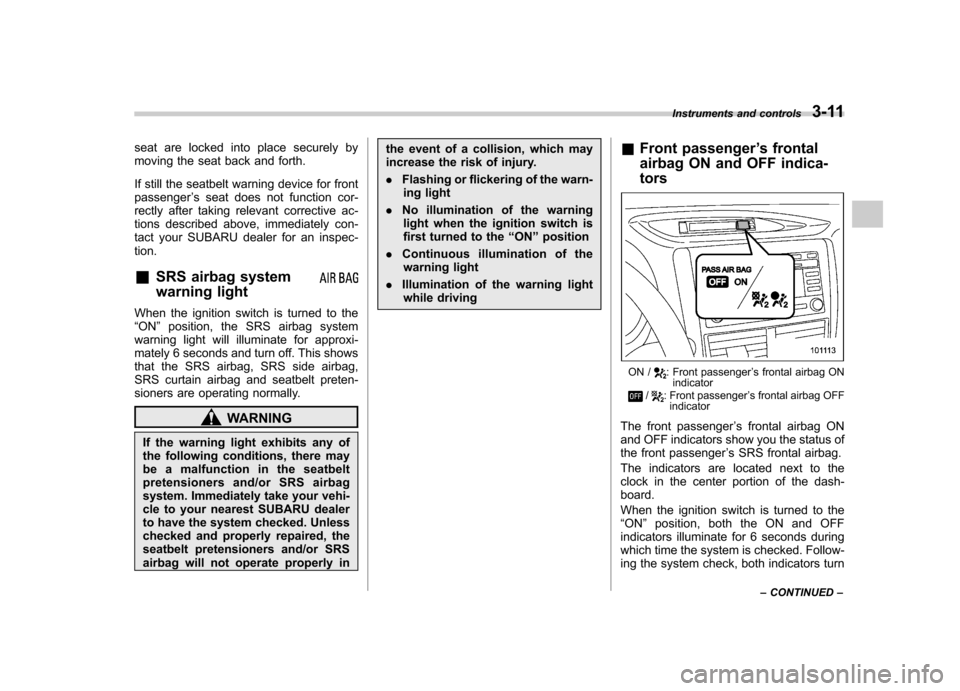
Front passenger ’s frontal
airbag ON and OFF indica- tors
ON /: Front passenger ’s frontal airbag ON
indicator
/: Front passenger ’s frontal airbag OFF
indicator
The front passenger ’s frontal airbag ON
and OFF indicators show you the status of
the front passenger ’s SRS frontal airbag.
The indicators are located next to the
clock in the center portion of the dash-board.
When the ignition switch is turned to the “ ON ”position, both the ON and OFF
indicators illuminate for 6 seconds during
which time the system is checked. Follow-
ing the system check, both indicators turn Instruments and controls
3-11
– CONTINUED –
Page 132 of 384

&Cruise control set in-
dicator light
The cruise control set indicator light
illuminates when the ignition switch is
turned to the “ON ”position and turns off
after approximately 3 seconds.
This light illuminates when vehicle speed
has been set. & Front fog light indicator
light (if equipped)
This indicator light is on while the front fog
lights are on. & Headlight indicator light
This indicator light illuminates when the
headlight switch is placed in the “”or
“” position. Clock
The clock shows the time while the
ignition switch is in the
“Acc ”or “ON ”
position.
The time changes by 1 minute each time the “+ ” button or “� ” button is pressed.
Pressing the “+ ” button moves the dis-
played time forward, while pressing the “� ”
button moves the displayed time back.
Pressing and holding either button
changes the displayed time continuously.
CAUTION
To ensure safety, do not attempt to
set the time while driving, as an
accident from inadequate attention
to the road could result.
NOTE
If the battery is disconnected, the time
will be erased. After reconnecting the
battery, set the correct time. Instruments and controls
3-21
Page 134 of 384
“ON ”position, the indication does not
flash. NOTE
The outside temperature indication
may differ from the actual outside
temperature. The road surface freeze
warning indication should be treated
only as a guide. Be sure to check the
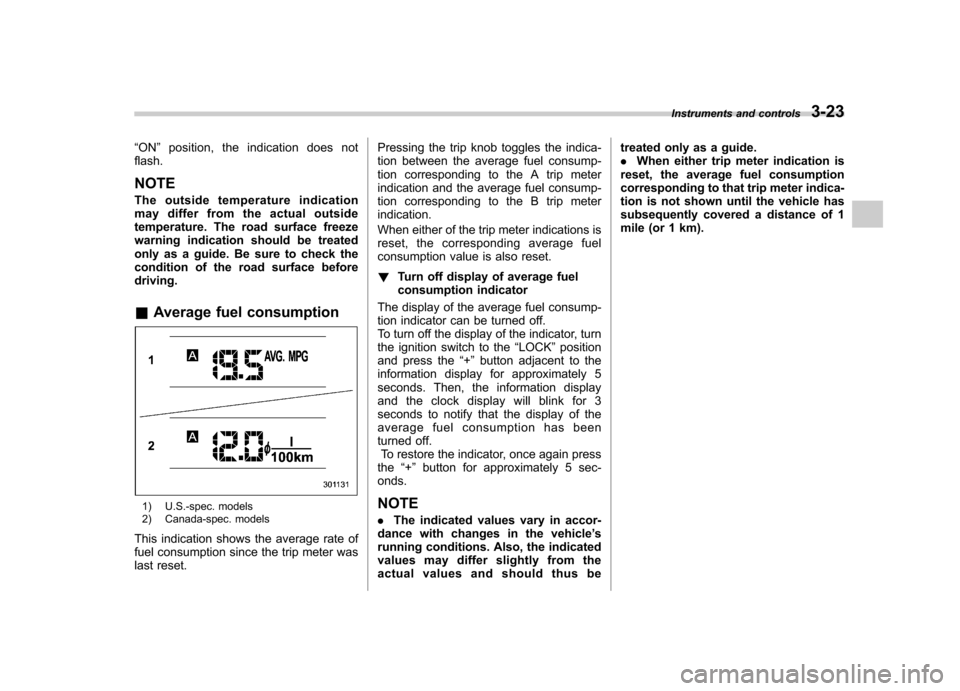
condition of the road surface beforedriving. & Average fuel consumption
1) U.S.-spec. models
2) Canada-spec. models
This indication shows the average rate of
fuel consumption since the trip meter was
last reset. Pressing the trip knob toggles the indica-
tion between the average fuel consump-
tion corresponding to the A trip meter
indication and the average fuel consump-
tion corresponding to the B trip meterindication.
When either of the trip meter indications is
reset, the corresponding average fuel
consumption value is also reset. !
Turn off display of average fuel
consumption indicator
The display of the average fuel consump-
tion indicator can be turned off.
To turn off the display of the indicator, turn
the ignition switch to the “LOCK ”position
and press the “+ ” button adjacent to the
information display for approximately 5
seconds. Then, the information display
and the clock display will blink for 3
seconds to notify that the display of the
average fuel consumption has been
turned off. To restore the indicator, once again press
the “+ ” button for approximately 5 sec-
onds.
NOTE . The indicated values vary in accor-
dance with changes in the vehicle ’s
running conditions. Also, the indicated
values may differ slightly from the
actual values and should thus be treated only as a guide..
When either trip meter indication is
reset, the average fuel consumption
corresponding to that trip meter indica-
tion is not shown until the vehicle has
subsequently covered a distance of 1
mile (or 1 km). Instruments and controls
3-23
Page 137 of 384
3-26Instruments and controls
&Automatic headlight beam
leveler (vehicles with HID headlights)
The HID headlights generate more light
than conventional halogen headlights.
Therefore a driver of an oncoming vehicle
may experience too much glare when your
headlight beam height adjustment is high
due to the vehicle carrying heavy load.
The automatic headlight beam leveler
adjusts the headlight beam height auto-
matically and optimally according to the
load being carried by the vehicle. Turn signal lever
To activate the right turn signal, push the
turn signal lever up. To activate the left
turn signal, push the turn signal lever
down. When the turn is finished, the lever
will return automatically. If the lever does
not return after cornering, return the lever
to the neutral position by hand.
To signal a lane change, push the turn
signal lever up or down slightly and hold it
during the lane change. The turn signal
indicator lights will flash in the direction of
the turn or lane change. The lever will
return automatically to the neutral position
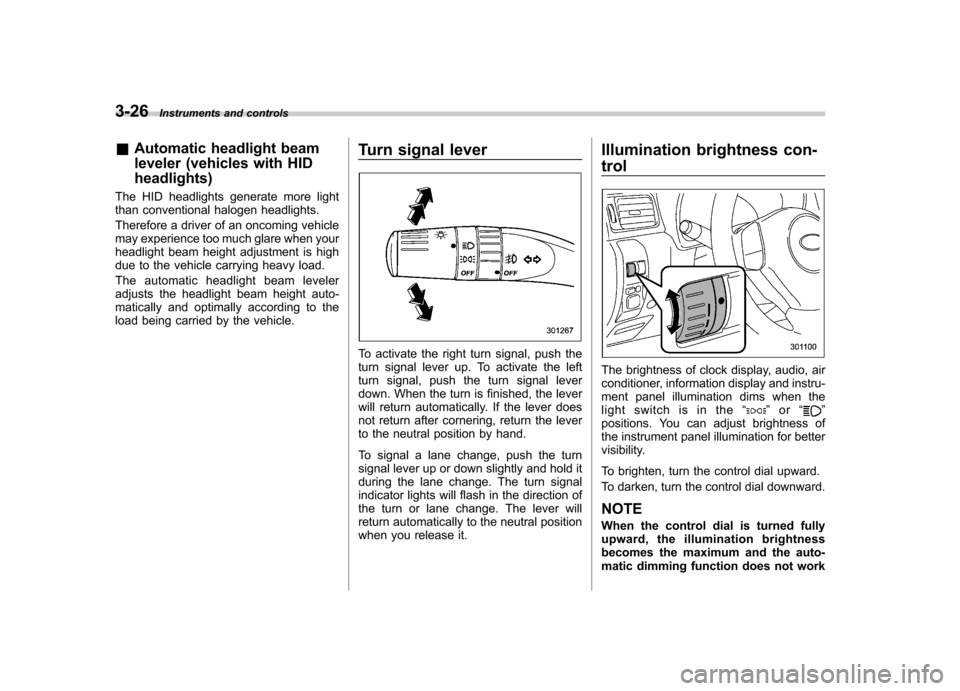
when you release it.Illumination brightness con- trol
The brightness of clock display, audio, air
conditioner, information display and instru-
ment panel illumination dims when the
light switch is in the
“
”or “”
positions. You can adjust brightness of
the instrument panel illumination for better
visibility.
To brighten, turn the control dial upward.
To darken, turn the control dial downward.
NOTE
When the control dial is turned fully
upward, the illumination brightness
becomes the maximum and the auto-
matic dimming function does not work
Page 142 of 384
speed is high).
When the transmission is shifted into
reverse, the rear wiper will switch to
continuous operation. When the transmis-
sion is shifted to a position other than
reverse, the rear wiper will return to
intermittent operation. !Washer
To wash the rear window while the rear
wiper is operating, turn the knob clockwise
to the “
”position. The washer fluid
sprays until you release the knob.
To wash the rear window when the rear
wiper is not in use, turn the knob counter-
clockwise to the “
”position. The washer
fluid sprays, and 2 seconds later the rear
wiper operates. Releasing the knob stops
the washer fluid spray, and 3 seconds
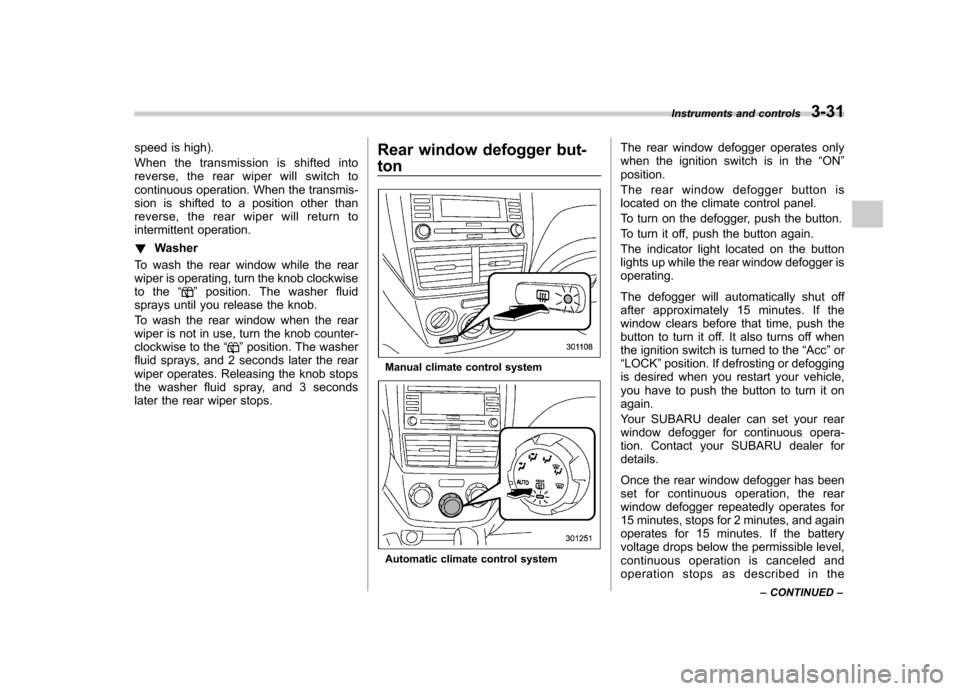
later the rear wiper stops. Rear window defogger but- ton
Manual climate control system
Automatic climate control systemThe rear window defogger operates only
when the ignition switch is in the
“ON ”
position.
The rear window defogger button is
located on the climate control panel.
To turn on the defogger, push the button.
To turn it off, push the button again.
The indicator light located on the button
lights up while the rear window defogger isoperating.
The defogger will automatically shut off
after approximately 15 minutes. If the
window clears before that time, push the
button to turn it off. It also turns off when
the ignition switch is turned to the “Acc ”or
“ LOCK ”position. If defrosting or defogging
is desired when you restart your vehicle,
you have to push the button to turn it onagain.
Your SUBARU dealer can set your rear
window defogger for continuous opera-
tion. Contact your SUBARU dealer fordetails.
Once the rear window defogger has been
set for continuous operation, the rear
window defogger repeatedly operates for
15 minutes, stops for 2 minutes, and again
operates for 15 minutes. If the battery
voltage drops below the permissible level,
continuous operation is canceled and
operation stops as described in the Instruments and controls
3-31
– CONTINUED –
Page 158 of 384

&Fan speed control dial
The fan operates only with the ignition
switch in the ON position. The fan speed
control dial is used to select the AUTO
(automatic control) mode or to select the
desired fan speed. The dial ’s positions
and their functions are as follows: OFF: The fan does not operate.
AUTO: The fan speed is adjusted auto-
maticallyinaccordancewiththeair
temperature inside and outside the pas-
senger compartment, the intensity of sun-
light, and other factors. SUBARU recom-
mends using the AUTO position.
Other positions: The fan speed can be
adjusted in 7 steps. NOTE
With the fan speed control dial in the
AUTO position and the air flow control
dial in the
“
”, “”,or “”position,
the fan does not operate during engine
warm-up until the engine coolant tem-
perature exceeds approximately 122 8F
(50 8C).
& Temperature control dial
This dial is used to set the desired interior
temperature. With the dial set to your
desired temperature, the system automa-
tically adjusts the temperature of air
supplied from the outlets such that the
desired temperature is achieved andmaintained.
If the dial is turned fully counterclockwise, the system gives maximum cooling per-
formance. If the dial is turned fully clock-
wise, the system gives maximum heatingperformance. &
Air flow control dial
This dial has the following six positions.
The outlets from which air is supplied in
each position are as follows: AUTO: The air flow control is adjusted
automatically in accordance with the air
temperature inside and outside the pas-
senger compartment, the intensity of sun-
light, and other factors. SUBARU recom-
mends using the AUTO position.
: Instrument panel outlets
: Instrument panel outlets and foot
outlets Climate control
4-9
– CONTINUED –