2009 SKODA ROOMSTER light
[x] Cancel search: lightPage 112 of 263

Automatic gearbox111
Using the system
Safety
Driving Tips
General Maintenance
Breakdown assistance
Praktik
Technical Data
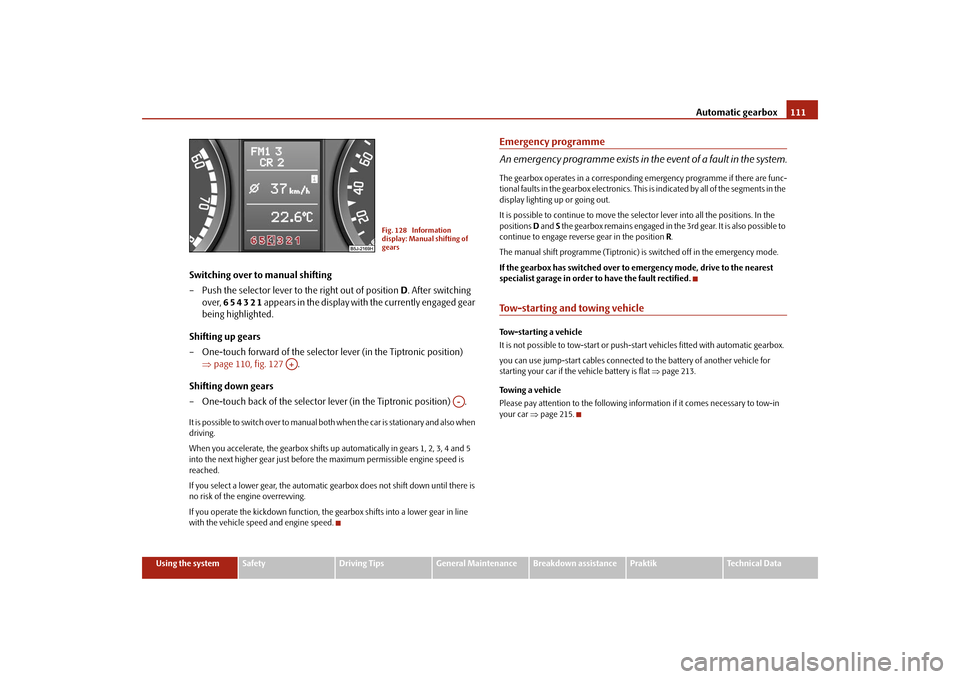
Switching over to manual shifting
– Push the selector lever to the right out of position D. After switching
over, 6 5 4 3 2 1 appears in the display with the currently engaged gear
being highlighted.
Shifting up gears
– One-touch forward of the selector lever (in the Tiptronic position)
⇒page 110, fig. 127 .
Shifting down gears
– One-touch back of the selector lever (in the Tiptronic position) .It is possible to switch over to manual both when the car is stationary and also when
driving.
When you accelerate, the gearbox shifts up automatically in gears 1, 2, 3, 4 and 5
into the next higher gear just before the maximum permissible engine speed is
reached.
If you select a lower gear, the automatic gearbox does not shift down until there is
no risk of the engine overrevving.
If you operate the kickdown function, the gearbox shifts into a lower gear in line
with the vehicle speed and engine speed.
Emergency programme
An emergency programme exists in the event of a fault in the system.The gearbox operates in a corresponding emergency programme if there are func-
tional faults in the gearbox electronics. This is indicated by all of the segments in the
display lighting up or going out.
It is possible to continue to move the selector lever into all the positions. In the
positions D and S the gearbox remains engaged in the 3rd gear. It is also possible to
continue to engage reverse gear in the position R.
The manual shift programme (Tiptronic) is switched off in the emergency mode.
If the gearbox has switched over to emergency mode, drive to the nearest
specialist garage in order to have the fault rectified.Tow-starting and towing vehicle Tow-starting a vehicle
It is not possible to tow-start or push-start vehicles fitted with automatic gearbox.
you can use jump-start cables connected to the battery of another vehicle for
starting your car if the vehicle battery is flat ⇒page 213.
Towing a vehicle
Please pay attention to the following information if it comes necessary to tow-in
your car ⇒page 215.
Fig. 128 Information
display: Manual shifting of
gears
A+
A-
s29g.4.book Page 111 Wednesday, June 17, 2009 9:54 AM
Page 116 of 263

Communication115
Using the system
Safety
Driving Tips
General Maintenance
Breakdown assistance
Praktik
Technical Data
•
During the dialogue avoid additional noise in the vehicle, e.g. simultaneously
talking occupants.
•
Do not speak, if the system makes an announcement.
•
The microphone for voice control is directed to the driver and front passenger.
Therefore the driver and the front passenger can operate the equipment.
WARNING
Pay attention primarily to the traffic situation! As the driver you are fully
responsible for road safety. Use the telephone system only to such an extent,
so that you are in full control of your vehicle at any time.
Caution
Taking the mobile phone out of the adapter during the call can lead to interruption
of the connection. When taking out the mobile phone, the connection to the
factory-fitted antenna is interrupted, this reduces the quality of the transmitting
and receiving signal. The charging of the mobile phone battery is also interrupted.
Note
•
Please also refer to the additional instructions ⇒page 122, “Mobile phones
and two-way radio system”.
•
Should you have any questions, please contact a specialist garage.
•
The voice control of the telephone is only possible for adapters with PTT button.
Suitable adapters are available at a specialist garage.
Inserting the mobile phone with the adapter*Only one telephone mount* is factory-fitted. An adapter for the phone
can be purchased from the Škoda original accessories.
Inserting the mobile phone with the adapter
– First of all push the adapter in the direction of arrow ⇒fig. 133 up
to the stop into the mount. Press the adapter slightly downwards, until
it locks securely into position.
– Insert the mobile phone into the adapter (as specified in manufac-
turer's instructions).
Removing the mobile phone with the adapter
– Press simultaneouly the side locks of the mount and remove the
mobile phone and adapter ⇒fig. 133.This enables you to make full use of the advantages of a normal carphone (“hands-
free system” using a microphone integrated in the vehicle, optimal transmission of
signals using an external aerial etc.). The battery of the mobile phone is also
constantly charged.
Fig. 133 Universal prepara-
tion for the phone
AA
AA
s29g.4.book Page 115 Wednesday, June 17, 2009 9:54 AM
Page 118 of 263

Communication117
Using the system
Safety
Driving Tips
General Maintenance
Breakdown assistance
Praktik
Technical Data
Note
It a yellow warning symbol lights up in the information display, the menu phone-
book cannot be selected.Voice commandsVoice commands for mobile phone operation
Voice commands for operating the phone phone bookOther possible commands
Enter PIN codeA PIN code must be entered before operating the system.
– Press the PTT button.
– Give the command ENTER PIN/PIN CODE after the signal tone.After this command the PIN code can be entered.
The entry of the PIN code is only possible if:•
the ignition is switched on;
•
the mobile phone is switched on.
Voice command
Activity
ENTER PIN/PIN CODE
After this command the PIN code of the mobile
phone can be entered ⇒page 117.
DIAL NUMBER
After this command a telephone number can be
entered which establishes a connection to the
requested partner ⇒page 118.
REDIAL
After this command the last selected telephone
number is selected again ⇒page 118.
Voice command
Activity
SAVE/STORE
NAMES/NAME/NUMBE
R
After this command a name with its telephone
number can be stored in the phone phone book
⇒page 119.
SELECT NAMES/NAME
After this command a telephone number which was
stored under its given name in the phone phone
book can be selected ⇒page 119.
DELETE NAMES/NAME
After this command a name in the phone phone
book can be erased ⇒page 120.
LISTEN TO/PLAY
PHONEBOOK
After this command you can listen-in to the phone
phone book ⇒page 120.
DELETE PHONEBOOK
After this command the complete phone book or a
name can be erased ⇒page 120.
Voice command
Activity
DIAL
The telephone number is selected.
STORE
The name and the telephone number are stored in
the phone phonebook or the entered PIN code is
stored.
REPEAT
The entered name or the digits are repeated. Then the
system requests with voice response “please pro-
ceed” the entry of further digits or commands.
BACK
The entered name or the last entered order of digits is
erased. Previously entered groups of digits are
repeated. Then the system requests with voice
response “please proceed” the entry of further digits
or commands.
DELETE
All entered digits are erased. Then the system
requests with voice response “The number is
deleted. The number please” the entry of further
digits or commands.
CANCEL
The dialogue is ended.
s29g.4.book Page 117 Wednesday, June 17, 2009 9:54 AM
Page 124 of 263

Communication123
Using the system
Safety
Driving Tips
General Maintenance
Breakdown assistance
Praktik
Technical Data
WARNING
•
If a mobile phone or a two-way radio system is operated in the vehicle
without using a special external aerial or an external aerial which has been
incorrectly installed, this can increase the strength of the electromagnetic
field in the interior of the vehicle.
•
Please concentrate fully at all times on your driving!
•
You must not install two-way radio systems, mobile phones or mounts
on the covers of the airbags or within the immediate deployment range of
airbags. This might result in injuries to the occupants in the event of an acci-
dent.Note
Please also refer to the operating instructions of the mobile phones and two-way
radio systems.Input AUX-IN*The input for external audio sources AUX-IN is located on the right next to the hand-
brake and is marked with
.
The input AUX-IN transmits audio signals from connected external audio sources
(e. g. iPod or mp3 player) and record music from these devices via your radio*
installed in the factory. The input AUX-IN* is only available in combination with a
radio installed in the factory. The description on how to operate AUX-IN* can be
found in the relevant operating instructions of the radio*.
Note
If an external audio source is connected via AUX-IN*, which has a separate power
supply, this can lead to an interference of the audio signals.
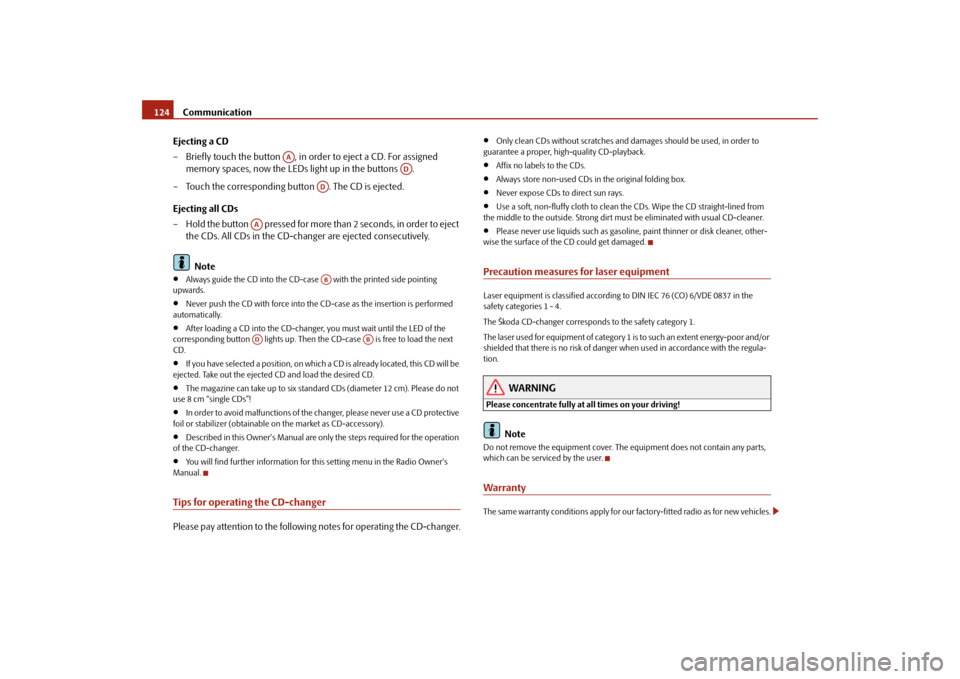
CD changer*Operating the CD changer*Loading a CD
– Touch the button and guide the CD (compact disc) into the CD-
case . The CD is automatically loaded onto the next free position in
the CD-changer. The LED in the corresponding button stops
flashing.
Load CDs
– Hold the button pressed and guide the CDs one after the other into
the CD-case . The LEDs in the buttons are no longer flashing.
Loading a CD to one definite position
– Briefly touch the button . The LEDs in the buttons light up at the
memory spaces, which are already assigned and flash in the case of
free memory spaces.
– Touch the desired button and guide the CD into the CD-case .
Fig. 135 The CD changer
AC
AB
AD
AC
AB
AD
AC
AD
AD
AB
s29g.4.book Page 123 Wednesday, June 17, 2009 9:54 AM
Page 125 of 263

Communication 124
Ejecting a CD
– Briefly touch the button , in order to eject a CD. For assigned
memory spaces, now the LEDs light up in the buttons .
– Touch the corresponding button . The CD is ejected.
Ejecting all CDs
– Hold the button pressed for more than 2 seconds, in order to eject
the CDs. All CDs in the CD-changer are ejected consecutively.
Note•
Always guide the CD into the CD-case with the printed side pointing
upwards.
•
Never push the CD with force into the CD-case as the insertion is performed
automatically.
•
After loading a CD into the CD-changer, you must wait until the LED of the
corresponding button lights up. Then the CD-case is free to load the next
CD.
•
If you have selected a position, on which a CD is already located, this CD will be
ejected. Take out the ejected CD and load the desired CD.
•
The magazine can take up to six standard CDs (diameter 12 cm). Please do not
use 8 cm “single CDs”!
•
In order to avoid malfunctions of the changer, please never use a CD protective
foil or stabilizer (obtainable on the market as CD-accessory).
•
Described in this Owner's Manual are only the steps required for the operation
of the CD-changer.
•
You will find further information for this setting menu in the Radio Owner's
Manual.
Tips for operating the CD-changerPlease pay attention to the following notes for operating the CD-changer.
•
Only clean CDs without scratches and damages should be used, in order to
guarantee a proper, high-quality CD-playback.
•
Affix no labels to the CDs.
•
Always store non-used CDs in the original folding box.
•
Never expose CDs to direct sun rays.
•
Use a soft, non-fluffy cloth to clean the CDs. Wipe the CD straight-lined from
the middle to the outside. Strong dirt must be eliminated with usual CD-cleaner.
•
Please never use liquids such as gasoline, paint thinner or disk cleaner, other-
wise the surface of the CD could get damaged.
Precaution measures for laser equipmentLaser equipment is classified according to DIN IEC 76 (CO) 6/VDE 0837 in the
safety categories 1 - 4.
The Škoda CD-changer corresponds to the safety category 1.
The laser used for equipment of category 1 is to such an extent energy-poor and/or
shielded that there is no risk of danger when used in accordance with the regula-
tion.
WARNING
Please concentrate fully at all times on your driving!
Note
Do not remove the equipment cover. The equipment does not contain any parts,
which can be serviced by the user.WarrantyThe same warranty conditions apply for our factory-fitted radio as for new vehicles.
AA
AD
AD
AA
AB
AD
AB
s29g.4.book Page 124 Wednesday, June 17, 2009 9:54 AM
Page 129 of 263

Passive Safety 128Before setting off
The driver is always fully responsible for his occupants and for the
operating safety of the vehicle.For your own safety and the safety of the people travelling with you, please pay
attention to the following points before setting off.•
Ensure that the lighting and the turn signal system are functioning properly.
•
Inspect the tyre inflation pressure.
•
Ensure that all the windows offer a good visibility to the outside.
•
Safely attach the items of luggage ⇒page 70, “Loading the luggage compart-
ment”.
•
Ensure that no objects can obstruct the pedal.
•
Adjust the mirror, the front seat and the head restraint to match your body size.
•
Point out to your occupants that the head restraints must be adjusted to match
their body size.
•
Protect the children in suitable child seats with correctly fastened seat belts
⇒page 147, “Transporting children safely”.
•
Adopt the correct seated position. Also inform your occupants to adopt the
correct seated position.
•
Fasten the seat belt correctly. Also inform your occupants to properly fasten the
seat belts ⇒page 134, “How are seat belts correctly fastened?”.
What influences the driving safety?
The driving safety is primarily determined by the style of driving and
the personal behaviour of all the occupants.The driver is fully responsible for himself and his occupants. If your driving safety is
effected, you place yourself and the oncoming traffic at risk. Please refer to the
following guidelines.•
Do not get distracted from concentrating on the traffic situation, e.g. by your
occupants or mobile phone calls.
•
Never drive when your driving ability is impaired, e.g. through medication,
alcohol, drugs.
•
Keep to the traffic regulations and the permissible speed limit.
•
Adjust the driving speed at all times to the road condition as well as to the traffic
and weather conditions.
•
Take regular breaks on long journeys - at the latest every two hours.
Correct seated positionCorrect seated position for the driver
Correct seated position for the driver is important for safe and
relaxed driving.
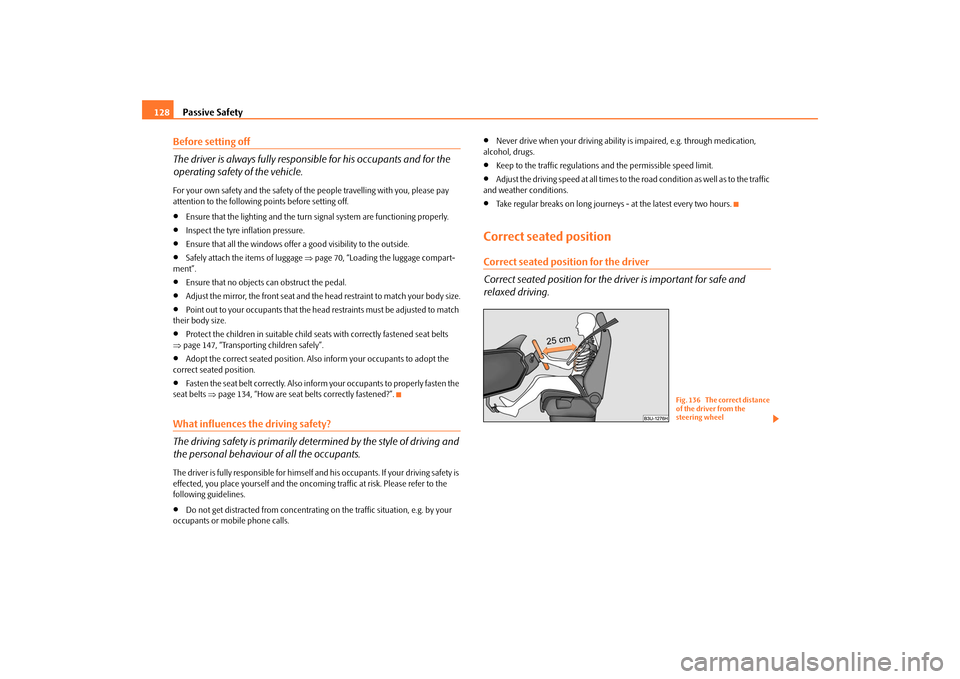
Fig. 136 The correct distance
of the driver from the
steering wheel
s29g.4.book Page 128 Wednesday, June 17, 2009 9:54 AM
Page 130 of 263

Passive Safety129
Using the system
Safety
Driving Tips
General Maintenance
Breakdown assistance
Praktik
Technical Data For your own safety and to reduce the risk of injury in the event of an accident, we
recommend the following setting.
•
Adjust the steering wheel so that the distance between the steering wheel and
your chest is at least 25 cm ⇒page 128, fig. 136.
•
Position the driver seat in the forward/back direction so that you are able to fully
press the pedals with your legs at a slight angle.
•
Adjust the seat backrest so that you are able to reach the highest point of the
steering wheel with your arms at a slight angle.
•
Adjust the head restraint so that the top edge of the head restraint is at the same
level as the upper part of your head ⇒fig. 137.
•
Fasten the seat belt correctly ⇒page 134, “How are seat belts correctly
fastened?”.
Driver seat adjustment ⇒page 63, “Adjusting the front seats”.
WARNING
•
The front seats and the head restraints must always be adjusted to match
the body size of the seat occupant as well as the seat belts must always be
correctly fastened in order to provide an optimal protection for you and your
occupants.
•
The driver must maintain a distance of at least 25 cm to the steering
wheel ⇒page 128, fig. 136. Not maintaining this minimum distance will mean that the airbag system will not be able to properly protect you -
hazard!
•
When driving, hold the steering wheel with both hands firmly on the
outer edge in the 9 o'clock and 3 o'clock position. Never hold the steering
wheel firmly in the 12 o'clock position or in another way (e.g. in the middle
of the steering wheel or at the inner steering wheel edge). In such cases,
injuries to the arms, the hands and the head can occur when the driver
airbag is deployed.
•
The seat backrests must not be angled too far back when driving other-
wise this will affect proper operation of the seat belts and of the airbag
system - risk of injury!
•
Ensure that there are no objects in the footwell as any objects may get
behind the pedals during a driving or braking manoeuvre. You would then
no longer be able to operate the clutch, to brake or accelerate.
Correct seated position for the front passenger
The front passenger must maintain a distance of at least 25 cm from
the dash panel so that the airbag offers the greatest possible safety
when an airbag is deployed.For the safety of the front passenger and to reduce the risk of injury in the event of
an accident, we recommend the following setting.•
Adjust the front passenger seat as far as possible to the rear.
•
Adjust the head restraint so that the top edge of the head restraint is at the same
level as the upper part of your head ⇒fig. 137.
•
Fasten the seat belt correctly ⇒page 134, “How are seat belts correctly
fastened?”.
In exceptional cases the front passenger airbag can be deactivated ⇒page 145,
“Deactivating airbags”.
Adjusting the passenger seat ⇒page 63, “Adjusting the front seats”.
Fig. 137 The correct head
restraint adjustment for the
driver
WARNING (continued)
s29g.4.book Page 129 Wednesday, June 17, 2009 9:54 AM
Page 139 of 263

Airbag system 138Airbag systemDescription of the airbag systemGeneral information on the airbag systemThe front airbag system is complementary to the three-point seat belts and offers
additional protection for the head and chest area of the driver and passenger in the
event of a frontal collision.
In the event of a side collision, the side airbags reduce the risk of injury to the occu-
pants to the part of their body facing the side of the accident.
The airbag system is only functional after the ignition has been switched on.
The operational readiness of the airbag system is monitored electronically. The
airbag warning light comes on for a few seconds each time the ignition is switched
on.
The airbag system (according to vehicle equipment) consists of:•
an electronic control unit;
•
the front airbags for the driver and front passenger ⇒page 139;
•
the side airbags ⇒page 142;
•
head airbags ⇒page 143;
•
an airbag warning light in the instrument cluster ⇒page 36;
•
a front passenger airbag switch* ⇒page 146;
•
an indicator light for a switched off front seat passenger airbag* in the middle
of the dash panel ⇒page 146.
A fault in the airbag system exists if:
•
the airbag indicator light does not light up when the ignition is switched on;
•
the airbag indicator light does not go out after about 3 seconds after the ignition
is switched on;
•
the airbag indicator light goes out and comes on again after the ignition is
switched on;
•
the airbag indicator light comes on or flickers when driving;
•
an airbag indicator light showing a switched-off front passenger airbag* in the
middle of the dash panel flashes.
WARNING
•
To enable the occupants of a vehicle to be protected with the greatest
possible effect when the airbag is deployed, the front seats must be
⇒page 128, “Correct seated position” correctly adjusted to match the body
size of the occupant.
•
If you do not fasten the seat belts when driving, lean too far forward or
adopt an incorrect seated position, you are exposing yourself to increased
risk of injury in the event of an accident.
•
Have the airbag system checked immediately by a specialist garage if a
fault exists. Otherwise, there is a risk of the airbag not being activated in the
event of an accident.
•
No modifications of any kind may be made to parts of the airbag system.
•
It is prohibited to manipulate individual parts of the airbag system as this
might result in the airbag being deployed.
•
The protective function of the airbag system is sufficient for only one
accident. The airbag system must then be replaced if the airbag has been
deployed.
•
The airbag system needs no maintenance during its working life.
•
If you sell your car, please hand over the complete vehicle documenta-
tion to the new owener. Please note that the documents relating to the
possibility of deactivating the front passenger airbag are also part of the
vehicle documents!
•
If the vehicle or individual parts of the airbag system are scrapped, it is
essential to observe the relevant safety precautions. Specialist garages are
familiar with these regulations.
•
When disposing of vehicle or parts of the airbag system, it is important
to comply with the national legal requirements.
s29g.4.book Page 138 Wednesday, June 17, 2009 9:54 AM