Page 78 of 263

Seats and Storage77
Using the system
Safety
Driving Tips
General Maintenance
Breakdown assistance
Praktik
Technical Data
Bicycle carrier*Install cross member– Remove the rear seats or fold the seats fully forwards, in order to make
available the necessary space in the luggage compartment
⇒page 68.
– Release the fixtures at the ends of the cross member by slightly
pulling up the securing screws .
– Position the cross member with the fixed (not pulled out) part onto
the (in direction of travel) right lashing eye and then the pull-out part
onto the left lashing eye.
– Secure the fixture to both sides and lock the fixing screws in
place.
– Tighten the fixing screws up to the stop.
– Check the attachment of the cross member by pulling it.
WARNING
When transporting the bicycles in the luggage compartment, ensure the
safety of the passengers transported on the rear seats ⇒page 130, “Correct
seated position for the occupants on the rear seats”.Install bicycle carrier– Position the approved bicycle carrier on the cross member, after
pulling up the screw push the frame side rail (alu-part) towards the
cross member and screw the screw into the nut ⇒fig. 90.
– Slacken the screw on the moveable part of the bicycle carrier and
pull out, then position the moveable part of the carrier, depending on
bicycle size, into one of the three possible positions.
– Insert the screw into the desired position and tighten.
Fig. 89 Install cross member
AB
AC
AA
AB
AC
AC
Fig. 90 Install bicycle carrier
AA
AA
ABAB
s29g.4.book Page 77 Wednesday, June 17, 2009 9:54 AM
Page 79 of 263
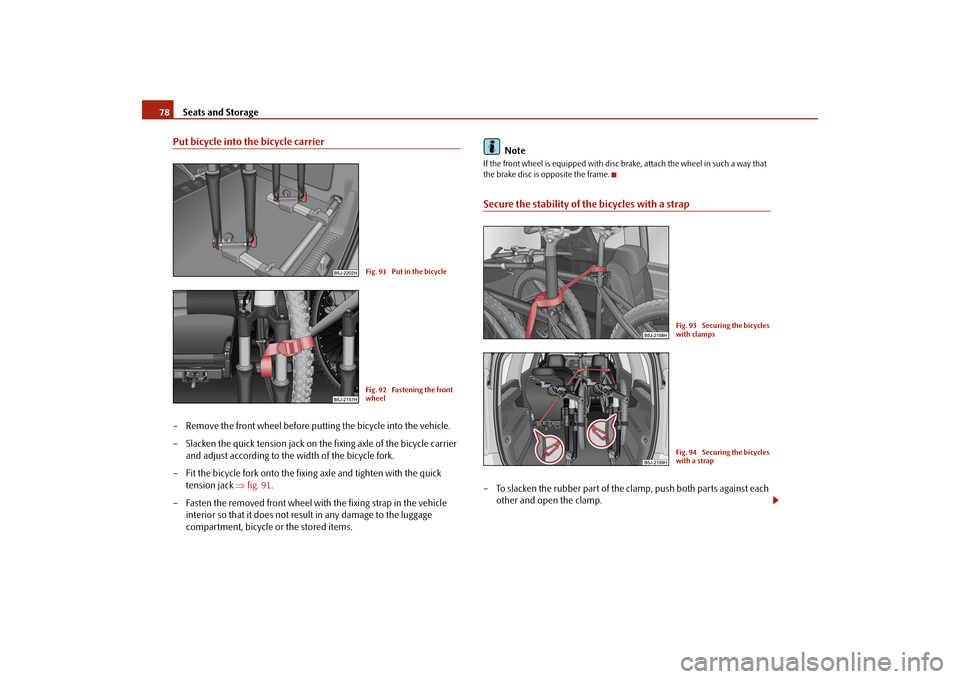
Seats and Storage 78Put bicycle into the bicycle carrier– Remove the front wheel before putting the bicycle into the vehicle.
– Slacken the quick tension jack on the fixing axle of the bicycle carrier
and adjust according to the width of the bicycle fork.
– Fit the bicycle fork onto the fixing axle and tighten with the quick
tension jack ⇒fig. 91.
– Fasten the removed front wheel with the fixing strap in the vehicle
interior so that it does not result in any damage to the luggage
compartment, bicycle or the stored items.Note
If the front wheel is equipped with disc brake, attach the wheel in such a way that
the brake disc is opposite the frame.Secure the stability of the bicycles with a strap– To slacken the rubber part of the clamp, push both parts against each
other and open the clamp.
Fig. 91 Put in the bicycleFig. 92 Fastening the front
wheel
Fig. 93 Securing the bicycles
with clampsFig. 94 Securing the bicycles
with a strap
s29g.4.book Page 78 Wednesday, June 17, 2009 9:54 AM
Page 82 of 263

Seats and Storage81
Using the system
Safety
Driving Tips
General Maintenance
Breakdown assistance
Praktik
Technical Data
Rear cup holder*You can place one cup or beverage can into the recess ⇒fig. 97.
WARNING
•
Do not place any hot beverages into the cup holder. If the vehicle moves,
the hot beverages may spill - risk of scalding!
•
Do not use any cups or beakers which are made of brittle material (e.g.
glass, porcelain). You might be injured by them in the event of an accident.Caution
Do not open the beverages in the cup holder while driving. There is a risk of spilling
e.g. when braking and therefore the electrical components or the seat upholstery
can be damaged.
Note holderThe note holder is designed e.g. for attaching a car park ticket in parking areas.
The attached note has to always be removed before starting off in order not to
restrict the driver's vision.Ashtray*
Fig. 97 Centre console: Cup
holder
Fig. 98 Windscreen: Note
holderFig. 99 Centre console: Front
ashtray
s29g.4.book Page 81 Wednesday, June 17, 2009 9:54 AM
Page 83 of 263
Seats and Storage 82
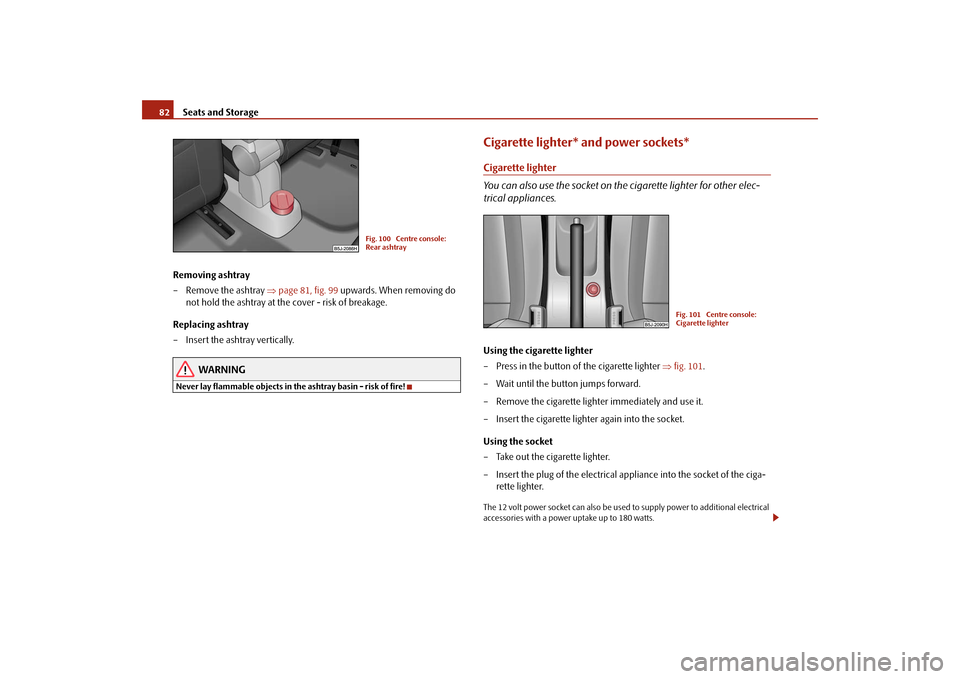
Removing ashtray
– Remove the ashtray ⇒page 81, fig. 99 upwards. When removing do
not hold the ashtray at the cover - risk of breakage.
Replacing ashtray
– Insert the ashtray vertically.
WARNING
Never lay flammable objects in the ashtray basin - risk of fire!
Cigarette lighter* and power sockets*Cigarette lighter
You can also use the socket on the cigarette lighter for other elec-
trical appliances.Using the cigarette lighter
– Press in the button of the cigarette lighter ⇒fig. 101.
– Wait until the button jumps forward.
– Remove the cigarette lighter immediately and use it.
– Insert the cigarette lighter again into the socket.
Using the socket
– Take out the cigarette lighter.
– Insert the plug of the electrical appliance into the socket of the ciga-
rette lighter.The 12 volt power socket can also be used to supply power to additional electrical
accessories with a power uptake up to 180 watts.
Fig. 100 Centre console:
Rear ashtray
Fig. 101 Centre console:
Cigarette lighter
s29g.4.book Page 82 Wednesday, June 17, 2009 9:54 AM