2009 Seat Ibiza ST tow
[x] Cancel search: towPage 80 of 250

Unlocking and locking79
Safety First
Operating instructions
Practical tips
Technical Data
Interior monitoring and anti-towing alarm*
Monitoring or control function incorporated in the anti-theft
alarm* which detects unauthorized vehicle entry by means of
ultrasound.Activation
– It is connected automatically when the anti-theft alarm is acti-
vated.
Deactivation
– Open the vehicle with the key, either mechanically
8) or by
pressing the button on the remote control.
– Press the button on the remote control twice. The volumetric sensor and tilt sensors will be deactivated. The alarm system
remains activated.
The interior monitoring and the anti-towing alarm are automatically switched
on again next time the vehicle is locked.
The interior monitoring and anti-towing alarm (tilt sensor) are automatically
switched on when the anti-theft alarm is switched on. In order to activate it,
all the doors and the rear lid must be closed.
If you wish to disconnect the interior monitoring and the anti-towing system,
it must be done each time that the vehicle is locked; if not, they will connect
automatically.
The interior monitoring and the anti-towing system should be disconnected
if animals are left inside the locked vehicle (otherwise, their movements will trigger the alarm) or when, for example, the vehicle is transported or has to
be towed with only one axle on the ground.
False alarms
The interior monitoring only operates correctly if the vehicle is completely
closed. Please observe legal requirements when doing so.
The following cases may cause a false alarm:
•opened windows (partially or fully)•panorama/tilting roof open (partially or completely).•movement of objects inside the vehicle, such as loose papers, items
hanging from the rear vision mirror (air fresheners), etc.Note
•If the vehicle is relocked and the alarm is activated without the volumetric
sensor function, relocking will activate the alarm with all its functions, except
the volumetric sensor. This function is reactivated when the alarm is switched
on again, unless it is deliberately switched off.•If the alarm has been triggered by the volumetric sensor, this will be indi-
cated by a flashing of the indicator on the driver door. The flash is different to
the flash indicating the alarm is activated.•The vibration of a mobile phone left inside the vehicle may cause the inte-
rior monitoring alarm to trigger, as both sensors react to movements and
shakes inside the vehicle.•If on activating the alarm, any door or the rear lid is open, only the alarm
will be activated. The interior monitoring and the anti-towing system will only
be activated once all the doors are closed (including the rear lid).
8)The time period from when the door is opened until the key is inserted in the contact
should not exceed 15 sec., otherwise the alarm will be triggered.
Ibiza ST_EN.book Seite 79 Dienstag, 12. Januar 2010 4:03 16
Page 92 of 250

Lights and visibility91
Safety First
Operating instructions
Practical tips
Technical Data
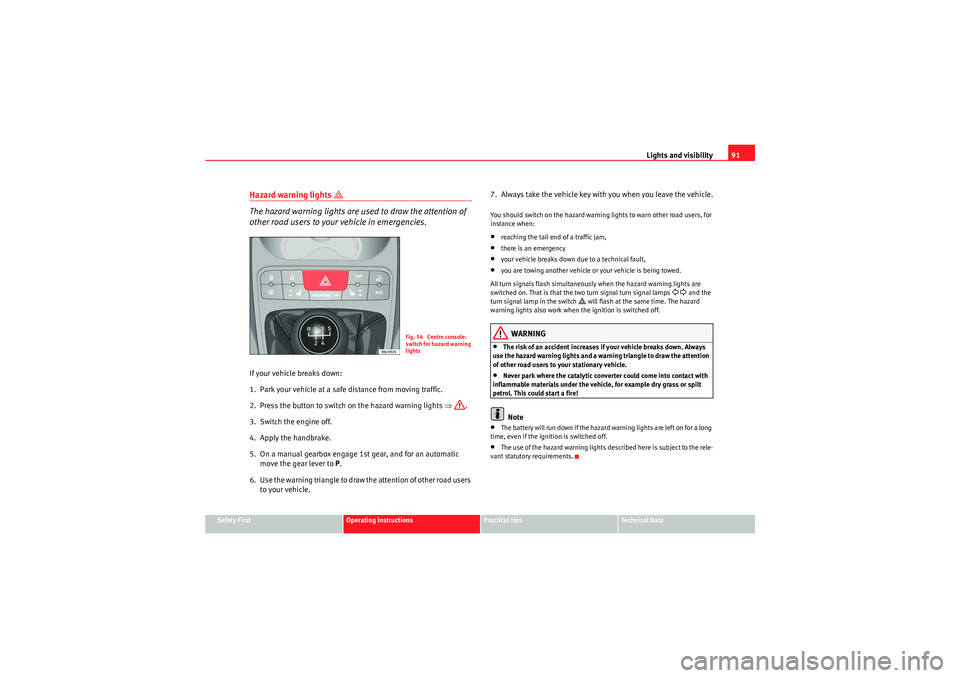
Hazard warning lights
The hazard warning lights are used to draw the attention of
other road users to your vehicle in emergencies.
If your vehicle breaks down:
1. Park your vehicle at a safe distance from moving traffic.
2. Press the button to switch on the hazard warning lights ⇒.
3. Switch the engine off.
4. Apply the handbrake.
5. On a manual gearbox engage 1st gear, and for an automatic move the gear lever to P.
6. Use the warning triangle to draw the attention of other road users to your vehicle. 7. Always take the vehicle key with you when you leave the vehicle.
You should switch on the hazard warning lights to warn other road users, for
instance when:•reaching the tail end of a traffic jam,•there is an emergency•your vehicle breaks down due to a technical fault,•you are towing another vehicle or your vehicle is being towed.
All turn signals flash simultaneously when the hazard warning lights are
switched on. That is that the two turn signal turn signal lamps
and the
turn signal lamp in the switch
will flash at the same time. The hazard
warning lights also work when the ignition is switched off.
WARNING
•The risk of an accident increases if your vehicle breaks down. Always
use the hazard warning lights and a warning triangle to draw the attention
of other road users to your stationary vehicle.•Never park where the catalytic converter could come into contact with
inflammable materials under the vehicle, for example dry grass or spilt
petrol. This could start a fire!Note
•The battery will run down if the hazard warning lights are left on for a long
time, even if the ignition is switched off.•The use of the hazard warning lights described here is subject to the rele-
vant statutory requirements.
Fig. 54 Centre console:
switch for hazard warning
lights
Ibiza ST_EN.book Seite 91 Dienstag, 12. Januar 2010 4:03 16
Page 93 of 250

Lights and visibility
92Turn signal and main beam headlight lever
The turn signal and main beam lever also operates the
parking lights and the headlight flasher.The turn signal and main beam headlight lever has the following
functions:
Switching on the turn signals
– Move the lever all the way up ⇒fig. 55 to indicate right , and
all the way down to indicate left .
Signalling a lane change
– Push the lever up or down to the point where you incur resistance and then release it. The turn signal will flash several
times. The corresponding warning lamp will also flash. Switching main beam on and off
– Turn the light switch to position
.
–Press the lever forward ⇒fig. 55 to switch on the main
beams.
– Pull the lever back towards you to switch the main beam head- lights off again.
Headlight flashers
– Pull the lever towards the steering wheel to operate the flasher.
Switching on parking lights
– Switch the ignition off and remove the key from the lock.
– Move the lever up or down to turn the right or left-hand parking lights on, respectively.
WARNING
The main beam can dazzle other drivers. Risk of accident! Never use the
main beam headlights or the headlight flasher if they could dazzle other
drivers.
Note
• The turn signals only work when the ignition is switched on. The corre-
sponding warning lamp
or flashes in the instrument panel. The warning
lamp
flashes when the turn signals are operated, provided a trailer is
correctly attached and connected to the vehicle. If a turn signal bulb is defec-
tive, the warning lamp flashes at double sp eed. If the trailer turn signal bulbs
are damaged, warning lamp
does not light up. Change the bulb.
Fig. 55 Turn signal and
main beam headlight
lever
A1
A2A1
A2
A4
A3
Ibiza ST_EN.book Seite 92 Dienstag, 12. Januar 2010 4:03 16
Page 95 of 250

Lights and visibility
94
NoteIf not all the vehicle doors are closed, the interior lights will be switched off
after approx. 10 minutes, providing the key has been removed and the cour-
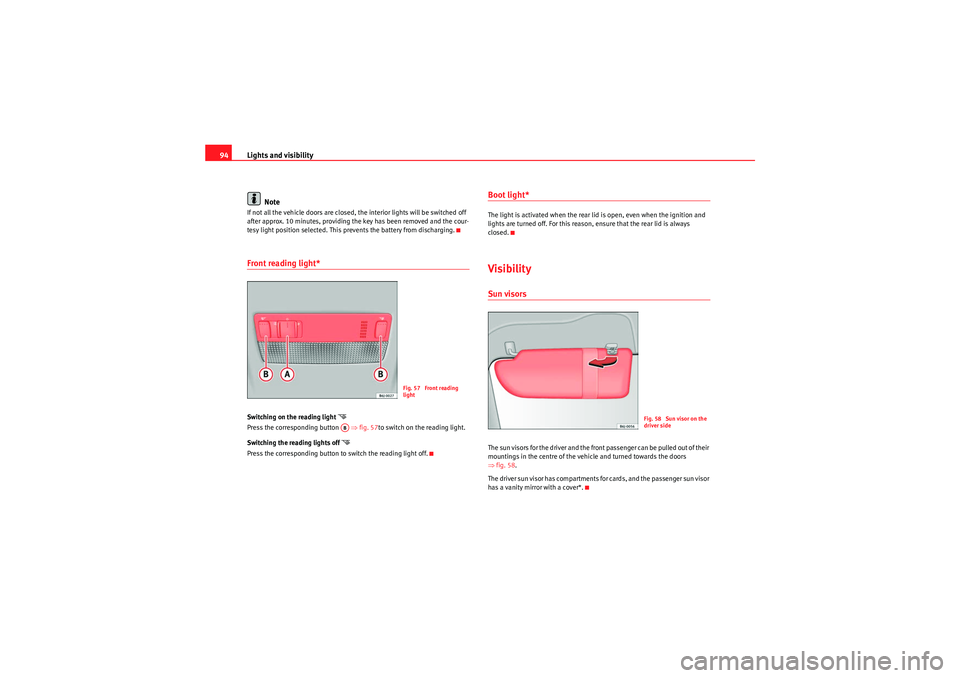
tesy light position selected. This prevents the battery from discharging.Front reading light*Switching on the reading light
Press the corresponding button ⇒fig. 57 to switch on the reading light.
Switching the reading lights off
Press the corresponding button to switch the reading light off.
Boot light*The light is activated when the rear lid is open, even when the ignition and
lights are turned off. For this reason, ensure that the rear lid is always
closed.VisibilitySun visorsThe sun visors for the driver and the front passenger can be pulled out of their
mountings in the centre of the vehicle and turned towards the doors
⇒ fig. 58.
The driver sun visor has compartments for cards, and the passenger sun visor
has a vanity mirror with a cover*.
Fig. 57 Front reading
light
AB
Fig. 58 Sun visor on the
driver side
Ibiza ST_EN.book Seite 94 Dienstag, 12. Januar 2010 4:03 16
Page 96 of 250

Lights and visibility95
Safety First
Operating instructions
Practical tips
Technical Data
Windscreen washersFront windscreen wipers
The windscreen wiper lever controls the windscreen wipers
and the automatic wash and wipe.
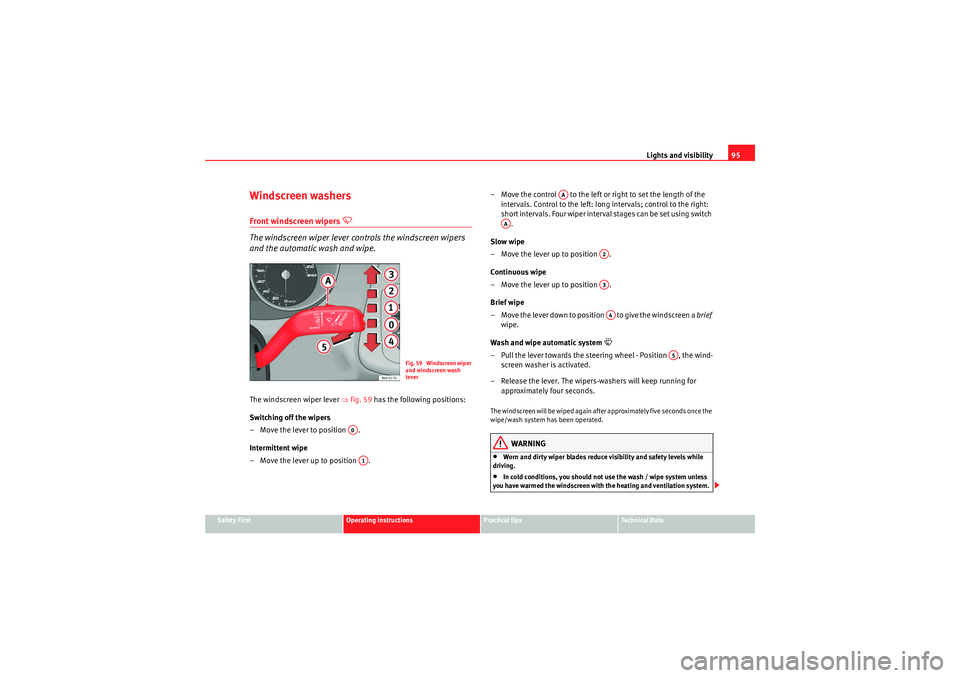
The windscreen wiper lever ⇒fig. 59 has the following positions:
Switching off the wipers
– Move the lever to position .
Intermittent wipe
– Move the lever up to position . – Move the control to the left or right to set the length of the
intervals. Control to the left: long intervals; control to the right:
short intervals. Four wiper interval stages can be set using switch .
Slow wipe
– Move the lever up to position .
Continuous wipe
– Move the lever up to position .
Brief wipe
– Move the lever down to position to give the windscreen a brief
wipe.
Wash and wipe automatic system
– Pull the lever towards the steering wheel - Position , the wind- screen washer is activated.
– Release the lever. The wipers-washers will keep running for approximately four seconds.The windscreen will be wiped again after approximately five seconds once the
wipe/wash system has been operated.
WARNING
•Worn and dirty wiper blades reduce visibility and safety levels while
driving.•In cold conditions, you should not use the wash / wipe system unless
you have warmed the windscreen with the heating and ventilation system.
Fig. 59 Windscreen wiper
and windscreen wash
lever
A0A1
AA
AA
A2A3A4
A5
Ibiza ST_EN.book Seite 95 Dienstag, 12. Januar 2010 4:03 16
Page 98 of 250

Lights and visibility97
Safety First
Operating instructions
Practical tips
Technical Data
Note
•Do not put stickers on the windscreen in front of the sensor. This may
cause sensor disruption or faults.Rear window wiper
The windscreen wiper lever operates the windscreen wiper
and the wash and wipe system for the rear window.
Switching on the interval wipe
– Press the lever forwards to position ⇒fig. 61 . The wiper will
wipe the window approximately every 6 seconds. Switching off the interval wipe function
– Pull the lever back from position towards the steering wheel.
The wiper will continue to function for a short period if you switch
off whilst the wipers are in motion.
Switching on the windscreen wiper and washer system
– Press the lever fully fo rwards to position ⇒fig. 61 . The rear
wiper and washer operate at the same time. The windscreen
wash system will function as long as you hold the lever in this
position.
– Release the lever. The washer system stops and the wipers continue until the end of the cycle.
– Move the lever towards the steering wheel to switch off.
WARNING
•A worn or dirty wiper blade will obstruct visibility and reduce safety.•Always note the corresponding warnings on ⇒page 189.Caution
In icy conditions, always check that the wiper blade is not frozen to the glass
before using the wiper for the first time. If you switch on the wiper when the
wiper blade is frozen to the glass, this could damage both the wiper blade
and the wiper motor.
Note
•The rear window wiper will only work when the ignition is switched on.•Depending on the version of the model, when you engage reverse gear
and with the headlight wiper activated, the lamps are wiped.
Fig. 61 Windscreen wiper
and windscreen wash
lever: rear window wiper
A6
A6
A7
Ibiza ST_EN.book Seite 97 Dienstag, 12. Januar 2010 4:03 16
Page 99 of 250

Lights and visibility
98Headlight washer system
The headlight washers clean the headlight lenses.The headlight washers are activated automatically when the windscreen
washer is used and the windscreen wiper lever is pulled towards the steering
wheel for at least 1.5 seconds – provided the dipped beam headlights or
main beams are switched on. Clean off stubborn dirt (insects, etc.) from the
headlights at regular intervals, for instance when filling the fuel tank.
Note
•To ensure that the headlight washers work properly in winter, keep the
nozzle holders in the bumper free of snow and remove any ice with a de-icer
spray.•To remove water, the windscreen wipers will be activated from time to
time, the headlight wipers will be activated every three cycles.Rear vision mirrorsAdjusting the head restraintsBefore beginning any journey, adjust the rear vision mirrors for correct
visibility.
Rear vision mirror
It is dangerous to drive if yo u cannot see clearly through the
rear window.Manual anti-dazzle function for rear vision mirror
In the basic mirror position, the lever at the bottom edge of the mirror should
be at the front. Pull the lever to the back to select the anti-dazzle function.Automatic anti-dazzle rear vision mirror*
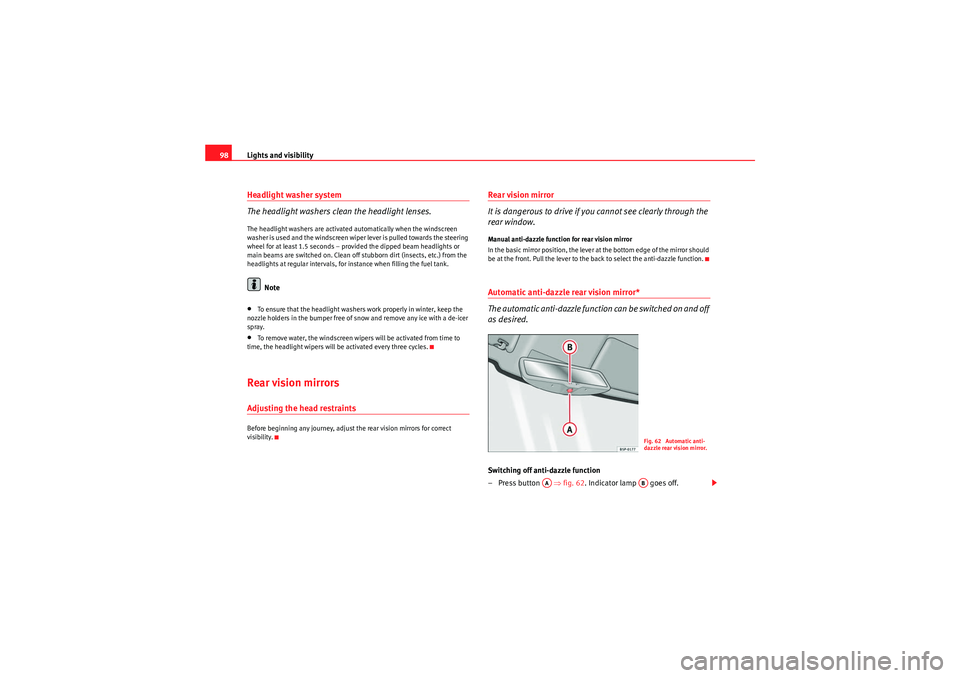
The automatic anti-dazzle function can be switched on and off
as desired.Switching off anti-dazzle function
–Press button ⇒ fig. 62. Indicator lamp goes off.
Fig. 62 Automatic anti-
dazzle rear vision mirror.
AA
AB
Ibiza ST_EN.book Seite 98 Dienstag, 12. Januar 2010 4:03 16
Page 100 of 250

Lights and visibility99
Safety First
Operating instructions
Practical tips
Technical Data
Switching on anti-dazzle function
– Press button ⇒page 98, fig. 62 . Warning lamp is lit.Anti-dazzle function
The anti-dazzle function is activated every time the ignition is switched on.
The green indicator lamp lights up in the mirror housing.
When the anti-dazzle function is enabled, the interior rear vision mirror will
darken automatically according to the amount of light it receives. The anti-
dazzle function is cancelled if reverse gear is engaged.
Note
•The automatic anti-dazzle function will only work properly if the sun
blind* for the rear window is retracted and there are no other objects
preventing light from reaching the rear vision mirror.•If you have to stick any type of sticker on the windscreen, do not do so in
front of the sensors. Doing so could prevent the anti-dazzle function from
working well or even from working at all.Folding in the exterior mirrorsThe exterior mirrors of the vehicle may be folded in. For this, press the mirror
housing towards the vehicle.
Note
Before washing the vehicle with an automatic car wash, fold in the mirrors to
avoid damage.
Electric exterior mirrors*
The exterior mirrors can be adjusted using the rotary knob in
the driver door.Basic setting of exterior mirrors
1. Turn knob ⇒fig. 63 to position L ( left exterior mirror).
2. Turn the rotary knob to positi on the mirror so that you have a
good view to the rear of the vehicle.
3. Turn knob to position R (right exterior mirror ).
4. Swivel the rotary knob to position the mirror so that you have a good view to the rear of the car ⇒.
Heated exterior mirrors*
– Press the demisting button
⇒ page 90, fig. 53
AA
Fig. 63 Controls of exte-
rior mirrors
Ibiza ST_EN.book Seite 99 Dienstag, 12. Januar 2010 4:03 16