2009 PORSCHE PANAMERA radio
[x] Cancel search: radioPage 125 of 343

Instrument Panel and Multi-Function Display
123
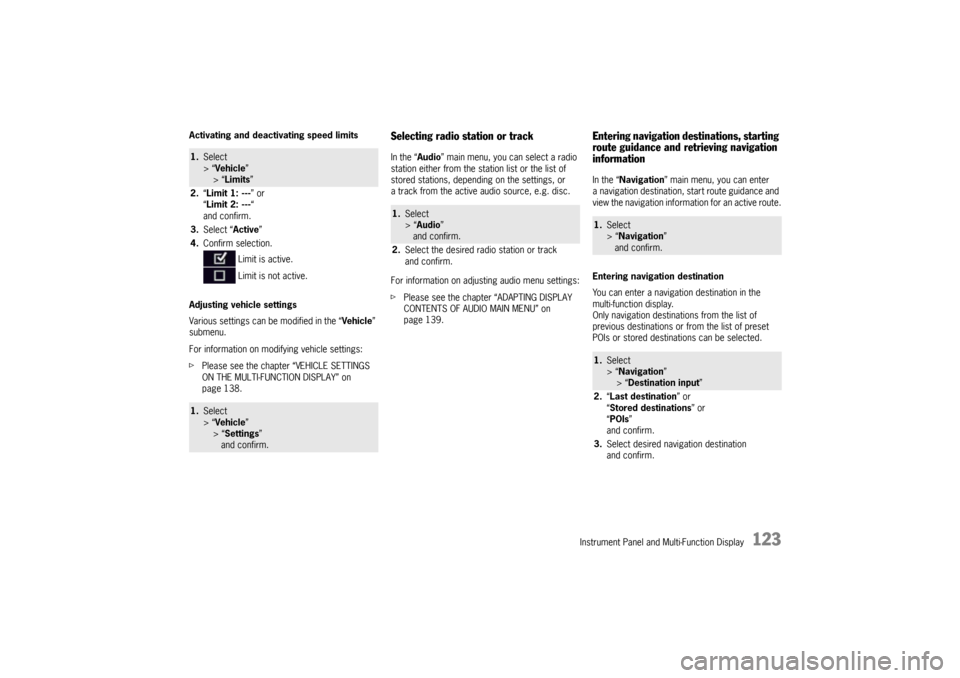
Activating and deactivating speed limits
Adjusting vehicle settings
Various settings can be modified in the “Vehicle”
submenu.
For information on modifying vehicle settings:
f Please see the chapter “VEHICLE SETTINGS
ON THE MULTI-FUNCTION DISPLAY” on
page 138.
Selecting radio station or trackIn the “ Audio” main menu, you can select a radio
station either from the st ation list or the list of
stored stations, depending on the settings, or
a track from the active audio source, e.g. disc.
For information on adjusting audio menu settings:
f Please see the chapter “ADAPTING DISPLAY
CONTENTS OF AUDIO MAIN MENU” on
page 139.
Entering navigation destinations, starting
route guidance and retrieving navigation
informationIn the “ Navigation” main menu, you can enter
a navigation destination, start route guidance and
view the navigation information for an active route.
Entering navigation destination
You can enter a navigatio n destination in the
multi-function display.
Only navigation destinations from the list of
previous destinations or from the list of preset
POIs or stored destinations can be selected.
1. Select
> “Vehicle ”
> “ Limits ”
2. “Limit 1: --- ” or
“ Limit 2: --- “
and confirm.
3. Select “ Active”
4. Confirm selection.
Limit is active.
Limit is not active.1.Select
> “Vehicle ”
> “ Settings ”
and confirm.
1. Select
> “Audio”
and confirm.
2. Select the desired radio station or track
and confirm.
1.Select
> “Navigation”
and confirm.1. Select
> “Navigation”
> “ Destination input ”
2. “Last destination ” or
“ Stored destinations” or
“ POIs ”
and confirm.
3. Select desired navigation destination
and confirm.
Page 136 of 343

134
Instrument Panel and Multi-Function Display
If necessary, fill in ti
re sealant and set the
correct tire pressure.
This tire pressure warning also appears when
driving and can be acknowledged.
The tire pressure warning light on the instrument
panel goes out only when the tire pressure has
been corrected.
System learningTire Pressure Monitoring begins to “learn” the
wheels after a wheel change, wheel transmitter
replacement or update of the tire settings . During
this process, Tire Pressu re Monitoring recognizes
the wheels and their locations.
The following message appears on the multi-
function display (example):
“No monitoring, system is learning”.
The wheel learning process takes place
exclusively when the vehicle is being driven
(vehicle speed above 16 mph (25 km/h)).
Tire Pressure Monitoring requires a certain
amount of time to learn the wheels. During this
time, the current tire pressures are not available
on the multi-function display:
– The tire pressure warning light remains lit until all wheels have been learned.
– Lines (-.-) appear on the display of the “Tire pressure” function. – The required pressures for cold tires (68 °F
(20 °C)) are indicated under “Fill info” in the tire
pressure menu.
Position and pressure information is displayed as
soon as Tire Pressure Monitoring has assigned
the wheels recognized as belonging to the vehicle
to the correct wheel positions.
f Check the tire pressure for all wheels under
“Fill info ”.
f Correct the tire pressure to the required
pressure if necessary.
Changing a wheel and replacing tiresfNew wheels must be fitted with radio
transmitters for Tire Pressure Monitoring.
Before tires are changed, the battery charge
condition of the wheel transmitters should be
checked.
Please contact a qualified specialist workshop.
We recommend that you have an authorized
Porsche dealer to do this work as they have
trained workshop personnel and the necessary
parts and tools.
f Switch off the ignition when changing a wheel.
The tire settings on the mu lti-function display must
be updated after changing a wheel.
If the tire settings are not updated, the message
“Tire change? Update settings!” is displayed on the
multi-function display.
f Update the multi-function display settings the
next time the vehicle is stationary.
Pressure increase as the result of
temperature increaseIn accordance with physical principles, the tire
pressure changes as the temperature
changes.The tire pressure increases or decreases
by 0.1 bar (1.5 psi) for
every 18 °F (10 °C) change in temperature.Partial monitoringMonitoring of the other wheels is continued if there
is a fault in one or two wheel transmitters.
– The tire pressure warning light lights up.
– The message “Restricted monitoring” appears
on the multi-function display.
– No tire pressures are displayed on the multi-function display for wheels with faulty
wheel transmitters.
Page 137 of 343

Instrument Panel and Multi-Function Display
135
No monitoringIn the event of faults, Tire Pressure Monitoring
cannot monitor the tire pressure.
The warning light on the instrument panel lights up
and a corresponding message appears on the
multi-function display.
Monitoring is not active:
– if Tire Pressure Monitoring is faulty,
– if wheel transmitters for Tire Pressure Monitoring are missing,
– during the learning phase after the tire settings have been updated,
– after a wheel change without updating the tire settings,
– if more than four wheel transmitters are recognized,
– if there is external interference by other radio sources, e.g. wireless headphones,
– if tire temperatures are too high.
f Please see the chapter “OVERVIEW OF
WARNING MESSAGES” on page 152.
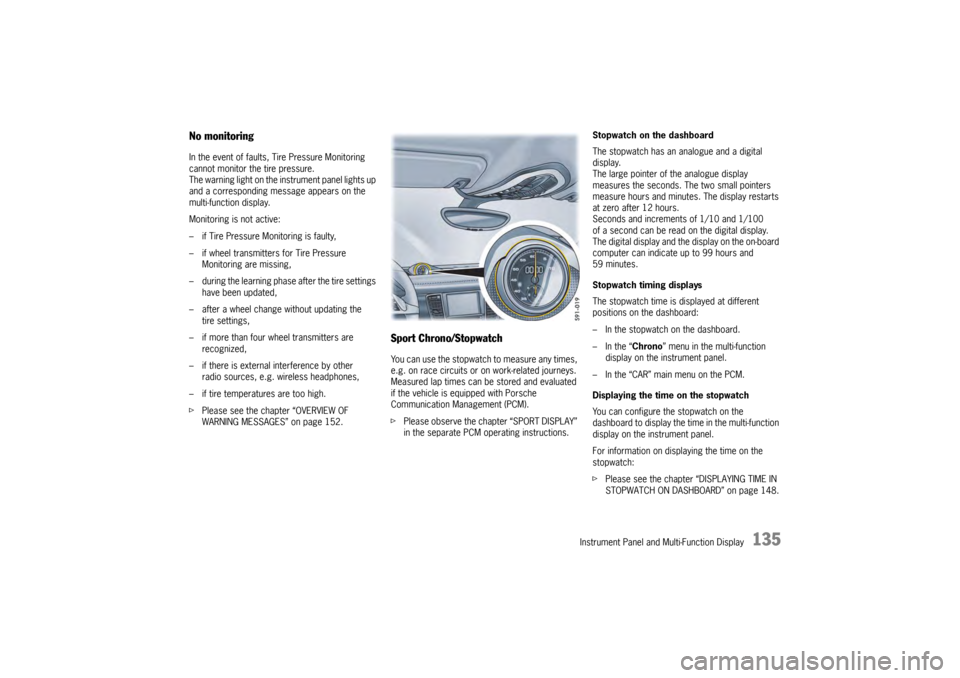
Sport Chrono/StopwatchYou can use the stopwatch to measure any times,
e.g. on race circuits or on work-related journeys.
Measured lap times can be stored and evaluated
if the vehicle is equipped with Porsche
Communication Management (PCM).
fPlease observe the chapter “SPORT DISPLAY”
in the separate PCM operating instructions. Stopwatch on the dashboard
The stopwatch has an analogue and a digital
display.
The large pointer of the analogue display
measures the seconds. The two small pointers
measure hours and minutes. The display restarts
at zero after 12 hours.
Seconds and increments of 1/10 and 1/100
of a second can be read on the digital display.
The digital display and the
display on the on-board
computer can indicate up to 99 hours and
59 minutes.
Stopwatch timing displays
The stopwatch time is displayed at different
positions on the dashboard:
– In the stopwatch on the dashboard.
– In the “ Chrono” menu in the multi-function
display on the instrument panel.
– In the “CAR” main menu on the PCM.
Displaying the time on the stopwatch
You can configure the stopwatch on the
dashboard to display the ti me in the multi-function
display on the instrument panel.
For information on displaying the time on the
stopwatch:
f Please see the chapter “DISPLAYING TIME IN
STOPWATCH ON DASHBOARD” on page 148.
Page 141 of 343

Instrument Panel and Multi-Function Display
139
Resetting to factory settingsAll settings made in the multi-function display
can be reset to the factory settings:
Note
All personal settings that have already been stored
will be lost as a result of resetting to factory
settings.
Adapting appearance of multi-function
displayThe contents and appearance of the multi-function
display can be adapted individually.
Selecting main menu display contents
Individual elements in the main menu can be
hidden and shown as required.
The main menu items “ Audio”, “Navigation”,
“ Map ”, “Phone ”, “Tr i p ”, “Tire pressure” and
“ Sport Chrono” can be hidden or shown.
The “ Settings ” menu item cannot be hidden. Adapting display contents of audio main
menu
In the audio main menu, you can display either
a list of all radio stations currently within range or
a list of all stored radio stations.
Available display contents:
–“
Station list ”
List of stations currently within range.
–“ Preset list ”
List of stored stations.
For information on the station and preset lists:
f Please observe the separate operating manual
for the Porsche communication Management
(PCM).
1.Select
> “Vehicle ”
> “ Settings ”
2. “Fact. settings ”
and confirm.
3. Select “ Ye s”
and confirm.
1. Select
> “Vehicle ”
> “Settings ”
> “ Display ”
and confirm.1. Select
> “Vehicle ”
> “Settings ”
> “ Display ”
2. “Menu scope ”
and confirm.
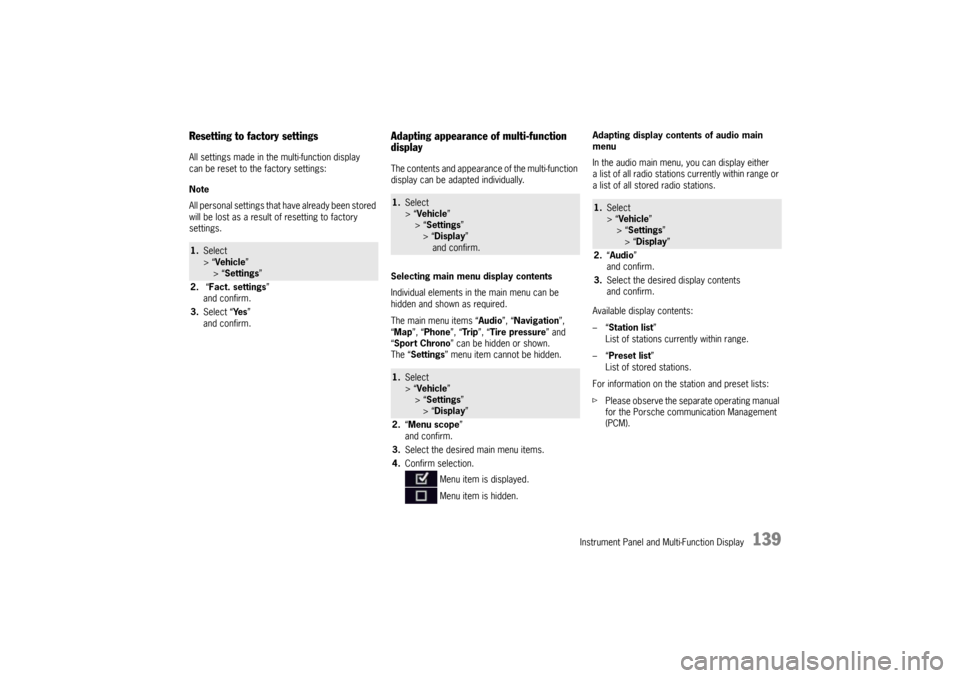
3. Select the desired main menu items.
4. Confirm selection.
Menu item is displayed.
Menu item is hidden.
1.Select
> “Vehicle ”
> “ Settings ”
> “Display ”
2. “Audio”
and confirm.
3. Select the desired display contents
and confirm.
Page 142 of 343

140
Instrument Panel and Multi-Function Display
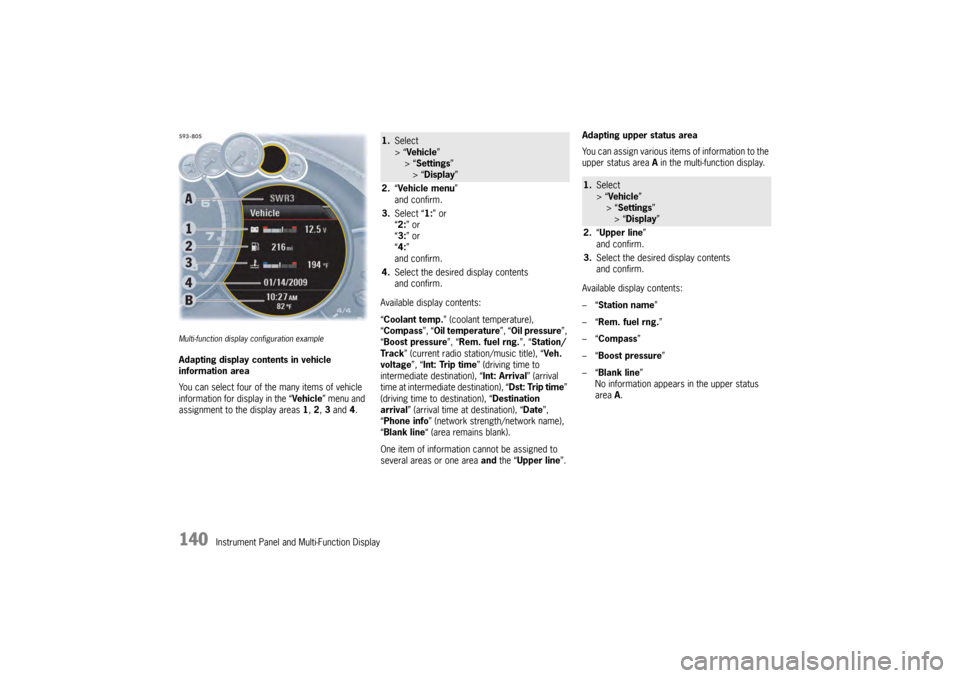
Multi-function display configuration exampleAdapting display contents in vehicle
information area
You can select four of the many items of vehicle
information for display in the “Vehicle” menu and
assignment to the display areas 1, 2 , 3 and 4. Available display contents:
“
Coolant temp. ” (coolant temperature),
“ Compass ”, “Oil temperature ”, “Oil pressure ”,
“ Boost pressure ”, “Rem. fuel rng. ”, “Station/
Track ” (current radio station/music title), “ Veh.
voltage ”, “Int: Trip time ” (driving time to
intermediate destination), “Int: Arrival ” (arrival
time at intermediate destination), “ Dst: Trip time”
(driving time to destination), “ Destination
arrival ” (arrival time at destination), “ Date”,
“ Phone info ” (network strength/network name),
“ Blank line “ (area remains blank).
One item of information cannot be assigned to
several areas or one area and the “ Upper line ”.Adapting upper status area
You can assign various items of information to the
upper status area
A in the multi-function display.
Available display contents:
–“ Station name”
–“ Rem. fuel rng. ”
–“ Compass”
–“ Boost pressure ”
–“ Blank line ”
No information appears in the upper status
area A.
1. Select
> “Vehicle ”
> “ Settings ”
> “Display ”
2. “Vehicle menu ”
and confirm.
3. Select “ 1:” or
“ 2: ” or
“ 3: ” or
“ 4: ”
and confirm.
4. Select the desired display contents
and confirm.
1.Select
> “Vehicle ”
> “Settings ”
> “Display ”
2. “Upper line ”
and confirm.
3. Select the desired display contents
and confirm.
Page 153 of 343

Instrument Panel and Multi-Function Display
151
Adjusting volume of warning tones
The volume of the warning tones can be adjusted
individually.
Available setting options:
–“Loud ”
–“ Medium”
–“ Low ”
Changing button assignment on multi-
function steering wheelThe assignment of the MFS button on the multi-
function display can be changed individually.
Functions from the multi-function display or PCM
can be assigned to the MFS button.
Available PCM functions:
–“Source change ”
Change audio source.
–“ Voice control ”
Activate voice control.
–“ Dri. instr. (Rep) “
Repeat voice instruction from the navigation
system.
–“ Station/track < ”
Previous radio station/title.
–“ Station/track > ”
Next radio station/track. –“
Map ”
Display navigation map in PCM.
–“ Menu change ”
Change main menu area.
Available instrument cluster functions:
–“ Start/Stop Chr. ”
Start/stop timing.
–“ Vehicle menu ”
Display vehicle menu.
–“ Tr i p m e n u ”
Display trip menu.
–“ TPM menu ”
Display TPM menu.
–“ Chrono menu”
Display chrono menu.
–“ ACC menu ”
Display ACC menu.
–“ Audio menu ”
Display audio menu.
–“ Phone menu ”
Display telephone menu.
–“ Navi menu ”
Display navigation menu.
–“ Map menu ”
Display navigation map on the multi-function
display.
1. Select
> “Vehicle ”
> “ Settings ”
> “Volume ”
2. “Warn. tones ”.
3. Select desired setting
and confirm.
1.Select
> “Vehicle ”
> “Settings ”
> “ Steering wheel op. ”
2. “Multif. key ”
and confirm.
3. Select “PCM function” or
“ Inst. clus. fun. ”
and confirm.
4. Select desired function assignment
and confirm.
Page 167 of 343

Driving and Driving Safety
165
To remove the ignition key:
fStop the vehicle.
f Move PDK selector lever to position P.
f Switch ignition off.
f Remove the ignition key.Ignition lock position 1 – Ignition onfTurn ignition key to position 1.
All electrical equipment can be switched on. The
warning lights on the inst rument panel light up for
alamp check.
f Please see the chapter “INSTRUMENT PANEL
USA MODELS” on page 107.
If an electrical consumer is not switched on for
10 minutes after switching on the ignition, the
ignition must be switched off then on again.
Ignition lock position 2 – Start enginef Turn ignition key to ignition lock position 2.
The car key is reset automa tically from position 2
to position 1 when you start the engine.Ignition lock position 3 – Activate
steering column lock on vehicles with
Porsche Entry & Drivef Please see the chapter “Manually locking the
steering column on vehicles with Porsche
Entry & Drive” on page 165.Steering column lockVehicles without Porsche Entry & Drive
The steering column is locked automatically
when the ignition key is removed from the ignition
lock and unlocked automatically when the
ignition key is inserted into the ignition lock.
Vehicles with Porsche Entry & Drive
The steering column is locked automatically
when the driver’s door is opened when the ignition
is switched off. Manually locking the steering column on
vehicles with Porsche Entry & Drive
f
Once the ignition is switched off, turn the
control unit to ignition lock position 3 again
and hold it there for 2seconds.
The steering column is locked when you hear
a clicking noise.
The steering column can be unlocked
automatically by turning the control unit to
ignition lock position 1.
Emergency operation with Porsche
Entry & DriveInterference in radio tr ansmission between the
vehicle and ignition lock or a discharged ignition
lock battery can disable the Porsche Entry & Drive
comfort function.
If this happens, the control unit can be removed
from the ignition lock and the vehicle can be
started using the standard ignition key.
Removing the control unit from the
ignition lock
1. Turn the control unit to ignition lock position 3
and hold it there for about 10 seconds.
Once you hear the clicking sound, you can remove
the control unit in ignition lock position 0.
Page 181 of 343

Driving and Driving Safety
179
Radiofrequency radiation exposure
Information
This equipment complies with FCC radiation
exposure limits set forth for an uncontrolled
environment. This equipment should be installed
and operated with minimum distance of 8 in.
(20 cm) between the radiator and your body.
This transmitter must not be co-located or
operating in conjunction wi th any other antenna or
transmitter
Warning!
Risk of accidents. Rada r sensor vision can be
impaired by rain, snow, ice or heavy spray.
Vehicles in front will not be detected properly
or may not be detected at all.
f Do not use adaptive cruise control under these conditions.
Warning message
Adaptive cruise control can be deactivated
automatically if the radar sensor is very dirty or
iced up, obstructed , in unfavorable weather
conditions (heavy rain) or when driving through
tunnels.
The message “Fault ACC sensor” will appear on
the multi-function display in the instrument panel.
For information on warning messages on the
multi-function display:
f Please see the chapter “OVERVIEW OF
WARNING MESSAGES” on page 152. Notes
This device complies with Part 15 of the FCC
Rules and with RSS-210 of Industry Canada.
Operation is subject to the following two
conditions:
1. This device may not cause harmful
interference, and
2. this device must accept any interference received, including interference that may
cause undesired operation.
Changes or modifications made to this equipment
not expressly approved by Porsche may void the
FCC authorization to operate this equipment.
This equipment has been tested and found to
comply with the limits for a Class A digital device,
pursuant to Part 15 of the FCC Rules. These limits
are designed to provide reasonable protection
against harmful interference when the equipment
is operated in a commercial environment. This
equipment generates, uses, and can radiate radio
frequency energy and, if not installed and used in
accordance with the instruction manual, may
cause harmful interference to radio
communications. Operation of this equipment in a
residential area is likely to cause harmful
interference in which case the user will be required
to correct the interferen ce at his own expense.
This Class A digital apparatus complies with
Canadian ICES-003.
Cet appareil numérique de la classe A est
conforme à la norme NMB-003 du Canada.
Operating principle of adaptive cruise
controlNo vehicle detected in front – open road
driving
Adaptive cruise control operates like a cruise
control system. The desired speed that was set is
maintained constantly.
Vehicle detected in front – driving in traffic
If a vehicle travelling ahead of you in the same lane
is detected as driving slower than the selected
desired speed, adaptive cruise control will
automatically maintain a set distance from the
vehicle in front.
If the vehicle in front stop s, adaptive cruise control
will slow your vehicle down to a stop provided this
is possible within the cont rol limits of the system.
Adaptive cruise control actively keeps your vehicle
at a standstill.
If the vehicle in front drives off, automatic speed
control and distance control can be resumed.