2009 NISSAN TIIDA e control
[x] Cancel search: e controlPage 1968 of 4331
![NISSAN TIIDA 2009 Service Repair Manual EC-612< SERVICE INFOMATION >
[MR TYPE 1]
TROUBLE DIAGNOSIS
*: Leaving cooling fan OFF with CONSULT-III while engine is running may cause the engine to overheat.
DTC & SRT CONFIRMATION MODE
SRT STATUS NISSAN TIIDA 2009 Service Repair Manual EC-612< SERVICE INFOMATION >
[MR TYPE 1]
TROUBLE DIAGNOSIS
*: Leaving cooling fan OFF with CONSULT-III while engine is running may cause the engine to overheat.
DTC & SRT CONFIRMATION MODE
SRT STATUS](/manual-img/5/57398/w960_57398-1967.png)
EC-612< SERVICE INFOMATION >
[MR TYPE 1]
TROUBLE DIAGNOSIS
*: Leaving cooling fan OFF with CONSULT-III while engine is running may cause the engine to overheat.
DTC & SRT CONFIRMATION MODE
SRT STATUS Mode
For details, refer to EC-542, " Emission-related Diagnostic Information " .
SRT WORK SUPPORT Mode
This mode enables a technician to drive a vehicle to set the SRT while monitoring the SRT status.
DTC WORK SUPPORT Mode
*: DTC P1442 and P1456 does not apply to C11 models but appears in DTC Work Support Mode screens.
Generic Scan Tool (GST) Function INFOID:0000000004537061
DESCRIPTION
Generic Scan Tool (OBDII scan tool) complying with SAE J1978 has
8 different functions explained below.
ISO 15765-4 is used as the protocol.
The name GST or Generic Scan Tool is used in this service manual.
FUNCTION VENT CON-
TROL/V • Ignition switch: ON
(Engine stopped)
• Turn solenoid valve “ON” and “OFF” with the CONSULT-III and
listen to operating sound. Solenoid valve makes an operating
sound. • Harness and connectors
• EVAP canister vent control valve
V/T ASSIGN AN-
GLE • Engine: Return to the original
trouble condition
• Change intake valve timing using CONSULT-III. If trouble symptom disappears, see
CHECK ITEM. • Harness and connectors
• Intake valve timing control sole-
noid valve
TEST ITEM CONDITION JUDGEMENT CHECK ITEM (REMEDY) Test mode Test item Corresponding DTC No. Reference page
EVAPORATIVE SYS-
TEM PURG FLOW P0441 P0441
EC-792EVP SML LEAK P0442/P1442*
P0442
EC-797 P0455
EC-847 EVP V/S LEAK P0456/P1456* P0456
EC-853PURG VOL CN/V P1444 P0443
EC-804A/F SEN1
A/F SEN1 (B1) P1276 P0130
EC-692A/F SEN1 (B1) P1278/P1279 P0133
EC-710HO2S2
HO2S2 (B1) P0139 P0139
EC-733HO2S2 (B1) P1146 P0138
EC-724HO2S2 (B1) P1147 P0137
EC-717 SEF139P
Page 1969 of 4331
![NISSAN TIIDA 2009 Service Repair Manual TROUBLE DIAGNOSIS
EC-613
< SERVICE INFOMATION >
[MR TYPE 1] C
D E
F
G H
I
J
K L
M A EC
NP
O
INSPECTION PROCEDURE
1. Turn ignition switch OFF.
2. Connect GST to data link connector (1), which i NISSAN TIIDA 2009 Service Repair Manual TROUBLE DIAGNOSIS
EC-613
< SERVICE INFOMATION >
[MR TYPE 1] C
D E
F
G H
I
J
K L
M A EC
NP
O
INSPECTION PROCEDURE
1. Turn ignition switch OFF.
2. Connect GST to data link connector (1), which i](/manual-img/5/57398/w960_57398-1968.png)
TROUBLE DIAGNOSIS
EC-613
< SERVICE INFOMATION >
[MR TYPE 1] C
D E
F
G H
I
J
K L
M A EC
NP
O
INSPECTION PROCEDURE
1. Turn ignition switch OFF.
2. Connect GST to data link connector (1), which is located under LH dash panel.
3. Turn ignition switch ON.
4. Enter the program according to instruction on the screen or in the operation manual.
(*: Regarding GST screens in this section, sample screens are
shown.) Diagnostic test mode Function
Service $01 READINESS TESTS This diagnostic service gains access to current emission-related data values, including an-
alog inputs and outputs, digital inputs and outputs, and system status information.
Service $02 (FREEZE DATA) This diagnostic service gains access to emission-related data value which were stored by
ECM during the freeze frame. For details, refer to EC-604, " CONSULT-III Function (EN-
GINE) " .
Service $03 DTCs This diagnostic service gains access to emission-related power train trouble codes which
were stored by ECM.
Service $04 CLEAR DIAG INFO This diagnostic service can clear all emission-related diagnostic information. This in-
cludes:
• Clear number of diagnostic trouble codes (Service $01)
• Clear diagnostic trouble codes (Service $03)
• Clear trouble code for freeze frame data (Service $01)
• Clear freeze frame data (Service $02)
• Reset status of system monitoring test (Service $01)
• Clear on board monitoring test results (Service $06 and $07)
Service $06 (ON BOARD TESTS) This diagnostic service accesses the results of on board diagnostic monitoring tests of
specific components/systems that are not continuously monitored.
Service $07 (ON BOARD TESTS) This diagnostic service enables the off board test drive to obtain test results for emission-
related powertrain components/systems that are continuously monitored during normal
driving conditions.
Service $08 — This diagnostic service can close EVAP system in ignition switch ON position (Engine
stopped). When this diagnostic service is performed, EVAP canister vent control valve can
be closed. In the following conditions, this diagnostic service cannot function.
• Low ambient temperature
• Low battery voltage
• Engine running
• Ignition switch OFF
• Low fuel temperature
• Too much pressure is applied to EVAP system
Service $09 (CALIBRATION ID) This diagnostic service enables the off-board test device to request specific vehicle infor-
mation such as Vehicle Identification Number (VIN) and Calibration IDs. BBIA0734E
SEF398S
Page 1981 of 4331

EC
NP
O
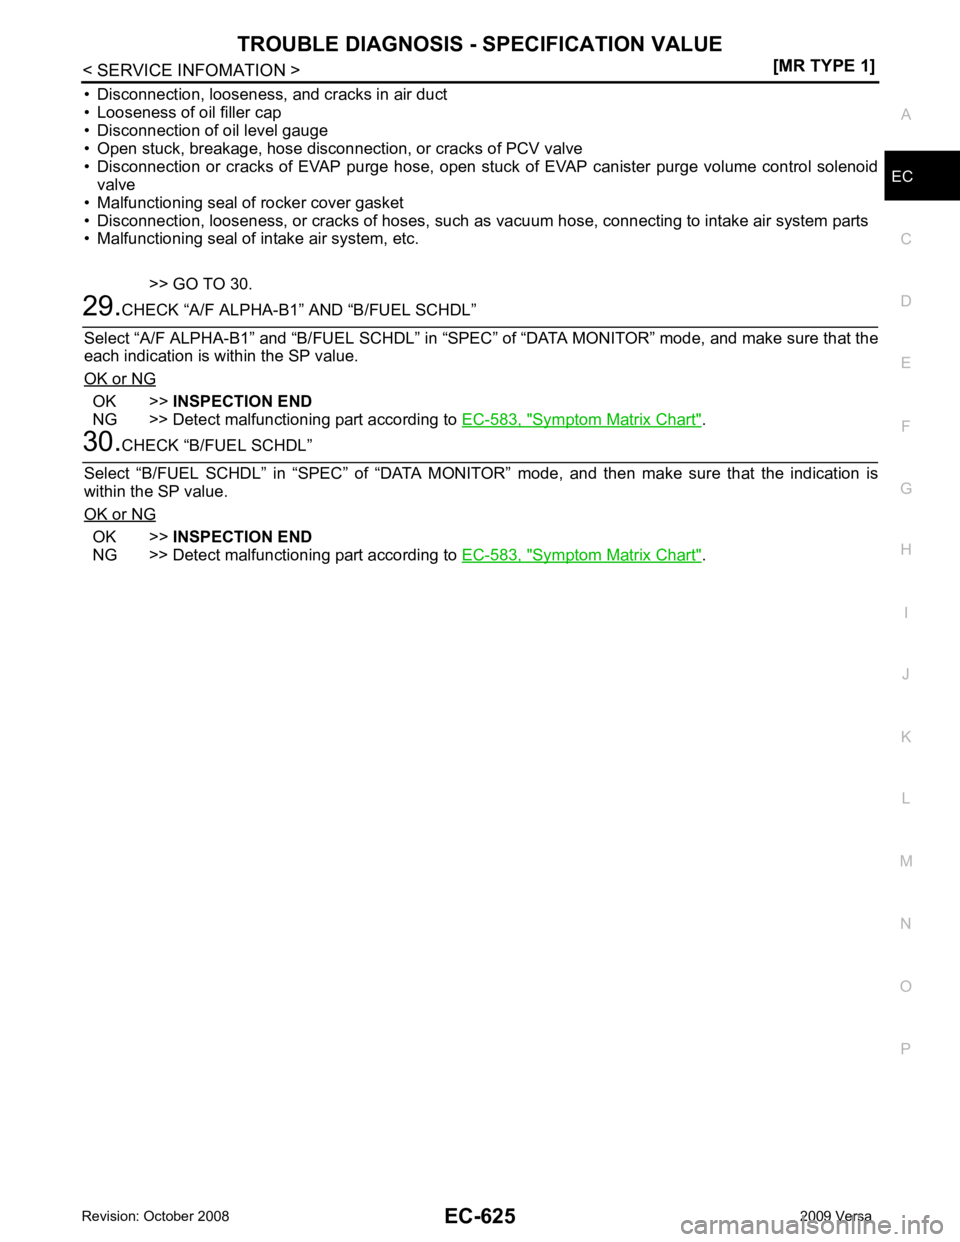
• Disconnection, looseness, and cracks in air duct
• Looseness of oil filler cap
• Disconnection of oil level gauge
• Open stuck, breakage, hose disconnection, or cracks of PCV valve
• Disconnection or cracks of EVAP purge hose, open stuck of EVAP canister purge volume control solenoid
valve
• Malfunctioning seal of rocker cover gasket
• Disconnection, looseness, or cracks of hoses, such as vacuum hose, connecting to intake air system parts
• Malfunctioning seal of intake air system, etc.
>> GO TO 30. OK >>
INSPECTION END
NG >> Detect malfunctioning part according to EC-583, " Symptom Matrix Chart " .
OK >>
INSPECTION END
NG >> Detect malfunctioning part according to EC-583, " Symptom Matrix Chart " .
Page 1988 of 4331
![NISSAN TIIDA 2009 Service Repair Manual EC-632< SERVICE INFOMATION >
[MR TYPE 1]
POWER SUPPLY AND GROUND CIRCUIT
Ground Inspection INFOID:0000000004537071
Ground connections are very important to the proper oper ation of electrica NISSAN TIIDA 2009 Service Repair Manual EC-632< SERVICE INFOMATION >
[MR TYPE 1]
POWER SUPPLY AND GROUND CIRCUIT
Ground Inspection INFOID:0000000004537071
Ground connections are very important to the proper oper ation of electrica](/manual-img/5/57398/w960_57398-1987.png)
EC-632< SERVICE INFOMATION >
[MR TYPE 1]
POWER SUPPLY AND GROUND CIRCUIT
Ground Inspection INFOID:0000000004537071
Ground connections are very important to the proper oper ation of electrical and electronic circuits. Ground
connections are often exposed to moisture, dirt and ot her corrosive elements. The corrosion (rust) can
become an unwanted resistance. This unwanted resistance can change the way a circuit works.
Electronically controlled circuits are very sensitive to proper grounding. A loose or corroded ground can drasti-
cally affect an electronically controlled circuit. A poor or corroded ground can easily affect the circuit. Even
when the ground connection looks clean, there can be a thin film of rust on the surface.
When inspecting a ground connection follow these rules:
• Remove the ground bolt or screw.
• Inspect all mating surfaces for tarnish, dirt, rust, etc.
• Clean as required to assure good contact.
• Reinstall bolt or screw securely.
• Inspect for “add-on” accessories which may be interfering with the ground circuit.
• If several wires are crimped into one ground eyelet termi nal, check for proper crimps. Make sure all of the
wires are clean, securely fastened and providing a good ground path. If multiple wires are cased in one eye-
let make sure no ground wires have excess wire insulation.
For detailed ground distribution information, refer to PG-29, " Ground Distribution " .
PBIB1870E
Page 1989 of 4331

EC
NP
O
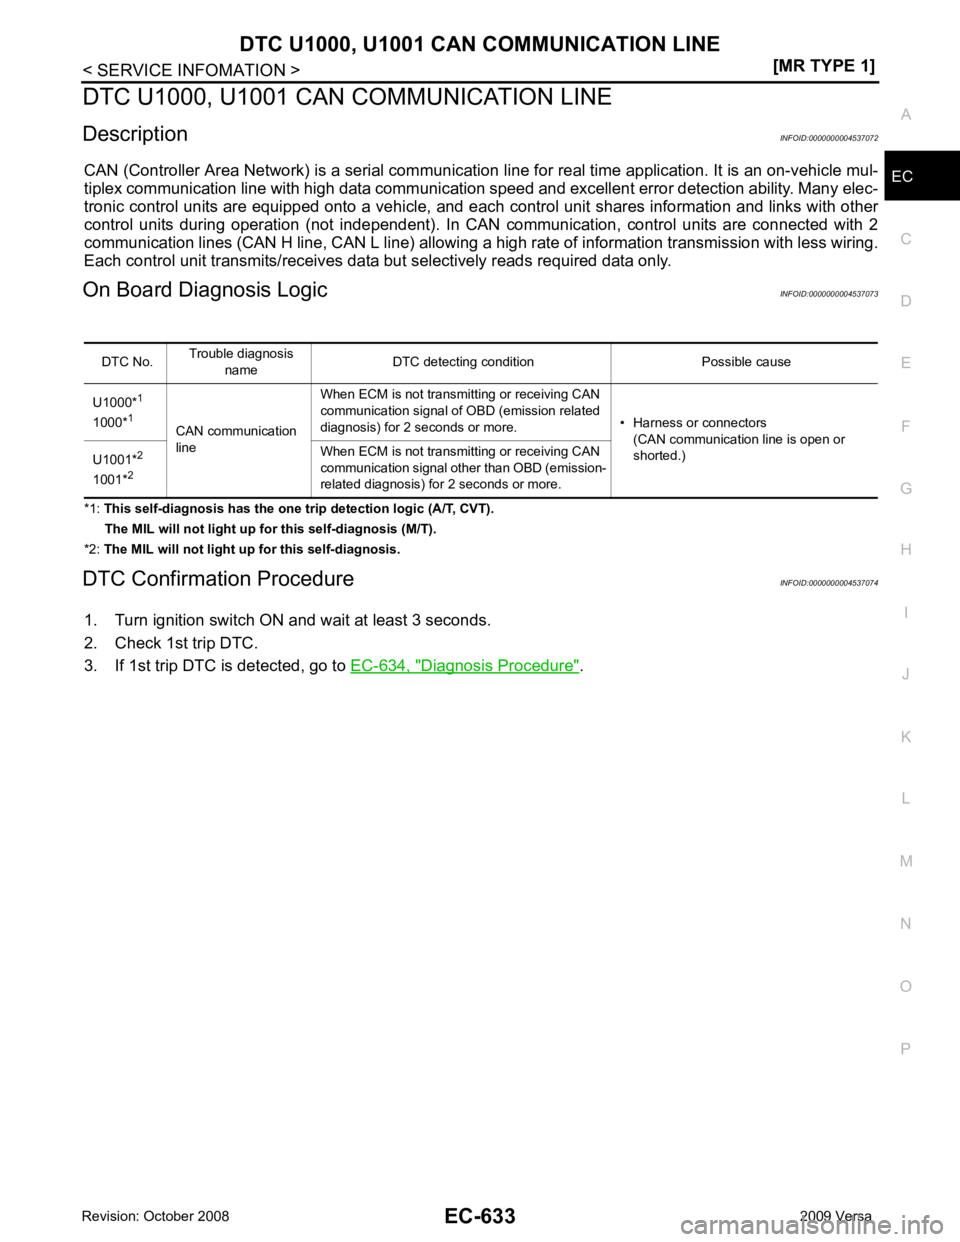
DTC U1000, U1001 CAN
COMMUNICATION LINE
Description INFOID:0000000004537072
CAN (Controller Area Network) is a serial communication li ne for real time application. It is an on-vehicle mul-
tiplex communication line with high data communication speed and excellent error detection ability. Many elec-
tronic control units are equipped onto a vehicle, and each control unit shares information and links with other
control units during operation (not independent). In CAN communication, control units are connected with 2
communication lines (CAN H line, CAN L line) allowing a high rate of information transmission with less wiring.
Each control unit transmits/receives data but selectively reads required data only.
On Board Diagnosis Logic INFOID:0000000004537073
*1: This self-diagnosis has the one trip detection logic (A/T, CVT).
The MIL will not light up for this self-diagnosis (M/T).
*2: The MIL will not light up for this self-diagnosis.
DTC Confirmation Procedure INFOID:0000000004537074
1. Turn ignition switch ON and wait at least 3 seconds.
2. Check 1st trip DTC.
3. If 1st trip DTC is detected, go to EC-634, " Diagnosis Procedure " .
DTC No.
Trouble diagnosis
name DTC detecting condition Possible cause
U1000* 1
1000* 1
CAN communication
line When ECM is not transmitting or receiving CAN
communication signal of OBD (emission related
diagnosis) for 2 seconds or more. • Harness or connectors
(CAN communication line is open or
shorted.)
U1001* 2
1001* 2 When ECM is not transmitting or receiving CAN
communication signal other than OBD (emission-
related diagnosis) for 2 seconds or more.
Page 1991 of 4331

EC
NP
O
DTC U1010 CAN COMMUNICATION
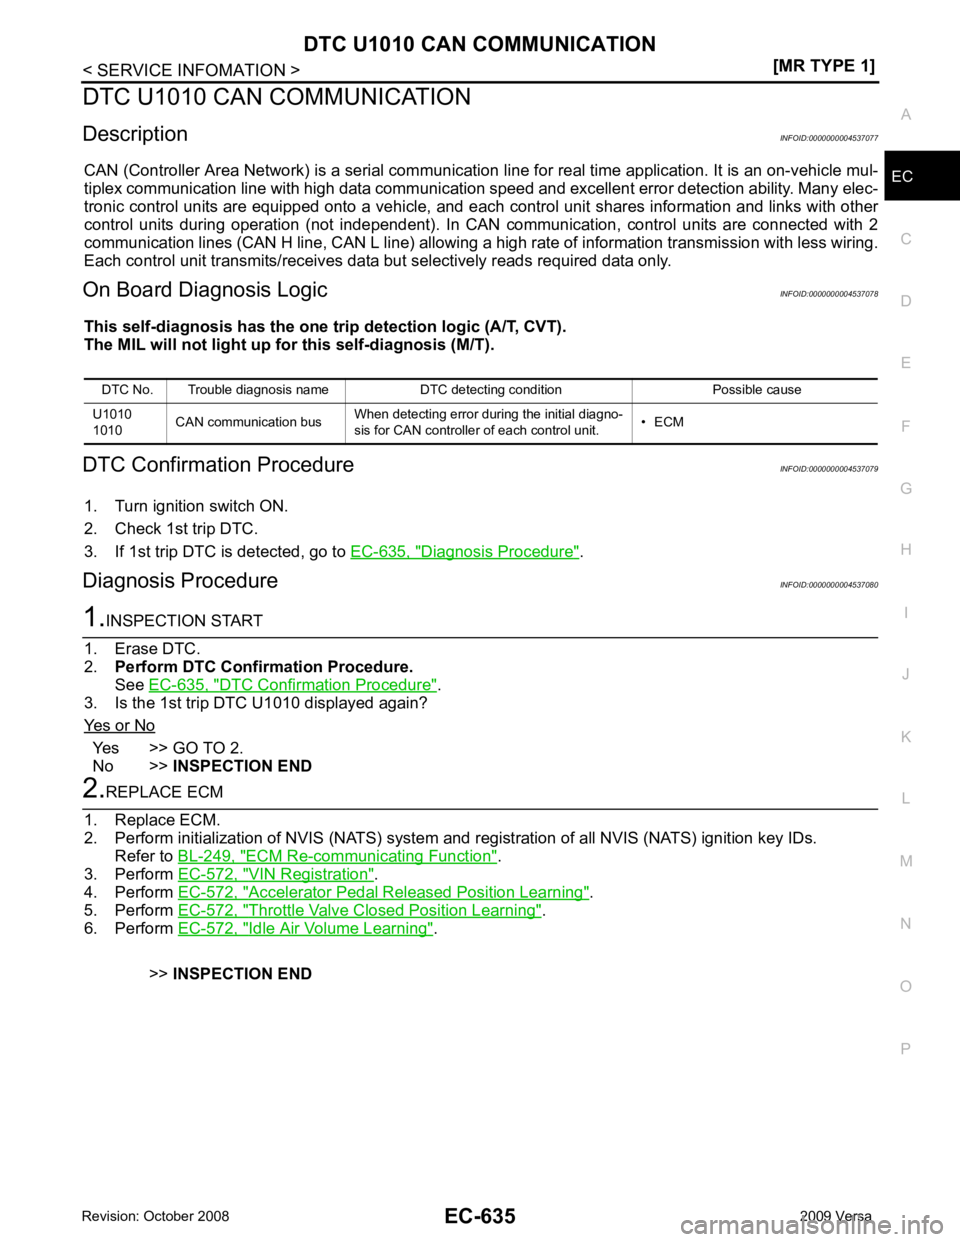
Description INFOID:0000000004537077
CAN (Controller Area Network) is a serial communication li ne for real time application. It is an on-vehicle mul-
tiplex communication line with high data communication speed and excellent error detection ability. Many elec-
tronic control units are equipped onto a vehicle, and each control unit shares information and links with other
control units during operation (not independent). In CAN communication, control units are connected with 2
communication lines (CAN H line, CAN L line) allowing a high rate of information transmission with less wiring.
Each control unit transmits/receives data but selectively reads required data only.
On Board Diagnosis Logic INFOID:0000000004537078
This self-diagnosis has the one trip detection logic (A/T, CVT).
The MIL will not light up for this self-diagnosis (M/T).
DTC Confirmation Procedure INFOID:0000000004537079
1. Turn ignition switch ON.
2. Check 1st trip DTC.
3. If 1st trip DTC is detected, go to EC-635, " Diagnosis Procedure " .
Diagnosis Procedure INFOID:0000000004537080DTC Confirmation Procedure " .
3. Is the 1st trip DTC U1010 displayed again?
Yes or No Yes >> GO TO 2.
No >> INSPECTION END ECM Re-communicating Function " .
3. Perform EC-572, " VIN Registration " .
4. Perform EC-572, " Accelerator Pedal Released Position Learning " .
5. Perform EC-572, " Throttle Valve Closed Position Learning " .
6. Perform EC-572, " Idle Air Volume Learning " .
>> INSPECTION END
DTC No. Trouble diagnosis name DTC detecting condition Possible cause
U1010
1010 CAN communication bus
When detecting error during the initial diagno-
sis for CAN controller of each control unit. • ECM
Page 1993 of 4331

EC
NP
O
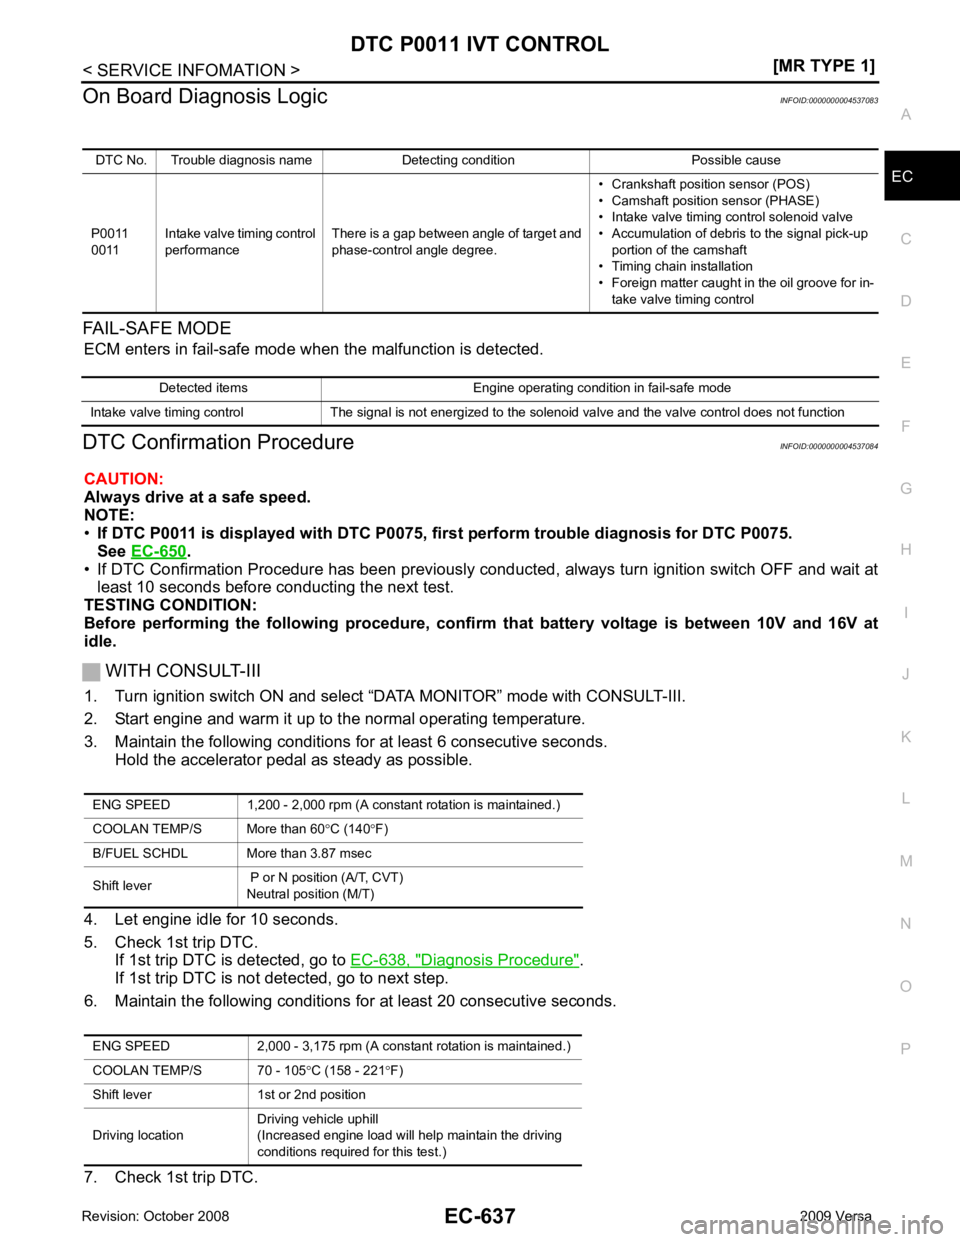
On Board Diagnosis Logic
INFOID:0000000004537083
FAIL-SAFE MODE ECM enters in fail-safe mode w hen the malfunction is detected.
DTC Confirmation Procedure INFOID:0000000004537084
CAUTION:
Always drive at a safe speed.
NOTE:
• If DTC P0011 is displayed with DTC P0075, first perform trouble diagnosis for DTC P0075.
See EC-650 .
• If DTC Confirmation Procedure has been previously conduc ted, always turn ignition switch OFF and wait at
least 10 seconds before conducting the next test.
TESTING CONDITION:
Before performing the following procedure, confi rm that battery voltage is between 10V and 16V at
idle.
WITH CONSULT-III
1. Turn ignition switch ON and select “DATA MONITOR” mode with CONSULT-III.
2. Start engine and warm it up to the normal operating temperature.
3. Maintain the following conditions for at least 6 consecutive seconds. Hold the accelerator pedal as steady as possible.
4. Let engine idle for 10 seconds.
5. Check 1st trip DTC. If 1st trip DTC is detected, go to EC-638, " Diagnosis Procedure " .
If 1st trip DTC is not detected, go to next step.
6. Maintain the following conditions for at least 20 consecutive seconds.
7. Check 1st trip DTC. DTC No. Trouble diagnosis name Detecting condition Possible cause
P0011
0011 Intake valve timing control
performance There is a gap between angle of target and
phase-control angle degree. • Crankshaft position sensor (POS)
• Camshaft position sensor (PHASE)
• Intake valve timing control solenoid valve
• Accumulation of debris to the signal pick-up portion of the camshaft
• Timing chain installation
• Foreign matter caught in the oil groove for in- take valve timing control Detected items Engine operating condition in fail-safe mode
Intake valve timing control The signal is not energized to the solenoid valve and the valve control does not function ENG SPEED 1,200 - 2,000 rpm (A constant rotation is maintained.)
COOLAN TEMP/S More than 60 °C (140 °F)
B/FUEL SCHDL More than 3.87 msec
Shift lever P or N position (A/T, CVT)
Neutral position (M/T)
ENG SPEED 2,000 - 3,175 rpm (A constant rotation is maintained.)
COOLAN TEMP/S 70 - 105 °C (158 - 221 °F)
Shift lever 1st or 2nd position
Driving location Driving vehicle uphill
(Increased engine load will help maintain the driving
conditions required for this test.)
Page 1994 of 4331
![NISSAN TIIDA 2009 Service Repair Manual EC-638< SERVICE INFOMATION >
[MR TYPE 1]
DTC P0011 IVT CONTROL
If 1st trip DTC is detected, go to EC-638, " Diagnosis Procedure " .
WITH GST
Follow the procedure “WITH CONSULT-III” above.
Diagno NISSAN TIIDA 2009 Service Repair Manual EC-638< SERVICE INFOMATION >
[MR TYPE 1]
DTC P0011 IVT CONTROL
If 1st trip DTC is detected, go to EC-638, " Diagnosis Procedure " .
WITH GST
Follow the procedure “WITH CONSULT-III” above.
Diagno](/manual-img/5/57398/w960_57398-1993.png)
EC-638< SERVICE INFOMATION >
[MR TYPE 1]
DTC P0011 IVT CONTROL
If 1st trip DTC is detected, go to EC-638, " Diagnosis Procedure " .
WITH GST
Follow the procedure “WITH CONSULT-III” above.
Diagnosis Procedure INFOID:00000000045370851.
CHECK OIL PRESSURE WARNING LAMP
1. Start engine.
2. Check oil pressure warning lamp and confirm it is not illumi-
nated.
OK or NG OK >> GO TO 2.
NG >> Go to LU-16, " Inspection " .
2.
CHECK INTAKE VALVE TIMING CONTROL SOLENOID VALVE
Refer to EC-639, " Component Inspection " .
OK or NG OK >> GO TO 3.
NG >> Replace intake valve timing control solenoid valve. 3.
CHECK CRANKSHAFT POSI TION SENSOR (POS)
Refer to EC-780, " Component Inspection " .
OK or NG OK >> GO TO 4.
NG >> Replace crankshaft position sensor (POS). 4.
CHECK CAMSHAFT POSITION SENSOR (PHASE)
Refer to EC-785, " Component Inspection " .
OK or NG OK >> GO TO 5.
NG >> Replace camshaft position sensor (PHASE). 5.
CHECK CAMSHAFT (INTAKE)
Check the following.
• Accumulation of debris to the si gnal plate of camshaft (1) rear end
• Chipping signal plate of camshaft rear end
OK or NG OK >> GO TO 6.
NG >> Remove debris and clean the signal plate of camshaft rear end or replace camshaft. 6.
CHECK TIMING CHAIN INSTALLATION
Check service records for any recent repairs that may cause timing chain misaligned.
Are there any service records that may cause timing chain misaligned?
Yes or No Yes >> Check timing chain installation. Refer to
EM-160 .
No >> GO TO 7. PBIA8559J
PBIA9557J