2009 NISSAN QASHQAI indicator
[x] Cancel search: indicatorPage 77 of 297
Downloaded from www.Manualslib.com manuals search engine NISSAN recommends consulting local regulations
on the use of lights.To clean the headlights, pull the windscreen washer
switch towards you while the headlight switch is in
the
position and the ignition switch is in the ON
position.
NOTE
The headlight cleaner will automatically operate
every fifth operation of the wiper and washer
switch.
See “Wiper and washer switch” earlier in this sec-
tion
CAUTION
Do not operate the cleaner continuously for
more than 15 seconds.
Do not operate the cleaner if the washer fluid
reservoir is empty or frozen.
See “Window washer fluid/headlight cleaner fluid
(where fitted)” in the “8. Maintenance and
do-it-yourself” section for details on refilling the res-
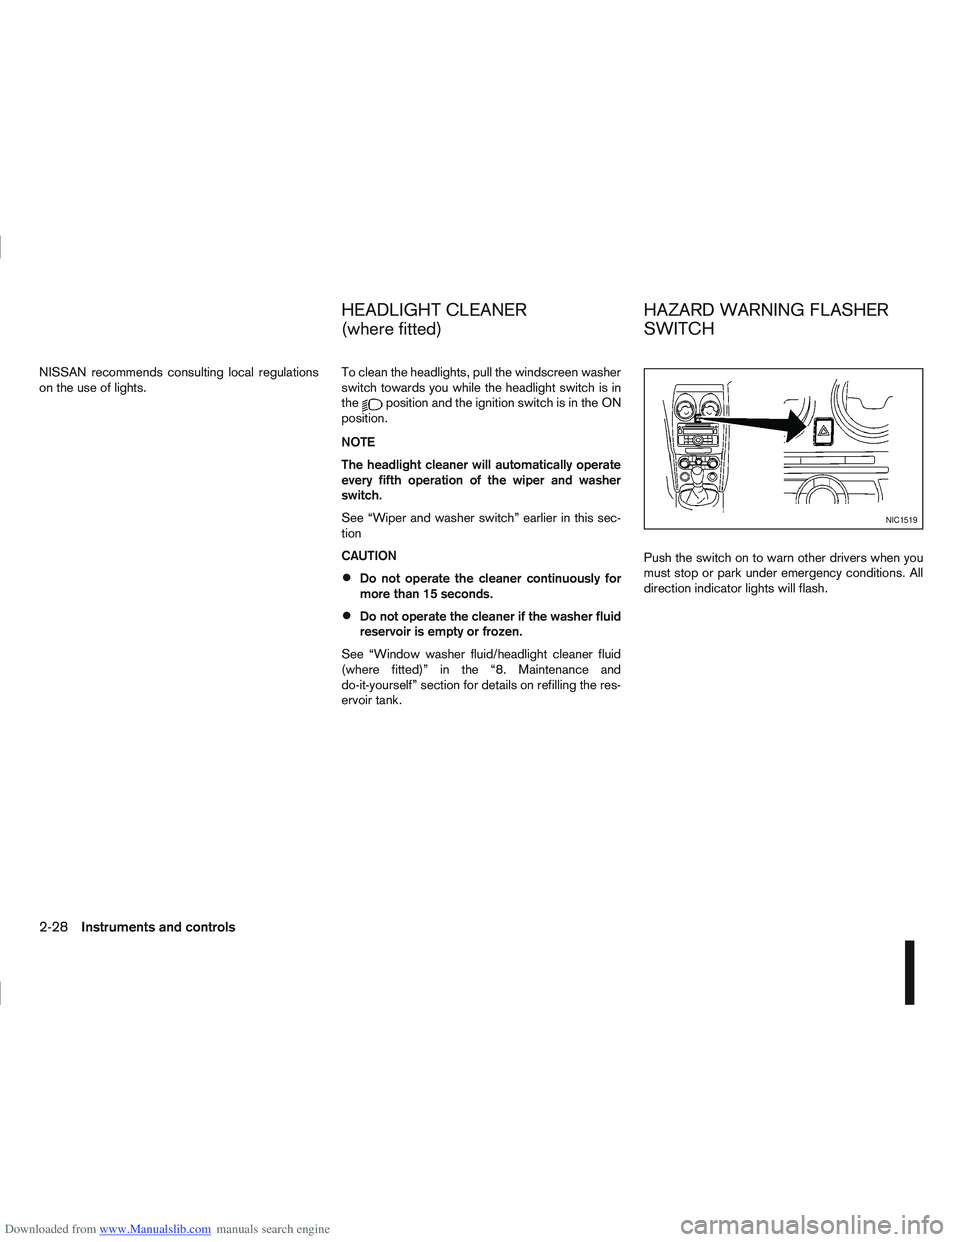
ervoir tank. Push the switch on to warn other drivers when you
must stop or park under emergency conditions. All
direction indicator lights will flash.
NIC1519
HEADLIGHT CLEANER
(where fitted)
HAZARD WARNING FLASHER
SWITCH
2-28Instruments and controls
Page 91 of 297
Downloaded from www.Manualslib.com manuals search engine use of additional remote controllers, contact a
NISSAN dealer or qualified workshop.
The integrated keyfob will not function under the fol-
lowing conditions:
When the distance between the integrated key-
fob and vehicle is more than approximately 5 m
(15 ft).
When the integrated keyfob battery is
discharged.
When the key is in the ignition switch.
All doors can be locked or unlocked from the out-
side by pressing the “LOCK”
or “UNLOCK”button on the integrated keyfob.
For Super Lock system models only (RHD mod-
els):
When the vehicle is occupied, never lock the
doors with the integrated keyfob. Doing so will
trap the occupants, since the Super Lock system
prevents the doors from being opened from the
inside.
WARNING
Only operate the integrated keyfob lock button in
full and clear view of the vehicle to prevent any-
body being trapped inside the vehicle.
CAUTION
When locking the doors using the integrated
keyfob, be sure not to leave the key in the
vehicle.
Always remove the ignition key or Intelligent
Key, close all windows before operating the
keyfob door lock system.
Ensure that the driver’s door is securely
closed before operating the integrated keyfob
door lock system for correct operation of the
system.
Do not allow the integrated keyfob, which
contains electrical components, to come into
contact with water or salt water. This could
affect the system function.
Do not drop the integrated keyfob.
Do not strike the integrated keyfob sharply
against another object.
Do not place the integrated keyfob for an ex-
tended period in an area where temperatures
exceed 60°C (140°F).
If a integrated keyfob is lost or stolen, NISSAN rec-
ommends erasing the ID code of that integrated
keyfob from the vehicle. This may prevent the unau-
thorised use of the integrated keyfob to unlock the
vehicle. For information regarding the erasing pro-
cedure, contact a NISSAN dealer or qualified work-
shop.
For information regarding the replacement of a bat-
tery, see “Battery” in the “8. Maintenance and
do-it-yourself” section.
SWITCHING FROM CONVENIENCE
MODE TO ANTI-HIJACK MODE
Selective unlock or “Anti-hijack” mode allows the
remote unlocking of only the driver’s door to prevent
an attacker from entering the vehicle via an unlocked
passenger door.
As default, the unlock mode will be set to “Conve-
nience” mode (all doors will unlock). Follow the in-
structions below to switch between convenience
mode and anti-hijack mode.
jA Key with integrated keyfob (from
outside the vehicle)
1. Turn the ignition switch to the “OFF” position.
2. Press and hold both the “LOCK”
and “UN-
LOCK”buttons for 5 seconds.
Setting anti-hijack mode:
– The direction indicators flash once.
Setting convenience mode:
– The direction indicators flash three times.
jB Intelligent Key
1. Turn the ignition switch from ON to LOCK and
exit the vehicle.
2. From outside the vehicle, lock the vehicle using the integrated keyfob “LOCK” button
.
3. Press and hold both the “LOCK”
and “UN-
LOCK”buttons for 10 seconds.
4. Within 3 seconds, press and hold the driver’s
3-4Pre-driving checks and adjustments
Page 92 of 297
Downloaded from www.Manualslib.com manuals search engine door outside lock switch until the direction indi-
cators flash to confirm the setting mode. Then
release the driver’s door outside lock switch.
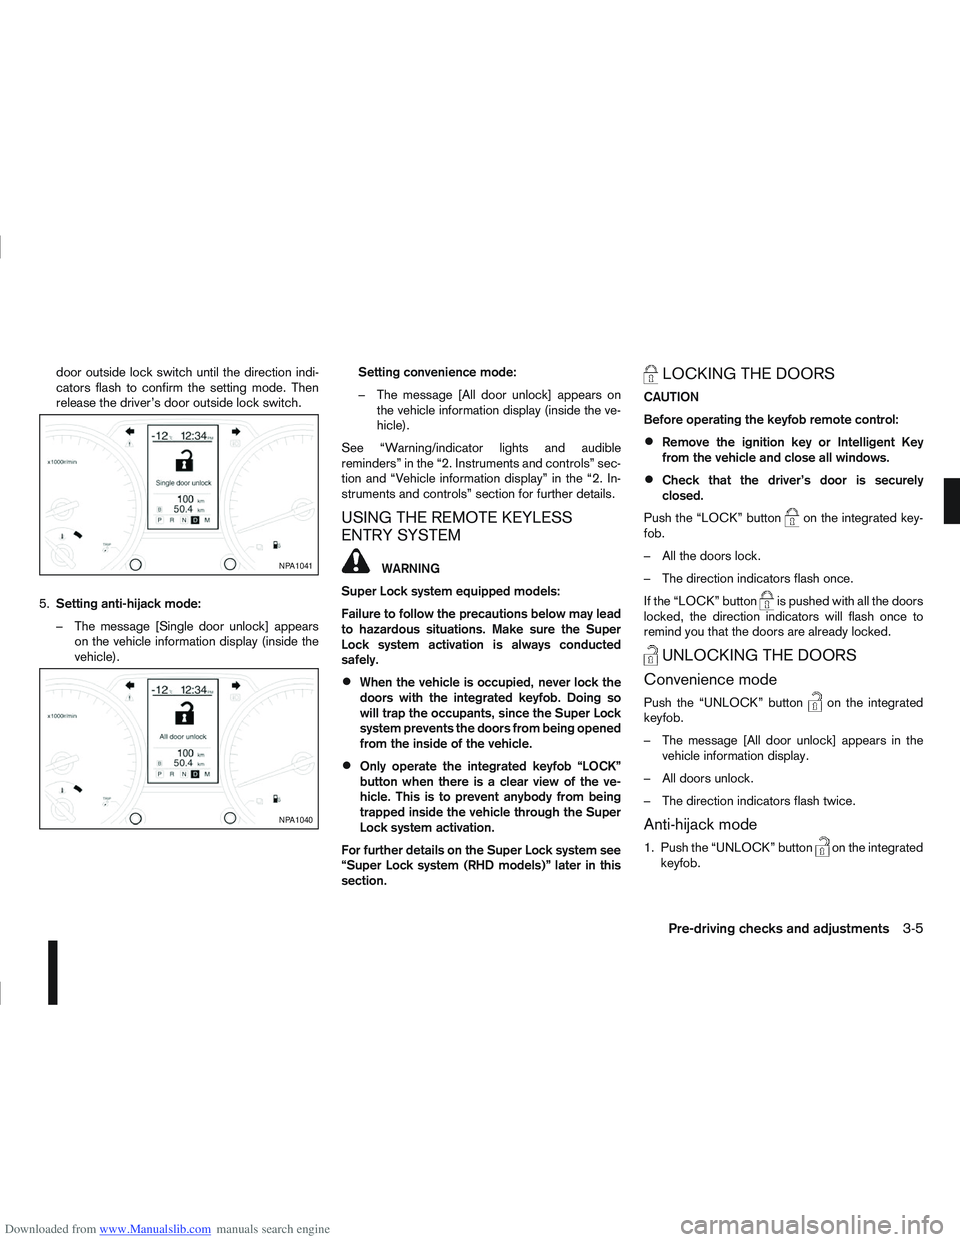
5. Setting anti-hijack mode:
– The message [Single door unlock] appears on the vehicle information display (inside the
vehicle). Setting convenience mode:
– The message [All door unlock] appears on
the vehicle information display (inside the ve-
hicle).
See “Warning/indicator lights and audible
reminders” in the “2. Instruments and controls” sec-
tion and “Vehicle information display” in the “2. In-
struments and controls” section for further details.
USING THE REMOTE KEYLESS
ENTRY SYSTEM
WARNING
Super Lock system equipped models:
Failure to follow the precautions below may lead
to hazardous situations. Make sure the Super
Lock system activation is always conducted
safely.
When the vehicle is occupied, never lock the
doors with the integrated keyfob. Doing so
will trap the occupants, since the Super Lock
system prevents the doors from being opened
from the inside of the vehicle.
Only operate the integrated keyfob “LOCK”
button when there is a clear view of the ve-
hicle. This is to prevent anybody from being
trapped inside the vehicle through the Super
Lock system activation.
For further details on the Super Lock system see
“Super Lock system (RHD models)” later in this
section.
LOCKING THE DOORS
CAUTION
Before operating the keyfob remote control:
Remove the ignition key or Intelligent Key
from the vehicle and close all windows.
Check that the driver’s door is securely
closed.
Push the “LOCK” button
on the integrated key-
fob.
– All the doors lock.
– The direction indicators flash once.
If the “LOCK” button
is pushed with all the doors
locked, the direction indicators will flash once to
remind you that the doors are already locked.
UNLOCKING THE DOORS
Convenience mode
Push the “UNLOCK” buttonon the integrated
keyfob.
– The message [All door unlock] appears in the vehicle information display.
– All doors unlock.
– The direction indicators flash twice.
Anti-hijack mode
1. Push the “UNLOCK” buttonon the integrated
keyfob.
NPA1041
NPA1040
Pre-driving checks and adjustments3-5
Page 93 of 297
![NISSAN QASHQAI 2009 Owners Manual Downloaded from www.Manualslib.com manuals search engine – The message [Single door unlock] appears inthe vehicle information display.
– Only the driver’s door unlocks.
– The direction indicat](/manual-img/5/56767/w960_56767-92.png "NISSAN QASHQAI 2009 Owners Manual Downloaded from www.Manualslib.com manuals search engine – The message [Single door unlock] appears inthe vehicle information display.
– Only the driver’s door unlocks.
– The direction indicat")
Downloaded from www.Manualslib.com manuals search engine – The message [Single door unlock] appears inthe vehicle information display.
– Only the driver’s door unlocks.
– The direction indicators flash twice, quickly.
2. Push the “UNLOCK” button
on the integrated
keyfob again.
– All doors unlock.
– The direction indicators flash twice.
Auto-relock:
An auto-relock function will operate 2 minutes after
a full or partial unlock, if no further user action is
taken. The auto-relock will be cancelled if any door
is opened or the key is inserted into the ignition.
KEYFOB OPERATION FAILURE
The keyfob may not work properly if:
The keyfob battery is low. See “Integrated key-
fob/Intelligent Key battery replacement” in the
“8. Maintenance and do-it-yourself” section for
keyfob battery replacement instructions and the
required battery type.
The locking/unlocking system has been used
continuously. An anti lock-abuse system pre-
vents the lock motors from overheating and dis-
ables the keyfob locking operation for a short
period of time if the system is used continuously.
The door handle is being pulled while the
keyfob is being operated.
The vehicle’s battery is dead. NOTE
See Intelligent Key detection warning, Intelligent
Key low battery warning or Intelligent Key system
fault warning in “Vehicle information display” ear-
lier in this section for more information.
The Intelligent Key system is a convenient keyless
entry system that allows you to operate your vehicle
without using an actual key.
WARNING
Radio waves could adversely affect electric medi-
cal equipment. Those who use a pacemaker
should contact the electric medical equipment
manufacturer for the possible influences before
use.
INTELLIGENT KEY OPERATING
RANGE
The Intelligent Key functions can only be used when
the Intelligent Key is within the specified operating
range from the request switch
j1.
When the Intelligent Key battery is discharged or
strong radio waves are present near the operating
location, the Intelligent Key system’s operating
range becomes narrower, and the Intelligent Key
may not function properly.
NPA1042NPA1018
INTELLIGENT KEY SYSTEM
(where fitted)
3-6Pre-driving checks and adjustments
Page 95 of 297
Downloaded from www.Manualslib.com manuals search engine Locking the doors
1. Make sure you have the Intelligent Key with youwhen exiting the vehicle.
2. Close all doors.
3. Press any of the outside lock switches (front doors or back door).
– All the doors lock.
– The direction indicators flash once.
– Super Lock system equipped models: The Su-
per Lock system will be activated
CAUTION
Do not leave the duplicate Intelligent Key inside
the vehicle as the locking procedure logic will
not work.
NOTE
If the Intelligent Key is left in the vehicle and the
door/back door outside lock switch is pressed, a
buzzer will sound, warning the owner that the
Intelligent Key has been left inside the vehicle.
Unlocking the doors
For details on setting the unlock mode (anti-hijack or
convenience mode) see “Switching from Conve-
nience mode to Anti-hijack mode” earlier in this sec-
tion. Convenience mode:
Push the door/back door outside lock switch.
– All doors unlock.
– The direction indicators flash twice.
– The message [All door unlock] appears in the
vehicle information display.
Anti-hijack mode:
1. Push the door/back door outside lock switch.
– The corresponding door unlocks
– The direction indicators flash twice quickly
– The message [Single door unlock] appears in the vehicle information display.
2. Push the door/back door outside lock switch again within 5 seconds.
– All doors unlock.
– The direction indicators flash twice, slowly.
NOTE
External interference may impair the Intelligent
Key’s operation. In this case, use the emergency
key located in the Intelligent Key integrated key-
fob. See “Door locks” later in this section for fur-
ther details.
CAUTION
Make sure the Intelligent Key battery is in good
condition. Note that battery life may vary de-
pending on condition, amount of use, ambi-
ent temperature, etc.
The Intelligent Key contains a miniature radio
transmitter that may be affected when placed
near metal objects.
Keep the Intelligent Key away from mobile
phones, laptop computers and other metal
objects or electronics.
STARTING THE ENGINE WITH THE
INTELLIGENT KEY
See “Ignition knob (where fitted)” in the “5. Starting
and driving” section.
CAUTION
Make sure you carry the Intelligent Key with
you when starting and driving the vehicle.
If the Intelligent Key is too far away from the
passenger compartment, the vehicle may not
start. See “Intelligent Key operating range” in
the “3. Pre-driving checks and adjustments”
section
3-8Pre-driving checks and adjustments
Page 100 of 297

Downloaded from www.Manualslib.com manuals search engine ALARM SYSTEM (where fitted)
The alarm system provides visual and audible alarm
signals if parts of the vehicle are disturbed.
How to arm the alarm system
1. Close all doors, windows, back door and bon-net.
2. Lock the vehicle using the keyfob (lock button), for additional information, see “Integrated key-
fob/remote control system” in the “3. Pre-driving
checks and adjustments” section.
NOTE
If the vehicle is not fully locked, a door/bonnet/
back door is open, or the ignition switch is in the
ON position (after arming the system), the buzzer
will sound. After correctly closing, the buzzer will
stop.
Alarm system operation
The system will give the following alarm:
The siren sounds intermittently and all direction
indicators will flash.
The alarm automatically turns off after 28 sec-
onds.
The alarm is activated when:
The volumetric sensing system (ultrasonic sen-
sors) is triggered.
Any door/the back door is opened.
The bonnet is opened.
The ignition circuit is turned on without the own-
er’s key being used.
The alarm system will stop when:
The vehicle is unlocked using the keyfob unlock
button.
The ignition switch or ignition knob is turned to
the ON position with a registered NATS key.
If the system does not operate as described
above, have it checked by your NISSAN dealer or
qualified workshop.
Ultrasonic sensors (where fitted)
The ultrasonic sensors (volumetric sensing) detect
movements in the passenger’s compartment. When
the alarm system is set to the armed position, it will
automatically switch on the ultrasonic sensors.
It is possible to exclude the ultrasonic sensors (e.g.
when leaving pets inside the car).
To exclude the ultrasonic sensors:
1. Turn the ignition switch 3 times within 7 seconds from the “OFF” to the ON position.
2. Close the door(s)/bonnet/back door and press the lock button
on the keyfob to lock all doors/
back door.
The ultrasonic sensors are now excluded from the
alarm system. All other functions of the system re-
main activated until the alarm system is disarmed
again.
NISSAN ANTI-THEFT SYSTEM (NATS)
The NISSAN Anti-Theft System (NATS)* will not
allow the engine to start without the use of the reg-
istered NATS key.
* Immobilizer
If the engine fails to start using the registered NATS
key, it may be due to interference from another
NATS key, an automated toll road device or an auto-
mated payment device on the key ring. Restart the
engine using the following procedure:
1. Leave the ignition switch in the ON position for approximately 5 seconds.
2. Turn the ignition switch to the “OFF” or LOCK position and wait approximately 5 seconds.
3. Repeat steps 1 and 2.
4. Restart the engine while holding the device (which may have caused the interference) sepa-
rated from the registered NATS key or NATS
Intelligent Key (where fitted).
If this procedure allows the engine to start,
NISSAN recommends placing the registered
NATS key or NATS Intelligent Key (where fitted)
on a separate key-ring to avoid interference from
other devices.
SECURITY SYSTEM
Pre-driving checks and adjustments3-13
Page 101 of 297
Downloaded from www.Manualslib.com manuals search engine NATS security warning/indicator light
(where fitted)
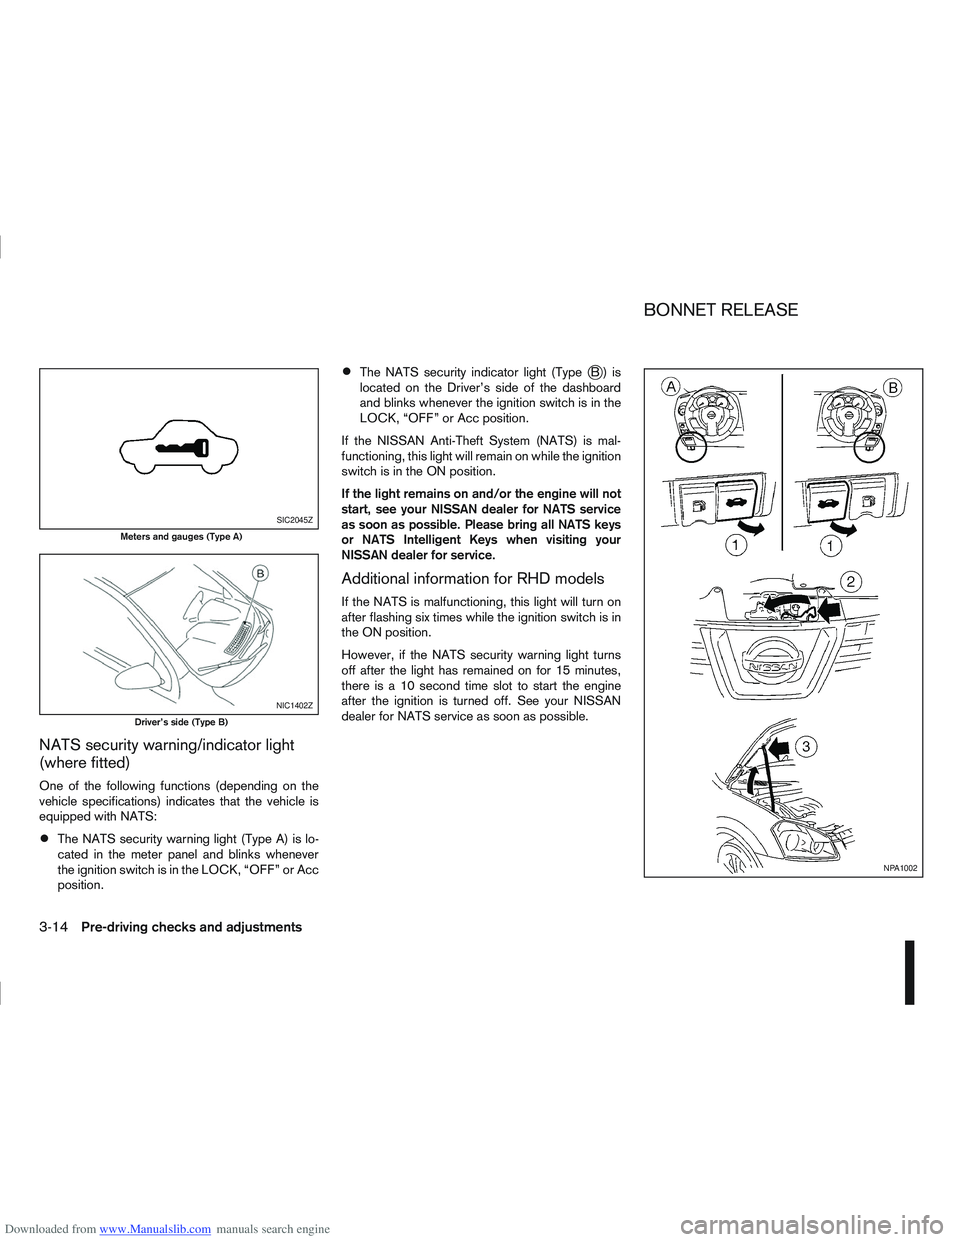
One of the following functions (depending on the
vehicle specifications) indicates that the vehicle is
equipped with NATS:
The NATS security warning light (Type A) is lo-
cated in the meter panel and blinks whenever
the ignition switch is in the LOCK, “OFF” or Acc
position.
The NATS security indicator light (TypejB) is
located on the Driver’s side of the dashboard
and blinks whenever the ignition switch is in the
LOCK, “OFF” or Acc position.
If the NISSAN Anti-Theft System (NATS) is mal-
functioning, this light will remain on while the ignition
switch is in the ON position.
If the light remains on and/or the engine will not
start, see your NISSAN dealer for NATS service
as soon as possible. Please bring all NATS keys
or NATS Intelligent Keys when visiting your
NISSAN dealer for service.
Additional information for RHD models
If the NATS is malfunctioning, this light will turn on
after flashing six times while the ignition switch is in
the ON position.
However, if the NATS security warning light turns
off after the light has remained on for 15 minutes,
there is a 10 second time slot to start the engine
after the ignition is turned off. See your NISSAN
dealer for NATS service as soon as possible.
SIC2045Z
Meters and gauges (Type A)
NIC1402Z
Driver’s side (Type B)
NPA1002
BONNET RELEASE
3-14Pre-driving checks and adjustments
Page 103 of 297
Downloaded from www.Manualslib.com manuals search engine the fuel system and emission control system.
An incorrect cap can result in a serious mal-
function and possible injury.
CAUTION
If fuel is spilled on the vehicle body, flush it away
with water to avoid paint damage.
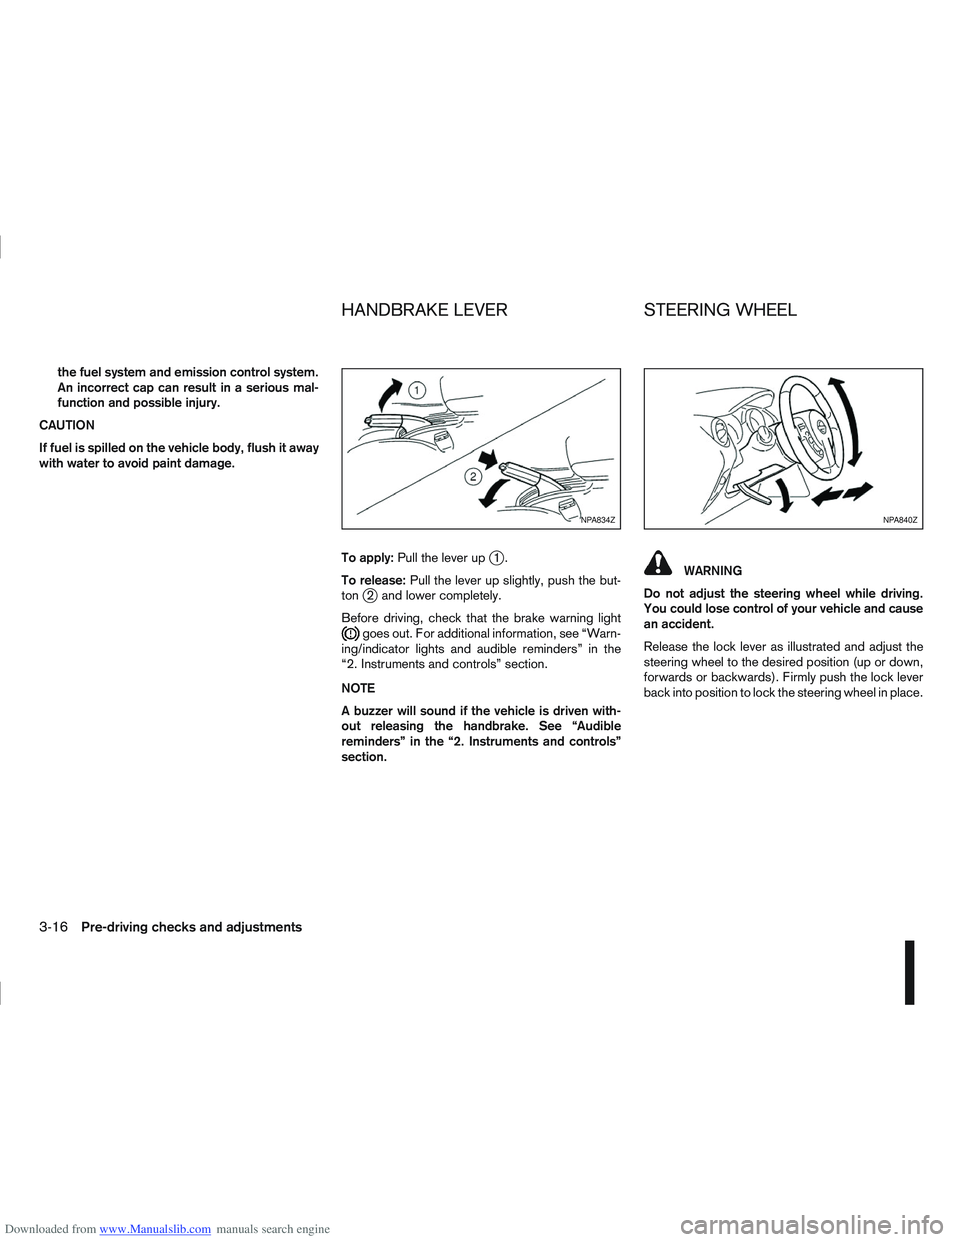
To apply:Pull the lever up
j1.
To release: Pull the lever up slightly, push the but-
ton
j2 and lower completely.
Before driving, check that the brake warning light
goes out. For additional information, see “Warn-
ing/indicator lights and audible reminders” in the
“2. Instruments and controls” section.
NOTE
A buzzer will sound if the vehicle is driven with-
out releasing the handbrake. See “Audible
reminders” in the “2. Instruments and controls”
section.
WARNING
Do not adjust the steering wheel while driving.
You could lose control of your vehicle and cause
an accident.
Release the lock lever as illustrated and adjust the
steering wheel to the desired position (up or down,
forwards or backwards). Firmly push the lock lever
back into position to lock the steering wheel in place.
NPA834ZNPA840Z
HANDBRAKE LEVER STEERING WHEEL
3-16Pre-driving checks and adjustments