2009 NISSAN MURANO mirror controls
[x] Cancel search: mirror controlsPage 70 of 443

Black plate (7,1)
2 Instruments and controls
Model "Z51-D" EDITED: 2007/ 10/ 2
Instrument panel................................................ 2-2
Meters and gauges............................................. 2-4
Speedometer and odometer............................. 2-5
Tachometer................................................... 2-6
Engine coolant temperature gauge..................... 2-6
Fuel gauge................................................... 2-7
Compass (if so equipped).................................... 2-7
Zone variation change procedure....................... 2-9
Warning/indicator lights and audible reminders.......2-10
Checking bulbs...........................................2-10
Warning lights.............................................2-10
Indicator lights.............................................2-15
Audible reminders........................................2-17
Dot matrix liquid crystal display............................2-17
Indicators for operation..................................2-18
Indicators for maintenance..............................2-20
Trip computer..............................................2-21
Security systems..............................................2-25
Vehicle security system (if so equipped)............2-25
NISSAN Vehicle Immobilizer System.................2-27
Windshield wiper and washer switch....................2-28
Rain-sensing auto wiper system
(if so equipped)..........................................2-29
Rear window wiper and washer switch..................2-30
Rear window and outside mirror defroster switch.....2-31Headlight and turn signal switch..........................2-32
Xenon headlights (if so equipped)....................2-32
Headlight switch..........................................2-32
Turn signal switch........................................2-36
Fog light switch (if so equipped)......................2-36
Hazard warning flasher switch.............................2-36
Horn.............................................................2-37
Heated seats (if so equipped).............................2-37
Clock............................................................2-38
Models without color display...........................2-38
Models with color display...............................2-39
Vehicle Dynamic Control (VDC) OFF switch...........2-39
Power outlet...................................................2-39
Cigarette lighter and ashtray (if so equipped)..........2-41
Storage.........................................................2-41
Cup holders................................................2-41
Sunglasses holder........................................2-42
Glove box..................................................2-43
Console box...............................................2-44
Storage box (if so equipped)..........................2-45
Cargo floor box...........................................2-45
Luggage side box.........................................2-46
Cargo cover (if so equipped)..........................2-46
Luggage hooks (if so equipped)......................2-47
Roof rack (if so equipped)..............................2-48
Page 73 of 443

Black plate (71,1)
Model "Z51-D" EDITED: 2007/ 10/ 2
29. All-Wheel Drive (AWD) LOCK switch*
30. Rear window and outside mirror* defroster switch
31. Heater/air conditioner control or Audio system
32. Glove box
*: if so equipped
**: Refer to the separate Navigation System Owner’s
Manual (if so equipped) .
Instruments and controls2-3
Page 79 of 443

Black plate (77,1)
Model "Z51-D" EDITED: 2007/ 10/ 2
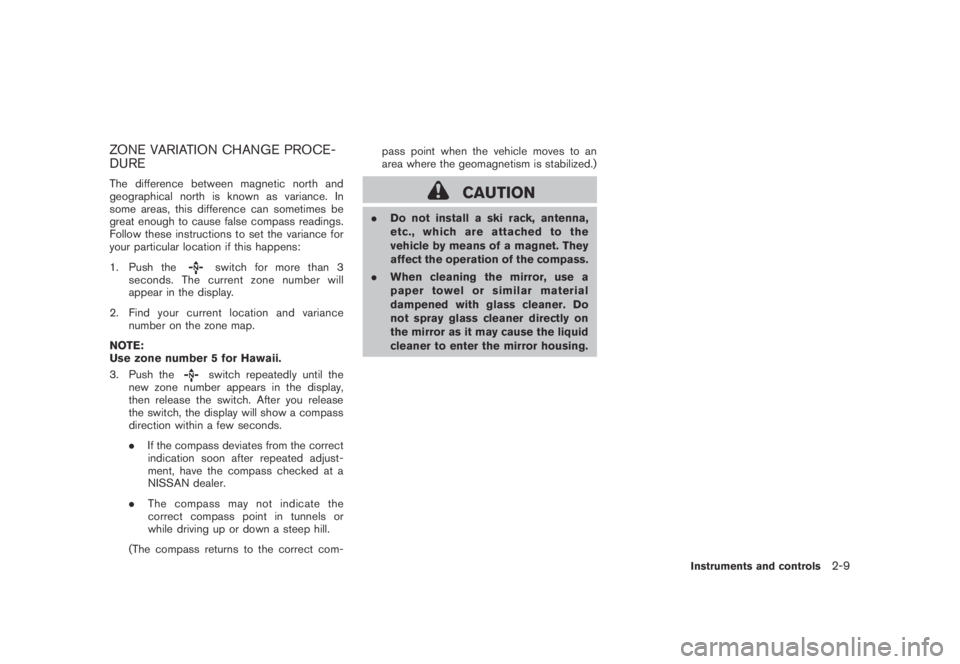
ZONE VARIATION CHANGE PROCE-
DURE
The difference between magnetic north and
geographical north is known as variance. In
some areas, this difference can sometimes be
great enough to cause false compass readings.
Follow these instructions to set the variance for
your particular location if this happens:
1. Push the
switch for more than 3
seconds. The current zone number will
appear in the display.
2. Find your current location and variance
number on the zone map.
NOTE:
Use zone number 5 for Hawaii.
3. Push the
switch repeatedly until the
new zone number appears in the display,
then release the switch. After you release
the switch, the display will show a compass
direction within a few seconds.
.If the compass deviates from the correct
indication soon after repeated adjust-
ment, have the compass checked at a
NISSAN dealer.
.The compass may not indicate the
correct compass point in tunnels or
while driving up or down a steep hill.
(The compass returns to the correct com-pass point when the vehicle moves to an
area where the geomagnetism is stabilized.)
CAUTION
.Do not install a ski rack, antenna,
etc., which are attached to the
vehicle by means of a magnet. They
affect the operation of the compass.
.When cleaning the mirror, use a
paper towel or similar material
dampened with glass cleaner. Do
not spray glass cleaner directly on
the mirror as it may cause the liquid
cleaner to enter the mirror housing.
Instruments and controls2-9
Page 101 of 443

Black plate (99,1)
Model "Z51-D" EDITED: 2007/ 10/ 2
SIC3666
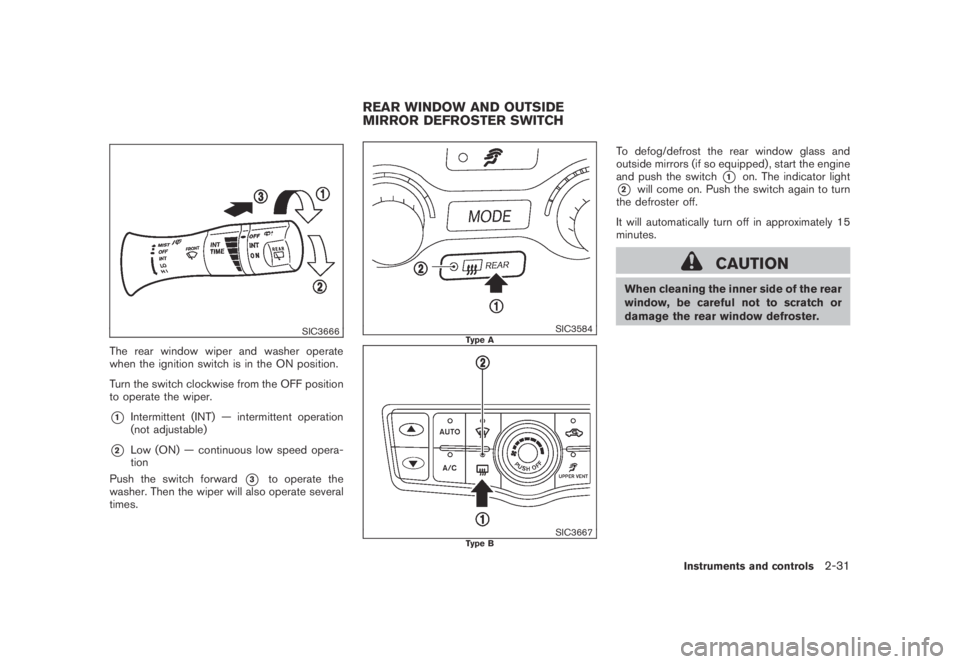
The rear window wiper and washer operate
when the ignition switch is in the ON position.
Turn the switch clockwise from the OFF position
to operate the wiper.
*1Intermittent (INT) — intermittent operation
(not adjustable)
*2Low (ON) — continuous low speed opera-
tion
Push the switch forward
*3to operate the
washer. Then the wiper will also operate several
times.
SIC3584Type A
SIC3667Type B
To defog/defrost the rear window glass and
outside mirrors (if so equipped) , start the engine
and push the switch
*1on. The indicator light
*2will come on. Push the switch again to turn
the defroster off.
It will automatically turn off in approximately 15
minutes.
CAUTION
When cleaning the inner side of the rear
window, be careful not to scratch or
damage the rear window defroster.
REAR WINDOW AND OUTSIDE
MIRROR DEFROSTER SWITCH
Instruments and controls2-31
Page 104 of 443

Black plate (102,1)
Model "Z51-D" EDITED: 2007/ 10/ 2
SIC3670
Headlight beam select
*1To select the low beam, put the lever in the
neutral position as shown.
*2To select the high beam, push the lever
forward while the switch is in the
position. Pull it back to select the low beam.
*3Pulling the lever toward you will flash the
headlight high beam even when the head-
light switch is in the OFF position.
Battery saver system
A chime will sound when the driver side door is
opened with the light switch in theorposition and the ignition switch in the ACC,
OFF or LOCK position.When the headlight switch is in the
orposition while the ignition switch is in the ON
position, the lights will automatically turn off 5
minutesaftertheignitionswitchhasbeen
pushed to the OFF position.
When the headlight switch remains in the
orposition after the lights automatically
turn off, the lights will turn on when the ignition
switch is pushed to the ON position.
CAUTION
.When you turn on the headlight
switch again after the lights auto-
matically turn off, the lights will not
turn off automatically. Be sure to
turn the light switch to the OFF
position when you leave the vehicle
for extended periods of time, other-
wise the battery will be discharged.
.Never leave the light switch on
when the engine is not running for
extended periods of time even if the
headlights turn off automatically.
SIC2275
Headlight aiming control (if so equipped)
Depending on the number of occupants in the
vehicle and the load it is carrying, the headlight
axis may be higher than desired. If the vehicle is
traveling on a hilly road, the headlights may
directly hit the rearview mirror of the vehicle
ahead or the windshield of the oncoming
vehicle. The light axis can be lowered with the
operation of the switch.
The larger the number designated on the switch,
the lower the axis.
When traveling with no heavy load or on a flat
road, select position 0.
2-34Instruments and controls
Page 105 of 443

Black plate (103,1)
Model "Z51-D" EDITED: 2007/ 10/ 2
WARNING
Xenon headlights are extremely bright
compared to conventional headlights. If
the xenon headlights hit the rearview
mirror of the vehicle ahead or the
windshield of oncoming vehicle, the
driver of these vehicles may have
difficulty driving because of the bright-
ness. Use the headlight aiming control
switch to lower the light axis. See
“XENON HEADLIGHTS” earlier in this
section for additional information.
Daytime running light system (Canada
only)
The daytime running lights automatically illumi-
nate when the engine is started with the parking
brake released. The daytime running lights
operate with the headlight switch in the OFF
position or in the
position. Turn the
headlight switch to theposition for full
illumination when driving at night.
If the parking brake is applied before the engine
is started, the daytime running lights do not
illuminate. The daytime running lights illuminate
once the parking brake is released. The daytime
running lights will remain on until the ignition
switch is pushed to the OFF position.
WARNING
When the daytime running light system
is active, tail lights on your vehicle are
not on. It is necessary at dusk to turn on
your headlights. Failure to do so could
cause an accident injuring yourself and
others.
SIC3585
Instrument brightness control
The instrument brightness control operates
when the ignition switch is in the ON position.
Pushing the control switch
*Aonce will change
the brightness to the night mode.
Pushing the control switch
*Bonce will change
the brightness to the day mode.
To adjust the brightness of instrument panel
lights, push the control switches. Pushing the
upper switch
*Awill brighten the lights. When
the brightness reaches the maximum level, a
beep will sound. The lower switch
*Bdims the
lights. Repeatedly pushing the lower switch will
turn the lights off and a beep will sound.
Instruments and controls2-35
Page 126 of 443

Black plate (124,1)
Model "Z51-D" EDITED: 2007/ 10/ 2
The mood lights*Alocated in the following
positions will illuminate whenever the headlight
switch is in the
orposition.
.next to the map lights
.on the rear ceiling
.under the instrument panel
.under the driver’s power window switch
The mood lights can be adjusted with the
illumination control buttons.
See “Instrument brightness control” earlier in
this section.
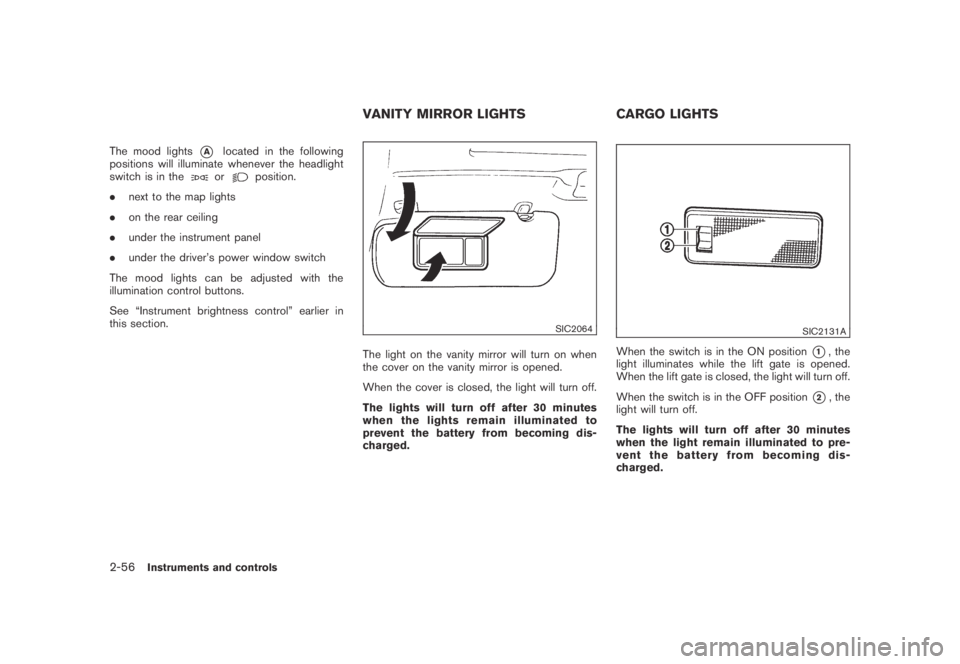
SIC2064
The light on the vanity mirror will turn on when
the cover on the vanity mirror is opened.
When the cover is closed, the light will turn off.
The lights will turn off after 30 minutes
when the lights remain illuminated to
prevent the battery from becoming dis-
charged.
SIC2131A
When the switch is in the ON position*1, the
light illuminates while the lift gate is opened.
When the lift gate is closed, the light will turn off.
When the switch is in the OFF position
*2, the
light will turn off.
The lights will turn off after 30 minutes
when the light remain illuminated to pre-
vent the battery from becoming dis-
charged.
VANITY MIRROR LIGHTS CARGO LIGHTS
2-56Instruments and controls
Page 158 of 443

Black plate (158,1)
Model "Z51-D" EDITED: 2007/ 10/ 2
Automatic anti-glare type
The inside mirror is designed so that it
automatically changes reflection according to
the intensity of the headlights of the following
vehicle.
The anti-glare system will be automatically
turned on when the ignition switch is pushed
to the ON position.
When the anti-glare system is turned on, the
indicator light
*Awill illuminate and excessive
glare from the headlights of the vehicle behind
you will be reduced.
Type A: Push the
switch*Bto make the
inside rearview mirror operate normally and the
indicator light will turn off. Push the
switch
again to turn the system on.
Type B: Push the “*” switch
*Cto make the
inside rearview mirror operate normally. The
indicator light will turn off. Push the “I” switch
*Dto turn the system on.
Do not allow any object to cover the
sensors
*Eor apply glass cleaner on
them. Doing so will reduce the sensitivity
of the sensor, resulting in improper opera-
tion.
For the compass (if so equipped) operation, see
“COMPASS” in the “2. Instruments and con-
trols” section.For the HomeLink
®Universal Transceiver opera-
tion, see “HomeLink®UNIVERSAL TRANSCEI-
VER” in the “2. Instruments and controls”
section.
SPA2319
OUTSIDE MIRRORS
WARNING
Objects viewed in the outside mirror on
the passenger side are closer than they
appear. Be careful when moving to the
right. Using only this mirror could cause
an accident. Use the inside mirror or
glance over your shoulder to properly
judge distances to other objects.
Adjusting outside mirrors
The outside mirror control switch is located on
the armrest.
3-28Pre-driving checks and adjustments