2009 NISSAN MURANO ignition
[x] Cancel search: ignitionPage 105 of 443

Black plate (103,1)
Model "Z51-D" EDITED: 2007/ 10/ 2
WARNING
Xenon headlights are extremely bright
compared to conventional headlights. If
the xenon headlights hit the rearview
mirror of the vehicle ahead or the
windshield of oncoming vehicle, the
driver of these vehicles may have
difficulty driving because of the bright-
ness. Use the headlight aiming control
switch to lower the light axis. See
“XENON HEADLIGHTS” earlier in this
section for additional information.
Daytime running light system (Canada
only)
The daytime running lights automatically illumi-
nate when the engine is started with the parking
brake released. The daytime running lights
operate with the headlight switch in the OFF
position or in the
position. Turn the
headlight switch to theposition for full
illumination when driving at night.
If the parking brake is applied before the engine
is started, the daytime running lights do not
illuminate. The daytime running lights illuminate
once the parking brake is released. The daytime
running lights will remain on until the ignition
switch is pushed to the OFF position.
WARNING
When the daytime running light system
is active, tail lights on your vehicle are
not on. It is necessary at dusk to turn on
your headlights. Failure to do so could
cause an accident injuring yourself and
others.
SIC3585
Instrument brightness control
The instrument brightness control operates
when the ignition switch is in the ON position.
Pushing the control switch
*Aonce will change
the brightness to the night mode.
Pushing the control switch
*Bonce will change
the brightness to the day mode.
To adjust the brightness of instrument panel
lights, push the control switches. Pushing the
upper switch
*Awill brighten the lights. When
the brightness reaches the maximum level, a
beep will sound. The lower switch
*Bdims the
lights. Repeatedly pushing the lower switch will
turn the lights off and a beep will sound.
Instruments and controls2-35
Page 107 of 443
Black plate (105,1)
Model "Z51-D" EDITED: 2007/ 10/ 2
.Turn signals do not work when the
hazard warning flasher lights are
on.
The flasher can be actuated with the ignition
switch in any position.
Some state laws may prohibit the use of
the hazard warning flasher switch while
driving.
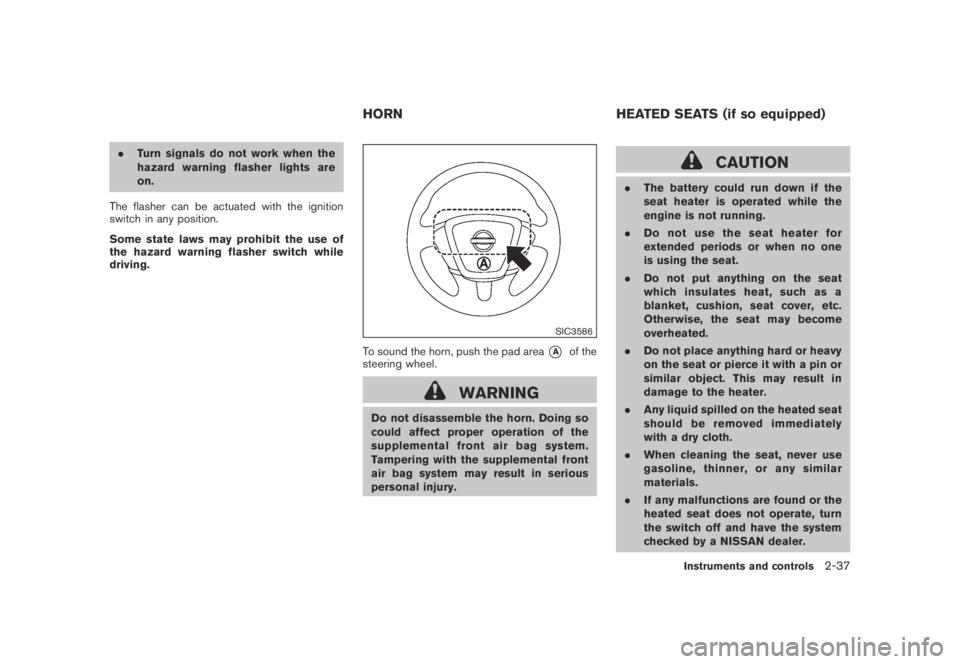
SIC3586
To sound the horn, push the pad area*Aof the
steering wheel.
WARNING
Do not disassemble the horn. Doing so
could affect proper operation of the
supplemental front air bag system.
Tampering with the supplemental front
air bag system may result in serious
personal injury.
CAUTION
.The battery could run down if the
seat heater is operated while the
engine is not running.
.Do not use the seat heater for
extended periods or when no one
is using the seat.
.Do not put anything on the seat
which insulates heat, such as a
blanket, cushion, seat cover, etc.
Otherwise, the seat may become
overheated.
.Do not place anything hard or heavy
on the seat or pierce it with a pin or
similar object. This may result in
damage to the heater.
.Any liquid spilled on the heated seat
should be removed immediately
with a dry cloth.
.When cleaning the seat, never use
gasoline, thinner, or any similar
materials.
.If any malfunctions are found or the
heated seat does not operate, turn
the switch off and have the system
checked by a NISSAN dealer.
HORN HEATED SEATS (if so equipped)
Instruments and controls2-37
Page 108 of 443
Black plate (106,1)
Model "Z51-D" EDITED: 2007/ 10/ 2
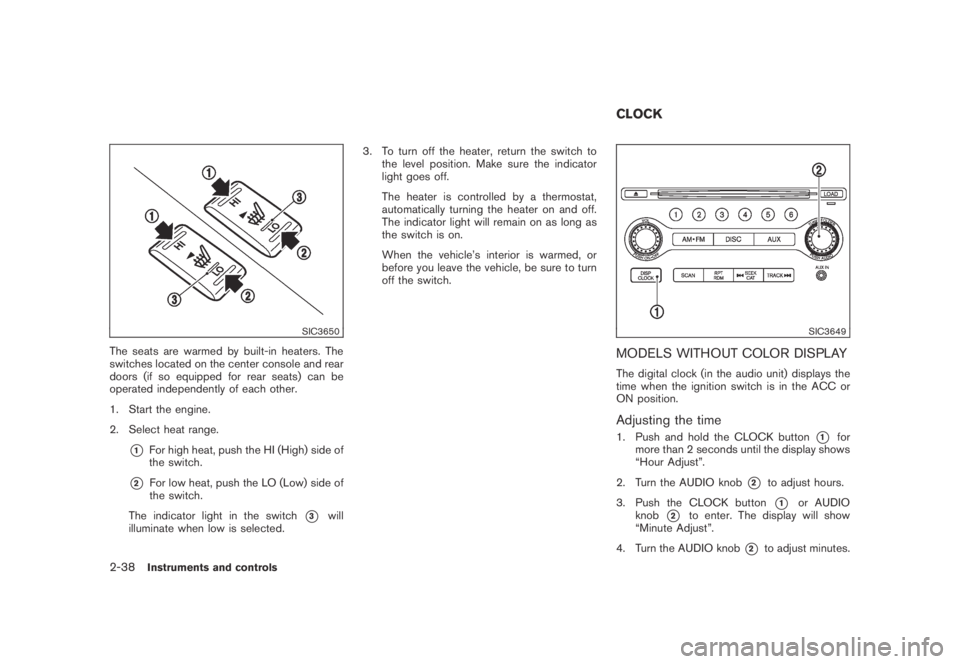
SIC3650
The seats are warmed by built-in heaters. The
switches located on the center console and rear
doors (if so equipped for rear seats) can be
operated independently of each other.
1. Start the engine.
2. Select heat range.
*1For high heat, push the HI (High) side of
the switch.
*2For low heat, push the LO (Low) side of
the switch.
The indicator light in the switch
*3will
illuminate when low is selected.3. To turn off the heater, return the switch to
the level position. Make sure the indicator
light goes off.
The heater is controlled by a thermostat,
automatically turning the heater on and off.
The indicator light will remain on as long as
the switch is on.
When the vehicle’s interior is warmed, or
before you leave the vehicle, be sure to turn
off the switch.
SIC3649
MODELS WITHOUT COLOR DISPLAY
The digital clock (in the audio unit) displays the
time when the ignition switch is in the ACC or
ON position.
Adjusting the time
1. Push and hold the CLOCK button*1for
more than 2 seconds until the display shows
“Hour Adjust”.
2. Turn the AUDIO knob
*2to adjust hours.
3. Push the CLOCK button
*1or AUDIO
knob
*2to enter. The display will show
“Minute Adjust”.
4. Turn the AUDIO knob
*2to adjust minutes.
CLOCK
2-38Instruments and controls
Page 111 of 443
Black plate (109,1)
Model "Z51-D" EDITED: 2007/ 10/ 2
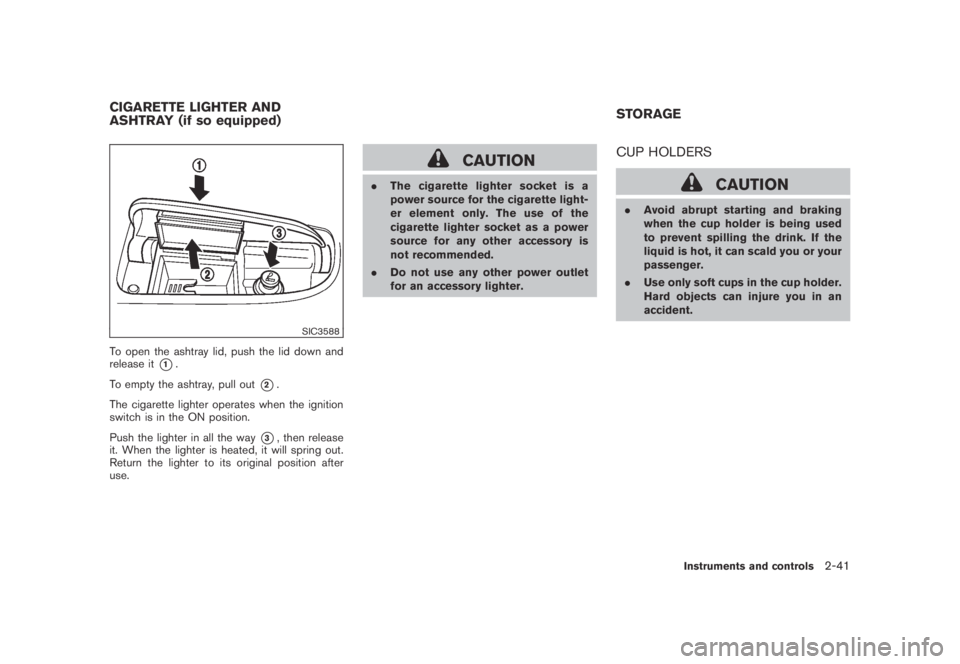
SIC3588
To open the ashtray lid, push the lid down and
release it
*1.
To empty the ashtray, pull out
*2.
The cigarette lighter operates when the ignition
switch is in the ON position.
Push the lighter in all the way
*3, then release
it. When the lighter is heated, it will spring out.
Return the lighter to its original position after
use.
CAUTION
.The cigarette lighter socket is a
power source for the cigarette light-
er element only. The use of the
cigarette lighter socket as a power
source for any other accessory is
not recommended.
.Do not use any other power outlet
for an accessory lighter.
CUP HOLDERS
CAUTION
.Avoid abrupt starting and braking
when the cup holder is being used
to prevent spilling the drink. If the
liquid is hot, it can scald you or your
passenger.
.Use only soft cups in the cup holder.
Hard objects can injure you in an
accident.
CIGARETTE LIGHTER AND
ASHTRAY (if so equipped)STORAGE
Instruments and controls2-41
Page 119 of 443
Black plate (117,1)
Model "Z51-D" EDITED: 2007/ 10/ 2
SIC3505
COAT HOOKS
The coat hooks are equipped beside the rear
personal lights.
CAUTION
Do not place items which are more than
2 lb (1 kg) on the hook.
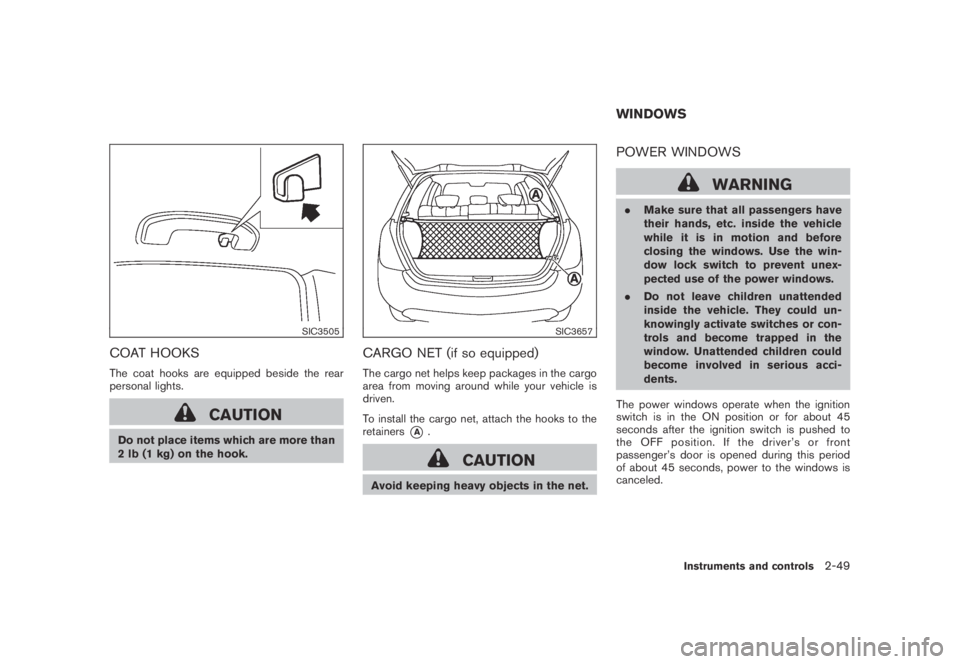
SIC3657
CARGO NET (if so equipped)
The cargo net helps keep packages in the cargo
area from moving around while your vehicle is
driven.
To install the cargo net, attach the hooks to the
retainers
*A.
CAUTION
Avoid keeping heavy objects in the net.
POWER WINDOWS
WARNING
.Make sure that all passengers have
their hands, etc. inside the vehicle
while it is in motion and before
closing the windows. Use the win-
dow lock switch to prevent unex-
pected use of the power windows.
.Do not leave children unattended
inside the vehicle. They could un-
knowingly activate switches or con-
trols and become trapped in the
window. Unattended children could
become involved in serious acci-
dents.
The power windows operate when the ignition
switch is in the ON position or for about 45
seconds after the ignition switch is pushed to
the OFF position. If the driver’s or front
passenger’s door is opened during this period
of about 45 seconds, power to the windows is
canceled.
WINDOWS
Instruments and controls2-49
Page 121 of 443
Black plate (119,1)
Model "Z51-D" EDITED: 2007/ 10/ 2
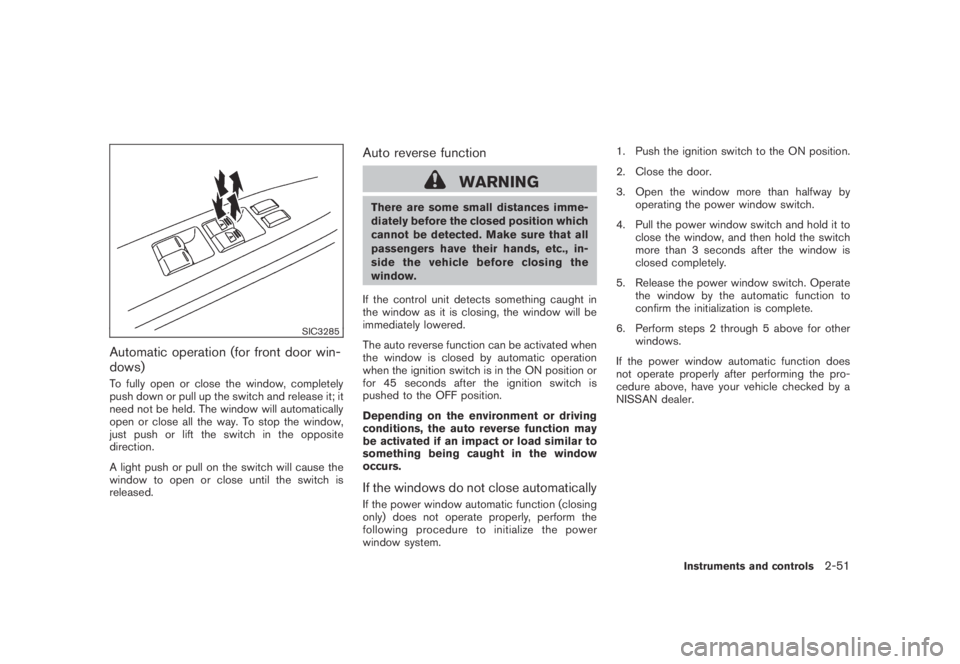
SIC3285
Automatic operation (for front door win-
dows)
To fully open or close the window, completely
push down or pull up the switch and release it; it
need not be held. The window will automatically
open or close all the way. To stop the window,
just push or lift the switch in the opposite
direction.
A light push or pull on the switch will cause the
window to open or close until the switch is
released.
Auto reverse function
WARNING
There are some small distances imme-
diately before the closed position which
cannot be detected. Make sure that all
passengers have their hands, etc., in-
side the vehicle before closing the
window.
If the control unit detects something caught in
the window as it is closing, the window will be
immediately lowered.
The auto reverse function can be activated when
the window is closed by automatic operation
when the ignition switch is in the ON position or
for 45 seconds after the ignition switch is
pushed to the OFF position.
Depending on the environment or driving
conditions, the auto reverse function may
be activated if an impact or load similar to
something being caught in the window
occurs.
If the windows do not close automatically
If the power window automatic function (closing
only) does not operate properly, perform the
following procedure to initialize the power
window system.1. Push the ignition switch to the ON position.
2. Close the door.
3. Open the window more than halfway by
operating the power window switch.
4. Pull the power window switch and hold it to
close the window, and then hold the switch
more than 3 seconds after the window is
closed completely.
5. Release the power window switch. Operate
the window by the automatic function to
confirm the initialization is complete.
6. Perform steps 2 through 5 above for other
windows.
If the power window automatic function does
not operate properly after performing the pro-
cedure above, have your vehicle checked by a
NISSAN dealer.
Instruments and controls2-51
Page 122 of 443
Black plate (120,1)
Model "Z51-D" EDITED: 2007/ 10/ 2
WARNING
.In an accident you could be thrown
from the vehicle through an open
moonroof. Always use seat belts
and child restraints.
.Do not allow anyone to stand up or
extend any portion of their body out
of the moonroof opening while the
vehicle is in motion or while the
moonroof is closing.
CAUTION
.Remove water drops, snow, ice or
sand from the moonroof before
opening.
.Do not place any heavy object on
the moonroof or surrounding area.
.Do not push or pull on the sun-
shade. Doing so can damage the
sunshade.
AUTOMATIC MOONROOF AND SUN-
SHADES
The moonroof and sunshades only operates
when the ignition switch is in the ON position.
The automatic moonroof and sunshades are
operational for about 45 seconds, even if the
ignition switch is pushed to the OFF position. If
the driver’s door or the passenger’s door is
opened during this period of about 45 seconds,
power to the moonroof and sunshades is
canceled.
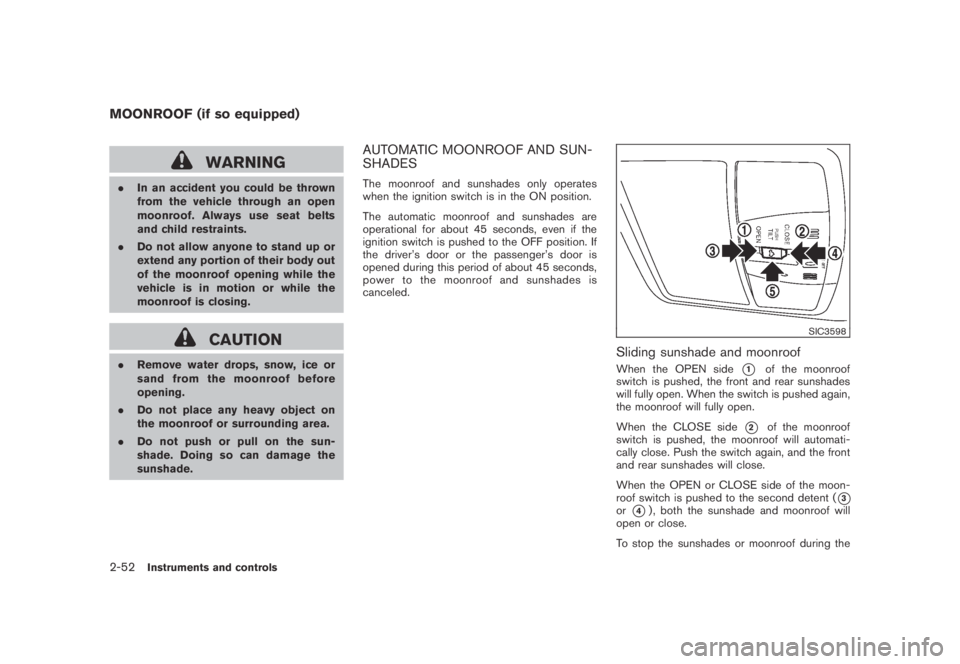
SIC3598
Sliding sunshade and moonroof
When the OPEN side*1of the moonroof
switch is pushed, the front and rear sunshades
will fully open. When the switch is pushed again,
the moonroof will fully open.
When the CLOSE side
*2of the moonroof
switch is pushed, the moonroof will automati-
cally close. Push the switch again, and the front
and rear sunshades will close.
When the OPEN or CLOSE side of the moon-
roof switch is pushed to the second detent (
*3or*4) , both the sunshade and moonroof will
open or close.
To stop the sunshades or moonroof during the
MOONROOF (if so equipped)
2-52Instruments and controls
Page 123 of 443
Black plate (121,1)
Model "Z51-D" EDITED: 2007/ 10/ 2
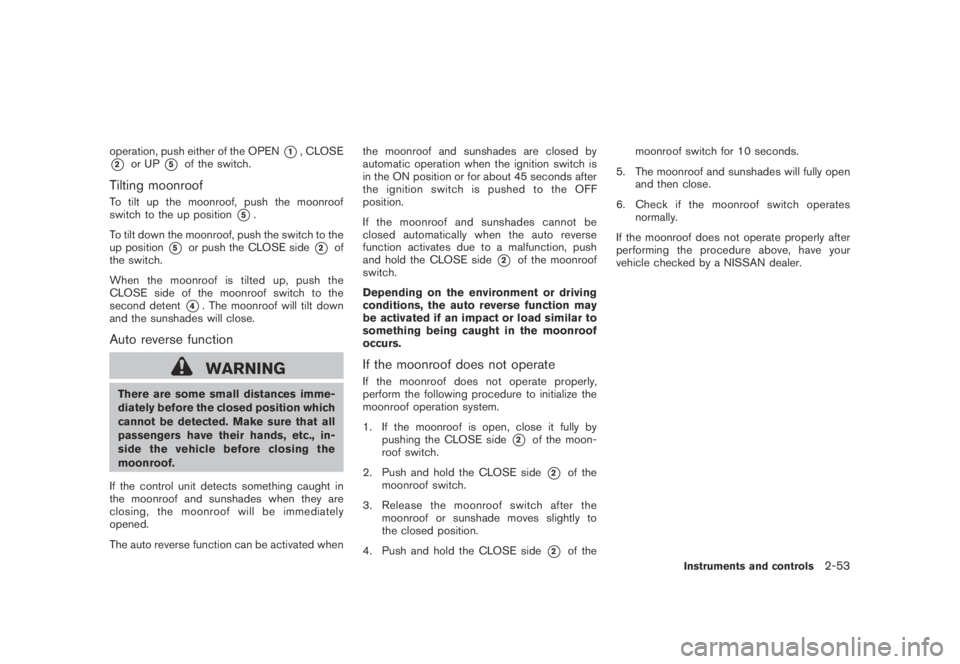
operation, push either of the OPEN*1, CLOSE
*2or UP*5of the switch.
Tilting moonroof
To tilt up the moonroof, push the moonroof
switch to the up position
*5.
To tilt down the moonroof, push the switch to the
up position
*5or push the CLOSE side*2of
the switch.
When the moonroof is tilted up, push the
CLOSE side of the moonroof switch to the
second detent
*4. The moonroof will tilt down
and the sunshades will close.
Auto reverse function
WARNING
There are some small distances imme-
diately before the closed position which
cannot be detected. Make sure that all
passengers have their hands, etc., in-
side the vehicle before closing the
moonroof.
If the control unit detects something caught in
the moonroof and sunshades when they are
closing, the moonroof will be immediately
opened.
The auto reverse function can be activated whenthe moonroof and sunshades are closed by
automatic operation when the ignition switch is
in the ON position or for about 45 seconds after
the ignition switch is pushed to the OFF
position.
If the moonroof and sunshades cannot be
closed automatically when the auto reverse
function activates due to a malfunction, push
and hold the CLOSE side
*2of the moonroof
switch.
Depending on the environment or driving
conditions, the auto reverse function may
be activated if an impact or load similar to
something being caught in the moonroof
occurs.
If the moonroof does not operate
If the moonroof does not operate properly,
perform the following procedure to initialize the
moonroof operation system.
1. If the moonroof is open, close it fully by
pushing the CLOSE side
*2of the moon-
roof switch.
2. Push and hold the CLOSE side
*2of the
moonroof switch.
3. Release the moonroof switch after the
moonroof or sunshade moves slightly to
the closed position.
4. Push and hold the CLOSE side
*2of themoonroof switch for 10 seconds.
5. The moonroof and sunshades will fully open
and then close.
6. Check if the moonroof switch operates
normally.
If the moonroof does not operate properly after
performing the procedure above, have your
vehicle checked by a NISSAN dealer.
Instruments and controls2-53