2009 NISSAN FRONTIER CD changer
[x] Cancel search: CD changerPage 161 of 366
4 Heater, air conditioner, audio and phone
systems
Vents............................................4-2
Heater and air conditioner (manual)..................4-2
Controls.......................................4-3
Heater operation...............................4-4
Air conditioner operation (if so equipped).........4-5
Air flow charts..................................4-7
Heater and air conditioner (manual).................4-10
Controls......................................4-10
Heater operation..............................4-11
Air conditioner operation.......................4-13
Air flow charts.................................4-14
Servicing air conditioner...........................4-17
Audio system....................................4-18
Radio (if so equipped).........................4-18
FM radio reception............................4-18
AM radio reception............................4-18
Satellite radio reception (if so equipped).........4-19
Audio operation precautions....................4-19FM/AM radio with compact disc (CD) player
(if so equipped)...............................4-25
FM/AM/SAT radio with compact disc (CD)
changer (if so equipped).......................4-29
CD care and cleaning..........................4-35
Steering wheel switch for audio control
(if so equipped)...............................4-36
Antenna......................................4-36
Car phone or CB radio............................4-37
BluetoothTHands-Free Phone System
(if so equipped)..................................4-37
Regulatory Information.........................4-39
Using the system..............................4-39
Control buttons...............................4-41
Getting started................................4-42
List of voice commands........................4-44
Speaker adaptation (SA) mode..................4-49
Troubleshooting guide.........................4-51
ZREVIEW COPYÐ2009 08+ Truck/Frontier(fro)
Owners ManualÐUSA_English(nna)
05/27/08Ðdebbie
X
Page 179 of 366

SATELLITE RADIO RECEPTION (if so
equipped)
When the satellite radio is first installed or the
battery has been replaced, the satellite radio may
not work properly. This is not a malfunction. Wait
more than 10 minutes with satellite radio ON and
the vehicle outside of any metal or large building
for satellite radio to receive all of the necessary
data.
No satellite radio reception is available and “NO
SAT” is displayed when the SAT band option is
selected unless optional satellite receiver and
antenna are installed and an XMTsatellite radio
service subscription is active. Satellite radio can
only be installed in vehicles that were factory
pre-wired for satellite radio. Satellite radio is not
available in Alaska, Hawaii and Guam.
Satellite radio performance may be affected if
cargo carried on the roof blocks the satellite radio
signal.
If possible, do not put cargo over the satellite
antenna.
A build up of ice on the satellite radio antenna can
affect satellite radio performance. Remove the
ice to restore satellite radio reception
AUDIO OPERATION PRECAUTIONSCompact disc (CD) player
CAUTION
cDo not force a compact disc into the CD
insert slot. This could damage the CD
and/or CD changer/player.
cTrying to load a CD with the CD door
closed could damage the CD and/or CD
changer.
cOnly one CD can be loaded into the CD
player at a time.
cOnly use high quality 4.7 in (12 cm)
round discs that have the “COMPACT
disc DIGITAL AUDIO” logo on the disc
or packaging.
cDuring cold weather or rainy days, the
player may malfunction due to the hu-
midity. If this occurs, remove the CD
and dehumidify or ventilate the player
completely.
cThe player may skip while driving on
rough roads.
cThe CD player sometimes cannot func-
tion when the compartment tempera-
ture is extremely high or low.
Decrease/increase the temperature
before use.
LHA0099
Heater, air conditioner, audio and phone systems4-19
ZREVIEW COPYÐ2009 08+ Truck/Frontier(fro)
Owners ManualÐUSA_English(nna)
05/27/08Ðdebbie
X
Page 189 of 366
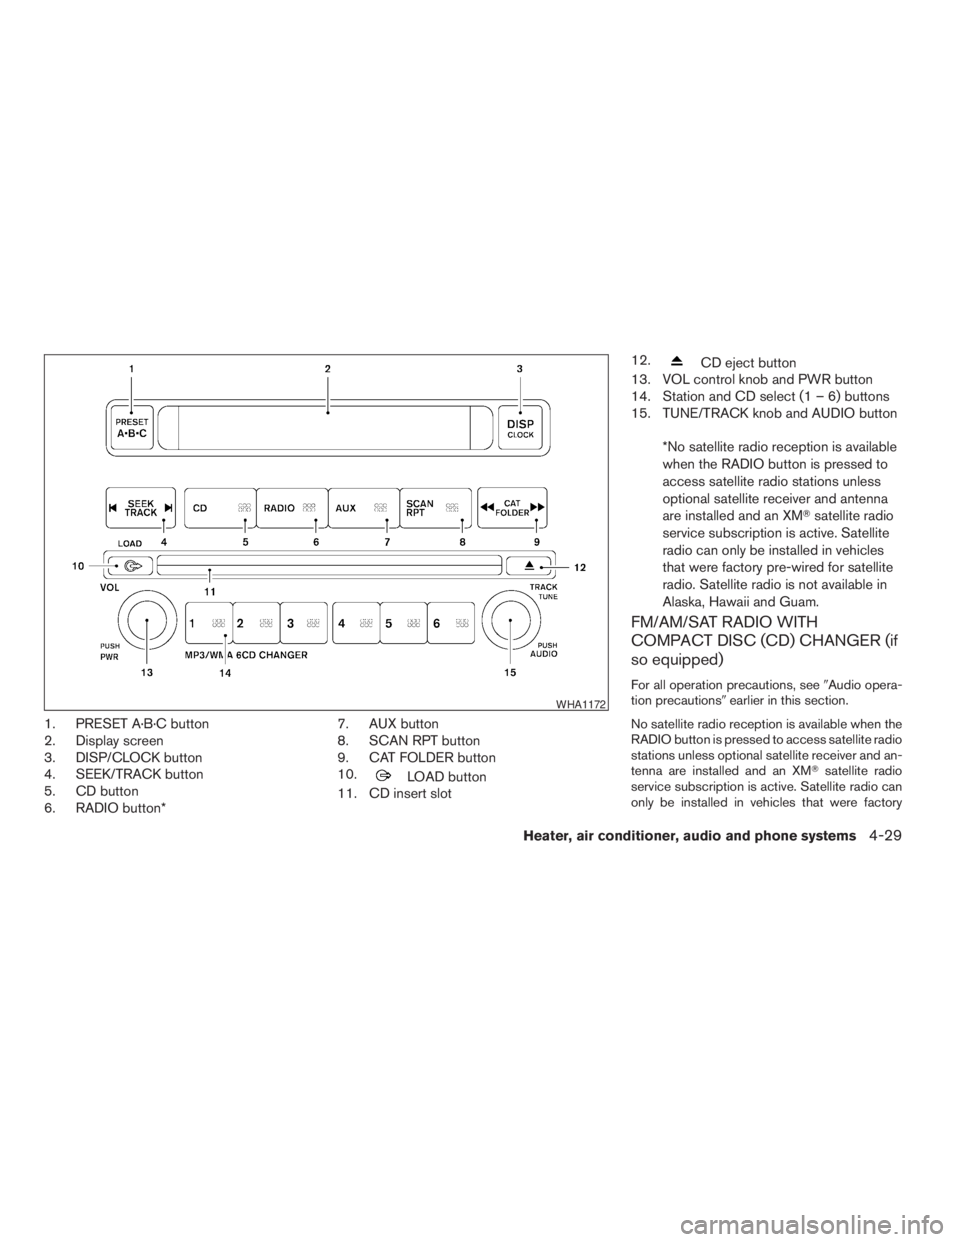
1. PRESET A·B·C button
2. Display screen
3. DISP/CLOCK button
4. SEEK/TRACK button
5. CD button
6. RADIO button*7. AUX button
8. SCAN RPT button
9. CAT FOLDER button
10.
LOAD button
11. CD insert slot12.
CD eject button
13. VOL control knob and PWR button
14. Station and CD select (1 – 6) buttons
15. TUNE/TRACK knob and AUDIO button
*No satellite radio reception is available
when the RADIO button is pressed to
access satellite radio stations unless
optional satellite receiver and antenna
are installed and an XMTsatellite radio
service subscription is active. Satellite
radio can only be installed in vehicles
that were factory pre-wired for satellite
radio. Satellite radio is not available in
Alaska, Hawaii and Guam.
FM/AM/SAT RADIO WITH
COMPACT DISC (CD) CHANGER (if
so equipped)
For all operation precautions, see9Audio opera-
tion precautions9earlier in this section.
No satellite radio reception is available when the
RADIO button is pressed to access satellite radio
stations unless optional satellite receiver and an-
tenna are installed and an XMTsatellite radio
service subscription is active. Satellite radio can
only be installed in vehicles that were factory
WHA1172
Heater, air conditioner, audio and phone systems4-29
ZREVIEW COPYÐ2009 08+ Truck/Frontier(fro)
Owners ManualÐUSA_English(nna)
05/27/08Ðdebbie
X
Page 193 of 366
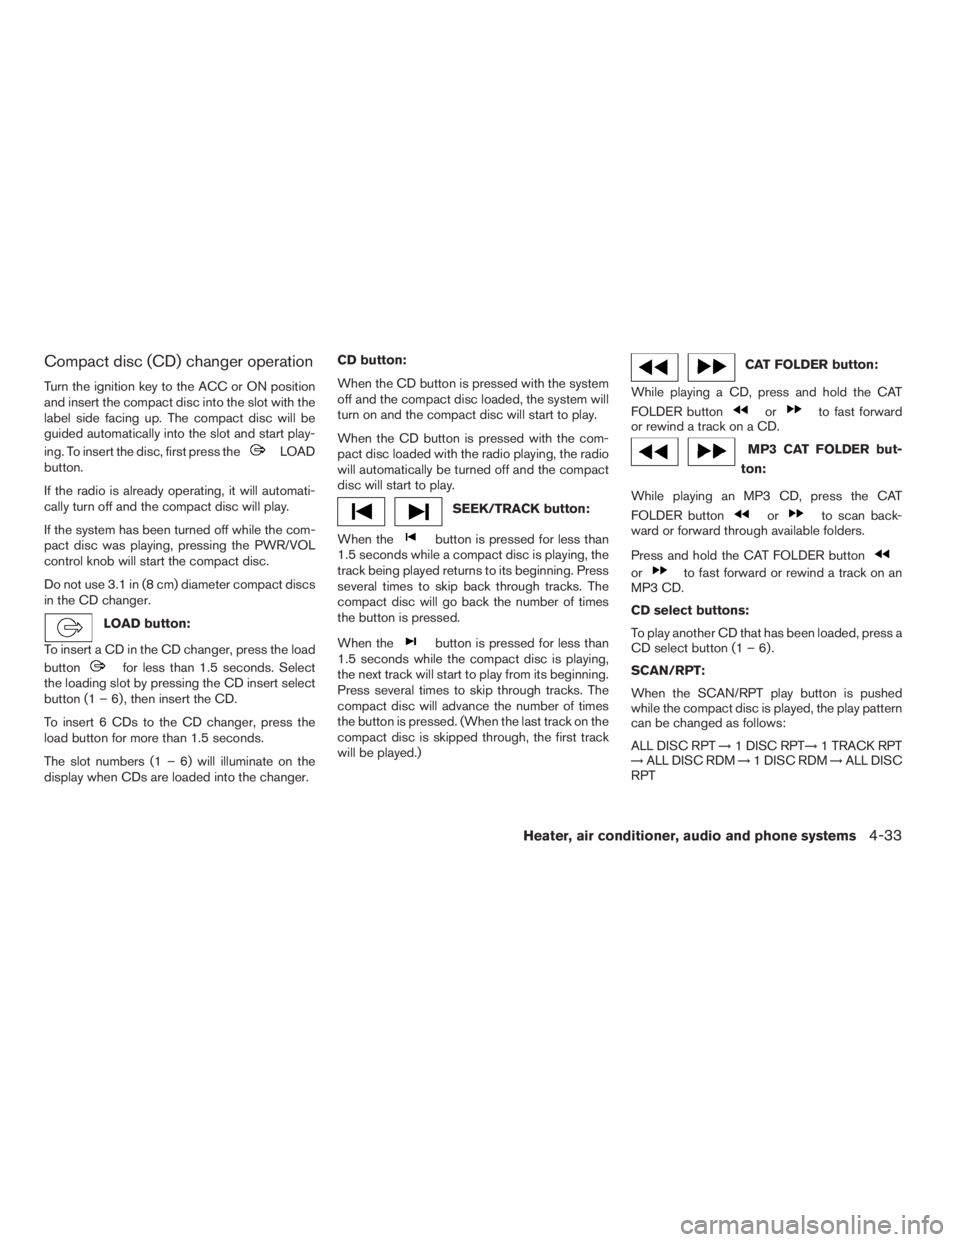
Compact disc (CD) changer operation
Turn the ignition key to the ACC or ON position
and insert the compact disc into the slot with the
label side facing up. The compact disc will be
guided automatically into the slot and start play-
ing. To insert the disc, first press the
LOAD
button.
If the radio is already operating, it will automati-
cally turn off and the compact disc will play.
If the system has been turned off while the com-
pact disc was playing, pressing the PWR/VOL
control knob will start the compact disc.
Do not use 3.1 in (8 cm) diameter compact discs
in the CD changer.
LOAD button:
To insert a CD in the CD changer, press the load
button
for less than 1.5 seconds. Select
the loading slot by pressing the CD insert select
button (1 – 6) , then insert the CD.
To insert 6 CDs to the CD changer, press the
load button for more than 1.5 seconds.
The slot numbers (1 – 6) will illuminate on the
display when CDs are loaded into the changer.CD button:
When the CD button is pressed with the system
off and the compact disc loaded, the system will
turn on and the compact disc will start to play.
When the CD button is pressed with the com-
pact disc loaded with the radio playing, the radio
will automatically be turned off and the compact
disc will start to play.
SEEK/TRACK button:
When the
button is pressed for less than
1.5 seconds while a compact disc is playing, the
track being played returns to its beginning. Press
several times to skip back through tracks. The
compact disc will go back the number of times
the button is pressed.
When the
button is pressed for less than
1.5 seconds while the compact disc is playing,
the next track will start to play from its beginning.
Press several times to skip through tracks. The
compact disc will advance the number of times
the button is pressed. (When the last track on the
compact disc is skipped through, the first track
will be played.)
CAT FOLDER button:
While playing a CD, press and hold the CAT
FOLDER button
orto fast forward
or rewind a track on a CD.
MP3 CAT FOLDER but-
ton:
While playing an MP3 CD, press the CAT
FOLDER button
orto scan back-
ward or forward through available folders.
Press and hold the CAT FOLDER button
orto fast forward or rewind a track on an
MP3 CD.
CD select buttons:
To play another CD that has been loaded, press a
CD select button (1 – 6) .
SCAN/RPT:
When the SCAN/RPT play button is pushed
while the compact disc is played, the play pattern
can be changed as follows:
ALL DISC RPT!1 DISC RPT!1 TRACK RPT
!ALL DISC RDM!1 DISC RDM!ALL DISC
RPT
Heater, air conditioner, audio and phone systems4-33
ZREVIEW COPYÐ2009 08+ Truck/Frontier(fro)
Owners ManualÐUSA_English(nna)
05/27/08Ðdebbie
X
Page 194 of 366
ALL DISC RPT: All discs loaded will be repeated.
1 DISC RPT: The disc that is currently playing will
be repeated.
1 TRACK RPT: The track that is currently playing
will be repeated
ALL DISC RDM: Tracks from all discs will be
played randomly
1 DISC RDM: Tracks from the disc that is cur-
rently playing will be played randomly
CD EJECT:
Current/Selected disc:
cPress the
button, then press the slot
number (1 – 6) for the desired disc. The
compact disc will be ejected. If no slot num-
ber (1 – 6) is pressed, the current loaded
disc will be ejected. Also, if the ejected disc
is not removed within 15 seconds, the disc
will reload.
All discs:
cPress and hold the
button for more
than 1.5 seconds. The compact discs will be
ejected one by one. If a disc is not removed
within 15 seconds or the
button is
pressed again during the eject sequence,
the entire disc eject sequence will be can-
celed.When this button is pressed while the compact
disc is being played, the compact disc will eject
and the last source will be played.
CD IN indicator:
The slot numbers (1 – 6) will illuminate if CDs
have been loaded into the changer in CD mode
only.
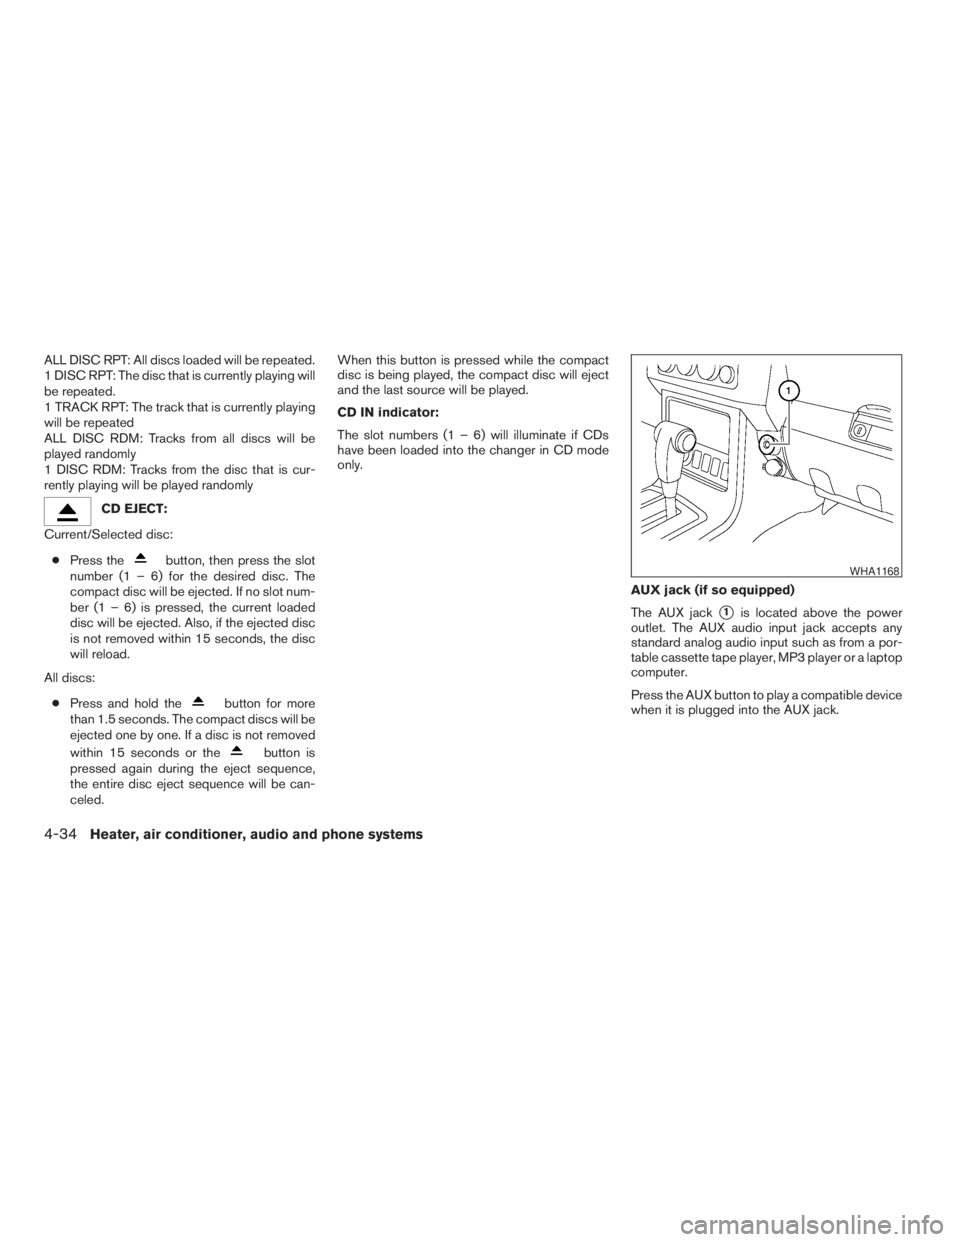
AUX jack (if so equipped)
The AUX jack
s1is located above the power
outlet. The AUX audio input jack accepts any
standard analog audio input such as from a por-
table cassette tape player, MP3 player or a laptop
computer.
Press the AUX button to play a compatible device
when it is plugged into the AUX jack.
WHA1168
4-34Heater, air conditioner, audio and phone systems
ZREVIEW COPYÐ2009 08+ Truck/Frontier(fro)
Owners ManualÐUSA_English(nna)
05/27/08Ðdebbie
X
Page 359 of 366
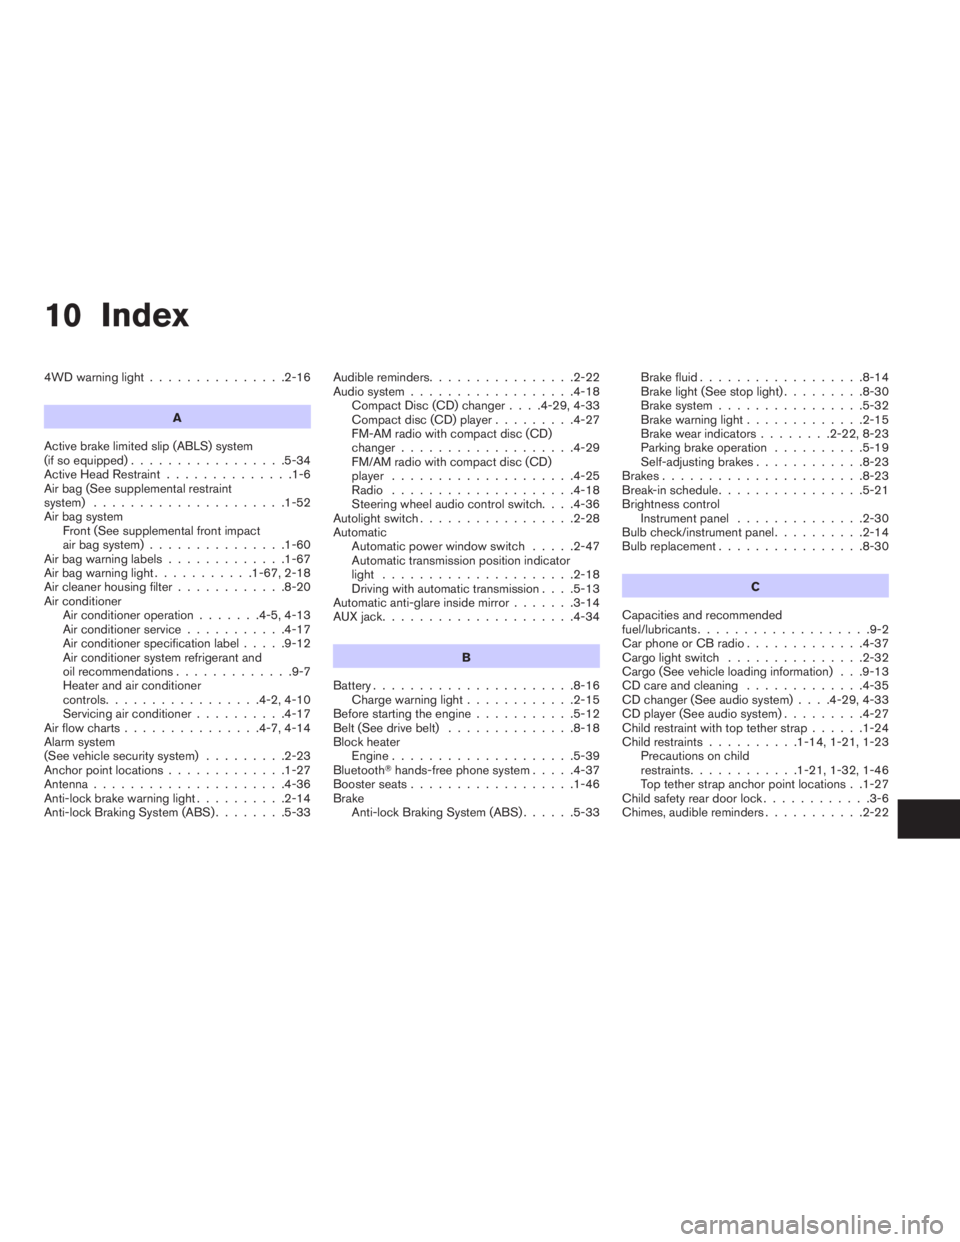
10 Index
4WD warning light...............2-16
A
Active brake limited slip (ABLS) system
(if so equipped).................5-34
Active Head Restraint..............1-6
Air bag (See supplemental restraint
system).....................1-52
Air bag system
Front (See supplemental front impact
air bag system)...............1-60
Air bag warning labels.............1-67
Air bag warning light...........1-67, 2-18
Air cleaner housing filter............8-20
Air conditioner
Air conditioner operation.......4-5, 4-13
Air conditioner service...........4-17
Air conditioner specification label.....9-12
Air conditioner system refrigerant and
oil recommendations.............9-7
Heater and air conditioner
controls.................4-2, 4-10
Servicing air conditioner..........4-17
Air flow charts...............4-7, 4-14
Alarm system
(See vehicle security system).........2-23
Anchor point locations.............1-27
Antenna.....................4-36
Anti-lock brake warning light..........2-14
Anti-lock Braking System (ABS)........5-33Audible reminders................2-22
Audio system..................4-18
Compact Disc (CD) changer. . . .4-29, 4-33
Compact disc (CD) player.........4-27
FM-AM radio with compact disc (CD)
changer...................4-29
FM/AM radio with compact disc (CD)
player....................4-25
Radio....................4-18
Steering wheel audio control switch. . . .4-36
Autolight switch.................2-28
Automatic
Automatic power window switch.....2-47
Automatic transmission position indicator
light.....................2-18
Driving with automatic transmission. . . .5-13
Automatic anti-glare inside mirror.......3-14
AUX jack.....................4-34
B
Battery......................8-16
Charge warning light............2-15
Before starting the engine...........5-12
Belt (See drive belt)..............8-18
Block heater
Engine....................5-39
BluetoothThands-free phone system.....4-37
Booster seats..................1-46
Brake
Anti-lock Braking System (ABS)......5-33Brake fluid..................8-14
Brake light (See stop light).........8-30
Brake system................5-32
Brake warning light.............2-15
Brake wear indicators........2-22, 8-23
Parking brake operation..........5-19
Self-adjusting brakes............8-23
Brakes......................8-23
Break-in schedule................5-21
Brightness control
Instrument panel..............2-30
Bulb check/instrument panel..........2-14
Bulb replacement................8-30
C
Capacities and recommended
fuel/lubricants...................9-2
Car phone or CB radio.............4-37
Cargo light switch...............2-32
Cargo (See vehicle loading information) . . .9-13
CD care and cleaning.............4-35
CD changer (See audio system). . . .4-29, 4-33
CD player (See audio system).........4-27
Child restraint with top tether strap......1-24
Child restraints..........1-14, 1-21, 1-23
Precautions on child
restraints............1-21, 1-32, 1-46
Top tether strap anchor point locations . .1-27
Child safety rear door lock............3-6
Chimes, audible reminders...........2-22
ZREVIEW COPYÐ2009 08+ Truck/Frontier(fro)
Owners ManualÐUSA_English(nna)
05/27/08Ðdebbie
X
Page 363 of 366

Compact Disc (CD) changer. . . .4-29, 4-33
FM-AM radio with compact disc (CD)
changer...................4-29
FM/AM radio with compact disc (CD)
player....................4-25
Steering wheel audio control switch. . . .4-36
Readiness for inspection maintenance (I/M)
test........................9-37
Rear power windows..............2-47
Rear sliding window..............2-48
Rear window defogger switch.........2-26
Recorders
Event data..................9-38
Refrigerant recommendation..........9-7
Registering your vehicle in another country . .9-10
Remote keyless entry system..........3-6
Reporting safety defects (US only)......9-37
Roof rack....................2-44
S
Safety
Child safety rear door lock..........3-6
Child seat belts........1-21, 1-32, 1-46
Reporting safety defects (US only). . . .9-37
Seat
Jump seat...................1-5
Seat adjustment
Front manual seat adjustment........1-2
Front power seat adjustment........1-4
Seat belt
Child safety.................1-14
Infants and small children.........1-14
Injured Person................1-15
Larger children...............1-15Precautions on seat belt usage......1-11
Pregnant women..............1-15
Pre-tensioner seat belt system.......1-65
Seat belt extenders.............1-20
Seat belt maintenance...........1-20
Seat belts..................1-11
Shoulder belt height adjustment......1-19
Three-point type with retractor.......1-15
Seat belt warning light.............2-18
Seatback pockets................2-42
Seats
Adjustment..................1-2
Front seats..................1-2
Heated seats................2-32
Manual front seat adjustment........1-2
Security indicator light.............2-20
Security system (NISSAN vehicle immobilizer
system) , engine start........2-24, 3-2, 5-11
Self-adjusting brakes..............8-23
Service manual order form...........9-39
Servicing air conditioner............4-17
Shift lock release................5-15
Shifting
Automatic transmission...........5-13
Manual transmission............5-17
Shoulder belt height adjustment........1-19
Side air bag system (See supplemental side air
bag, curtain and rollover air bag systems). . .1-64
Spark plug replacement............8-19
Speedometer...................2-4
SRS warning label...............1-67
Starting
Before starting the engine.........5-12
Jump starting.................6-9
Precautions when starting and driving . . .5-2
Push starting................6-11Starting the engine.............5-12
Steering
Power steering fluid.............8-13
Power steering system...........5-32
Tilting steering wheel............3-12
Steering wheel audio control switch......4-36
Stop light....................8-30
Storage.....................2-37
Storage tray...............2-37, 2-39
Sun visors....................3-12
Sunglasses case................2-40
Sunroof (see Moonroof)............2-48
Supplemental air bag warning labels.....1-67
Supplemental air bag warning light . . .1-67, 2-18
Supplemental front impact air bag system . .1-60
Supplemental restraint system
Information and warning labels.......1-67
Precautions on supplemental restraint
system....................1-52
Supplemental restraint system
(Supplemental air bag system).........1-52
Switch
Autolight switch...............2-28
Automatic power window switch.....2-47
Clutch interlock (clutch start) switch . . .2-35
Electronic locking rear differential (E-Lock)
system switch................2-34
Fog light switch...............2-30
Hazard warning flasher switch.......2-31
Headlight and turn signal switch......2-27
Headlight control switch..........2-27
Hill descent control switch.........2-33
Ignition switch................5-9
Overdrive switch..............5-16
Power door lock switch...........3-4
Rear window defogger switch.......2-26
10-5
ZREVIEW COPYÐ2009 08+ Truck/Frontier(fro)
Owners ManualÐUSA_English(nna)
05/27/08Ðdebbie
X