2009 NISSAN ARMADA mirror controls
[x] Cancel search: mirror controlsPage 82 of 465
2 Instruments and controls
Instrument panel...................................2-2
Meters and gauges................................2-4
Speedometer and odometer.....................2-5
Tachometer....................................2-6
Engine coolant temperature gauge...............2-6
Fuel gauge....................................2-7
Engine oil pressure gauge.......................2-8
Voltmeter......................................2-8
Automatic transmission fluid temperature
gauge.........................................2-9
Compass display (if so equipped)...................2-9
Compass display..............................2-10
Zone variation change procedure................2-11
Warning/indicator lights and audible reminders......2-13
Checking bulbs...............................2-13
Warning lights................................2-13
Indicator lights................................2-18
Audible reminders.............................2-20
Vehicle Information Display........................2-21
How to use the Vehicle Information Display.......2-21
Security systems.................................2-27
Vehicle security system.........................2-27
NISSAN vehicle immobilizer system.............2-29Windshield wiper and washer switch...............2-30
Switch operation..............................2-30
Rear window wiper and washer switch..............2-31
Rear window and outside mirror defroster switch.....2-32
Headlight and turn signal switch....................2-32
Headlight control switch........................2-32
Daytime running light system (Canada only)......2-34
Instrument brightness control...................2-35
Turn signal switch.............................2-35
Fog light switch (if so equipped)................2-35
Hazard warning flasher switch.....................2-36
Horn............................................2-36
Heated seat (if so equipped).......................2-37
Heated steering wheel (if so equipped).............2-37
Vehicle Dynamic Control (VDC) off switch...........2-38
Front and rear sonar system off switch..............2-38
Tow mode switch (if so equipped)..................2-39
Power outlet.....................................2-40
Storage.........................................2-41
Instrument panel storage trays..................2-41
Console box..................................2-41
Glove box....................................2-43
Sunglasses holder.............................2-43
ZREVIEW COPYÐ2009 Armada(wzw)
Owners ManualÐUSA_English(nna)
02/26/08Ðdebbie
X
ProCarManuals.com
Page 91 of 465
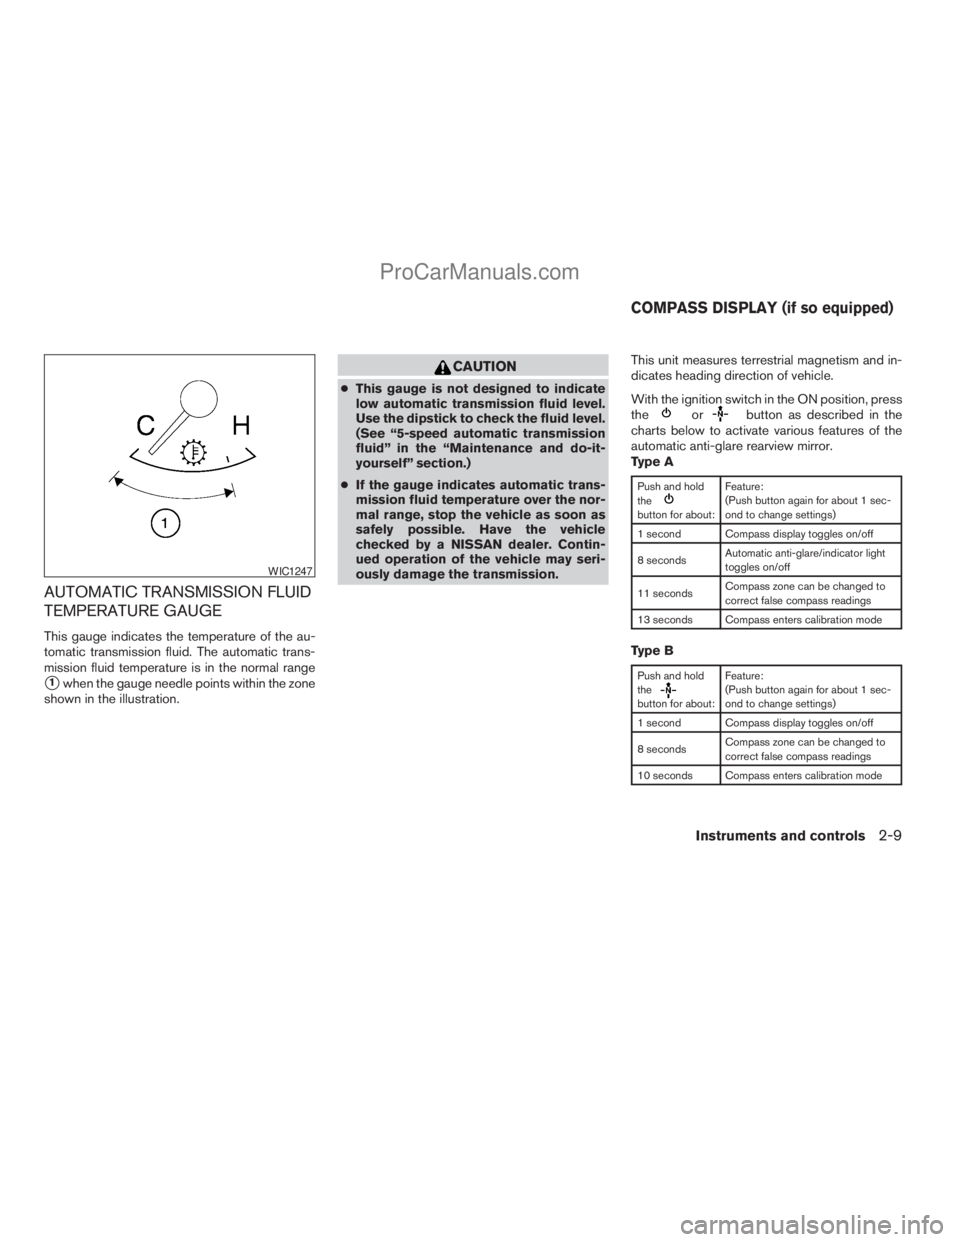
AUTOMATIC TRANSMISSION FLUID
TEMPERATURE GAUGE
This gauge indicates the temperature of the au-
tomatic transmission fluid. The automatic trans-
mission fluid temperature is in the normal range
s1when the gauge needle points within the zone
shown in the illustration.
CAUTION
cThis gauge is not designed to indicate
low automatic transmission fluid level.
Use the dipstick to check the fluid level.
(See “5-speed automatic transmission
fluid” in the “Maintenance and do-it-
yourself” section.)
cIf the gauge indicates automatic trans-
mission fluid temperature over the nor-
mal range, stop the vehicle as soon as
safely possible. Have the vehicle
checked by a NISSAN dealer. Contin-
ued operation of the vehicle may seri-
ously damage the transmission.This unit measures terrestrial magnetism and in-
dicates heading direction of vehicle.
With the ignition switch in the ON position, press
the
orbutton as described in the
charts below to activate various features of the
automatic anti-glare rearview mirror.
Type A
Push and hold
the
button for about:Feature:
(Push button again for about 1 sec-
ond to change settings)
1 second Compass display toggles on/off
8 secondsAutomatic anti-glare/indicator light
toggles on/off
11 secondsCompass zone can be changed to
correct false compass readings
13 seconds Compass enters calibration mode
Type B
Push and hold
the
button for about:Feature:
(Push button again for about 1 sec-
ond to change settings)
1 second Compass display toggles on/off
8 secondsCompass zone can be changed to
correct false compass readings
10 seconds Compass enters calibration mode
WIC1247
COMPASS DISPLAY (if so equipped)
Instruments and controls2-9
ZREVIEW COPYÐ2009 Armada(wzw)
Owners ManualÐUSA_English(nna)
02/27/08Ðtbrooks
X
ProCarManuals.com
Page 92 of 465
For information about the automatic anti-glare
feature, refer to “Automatic anti-glare rearview
mirror” in the “Pre-driving checks and adjust-
ments” section.
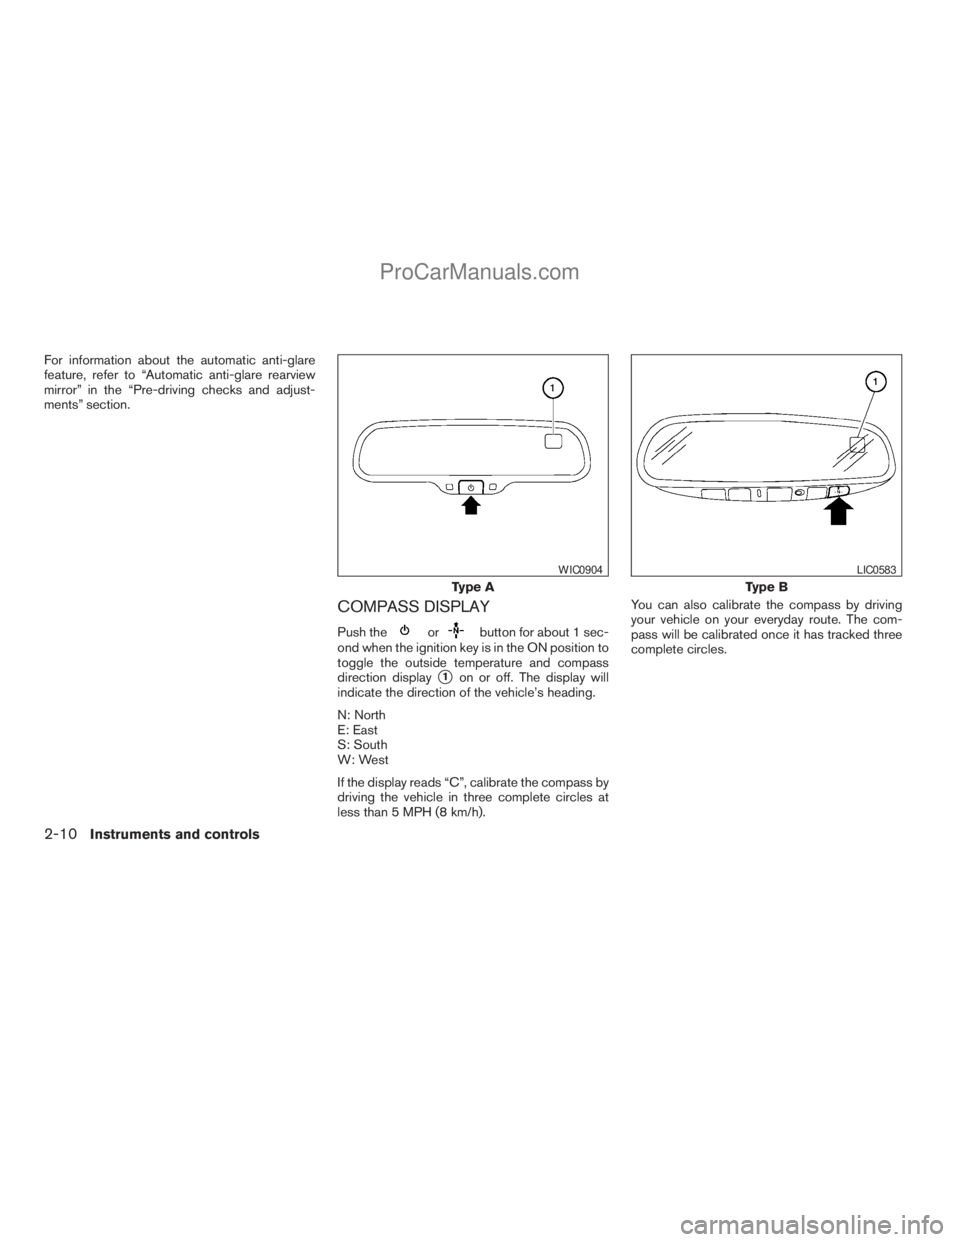
COMPASS DISPLAY
Push theorbutton for about 1 sec-
ond when the ignition key is in the ON position to
toggle the outside temperature and compass
direction display
s1on or off. The display will
indicate the direction of the vehicle’s heading.
N: North
E: East
S: South
W: West
If the display reads “C”, calibrate the compass by
driving the vehicle in three complete circles at
less than 5 MPH (8 km/h).You can also calibrate the compass by driving
your vehicle on your everyday route. The com-
pass will be calibrated once it has tracked three
complete circles.
Type A
WIC0904
Type B
LIC0583
2-10Instruments and controls
ZREVIEW COPYÐ2009 Armada(wzw)
Owners ManualÐUSA_English(nna)
02/26/08Ðdebbie
X
ProCarManuals.com
Page 94 of 465
2. Calibrate the compass by driving the vehicle
one and a half circles at a maximum speed of
6 MPH (10 km/h).
3. After completing the circles, the display
should return to normal.
cIf the compass deviates from the correct
indication soon after repeated adjustment,
have the compass checked at an authorized
NISSAN dealer.
cThe compass may not indicate the correct
compass point in tunnels or while driving up
or down a steep hill. (The compass returns
to the correct compass point when the ve-
hicle moves to an area where the geomag-
netism is stabilized.)
cIf a magnet is located in or near the overhead
console in the front of the vehicle or the
vehicle is driven where the terrestrial mag-
netism is disturbed, the compass display
may not indicate the correct direction.
CAUTION
cDo not install a ski rack, antenna, etc.,
which are attached to the vehicle by
means of a magnet. They affect the op-
eration of the compass.cWhen cleaning the mirror, use a paper
towel or similar material dampened
with glass cleaner. Do not spray glass
cleaner directly on the mirror as it may
cause the liquid cleaner to enter the
mirror housing.
2-12Instruments and controls
ZREVIEW COPYÐ2009 Armada(wzw)
Owners ManualÐUSA_English(nna)
02/26/08Ðdebbie
X
ProCarManuals.com
Page 114 of 465
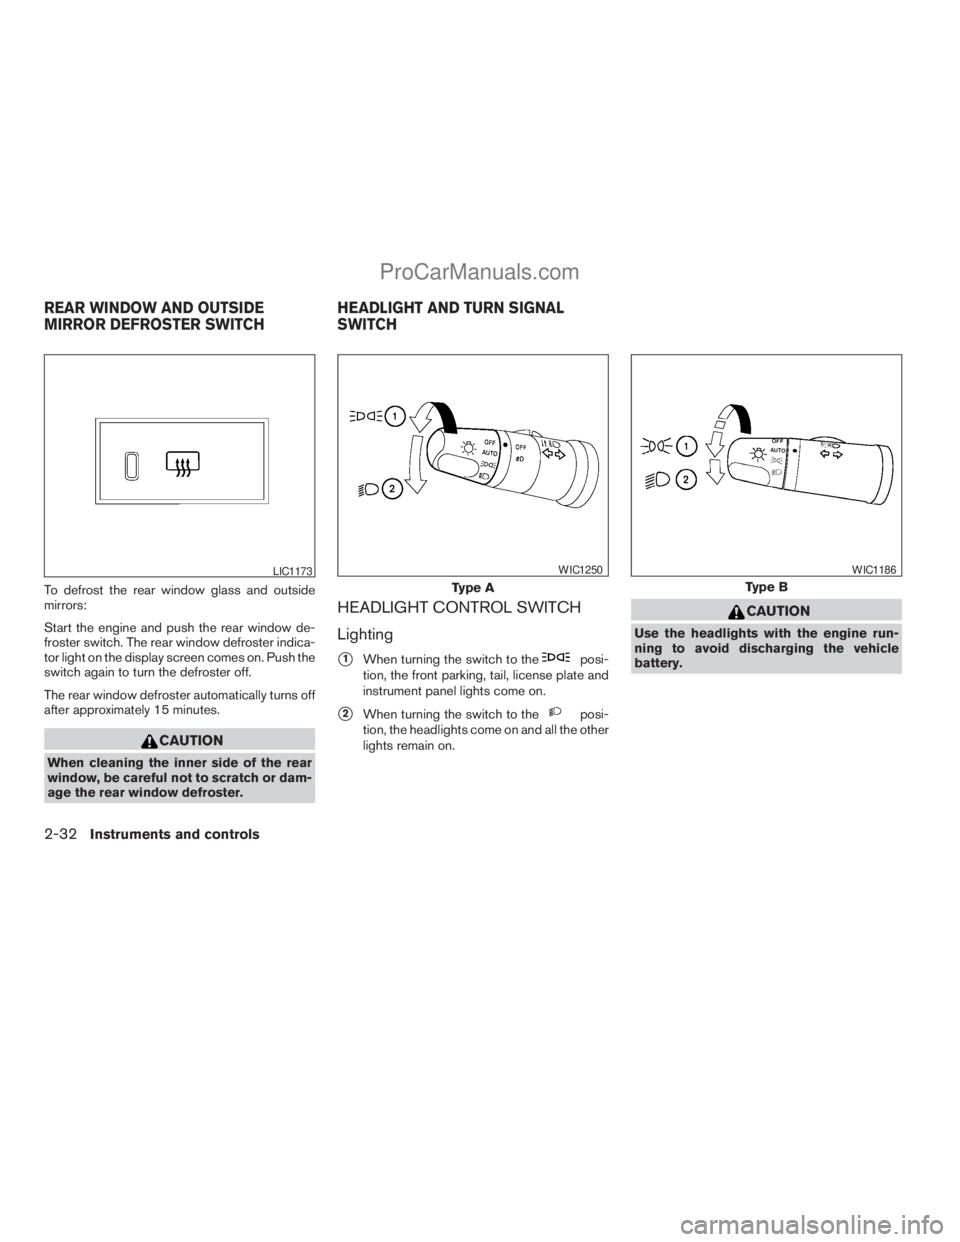
To defrost the rear window glass and outside
mirrors:
Start the engine and push the rear window de-
froster switch. The rear window defroster indica-
tor light on the display screen comes on. Push the
switch again to turn the defroster off.
The rear window defroster automatically turns off
after approximately 15 minutes.
CAUTION
When cleaning the inner side of the rear
window, be careful not to scratch or dam-
age the rear window defroster.
HEADLIGHT CONTROL SWITCH
Lighting
s1When turning the switch to theposi-
tion, the front parking, tail, license plate and
instrument panel lights come on.
s2When turning the switch to theposi-
tion, the headlights come on and all the other
lights remain on.
CAUTION
Use the headlights with the engine run-
ning to avoid discharging the vehicle
battery.
LIC1173
Type A
WIC1250
Type B
WIC1186
REAR WINDOW AND OUTSIDE
MIRROR DEFROSTER SWITCHHEADLIGHT AND TURN SIGNAL
SWITCH
2-32Instruments and controls
ZREVIEW COPYÐ2009 Armada(wzw)
Owners ManualÐUSA_English(nna)
02/26/08Ðdebbie
X
ProCarManuals.com
Page 175 of 465

Do not hang objects over the sensors1or apply
glass cleaner to the sensors. Doing so will reduce
the sensitivity of the sensors, resulting in im-
proper operation.
The indicator light will illuminate when the auto-
matic anti-glare feature is operating.
For information on HomeLinkTUniversal Trans-
ceiver operation, see “HomeLinkTUniversal
Transceiver” in the “Instrument and controls” sec-
tion of this manual.
For information on the
s2compass and compass
features, see “Compass display” in the “Instru-
ment and controls” section of this manual.
OUTSIDE MIRRORS
The outside mirror remote control will operate
only when the ignition switch is in the ACC or ON
position.
Rotate the round switch
s1to select the right or
left mirror. Adjust each mirror to the desired po-
sition pushing the round switch.
WARNING
cObjects viewed in the outside mirror on
the passenger side are closer than they
appear. Be careful when moving to the
right. Using only this mirror could cause
an accident. Use the inside mirror or
glance over your shoulder to properly
judge distances to other objects.
cDo not adjust the mirrors while driving.
You could lose control of your vehicle
and cause an accident.
LPD0418
Pre-driving checks and adjustments3-31
ZREVIEW COPYÐ2009 Armada(wzw)
Owners ManualÐUSA_English(nna)
02/26/08Ðdebbie
X
ProCarManuals.com
Page 176 of 465
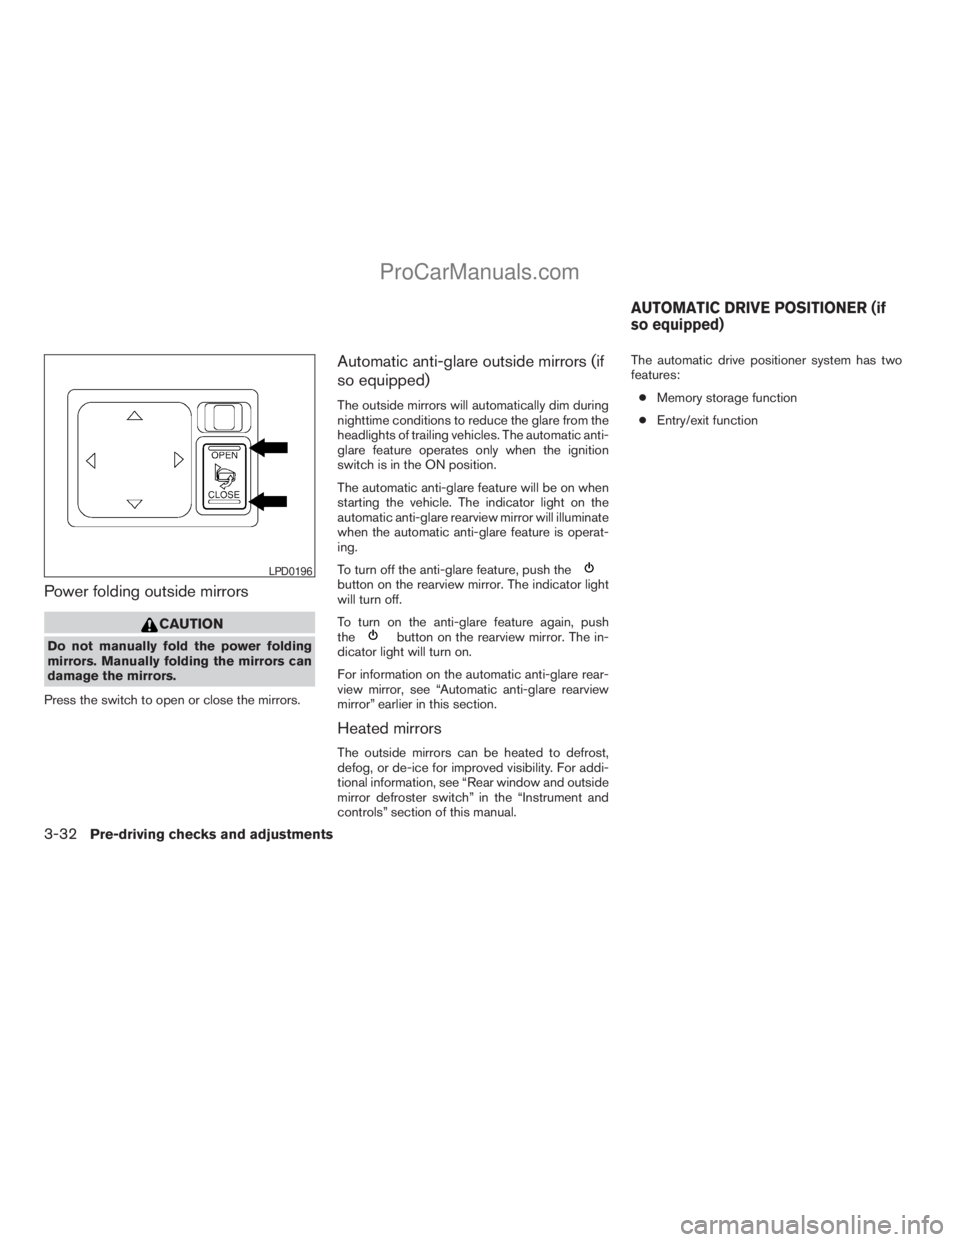
Power folding outside mirrors
CAUTION
Do not manually fold the power folding
mirrors. Manually folding the mirrors can
damage the mirrors.
Press the switch to open or close the mirrors.
Automatic anti-glare outside mirrors (if
so equipped)
The outside mirrors will automatically dim during
nighttime conditions to reduce the glare from the
headlights of trailing vehicles. The automatic anti-
glare feature operates only when the ignition
switch is in the ON position.
The automatic anti-glare feature will be on when
starting the vehicle. The indicator light on the
automatic anti-glare rearview mirror will illuminate
when the automatic anti-glare feature is operat-
ing.
To turn off the anti-glare feature, push the
button on the rearview mirror. The indicator light
will turn off.
To turn on the anti-glare feature again, push
the
button on the rearview mirror. The in-
dicator light will turn on.
For information on the automatic anti-glare rear-
view mirror, see “Automatic anti-glare rearview
mirror” earlier in this section.
Heated mirrors
The outside mirrors can be heated to defrost,
defog, or de-ice for improved visibility. For addi-
tional information, see “Rear window and outside
mirror defroster switch” in the “Instrument and
controls” section of this manual.The automatic drive positioner system has two
features:
cMemory storage function
cEntry/exit function
LPD0196
AUTOMATIC DRIVE POSITIONER (if
so equipped)
3-32Pre-driving checks and adjustments
ZREVIEW COPYÐ2009 Armada(wzw)
Owners ManualÐUSA_English(nna)
02/26/08Ðdebbie
X
ProCarManuals.com
Page 334 of 465
cMake sure the area around the vehicle is
clear.
cCheck fluid levels such as engine oil, cool-
ant, brake fluid, and window washer fluid as
frequently as possible, or at least whenever
you refuel.
cCheck that all windows and lights are clean.
cVisually inspect tires for their appearance
and condition. Also check tires for proper
inflation.
cCheck that all doors are closed.
cPosition seat and adjust head restraint.
cAdjust inside and outside mirrors.
cFasten seat belts and ask all passengers to
do likewise.
cCheck the operation of warning lights when
the key is turned to the ON (3) position. See
“Warning/indicator lights and audible re-
minders” in the “Instruments and controls”
section of this manual.1. Apply the parking brake.
2. Move the shift selector lever to P (Park) or N
(Neutral) . P (Park) is recommended.
The shift selector lever cannot be
moved out of P (Park) and into any of
the other gear positions if the ignition
key is turned to the OFF position or if
the key is removed from the ignition
switch.
The starter is designed not to operate if
the shift selector lever is in any of the
driving positions.
3. Crank the enginewith your foot off the
accelerator pedalby turning the ignition
key to START. Release the key when the
engine starts. If the engine starts, but fails to
run, repeat the above procedure.
cIf the engine is very hard to start in ex-
tremely cold weather or when restarting,
depress the accelerator pedal a little (ap-
proximately 1/3 to the floor) and hold it
and then crank the engine. Release the
key and the accelerator pedal when the
engine starts.cIf the engine is very hard to start because
it is flooded, depress the accelerator
pedal all the way to the floor and hold it.
Crank the engine for 5-6 seconds. After
cranking the engine, release the accel-
erator pedal. Crank the enginewith your
foot off the accelerator pedalby turn-
ing the ignition key to START. Release the
key when the engine starts. If the engine
starts, but fails to run, repeat the above
procedure.
CAUTION
Do not operate the starter for more than
15 seconds at a time. If the engine does
not start, turn the key off and wait 10 sec-
onds before cranking again, otherwise the
starter could be damaged.
4. Allow the engine to idle for at least 30 sec-
onds after starting. Do not race the engine
while warming it up. Drive at moderate
speed for a short distance first, especially in
cold weather.
In cold weather, keep the engine running for
a minimum of 2–3 minutes before shutting it
off. Starting and stopping the engine over a
short period of time may make the vehicle
more difficult to start.
BEFORE STARTING THE ENGINE STARTING THE ENGINE
5-12Starting and driving
ZREVIEW COPYÐ2009 Armada(wzw)
Owners ManualÐUSA_English(nna)
02/26/08Ðdebbie
X
ProCarManuals.com