2009 NISSAN ARMADA wheel
[x] Cancel search: wheelPage 133 of 465
WARNING
cDrive extra carefully when the vehicle is
loaded at or near the cargo carrying
capacity, especially if the significant
portion of that load is carried on the
roof rack.
cHeavy loading of the roof rack has the
potential to affect the vehicle stability
and handling during sudden or abnor-
mal handling maneuvers.
cRoof rack load should be evenly
distributed.
cDo not exceed maximum roof rack load
weight capacity.
cProperly secure all cargo with ropes or
straps to help prevent it from sliding or
shifting. In a sudden stop or collision,
unsecured cargo could cause personal
injury.
CAUTION
Use care when placing or removing items
from the roof rack. If you cannot comfort-
ably lift the items onto the roof rack from
the ground, use a ladder or stool.Always distribute the luggage evenly on the roof
rack. Do not load more than 200 lbs (91 kg) on
entire roof rack. Be sure load is evenly distributed
across both crossbars. Be careful that your ve-
hicle does not exceed the Gross Vehicle Weight
Rating (GVWR) or its Gross Axle Weight Rating
(GAWR front and rear) . The GVWR and GAWR
are located on the F.M.V.S.S. label (located on
the driver’s door pillar) . For more information
regarding GVWR and GAWR, refer to “Vehicle
loading information” in the “Technical and con-
sumer information” section later in this manual.
The crossbars can be adjusted forward and
backward. Loosen the thumbwheel
s1and ad-
just the crossbar to the desired position. Tighten
the thumbwheel. Place your luggage on the bars
and secure the luggage with rope to the utility
loops
s2. Do not place luggage on the side rails
or tie rope directly to the side rails. Always be
sure the thumbwheels are fully tightened to keep
the crossbar in place. Do not use utility loops for
any purpose other than securing luggage.
LIC1200
Instruments and controls2-51
ZREVIEW COPYÐ2009 Armada(wzw)
Owners ManualÐUSA_English(nna)
02/26/08Ðdebbie
X
ProCarManuals.com
Page 145 of 465
3 Pre-driving checks and adjustments
Keys .............................................3-2
Intelligent keys (if so equipped)..................3-2
NISSAN vehicle immobilizer system keys..........3-3
Doors............................................3-4
Locking with key................................3-4
Locking with inside lock knob....................3-5
Locking with power door lock switch.............3-5
Vehicle speed sensing door lock mechanism......3-6
Child safety rear door lock.......................3-7
Remote keyless entry system.......................3-7
How to use remote keyless entry system..........3-8
Intelligent Key system (if so equipped)..............3-11
Operating range...............................3-12
Door locks/unlocks precaution..................3-13
Intelligent Key operation........................3-13
How to use the remote keyless entry
function......................................3-16
Warning signals...............................3-19
Troubleshooting guide.........................3-20
Hood...........................................3-21
Lift gate.........................................3-21Operating the manual lift gate...................3-22
Operating the power lift gate
(if so equipped)...............................3-22
Cancel switch.................................3-24
Lift gate release...............................3-25
Glass hatch......................................3-26
Fuel-filler door...................................3-26
Fuel-filler cap.................................3-26
Steering wheel...................................3-28
Tilt operation..................................3-28
Pedal position adjustment.........................3-28
Sun visors.......................................3-28
Vanity mirrors.................................3-29
Mirrors..........................................3-29
Automatic anti-glare rearview mirror
(if so equipped)...............................3-29
Outside mirrors...............................3-31
Automatic drive positioner (if so equipped)..........3-32
Memory storage function.......................3-33
Entry/exit function.............................3-34
System operation..............................3-34
ZREVIEW COPYÐ2009 Armada(wzw)
Owners ManualÐUSA_English(nna)
02/26/08Ðdebbie
X
ProCarManuals.com
Page 155 of 465

WARNING
Radio waves could adversely affect elec-
tric medical equipment. Those who use a
pacemaker should contact the electric
medical equipment manufacturer for the
possible influences before use.
The Intelligent Key system can operate all the
door locks using the remote controller function or
pushing the request switch on the vehicle without
taking the key out from a pocket or purse. The
operating environment and/or conditions may af-
fect the Intelligent Key system operation.
Be sure to read the following before using the
Intelligent Key system.
CAUTION
cBe sure to carry the Intelligent Key with
you when operating the vehicle.
cNever leave the Intelligent Key in the
vehicle when you leave the vehicle.
The Intelligent Key is always communicating with
the vehicle as it receives radio waves. The Intel-
ligent Key system transmits weak radio waves.
Environmental conditions may interfere with the
operation of the Intelligent Key system under the
following operating conditions.cWhen operating near a location where
strong radio waves are transmitted, such as
a TV tower, power station and broadcasting
station.
cWhen in possession of wireless equipment,
such as a cellular telephone, transceiver,
and CB radio.
cWhen the Intelligent Key is in contact with or
covered by metallic materials.
cWhen any type of radio wave remote control
is used nearby.
cWhen the Intelligent Key is placed near an
electric appliance such as a personal com-
puter.
cWhen the vehicle is parked near a parking
meter.
In such cases, correct the operating conditions
before using the Intelligent Key function or use
the mechanical key.
Although the life of the battery varies depending
on the operating conditions, the battery’s life is
approximately 2 years. If the battery is dis-
charged, replace it with a new one.
When the Intelligent Key battery is low, the Intel-
ligent Key system warning light (
) will blink
green for about 30 seconds after the ignition
switch is turned to the ON position.Since the Intelligent Key is continuously receiving
radio waves, if the key is left near equipment
which transmits strong radio waves, such as sig-
nals from a TV and personal computer, the bat-
tery life may become shorter.
For information regarding replacement of a bat-
tery, see “Battery” in the “Maintenance and do-it-
yourself” section.
Because the steering wheel is locked electrically,
unlocking the steering wheel with the ignition
switch in the LOCK position is impossible when
the vehicle battery is completely discharged. Un-
locking the steering wheel is impossible even if
the Intelligent Key is inserted into the ignition
switch. Pay special attention that the vehicle bat-
tery is not completely discharged.
As many as 4 Intelligent Keys can be registered
and used with one vehicle. For information about
the purchase and use of additional Intelligent
Keys, contact a NISSAN dealer.
CAUTION
cDo not allow the Intelligent Key, which
contains electrical components, to
come into contact with water or salt
water. This could affect the system
function.
cDo not drop the Intelligent Key.
INTELLIGENT KEY SYSTEM (if so
equipped)
Pre-driving checks and adjustments3-11
ZREVIEW COPYÐ2009 Armada(wzw)
Owners ManualÐUSA_English(nna)
02/26/08Ðdebbie
X
ProCarManuals.com
Page 172 of 465
TILT OPERATION
WARNING
Do not adjust the steering wheel while
driving. You could lose control of your
vehicle and cause an accident.
Pull the lock lever forward and hold it to adjust the
steering wheel up or down to the desired posi-
tion.
Release the lock lever to lock the steering wheel
in place.The accelerator and brake pedals can be ad-
justed for driving comfort.
Use the pedal adjusting switch to adjust the
brake and accelerator pedal position forwards1
or backwards2.
The brake and accelerator pedals cannot be ad-
justed separately.
CAUTION
Do not adjust the pedal position with your
foot on the pedal.
WPD0428WPD0429
LPD0256
STEERING WHEEL PEDAL POSITION ADJUSTMENT SUN VISORS
3-28Pre-driving checks and adjustments
ZREVIEW COPYÐ2009 Armada(wzw)
Owners ManualÐUSA_English(nna)
02/26/08Ðdebbie
X
ProCarManuals.com
Page 180 of 465
4 Monitor, climate, audio, phone and voice
recognition systems
Control panel buttons — color screen without
Navigation System.................................4-2
How to use the NISSAN controller...............4-3
How to select menus on the screen..............4-4
How to use the STATUS button..................4-4
How to use the INFO button.....................4-4
How to use the SETTING button.................4-9
OFF button.............................4-16
Control panel buttons — color screen with
Navigation System (if so equipped).................4-16
How to use the NISSAN controller..............4-17
How to use the touch screen...................4-17
Start-up screen...............................4-19
How to select menus on the screen.............4-19
How to use the STATUS button.................4-20
How to use the INFO button....................4-20
How to use the SETTING button................4-25
OFF button.............................4-32
Rearview monitor (if so equipped)..................4-32
How to read the displayed lines.................4-33
Adjusting the screen...........................4-33
Operating tips.................................4-34
Vents...........................................4-35Heater and air conditioner (automatic)..............4-36
Automatic operation...........................4-36
Manual operation..............................4-37
Operating tips.................................4-37
Rear seat air conditioner..........................4-38
Controls......................................4-39
Servicing air conditioner...........................4-39
Audio system....................................4-39
Radio........................................4-39
FM radio reception............................4-40
AM radio reception............................4-40
Satellite radio reception (if so equipped).........4-40
Audio operation precautions....................4-41
FM/AM/SAT radio with compact disc (CD)
changer (if so equipped).......................4-47
FM/AM/SAT radio with compact disc (CD)
player (if so equipped).........................4-55
CompactFlash™ (CF) player operation
(if so equipped)...............................4-60
Music Box hard-disk drive audio system
(if so equipped)...............................4-62
CD/CF (CompactFlash™) care and cleaning......4-71
Steering wheel switch for audio control..........4-73
ZREVIEW COPYÐ2009 Armada(wzw)
Owners ManualÐUSA_English(nna)
02/26/08Ðdebbie
X
ProCarManuals.com
Page 186 of 465
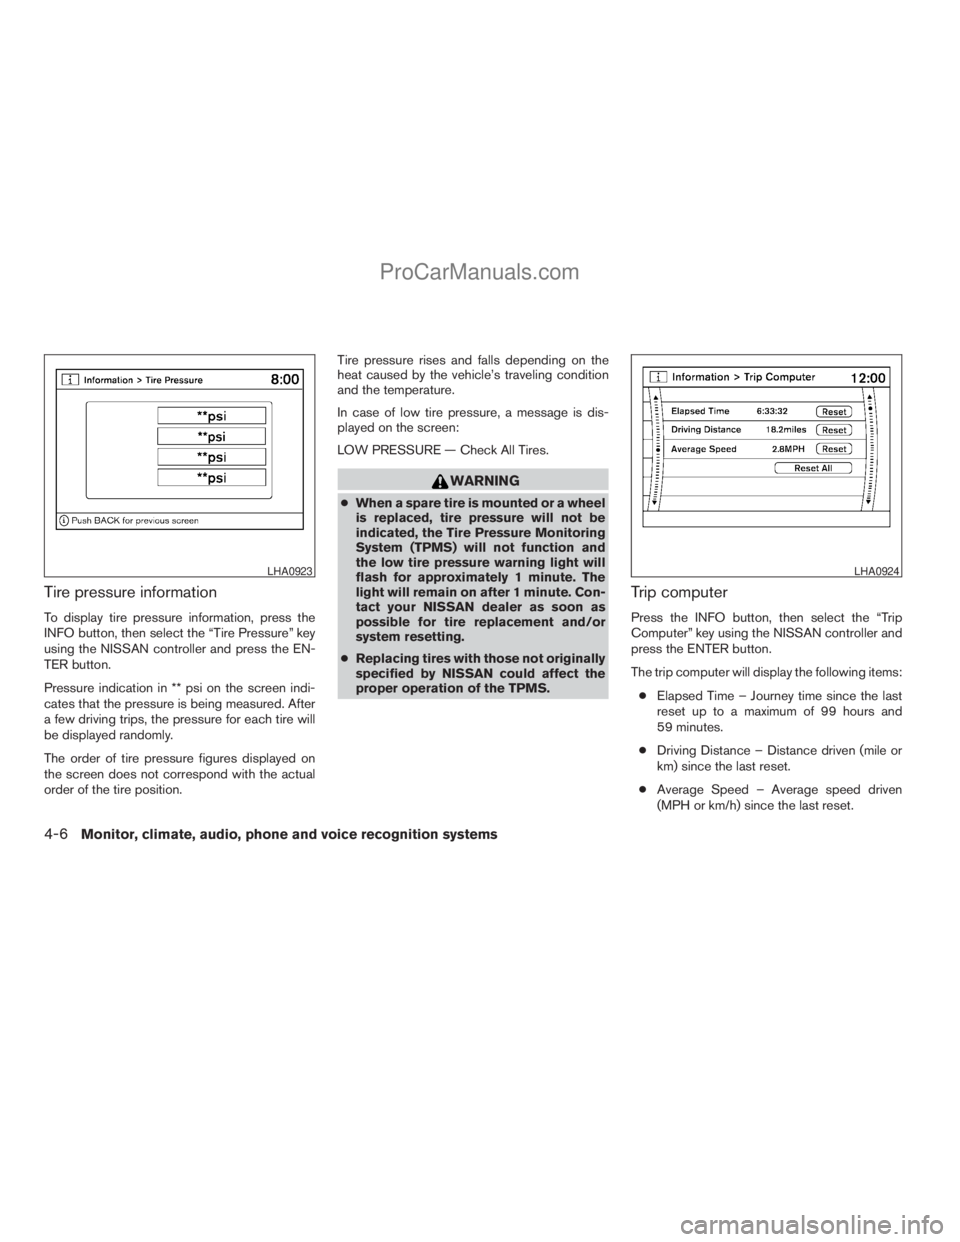
Tire pressure information
To display tire pressure information, press the
INFO button, then select the “Tire Pressure” key
using the NISSAN controller and press the EN-
TER button.
Pressure indication in ** psi on the screen indi-
cates that the pressure is being measured. After
a few driving trips, the pressure for each tire will
be displayed randomly.
The order of tire pressure figures displayed on
the screen does not correspond with the actual
order of the tire position.Tire pressure rises and falls depending on the
heat caused by the vehicle’s traveling condition
and the temperature.
In case of low tire pressure, a message is dis-
played on the screen:
LOW PRESSURE — Check All Tires.
WARNING
cWhen a spare tire is mounted or a wheel
is replaced, tire pressure will not be
indicated, the Tire Pressure Monitoring
System (TPMS) will not function and
the low tire pressure warning light will
flash for approximately 1 minute. The
light will remain on after 1 minute. Con-
tact your NISSAN dealer as soon as
possible for tire replacement and/or
system resetting.
cReplacing tires with those not originally
specified by NISSAN could affect the
proper operation of the TPMS.
Trip computer
Press the INFO button, then select the “Trip
Computer” key using the NISSAN controller and
press the ENTER button.
The trip computer will display the following items:
cElapsed Time – Journey time since the last
reset up to a maximum of 99 hours and
59 minutes.
cDriving Distance – Distance driven (mile or
km) since the last reset.
cAverage Speed – Average speed driven
(MPH or km/h) since the last reset.
LHA0923LHA0924
4-6Monitor, climate, audio, phone and voice recognition systems
ZREVIEW COPYÐ2009 Armada(wzw)
Owners ManualÐUSA_English(nna)
02/26/08Ðdebbie
X
ProCarManuals.com
Page 202 of 465
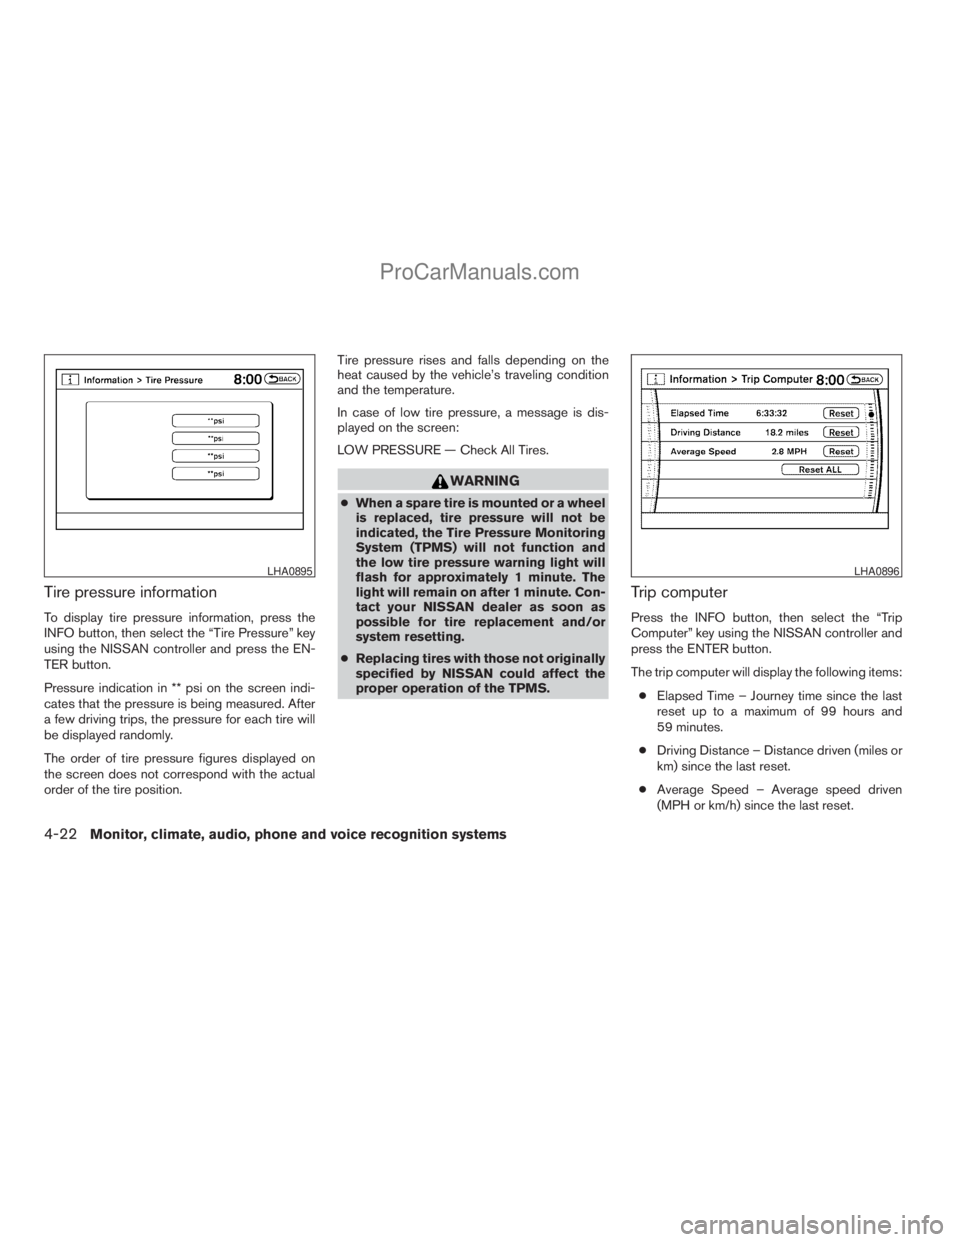
Tire pressure information
To display tire pressure information, press the
INFO button, then select the “Tire Pressure” key
using the NISSAN controller and press the EN-
TER button.
Pressure indication in ** psi on the screen indi-
cates that the pressure is being measured. After
a few driving trips, the pressure for each tire will
be displayed randomly.
The order of tire pressure figures displayed on
the screen does not correspond with the actual
order of the tire position.Tire pressure rises and falls depending on the
heat caused by the vehicle’s traveling condition
and the temperature.
In case of low tire pressure, a message is dis-
played on the screen:
LOW PRESSURE — Check All Tires.
WARNING
cWhen a spare tire is mounted or a wheel
is replaced, tire pressure will not be
indicated, the Tire Pressure Monitoring
System (TPMS) will not function and
the low tire pressure warning light will
flash for approximately 1 minute. The
light will remain on after 1 minute. Con-
tact your NISSAN dealer as soon as
possible for tire replacement and/or
system resetting.
cReplacing tires with those not originally
specified by NISSAN could affect the
proper operation of the TPMS.
Trip computer
Press the INFO button, then select the “Trip
Computer” key using the NISSAN controller and
press the ENTER button.
The trip computer will display the following items:
cElapsed Time – Journey time since the last
reset up to a maximum of 99 hours and
59 minutes.
cDriving Distance – Distance driven (miles or
km) since the last reset.
cAverage Speed – Average speed driven
(MPH or km/h) since the last reset.
LHA0895LHA0896
4-22Monitor, climate, audio, phone and voice recognition systems
ZREVIEW COPYÐ2009 Armada(wzw)
Owners ManualÐUSA_English(nna)
02/26/08Ðdebbie
X
ProCarManuals.com
Page 210 of 465
Select to turn off all sounds made when a door
handle request switch is pushed, by selecting the
“OFF” key.
Intelligent Key Unlock Reply:Select to
change the sound of the Intelligent Key mode
used when a door handle request switch is
pushed to unlock.
Select to turn off all sounds made when a door
handle request switch is pushed, by selecting the
“OFF” key.
Lift Steering Wheel on Exit:Select to turn on
or turn off the steering wheel moving upward for
easy exit when the ignition switch is in the OFF
position and the driver’s door is opened. After
getting into the vehicle and pushing the ignition
switch to the ACC position, the steering wheel
moves to the previous position.
Slide Driver Seat Back on Exit:Select to turn
on or turn off the driver’s seat moving backwards
for easy exit when the ignition switch is in the OFF
position and the driver’s door is opened. After
getting into the vehicle and pushing the ignition
switch to the ACC position, the driver’s seat
moves to the previous position.
Return All Settings to Default:Select to
change all the comfort and convenience systems
to their default settings.
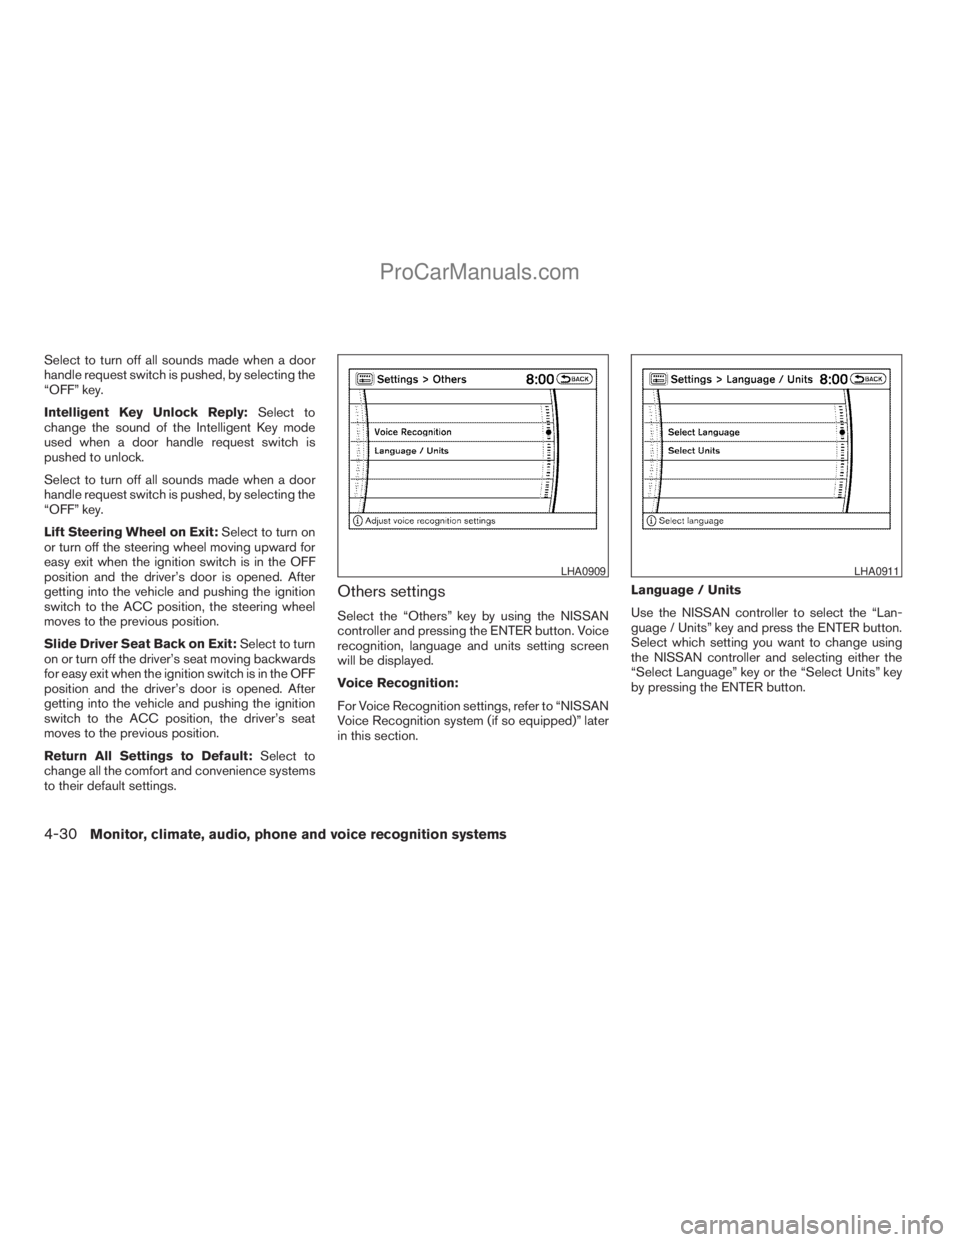
Others settings
Select the “Others” key by using the NISSAN
controller and pressing the ENTER button. Voice
recognition, language and units setting screen
will be displayed.
Voice Recognition:
For Voice Recognition settings, refer to “NISSAN
Voice Recognition system (if so equipped)” later
in this section.Language / Units
Use the NISSAN controller to select the “Lan-
guage / Units” key and press the ENTER button.
Select which setting you want to change using
the NISSAN controller and selecting either the
“Select Language” key or the “Select Units” key
by pressing the ENTER button.
LHA0909LHA0911
4-30Monitor, climate, audio, phone and voice recognition systems
ZREVIEW COPYÐ2009 Armada(wzw)
Owners ManualÐUSA_English(nna)
02/26/08Ðdebbie
X
ProCarManuals.com