2009 NISSAN ALTIMA HYBRID rear view mirror
[x] Cancel search: rear view mirrorPage 79 of 353

2 Instruments and controls
Instrument panel...................................2-2
Meters and gauges................................2-3
Speedometer and odometer.....................2-4
Power meter...................................2-4
High voltage battery status meter.................2-5
Fuel gauge....................................2-5
Compass display (if so equipped)...................2-6
Compass display...............................2-6
Warning/indicator lights and audible reminders.......2-9
Checking bulbs................................2-9
Warning lights................................2-10
Indicator lights................................2-15
Audible reminders.............................2-17
Vehicle information display.........................2-18
How to use the vehicle information display.......2-18
Security systems.................................2-26
Vehicle security system.........................2-26
NISSAN vehicle immobilizer system.............2-27
Windshield wiper and washer switch...............2-28
Switch operation..............................2-28
Rear window and outside mirror (if so equipped)
defroster switch..................................2-29
Headlight and turn signal switch....................2-29Headlight control switch........................2-29
Daytime running light system (Canada only)......2-32
Instrument brightness control...................2-32
Turn signal switch.............................2-33
Fog light switch (if so equipped)................2-33
Hazard warning flasher switch.....................2-33
Horn............................................2-34
Heated seats (if so equipped)......................2-34
Power outlet.....................................2-35
Storage.........................................2-36
Map pockets..................................2-36
Seatback pockets.............................2-36
Sunglasses holder.............................2-37
Cup holders..................................2-37
Glove box....................................2-38
Console box..................................2-39
Covered storage box...........................2-40
Grocery hooks................................2-40
Cargo net (if so equipped)......................2-41
Windows........................................2-41
Power windows...............................2-41
Moonroof (if so equipped).........................2-44
Automatic moonroof...........................2-44
ZREVIEW COPYÐ2009 Altima Hybrid Electric
(ahv)
Owners ManualÐCanadian_French(fr_can)
06/14/08Ðdebbie
X
Page 85 of 353

This unit measures terrestrial magnetism and in-
dicates the direction of the vehicle’s heading.
With the ignition switch placed in the ON posi-
tion, press the
button as described in the
chart below to activate various features of the
automatic anti-glare rearview mirror.
Push and hold
the
button for about:Feature:
(Push button again for about 1 sec-
ond to change settings)
1 second Compass display toggles on/off
5 secondsCompass zone can be changed to
correct false compass readings
9 seconds Compass enters calibration mode
For information about the automatic anti-glare
feature, refer to “Automatic anti-glare rearview
mirror” in the “Pre-driving checks and adjust-
ments” section.Push thebutton for about 1 second when
the ignition switch is placed in the ON position to
toggle the compass display
s1on or off. The
display will indicate the direction of the vehicle’s
heading.
N: North
E: East
S: South
W: West
If the display reads “C”, calibrate the compass by
driving the vehicle in three complete circles at
less than 5 MPH (8 km/h) .You can also calibrate the compass by driving
your vehicle on your everyday route. The com-
pass will be calibrated once it has tracked three
complete circles.
COMPASS DISPLAY
Push thebutton when the ignition switch is
placed in the ON position. The direction will be
displayed.
LIC0583
COMPASS DISPLAY (if so equipped)
2-6Instruments and controls
ZREVIEW COPYÐ2009 Altima Hybrid Electric
(ahv)
Owners ManualÐCanadian_French(fr_can)
06/14/08Ðdebbie
X
Page 108 of 353

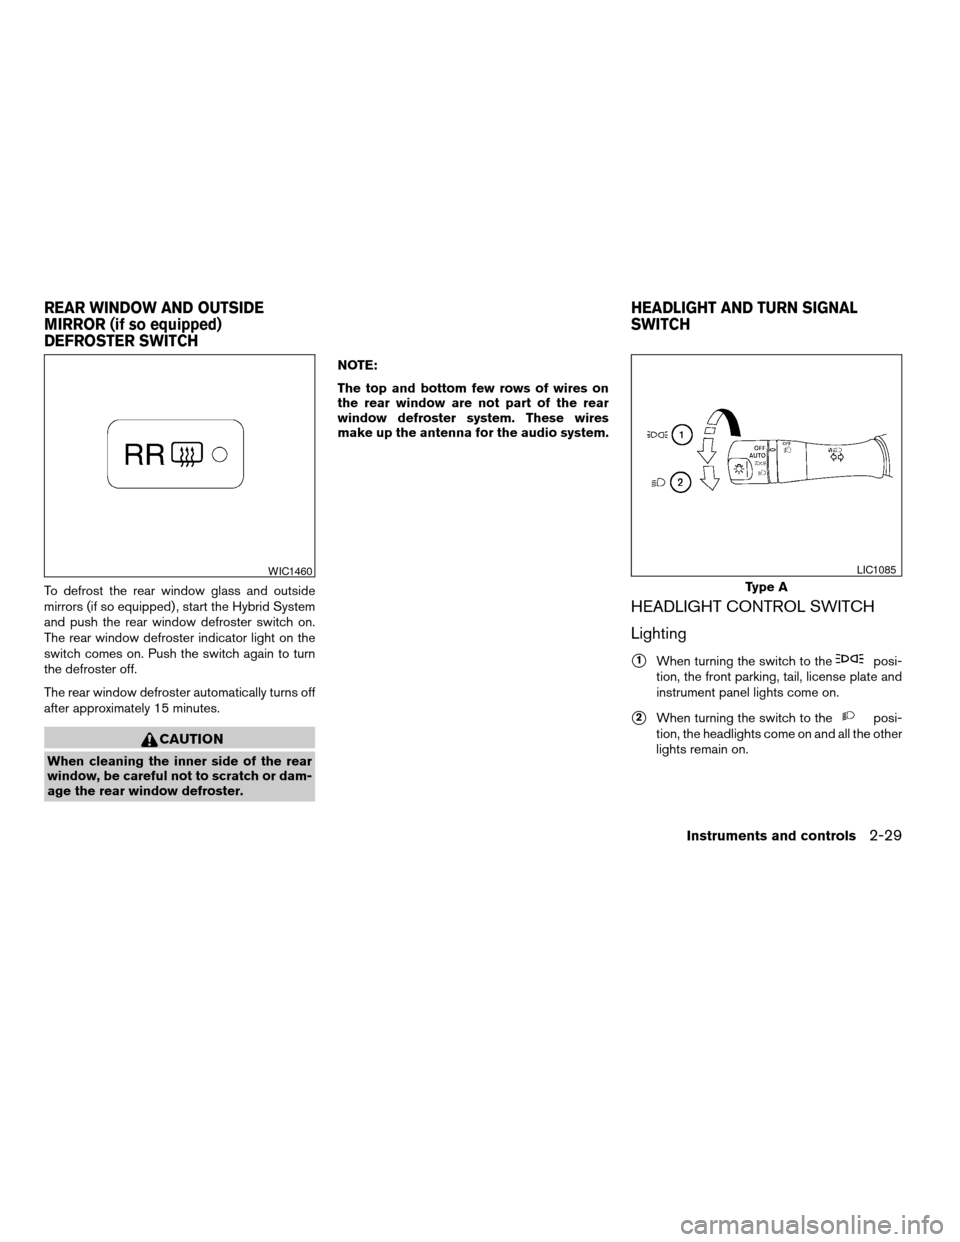
To defrost the rear window glass and outside
mirrors (if so equipped) , start the Hybrid System
and push the rear window defroster switch on.
The rear window defroster indicator light on the
switch comes on. Push the switch again to turn
the defroster off.
The rear window defroster automatically turns off
after approximately 15 minutes.
CAUTION
When cleaning the inner side of the rear
window, be careful not to scratch or dam-
age the rear window defroster.NOTE:
The top and bottom few rows of wires on
the rear window are not part of the rear
window defroster system. These wires
make up the antenna for the audio system.
HEADLIGHT CONTROL SWITCH
Lighting
s1When turning the switch to theposi-
tion, the front parking, tail, license plate and
instrument panel lights come on.
s2When turning the switch to theposi-
tion, the headlights come on and all the other
lights remain on.
WIC1460
Type A
LIC1085
REAR WINDOW AND OUTSIDE
MIRROR (if so equipped)
DEFROSTER SWITCHHEADLIGHT AND TURN SIGNAL
SWITCH
Instruments and controls2-29
ZREVIEW COPYÐ2009 Altima Hybrid Electric
(ahv)
Owners ManualÐCanadian_French(fr_can)
06/16/08Ðdebbie
X
Page 132 of 353

3 Pre-driving checks and adjustments
Keys .............................................3-2
NISSAN Intelligent Key™........................3-2
NISSAN vehicle immobilizer system keys..........3-3
Doors............................................3-4
Locking with key................................3-4
Locking with inside lock knob....................3-5
Locking with power door lock switch.............3-5
Automatic Door Locks..........................3-6
Child safety rear door lock.......................3-6
NISSAN Intelligent Key™...........................3-7
Operating range................................3-9
Door locks/unlocks precaution...................3-9
NISSAN Intelligent Key™ Operation..............3-10
How to use the remote keyless entry
function......................................3-13
Warning signals...............................3-16
Troubleshooting guide.........................3-17
Hood...........................................3-18Trunk lid.........................................3-18
Opener operation..............................3-18
Secondary trunk lid release.....................3-19
Interior trunk lid release........................3-20
Fuel-filler door...................................3-21
Opener operation..............................3-21
Fuel-filler cap.................................3-21
Tilting/telescopic steering column..................3-22
Tilt operation..................................3-22
Telescopic operation...........................3-23
Sun visors.......................................3-23
Vanity mirrors.................................3-24
Mirrors..........................................3-24
Rearview mirror (if so equipped).................3-24
Automatic anti-glare rearview mirror
(if so equipped)...............................3-24
Outside mirrors...............................3-25
ZREVIEW COPYÐ2009 Altima Hybrid Electric
(ahv)
Owners ManualÐCanadian_French(fr_can)
06/16/08Ðdebbie
X
Page 155 of 353

VANITY MIRRORS
To access the vanity mirror, pull the sun visor
down and flip open the mirror cover. Some vanity
mirrors are illuminated and turn on when the
mirror cover is open.
REARVIEW MIRROR (if so equipped)
The night positions1reduces glare from the
headlights of vehicles behind you at night.
Use the day position
s2when driving in daylight
hours.
WARNING
Use the night position only when neces-
sary, because it reduces rear view clarity.
AUTOMATIC ANTI-GLARE
REARVIEW MIRROR (if so equipped)
The inside mirror is designed so that it automati-
cally dims according to the intensity of the head-
lights of the vehicle following you. The automatic
anti-glare feature operates only when the ignition
switch is in the ON position.
The indicator light
s1will illuminate when the
automatic anti-glare feature is operating.
To turn off the automatic anti-glare feature, press
the
button. The indicator light will turn off.
WPD0141WPD0126WPD0333
MIRRORS
3-24Pre-driving checks and adjustments
ZREVIEW COPYÐ2009 Altima Hybrid Electric
(ahv)
Owners ManualÐCanadian_French(fr_can)
06/16/08Ðdebbie
X
Page 156 of 353

To turn on the automatic anti-glare feature, press
the
button again. The indicator light will
turn on.
For information on HomeLinkTUniversal Trans-
ceiver operation, see “HomeLinkTUniversal
Transceiver” in the “Instrument and controls” sec-
tion of this manual.
For information on the compass and outside tem-
perature display, see “Compass and outside
temperature display” in the “Instrument and con-
trols” section of this manual.
NOTE:
Do not hang any objects over the sensors
s2or apply glass cleaner to the sensors.
Doing so will reduce the sensitivity of the
sensors, resulting in improper operation.
OUTSIDE MIRRORS
WARNING
cObjects viewed in the outside mirror on
the passenger side are closer than they
appear. Be careful when moving to the
right. Using only this mirror could cause
an accident. Use the inside mirror or
glance over your shoulder to properly
judge distances to other objects.
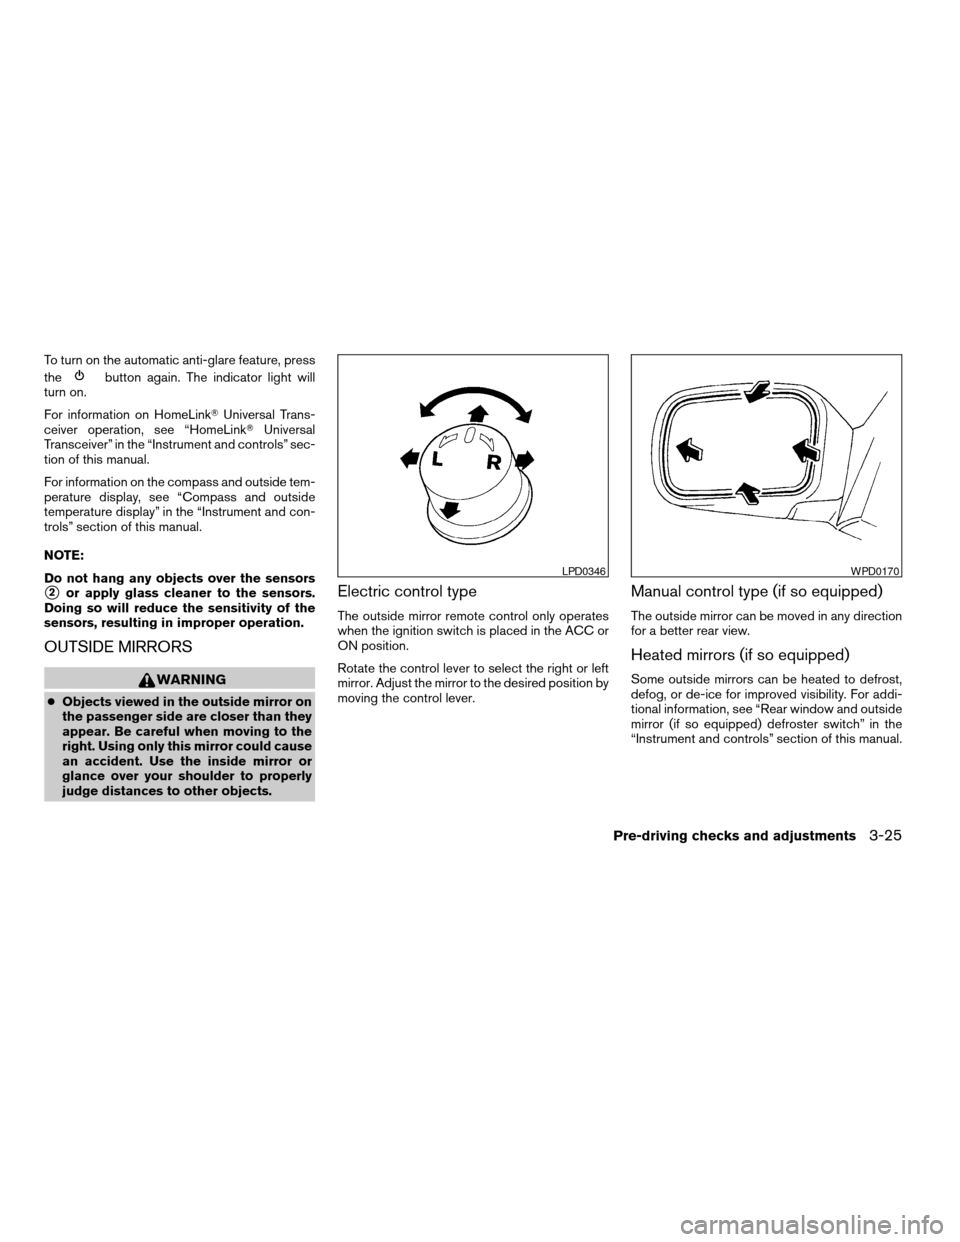
Electric control type
The outside mirror remote control only operates
when the ignition switch is placed in the ACC or
ON position.
Rotate the control lever to select the right or left
mirror. Adjust the mirror to the desired position by
moving the control lever.
Manual control type (if so equipped)
The outside mirror can be moved in any direction
for a better rear view.
Heated mirrors (if so equipped)
Some outside mirrors can be heated to defrost,
defog, or de-ice for improved visibility. For addi-
tional information, see “Rear window and outside
mirror (if so equipped) defroster switch” in the
“Instrument and controls” section of this manual.
LPD0346WPD0170
Pre-driving checks and adjustments3-25
ZREVIEW COPYÐ2009 Altima Hybrid Electric
(ahv)
Owners ManualÐCanadian_French(fr_can)
06/16/08Ðdebbie
X
Page 171 of 353

1. Push the AUTO button on.
2. Turn the driver’s side temperature control
dial to the left or right to set the desired
temperature. Driver and passenger tem-
peratures can be set independently. Press
DUAL or turn the passenger temperature
control dial to the left or right to activate dual
climate control functions. Turn the passen-
ger’s side temperature control dial to the left
or right to set the desired passenger’s tem-
perature.
cAdjust the temperature dial to about 75°F
(24°C) for normal operation.
cThe temperature of the passenger compart-
ment will be maintained automatically. Air
flow distribution, fan speed and A/C on/off
are also controlled automatically.
cA visible mist may be seen coming from the
ventilators in hot, humid conditions as the air
is cooled rapidly. This does not indicate a
malfunction.
Dehumidified defrosting or defogging
1. Push the defroster control buttonto
turn the system on. The indicator light in the
button will illuminate.
2. Turn the temperature dial to the left or right
to set the desired temperature.cTo quickly remove ice from the outside of the
windows, turn the manual fan control to HI.
cAs soon as possible after the windshield is
clean, push the AUTO button to return to the
auto mode.
cWhen the
control is activated, the air
conditioner will automatically be turned on at
outside temperatures above 36°F (2°C) .
Rear window defroster switch
For more information about the rear window de-
froster switch, see “Rear window and outside
mirror (if so equipped) defroster switch” in the
“Instruments and controls” section of this manual.
MANUAL OPERATION
Fan speed control
Turn the fan control dialleft or right to
manually control the fan speed.
Press the
/OFF button to turn the system
off.
Push the AUTO button to return to automatic
control of the fan speed.
Air recirculation
Push the air recirculation buttonto recir-
culate interior air inside the vehicle. The indicator
light on the switch will come on.
The air recirculation button will not be activated
when the air conditioner is in DEF or
mode.
The air recirculation mode may be turned off
automatically depending on the vehicle condi-
tion.
Air flow control
Push the air flow control buttons to manually
control air flow and select the air outlet:
— Air flows from center and side
ventilators.
— Air flows from center and side
ventilators and foot outlets.
— Air flows mainly from foot outlets.
— Air flows from defroster and foot
outlets.
— Air flows from defroster outlets.
To turn system off
Press the/OFF button.
4-12Monitor, climate, audio, phone and voice recognition systems
ZREVIEW COPYÐ2009 Altima Hybrid Electric
(ahv)
Owners ManualÐCanadian_French(fr_can)
06/16/08Ðdebbie
X
Page 237 of 353

2. Place the ignition switch in the OFF or
LOCK position, and wait approximately 10
seconds.
3. Repeat steps 1 and 2.
4. Restart the engine while holding the device
(which may have caused the interference)
separate from the registered key.
If the no start condition re-occurs, NISSAN rec-
ommends placing the registered key on a sepa-
rate key ring to avoid interference from other
devices.cMake sure the area around the vehicle is
clear.
cCheck fluid levels such as engine oil, cool-
ant, brake fluid, and window washer fluid as
frequently as possible, or at least whenever
you refuel.
cCheck that all windows and lights are clean.
cVisually inspect tires for their appearance
and condition. Also check tires for proper
inflation.
cLock all doors.
cPosition seat and adjust head restraints.
cAdjust inside and outside mirrors.
cFasten seat belts and ask all passengers to
do likewise.
cCheck the operation of warning lights when
the ignition switch is pushed to the ON
position. See “Warning/indicator lights and
audible reminders” in the “Instruments and
controls” section of this manual.1. Apply the parking brake.
2. Move the shift selector to P (Park) .
The Hybrid System is designed not to
operate if the shift selector is not in the
P (Park) position.
3. Place the ignition switch in the ON position.
Depress the brake pedal and push the igni-
tion switch to start the Hybrid System. The
READY light will illuminate on the meter.
NOTE:
When starting the Hybrid System at very
low outside temperatures, the READY light
will flash and it may take longer for the
READY light to illuminate.
cThe engine may not start even with the
READY light illuminated. Once the
READY light is illuminated you may begin
driving the vehicle.
cYou may hear a sound in the engine com-
partment when the brake pedal is de-
pressed with the Hybrid System off. This
does not indicate a problem.
cWhen the Hybrid System is started or
stopped, you may hear a sound coming
from the high voltage battery located un-
der the rear seats. This does not indicate
a problem.
BEFORE STARTING THE HYBRID
SYSTEMSTARTING THE HYBRID SYSTEM
5-10Starting and driving
ZREVIEW COPYÐ2009 Altima Hybrid Electric
(ahv)
Owners ManualÐCanadian_French(fr_can)
06/16/08Ðdebbie
X