Page 174 of 238
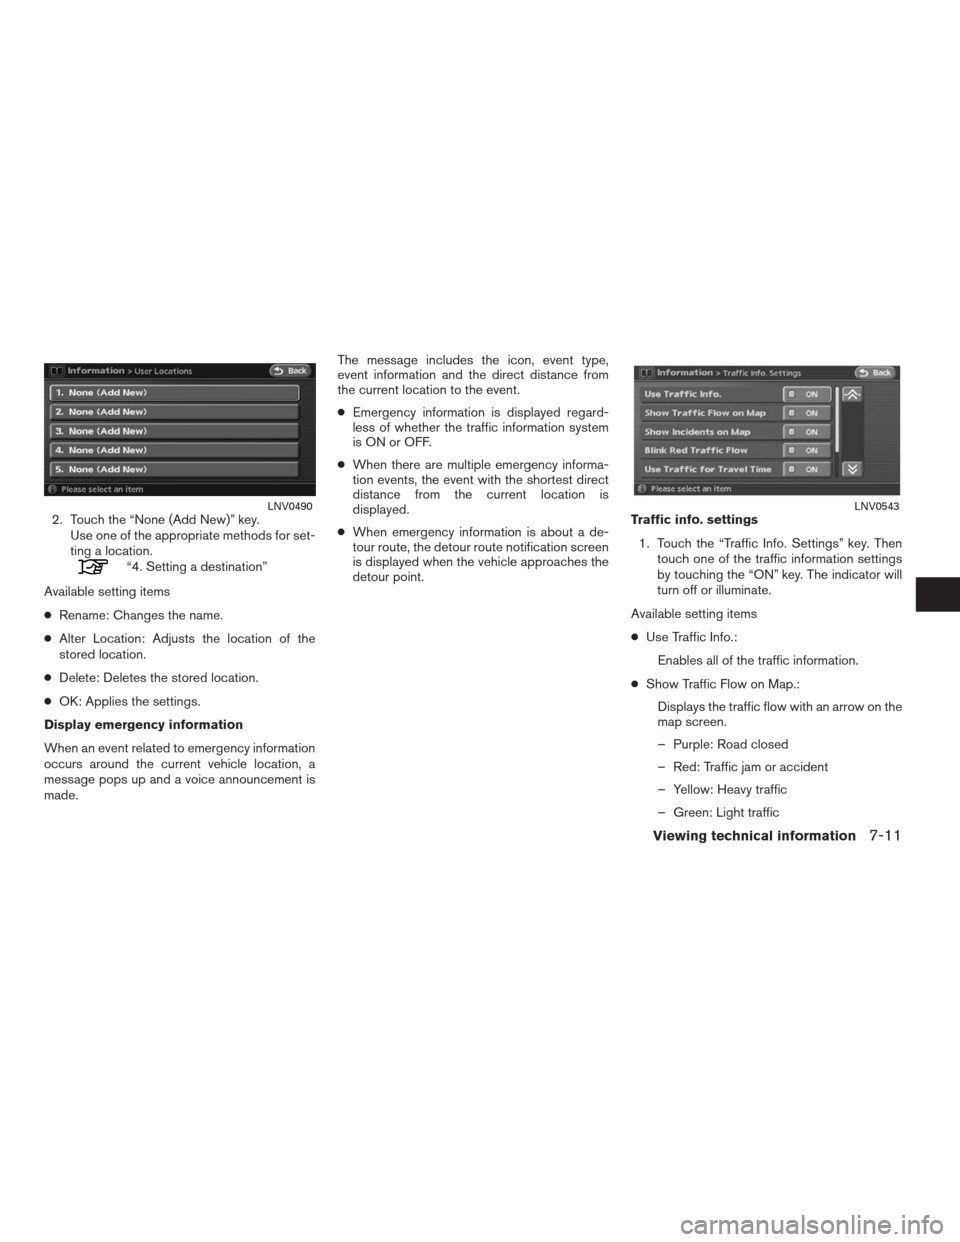
2. Touch the “None (Add New)” key.
Use one of the appropriate methods for set-
ting a location.
“4. Setting a destination”
Available setting items
●Rename: Changes the name.
●Alter Location: Adjusts the location of the
stored location.
●Delete: Deletes the stored location.
●OK: Applies the settings.
Display emergency information
When an event related to emergency information
occurs around the current vehicle location, a
message pops up and a voice announcement is
made.The message includes the icon, event type,
event information and the direct distance from
the current location to the event.
●Emergency information is displayed regard-
less of whether the traffic information system
is ON or OFF.
●When there are multiple emergency informa-
tion events, the event with the shortest direct
distance from the current location is
displayed.
●When emergency information is about a de-
tour route, the detour route notification screen
is displayed when the vehicle approaches the
detour point.Traffic info. settings
1. Touch the “Traffic Info. Settings” key. Then
touch one of the traffic information settings
by touching the “ON” key. The indicator will
turn off or illuminate.
Available setting items
●Use Traffic Info.:
Enables all of the traffic information.
●Show Traffic Flow on Map.:
Displays the traffic flow with an arrow on the
map screen.
– Purple: Road closed
– Red: Traffic jam or accident
– Yellow: Heavy traffic
– Green: Light traffic
LNV0490LNV0543
Viewing technical information7-11
�REVIEW COPY—2009 Altima(alt)
Navigation System OM—USA_English(nna)
06/12/08—tbrooks
�
Page 180 of 238
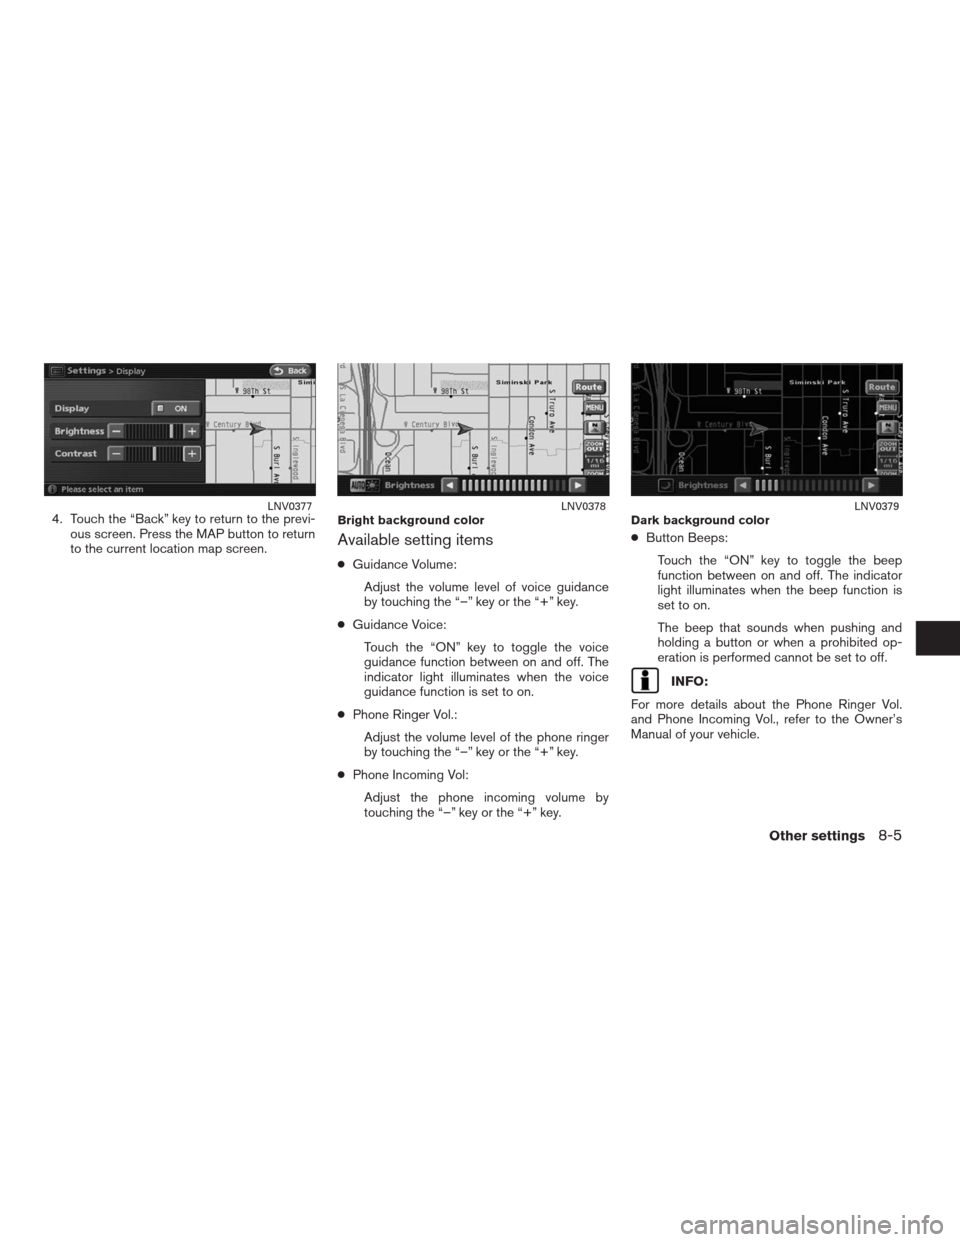
4. Touch the “Back” key to return to the previ-
ous screen. Press the MAP button to return
to the current location map screen.
Available setting items
●Guidance Volume:
Adjust the volume level of voice guidance
by touching the “–” key or the “+” key.
●Guidance Voice:
Touch the “ON” key to toggle the voice
guidance function between on and off. The
indicator light illuminates when the voice
guidance function is set to on.
●Phone Ringer Vol.:
Adjust the volume level of the phone ringer
by touching the “–” key or the “+” key.
●Phone Incoming Vol:
Adjust the phone incoming volume by
touching the “–” key or the “+” key.●Button Beeps:
Touch the “ON” key to toggle the beep
function between on and off. The indicator
light illuminates when the beep function is
set to on.
The beep that sounds when pushing and
holding a button or when a prohibited op-
eration is performed cannot be set to off.
INFO:
For more details about the Phone Ringer Vol.
and Phone Incoming Vol., refer to the Owner’s
Manual of your vehicle.
LNV0377Bright background colorLNV0378Dark background colorLNV0379
Other settings8-5
�REVIEW COPY—2009 Altima(alt)
Navigation System OM—USA_English(nna)
05/22/08—debbie
�
Page 182 of 238
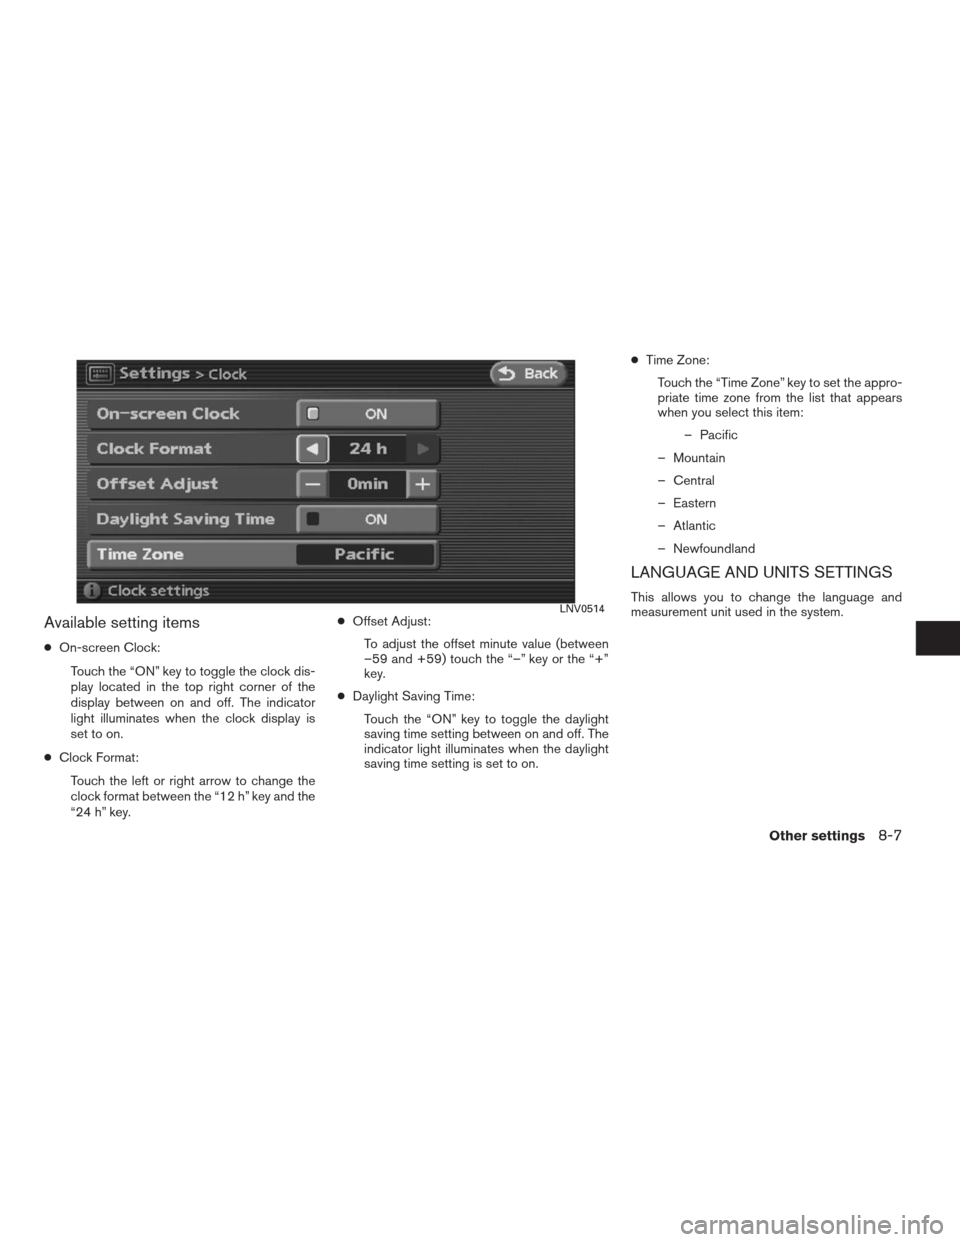
Available setting items
●On-screen Clock:
Touch the “ON” key to toggle the clock dis-
play located in the top right corner of the
display between on and off. The indicator
light illuminates when the clock display is
set to on.
●Clock Format:
Touch the left or right arrow to change the
clock format between the “12 h” key and the
“24 h” key.●Offset Adjust:
To adjust the offset minute value (between
–59 and +59) touch the “–” key or the “+”
key.
●Daylight Saving Time:
Touch the “ON” key to toggle the daylight
saving time setting between on and off. The
indicator light illuminates when the daylight
saving time setting is set to on.●Time Zone:
Touch the “Time Zone” key to set the appro-
priate time zone from the list that appears
when you select this item:
– Pacific
– Mountain
– Central
– Eastern
– Atlantic
– Newfoundland
LANGUAGE AND UNITS SETTINGS
This allows you to change the language and
measurement unit used in the system.LNV0514
Other settings8-7
�REVIEW COPY—2009 Altima(alt)
Navigation System OM—USA_English(nna)
05/22/08—debbie
�
Page 183 of 238
Language settings
1. Touch the “Language/Units” key.2. Touch the “Select Language” key. 3. Touch the preferred setting item by touch-
ing the “ON” key. The indicator light of the
selected item illuminates.
Available languages:
– English
– Français
LNV0382LNV0383LNV0384
8-8Other settings
�REVIEW COPY—2009 Altima(alt)
Navigation System OM—USA_English(nna)
05/22/08—debbie
�
Page 185 of 238
2. Touch the “Select Units” key. 3. Touch the preferred unit by touching the
“ON” key. The indicator light of the selected
item illuminates.
Available units:
– US:
mile, MPH, °F, MPG
– Metric:
km, km/h, °C, L/100 km
4. Touch the “Back” key to return to the previ-
ous screen
Press the MAP button to return to the cur-
rent location map screen.This allows you to change the map color.LNV0387LNV0388LNV0389
MAP COLOR SETTINGS
8-10Other settings
�REVIEW COPY—2009 Altima(alt)
Navigation System OM—USA_English(nna)
05/22/08—debbie
�
Page 186 of 238
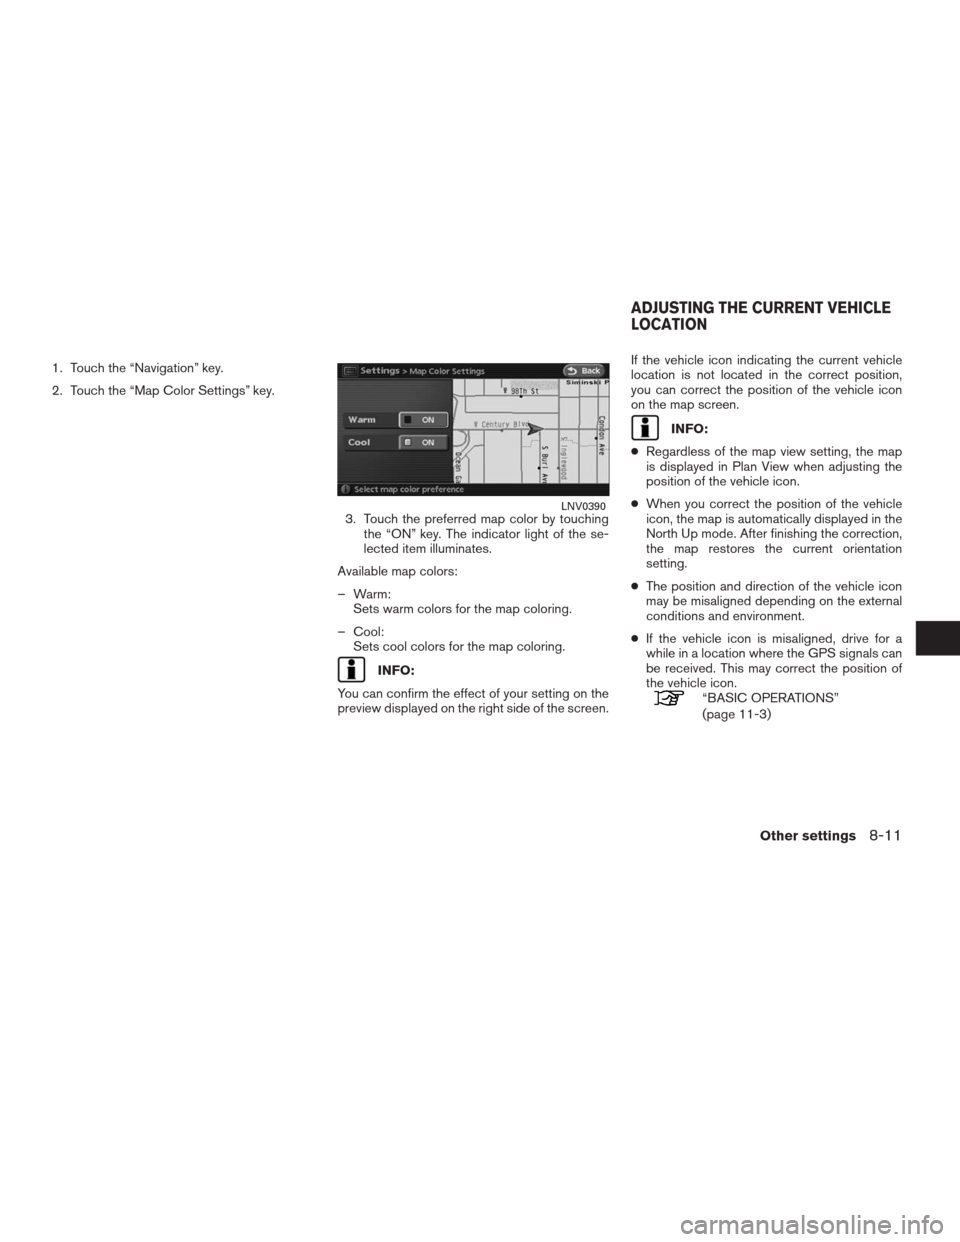
1. Touch the “Navigation” key.
2. Touch the “Map Color Settings” key.
3. Touch the preferred map color by touching
the “ON” key. The indicator light of the se-
lected item illuminates.
Available map colors:
– Warm:
Sets warm colors for the map coloring.
– Cool:
Sets cool colors for the map coloring.
INFO:
You can confirm the effect of your setting on the
preview displayed on the right side of the screen.If the vehicle icon indicating the current vehicle
location is not located in the correct position,
you can correct the position of the vehicle icon
on the map screen.
INFO:
●Regardless of the map view setting, the map
is displayed in Plan View when adjusting the
position of the vehicle icon.
●When you correct the position of the vehicle
icon, the map is automatically displayed in the
North Up mode. After finishing the correction,
the map restores the current orientation
setting.
●The position and direction of the vehicle icon
may be misaligned depending on the external
conditions and environment.
●If the vehicle icon is misaligned, drive for a
while in a location where the GPS signals can
be received. This may correct the position of
the vehicle icon.
“BASIC OPERATIONS”
(page 11-3)
LNV0390
ADJUSTING THE CURRENT VEHICLE
LOCATION
Other settings8-11
�REVIEW COPY—2009 Altima(alt)
Navigation System OM—USA_English(nna)
05/22/08—debbie
�
Page 213 of 238
INFO:
●If you touch the “Voice” key when you have
deviated from the suggested route and when
the automatic reroute function is off, voice
guidance will announce, “Proceed to the
highlighted route.”
●If you touch the “Voice” key when you are go-
ing in the wrong direction, voice guidance will
announce: “Please make a legal U-turn if
possible.”
NOTES ON VOICE GUIDANCE
●Voice guidance in this system should be re-
garded as a supplementary function. When
driving your vehicle, check the route on the
map and follow the actual roads and traffic
regulations.
●Voice guidance is activated only for intersec-
tions with certain conditions.
●There may be cases where the vehicle has to
turn, but voice guidance is not provided.
●Voice guidance contents may vary, depending
on the direction of the turn and the type of
intersection.
●The voice guidance timing will vary depending
on the situation.●When the vehicle has deviated from the sug-
gested route, voice guidance is not available.
The system will not announce this to you. Re-
fer to the map and recalculate the route.
“RECALCULATE ROUTE”
(page 5-13)
●Voice guidance may not accurately corre-
spond with road numbers and directions at
freeway junctions.
●Voice guidance may not accurately corre-
spond to street names at freeway exits.
●The displayed street names may sometimes
differ from the actual names, or “UNKNOWN
STREET NAME” may be displayed.
●Voice guidance is not available when the
Guidance Voice “ON” key indicator is not
illuminated.
●Voice guidance will start when the vehicle en-
ters the suggested route. Refer to the map for
directions to the starting point of the route.
●When approaching a waypoint, voice guid-
ance will announce, “You have arrived at way-
point 1 (2, 3, 4,...) .” Voice guidance will switch
to the next section of the route. When voice
guidance is not available, refer to the map for
directions.●In some cases, voice guidance ends before
arrival at the destination. Refer to the destina-
tion icon on the map to reach the destination.
●If the system recognizes on which side the
destination (waypoint) is located, voice guid-
ance will announce “on the right/left” after an-
nouncing the arrival at the destination.
●Voice guidance may be partially operational or
inoperative due to the angle of roads at an
intersection.
10-14General system information
�REVIEW COPY—2009 Altima(alt)
Navigation System OM—USA_English(nna)
05/22/08—debbie
�
Page 216 of 238
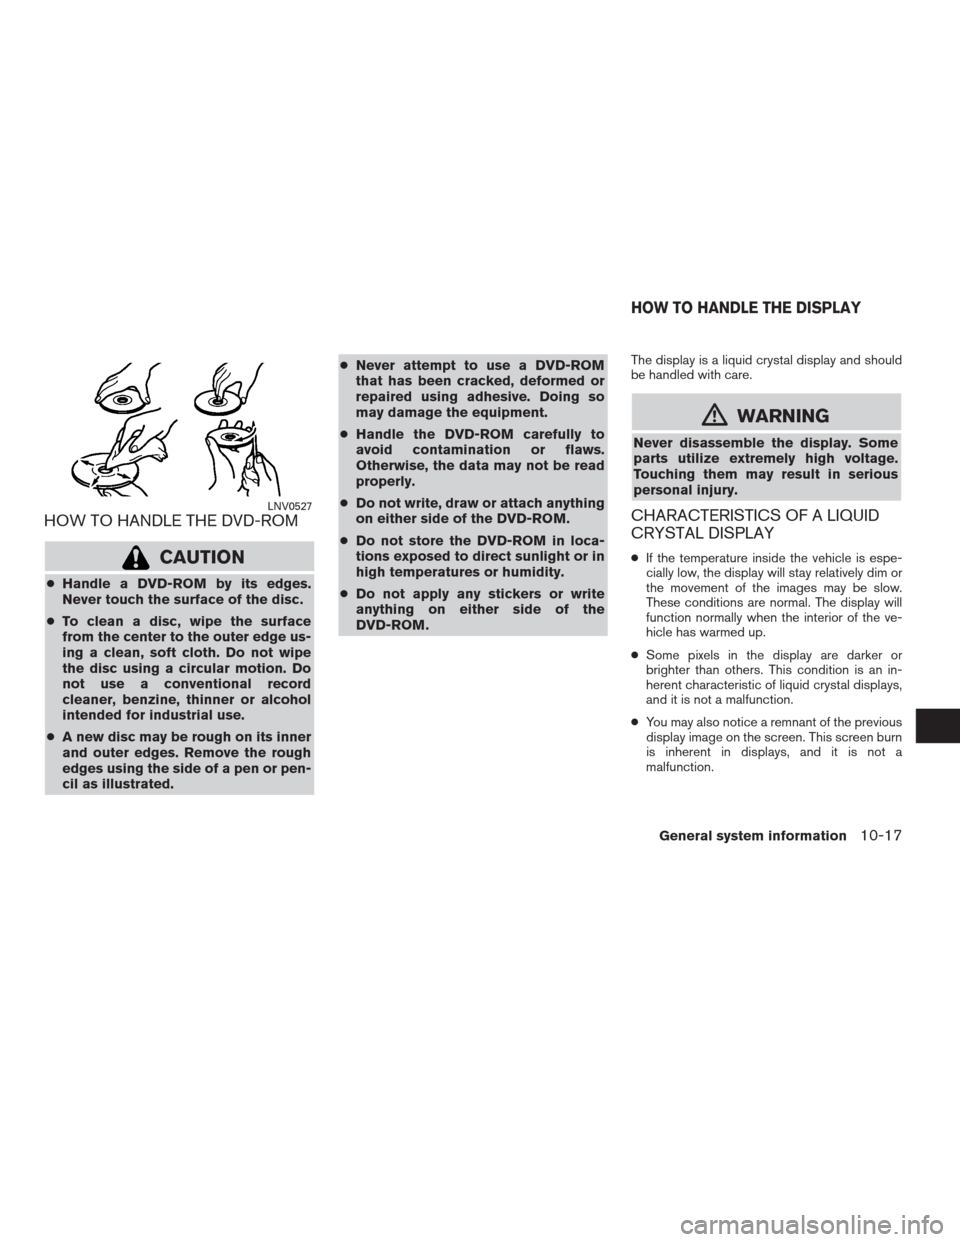
HOW TO HANDLE THE DVD-ROM
CAUTION
●Handle a DVD-ROM by its edges.
Never touch the surface of the disc.
●To clean a disc, wipe the surface
from the center to the outer edge us-
ing a clean, soft cloth. Do not wipe
the disc using a circular motion. Do
not use a conventional record
cleaner, benzine, thinner or alcohol
intended for industrial use.
●A new disc may be rough on its inner
and outer edges. Remove the rough
edges using the side of a pen or pen-
cil as illustrated.●Never attempt to use a DVD-ROM
that has been cracked, deformed or
repaired using adhesive. Doing so
may damage the equipment.
●Handle the DVD-ROM carefully to
avoid contamination or flaws.
Otherwise, the data may not be read
properly.
●Do not write, draw or attach anything
on either side of the DVD-ROM.
●Do not store the DVD-ROM in loca-
tions exposed to direct sunlight or in
high temperatures or humidity.
●Do not apply any stickers or write
anything on either side of the
DVD-ROM.
The display is a liquid crystal display and should
be handled with care.
�WARNING
Never disassemble the display. Some
parts utilize extremely high voltage.
Touching them may result in serious
personal injury.
CHARACTERISTICS OF A LIQUID
CRYSTAL DISPLAY
●If the temperature inside the vehicle is espe-
cially low, the display will stay relatively dim or
the movement of the images may be slow.
These conditions are normal. The display will
function normally when the interior of the ve-
hicle has warmed up.
●Some pixels in the display are darker or
brighter than others. This condition is an in-
herent characteristic of liquid crystal displays,
and it is not a malfunction.
●You may also notice a remnant of the previous
display image on the screen. This screen burn
is inherent in displays, and it is not a
malfunction.
LNV0527
HOW TO HANDLE THE DISPLAY
General system information10-17
�REVIEW COPY—2009 Altima(alt)
Navigation System OM—USA_English(nna)
05/22/08—debbie
�