2009 NISSAN ALTIMA COUPE manual radio set
[x] Cancel search: manual radio setPage 198 of 373
TUNE/FF·REW (tuning)
button:
Press the TUNE/FF·REW button
orfor manual tuning. To move quickly through the
channels, hold the tuning buttons down.
SEEK (tuning) button:
Press the SEEK/TRACK button
orto tune from high to low or low to high frequen-
cies and stop at the next broadcasting station.
SCAN (tuning) button:
Press the SCAN button. SCAN illuminates in the
display window. Scan tuning begins from low to
high frequencies. Scan tuning stops for 5 sec-
onds at each broadcasting station that has suffi-
cient signal strength. When scanning, SCAN
blinks in the display. Pressing the SCAN button
again during this 5 second period stops scan
tuning and the radio remains tuned to that station.
Station memory operations:
18 stations can be set for the FM and AM radio to
the A, B and C preset button in any combination
of AM or FM stations.
1. Press the PRESET A·B·C button to change
between storage banks. The radio displaysthe icon A, B or C to indicate which set of
presets are active.
2. Tune to the desired station using manual
TUNE or SEEK tuning. Press and hold any of
the desired station memory buttons (1 – 6)
until a beep sound is heard. (The radio mutes
when the select button is pressed.)
3. The channel indicator will then come on and
the sound will resume. Programming is now
complete.
4. Other buttons can be set in the same man-
ner.
If the battery cable is disconnected, or if the fuse
opens, the radio memory will be canceled. In that
case, reset the desired stations.
Radio data system (RDS):
RDS stands for Radio Data System, and is a data
information service transmitted by some radio
stations on the FM band (not AM band) . Cur-
rently, most RDS stations are in large cities, but
many stations are now considering broadcasting
RDS data.
RDS can display:
cStation call sign, such as “WHFR 98.3”.
cStation name, such as “The Groove”.cMusic or programming type such as “Clas-
sical”, “Country”, or “Rock”.
If the station broadcasts RDS information, the
RDS icon is displayed.
Compact disc (CD) changer operation
Place the ignition switch in the ACC or ON
position and insert the compact disc into the slot
with the label side facing up. The compact disc
will be guided automatically into the slot and start
playing. To insert the disc, first press the
button.
If the radio is already operating, it will automati-
cally turn off and the compact disc will play.
If the system has been turned off while the com-
pact disc was playing, pressing the PWR button
will start the compact disc.
Do not use 3.1 in (8 cm) diameter compact discs
in the CD changer.
CD load button:
To insert a CD in the CD changer, press
the
load button for less than 1.5 seconds.
Select the loading slot by pressing the CD insert
select button (1 – 6) , then insert the CD.
To insert 6 CDs to the CD changer, press
the
load button for more than 1.5 seconds.
4-34Monitor, climate, audio, phone and voice recognition systems
ZREVIEW COPYÐ2009 Altima(alt)
Owners Manual(owners)ÐUSA_English(nna)
02/03/09Ðdebbie
X
Page 202 of 373
FM/AM/SAT RADIO WITH
COMPACT DISC (CD) CHANGER (if
so equipped)
For all operation precautions, see “Audio opera-
tion precautions” earlier in this section.
No satellite radio reception is available unless
there is an active XMTsatellite radio service
subscription. Satellite radio is not available in
Alaska, Hawaii and Guam. If satellite radio is not
operational then pressing the RADIO button will
switch between FM and AM bands.
Reference symbols:
RADIO button — This is a button on the radio. By
pressing this button you can select the item or
perform this action.
“Display” key — This is a select key on the touch-
screen. By touching this key you can proceed to
the next function.
Audio main operation
ON·OFF/VOL control:
Place the ignition switch to the ACC or ON
position, then press the ON·OFF/VOL control
knob while the audio system is off to call up the
mode (radio or CD) which was playing immedi-
ately before the system was turned off.To turn the system off, press the ON·OFF/VOL
control knob.
Turn the ON·OFF/VOL control knob to adjust the
volume.
This vehicle may be equipped with Speed Sen-
sitive Volume (SSV) for audio. The audio volume
changes as the driving speed changes.
AUDIO knob (Bass, Treble, Balance, Fade,
and SSV):
Press the AUDIO knob to change the mode as
follows:
Bass!Treble!Balance!Fade!Audio!
Bass
To adjust Bass, Treble, Balance, and Fade press
the AUDIO knob until the desired mode appears
in the display. Turn the Tuning knob to adjust
Bass and Treble to the desired level. You can also
use the Tuning knob to adjust Fade and Balance
modes. Fade adjusts the sound level between the
front and rear speakers and Balance adjusts the
sound between the right and left speakers.
Once you have adjusted the sound quality to the
desired level, press the AUDIO knob repeatedly
until the radio or CD display reappears. Other-
wise, the radio or CD display will automatically
reappear after about 10 seconds.To change the SSV mode from 0 to 5, press the
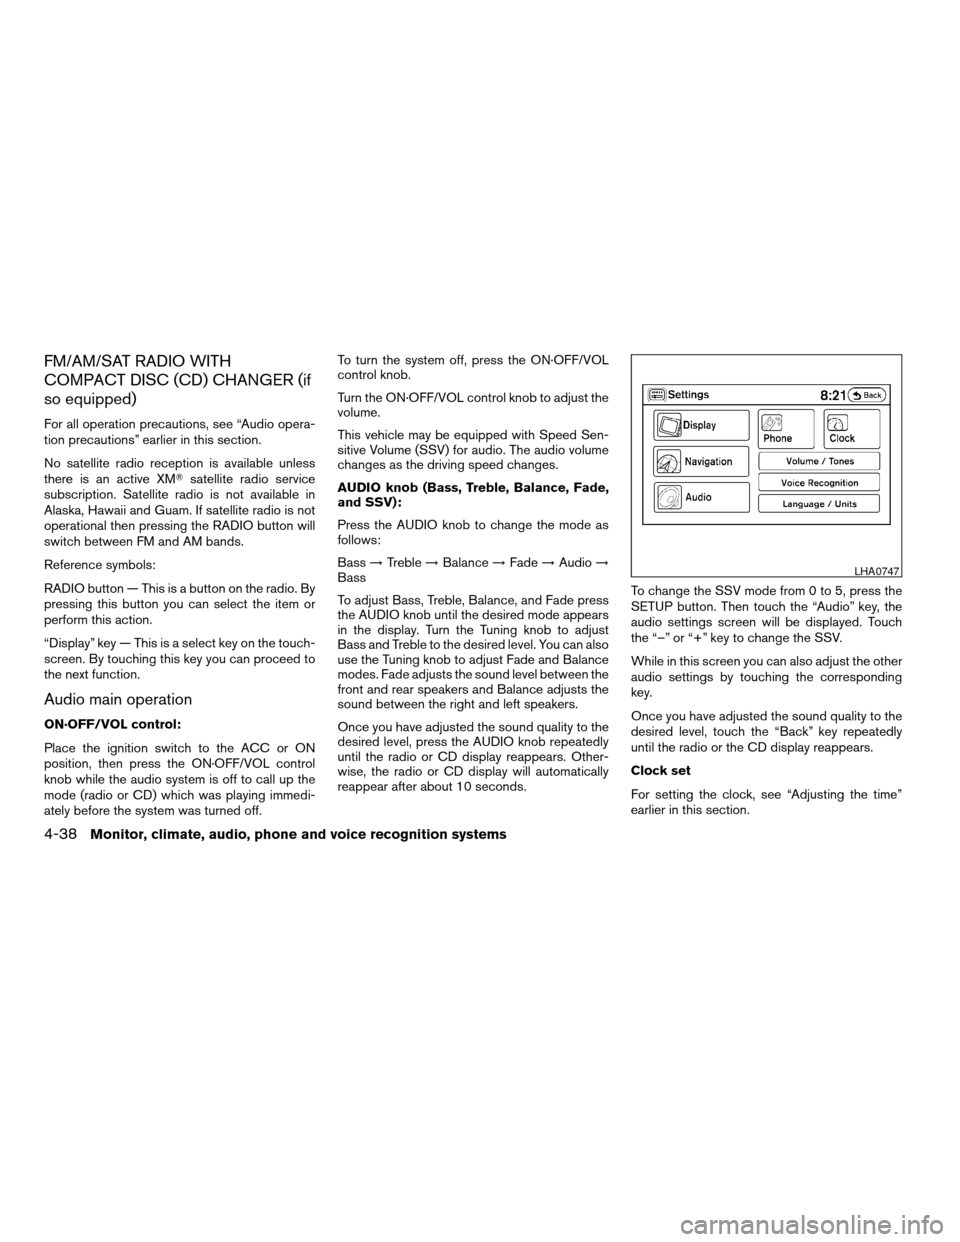
SETUP button. Then touch the “Audio” key, the
audio settings screen will be displayed. Touch
the “–” or “+” key to change the SSV.
While in this screen you can also adjust the other
audio settings by touching the corresponding
key.
Once you have adjusted the sound quality to the
desired level, touch the “Back” key repeatedly
until the radio or the CD display reappears.
Clock set
For setting the clock, see “Adjusting the time”
earlier in this section.
LHA0747
4-38Monitor, climate, audio, phone and voice recognition systems
ZREVIEW COPYÐ2009 Altima(alt)
Owners Manual(owners)ÐUSA_English(nna)
02/03/09Ðdebbie
X
Page 204 of 373
SEEK/TRACK (tuning)
button:
Press the SEEK/TRACK button
orfor less than 1.5 seconds to tune from high to low
or low to high frequencies and stop at the next
broadcasting station.
“Scan” (tuning) key:
Touch the “Scan” key. SCAN illuminates in the
display window. Scan tuning begins from low to
high frequencies. Scan tuning stops for 5 sec-
onds at each broadcasting station that has suffi-
cient signal strength. Touching the “Scan” key
again during this 5 second period stops scan
tuning and the radio remains tuned to that station.
Station memory operations:
18 stations can be set for the FM, AM or SAT
(Satellite if so equipped) radio to the A, B and C
preset button in any combination of FM, AM or
SAT stations.
1. Press the A·B·C button or the “Preset” key to
select preset channel A, B or C.
2. Press the RADIO button to select the de-
sired FM, AM or SAT station band.
3. Tune to the desired station using manual
tuning, seek tuning or scan tuning. Press
and hold any of the desired station memory(1 – 6) buttons until a beep sound is heard
(the station will now appear in one of the 1 –
6 keys on the screen)
4. The channel indicator will then come on and
the sound will resume. Memorizing is now
complete.
5. Other buttons can be set in the same man-
ner.
If the battery cable is disconnected, or if the fuse
blows, the radio memory will be canceled. In that
case, reset the desired stations.
Radio data system (RDS):
RDS stands for Radio Data System, and is a data
information service transmitted by some radio
stations on the FM band (not AM band) . Cur-
rently, most RDS stations are in large cities, but
many stations are now considering broadcasting
RDS data.
RDS can display:
cStation call sign, such as “WHFR 98.3”.
cStation name, such as “The Groove”.
cMusic or programming type such as “Clas-
sical”, “Country” or “Rock”.
If the station broadcasts RDS information, the
RDS icon is displayed.
Compact disc (CD) changer operation
With the ignition switch in the ACC or ON posi-
tion, press one of the CD changer (1 – 6) but-
tons. Once the CD slot has open insert the
compact disc into the slot with the label side
facing up. The compact disc will be guided auto-
matically into the slot and start playing.
If the radio is already operating, it will automati-
cally turn off and the compact disc will play.
If the system has been turned off while the com-
pact disc was playing, pressing the
ON·OFF/VOL control knob will start the compact
disc.
Loading buttons:
1 Disc Load:
cPress one of the CD changer (1 – 6) select
buttons for less than 1.5 seconds, then in-
sert the CD.
cWhile in CD mode press one of the station
and CD select (1 – 6) buttons on the radio,
then insert the CD.
cWhile in CD mode press one of the CD (1 –
6) keys on the screen, then insert the CD.
All Disc Load:
cPress and hold one of the CD changer (1 –
6) buttons for more than 1.5 seconds.
4-40Monitor, climate, audio, phone and voice recognition systems
ZREVIEW COPYÐ2009 Altima(alt)
Owners Manual(owners)ÐUSA_English(nna)
02/03/09Ðdebbie
X
Page 208 of 373
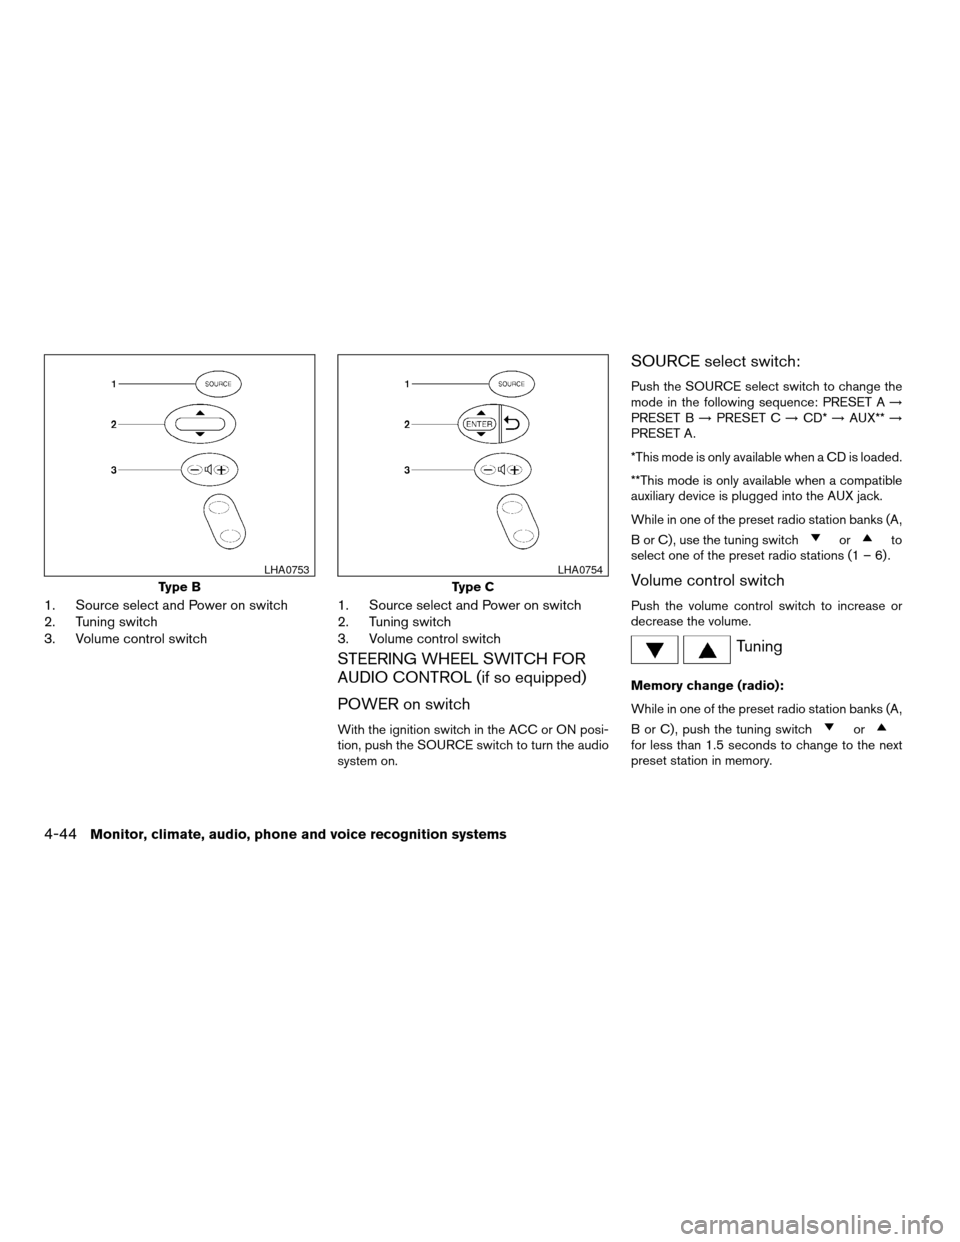
1. Source select and Power on switch
2. Tuning switch
3. Volume control switch1. Source select and Power on switch
2. Tuning switch
3. Volume control switch
STEERING WHEEL SWITCH FOR
AUDIO CONTROL (if so equipped)
POWER on switch
With the ignition switch in the ACC or ON posi-
tion, push the SOURCE switch to turn the audio
system on.
SOURCE select switch:
Push the SOURCE select switch to change the
mode in the following sequence: PRESET A!
PRESET B!PRESET C!CD*!AUX**!
PRESET A.
*This mode is only available when a CD is loaded.
**This mode is only available when a compatible
auxiliary device is plugged into the AUX jack.
While in one of the preset radio station banks (A,
B or C) , use the tuning switch
orto
select one of the preset radio stations (1 – 6) .
Volume control switch
Push the volume control switch to increase or
decrease the volume.
Tuning
Memory change (radio):
While in one of the preset radio station banks (A,
B or C) , push the tuning switch
orfor less than 1.5 seconds to change to the next
preset station in memory.
Type B
LHA0753
Type C
LHA0754
4-44Monitor, climate, audio, phone and voice recognition systems
ZREVIEW COPYÐ2009 Altima(alt)
Owners Manual(owners)ÐUSA_English(nna)
02/03/09Ðdebbie
X
Page 226 of 373
module when the ignition switch is turned to the
ON position with the paired cellular phone turned
on and carried in the vehicle.
You can register up to 5 different BluetoothT
cellular phones to the in-vehicle phone module.
However, you can talk on only one cellular phone
at a time.
NISSAN Voice Recognition system supports the
phone commands, so dialing a phone number
using your voice is possible. For more details, see
“NISSAN Voice Recognition System” later in this
section.
Before using the BluetoothTHands-Free Phone
System, refer to the following notes.
cSet up the wireless connection between a
cellular phone and the in-vehicle phone
module before using the hands-free phone
system.
cSome BluetoothTenabled cellular phones
may not be recognized by the in-vehicle
phone module. Please visit
www.nissanusa.com/bluetooth for a recom-
mended phone list and pairing.
cYou will not be able to use a hands-free
phone under the following conditions:
– Your vehicle is outside of the cellular ser-
vice area.– Your vehicle is in an area where it is
difficult to receive cellular signal; such as
in a tunnel, in an underground parking
garage, near a tall building or in a moun-
tainous area.
– Your cellular phone is locked to prevent it
from being dialed.
cWhen the radio wave condition is not ideal
or ambient sound is too loud, it may be
difficult to hear the other person’s voice dur-
ing a call.
cImmediately after the ignition switch is
pushed to the ON position or the DVD-ROM
for the navigation system is inserted into the
player, it may be impossible to receive a call
for a short period of time.
cDo not place the cellular phone in an area
surrounded by metal or far away from the
in-vehicle phone module to prevent tone
quality degradation and wireless connection
disruption.
cWhile a cellular phone is connected through
the BluetoothTwireless connection, the bat-
tery power of the cellular phone may dis-
charge quicker than usual. The BluetoothT
Hands-Free Phone System cannot charge
cellular phones.cIf the hands-free phone system seems to be
malfunctioning, see “Troubleshooting guide”
later in this section. You can also visit
www.nissanusa.com/bluetooth for trouble-
shooting help.
cSome cellular phones or other devices may
cause interference or a buzzing noise to
come from the audio system speakers. Stor-
ing the device in a different location may
reduce or eliminate the noise.
cRefer to the cellular phone owner’s manual
regarding the telephone charges, cellular
phone antenna and body, etc.
cThe signal strength display on the monitor
will not coincide with the signal strength
display of some cellular phones.
REGULATORY INFORMATION
FCC Regulatory information
– CAUTION: To maintain compliance with
FCC’s RF exposure guidelines, use only the
supplied antenna. Unauthorized antenna,
modification, or attachments could damage
the transmitter and may violate FCC regula-
tions.
– Operation is subject to the following two con-
ditions:
1. This device may not cause interference and
4-62Monitor, climate, audio, phone and voice recognition systems
ZREVIEW COPYÐ2009 Altima(alt)
Owners Manual(owners)ÐUSA_English(nna)
02/03/09Ðdebbie
X
Page 243 of 373
cWhen a spare tire is mounted or a wheel
is replaced, tire pressure will not be
indicated, the TPMS will not function
and the low tire pressure warning light
will flash for approximately 1 minute.
The light will remain on after 1 minute.
Contact your NISSAN dealer as soon as
possible for tire replacement and/or
system resetting.
cReplacing tires with those not originally
specified by NISSAN could affect the
proper operation of the TPMS.
cDo not inject any tire liquid or aerosol
tire sealant into the tires, as this may
cause a malfunction of the tire pressure
sensors.
CAUTION
Do not place metalized film or any metal
parts (antenna, etc.) on the windows. This
may cause poor reception of the signals
from the tire pressure sensors, and the
TPMS will not function properly.
Some devices and transmitters may temporarily
interfere with the operation of the TPMS and
cause the low tire pressure warning light to illu-
minate.Some examples are:
– Facilities or electric devices using similar radio
frequencies are near the vehicle.
– If a transmitter set to similar frequencies is
being used in or near the vehicle.
– If a computer (or similar equipment) or a
DC/AC converter is being used in or near the
vehicle.
FCC Notice:
Changes or modifications not expressly ap-
proved by the party responsible for compli-
ance could void the user’s authority to op-
erate the equipment.
This device complies with Part 15 of the
FCC Rules and RSS-210 of Industry
Canada.
Operation is subject to the following two
conditions: (1) This device may not cause
harmful interference, and (2) this device
must accept any interference received, in-
cluding interference that may cause undes-
ired operation of the device.
AVOIDING COLLISION AND
ROLLOVER
WARNING
Failure to operate this vehicle in a safe
and prudent manner may result in loss of
control or an accident.
Be alert and drive defensively at all times. Obey
all traffic regulations. Avoid excessive speed,
high speed cornering, or sudden steering ma-
neuvers, because these driving practices could
cause you to lose control of your vehicle.As with
any vehicle, loss of control could result in a
collision with other vehicles or objects or
cause the vehicle to roll over, particularly if
the loss of control causes the vehicle to
slide sideways.
Be attentive at all times, and
avoid driving when tired. Never drive when under
the influence of alcohol or drugs (including pre-
scription or over-the-counter drugs which may
cause drowsiness) . Always wear your seat belt as
outlined in the “Safety – Seats, seat belts and
supplemental restraint system” section of this
manual, and also instruct your passengers to do so.
Seat belts help reduce the risk of injury in collisions
and rollovers.In a rollover crash, an unbelted
or improperly belted person is significantly
more likely to be injured or killed than a
person properly wearing a seat belt.
Starting and driving5-5
ZREVIEW COPYÐ2009 Altima(alt)
Owners Manual(owners)ÐUSA_English(nna)
02/03/09Ðdebbie
X
Page 369 of 373
Rear power windows............2-45
Precautions
Maintenance precautions..........8-5
Precautions on child
restraints............1-23, 1-33, 1-39
Precautions on seat belt usage......1-15
Precautions on supplemental restraint
system....................1-43
Precautions when starting and driving . . .5-2
Programmable features.............4-3
Push starting...................6-9
R
Radio
Car phone or CB radio...........4-45
Compact Disc (CD) changer. . . .4-34, 4-40
FM-AM radio with compact disc
(CD) player.................4-27
FM/AM/SAT radio with compact disc
(CD) changer.............4-31, 4-38
Readiness for inspection maintenance
(I/M) test.....................9-26
Rear power windows..............2-45
Rear seat.....................1-9
Rear window and outside mirror defroster
switch......................2-28
RearView Monitor................4-8
Recorders
Event data..................9-27
Refrigerant recommendation..........9-6
Registering your vehicle in another country. . .9-9
Reporting safety defects (US only)......9-25S
Safety
Child safety rear door lock..........3-6
Child seat belts........1-23, 1-33, 1-39
Reporting safety defects (US only). . . .9-25
Seat adjustment
Front manual seat adjustment........1-2
Front power seat adjustment........1-4
Rear seat adjustment.............1-9
Seat belt
Child safety.................1-18
Infants and small children.........1-18
Injured Person................1-19
Larger children...............1-18
Precautions on seat belt usage......1-15
Pregnant women..............1-19
Seat belt extenders.............1-22
Seat belt maintenance...........1-23
Seat belts..................1-15
Shoulder belt height adjustment......1-22
Three-point type with retractor.......1-19
Seat belt warning light.............2-13
Seatback pockets................2-37
Seats
Adjustment..................1-2
Front seats..................1-2
Heated seats................2-34
Manual front seat adjustment........1-2
Rear seat...................1-9
Security indicator light.............2-15
Security system (NISSAN vehicle immobilizer
system) , engine start...........2-26, 3-3
Self-adjusting brakes..............8-21
Service manual order form...........9-27Servicing air conditioner............4-20
Setup button...................4-3
Shift lock release................5-14
Shifting
Continuously Variable Transmission
(CVT)....................5-12
Manual transmission............5-16
Shoulder belt height adjustment........1-22
Spark plug replacement............8-18
Speedometer...................2-4
Spotlights (See map light)...........2-50
SRS warning label...............1-58
Starting
Before starting the engine.........5-10
Jump starting.................6-7
Precautions when starting and driving . . .5-2
Push starting.................6-9
Starting the engine.............5-10
Startup screen..................4-3
Steering
Power steering fluid.............8-13
Power steering system...........5-23
Stop light....................8-28
Storage.....................2-37
Sun visors....................3-27
Sunglasses case................2-38
Sunglasses holder...............2-38
Sunroof.....................2-46
Supplemental air bag warning light . . .1-58, 2-14
Supplemental front impact air bag system . .1-52
Supplemental restraint system
Information and warning labels.......1-58
Precautions on supplemental restraint
system....................1-43
Supplemental restraint system
(Supplemental air bag system).........1-43
10-5
ZREVIEW COPYÐ2009 Altima(alt)
Owners Manual(owners)ÐUSA_English(nna)
02/03/09Ðdebbie
X