2009 MITSUBISHI ASX window
[x] Cancel search: windowPage 172 of 368
CAUTION
• When the air conditioning is operated
in AUTO mode where the tempera-
ture control dial is set to the max. hot
or the max. cool position (for vehicles
with automatic air conditioning).
• When the air conditioning is ON, the passenger compartment temperature
rises and the air conditioning compres-
sor operates to lower the temperature.
• Mode selection dial is set to the demis- ter position.
Refer to “Demisting of the windscreen
and door windows: For quick demist-
ing” on page 5-08
• Electric power consumption is high, such as when the rear window demis-
ter or other electrical components are
operating or the blower speed is set to
a high setting.
NOTE l If
the “Auto Stop & Go (AS&G) OFF”
switch is pressed to deactivate the Auto Stop
& Go (AS&G) system while the engine is
stopped automatically, the engine will not re-
start automatically even if the clutch pedal is
depressed.
l When the engine restarts automatically, the
audio volume may temporarily decrease.
This does not indicate a malfunction.
l While the engine is stopped automatically,
the air conditioning may temporarily change
the air volume.
This does not indicate a malfunction. To deactivate
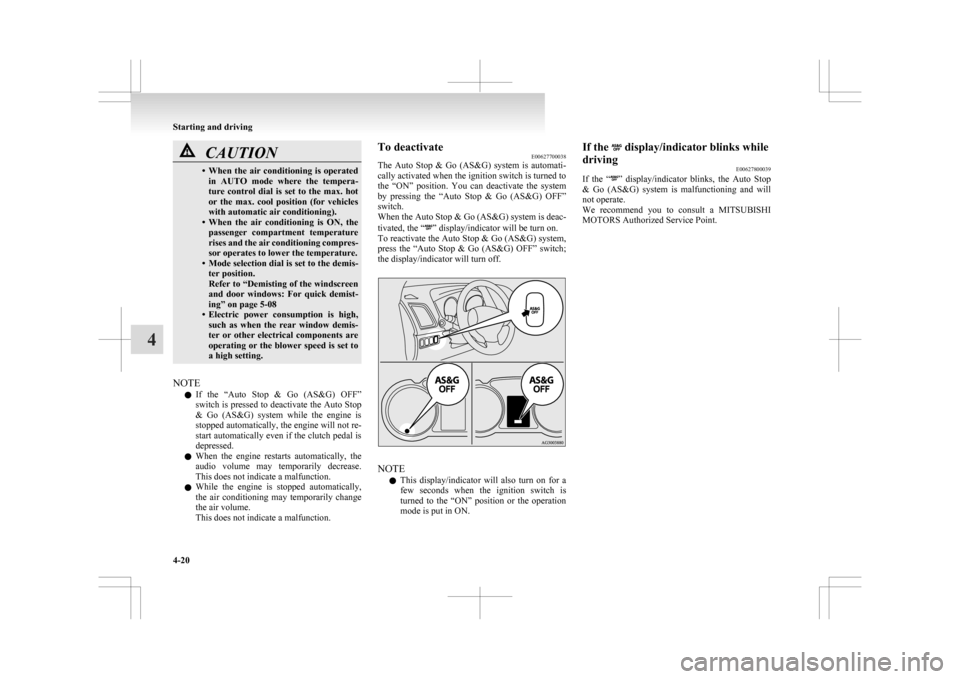
E00627700038
The
Auto Stop & Go (AS&G) system is automati-
cally activated when the ignition switch is turned to
the “ON” position. You can deactivate the system
by pressing the “Auto Stop & Go (AS&G) OFF”
switch.
When the Auto Stop & Go (AS&G) system is deac-
tivated, the “ ” display/indicator will be turn on.
To
reactivate the Auto Stop & Go (AS&G) system,
press the “Auto Stop & Go (AS&G) OFF” switch;
the display/indicator will turn off. NOTE
l This
display/indicator will also turn on for a
few seconds when the ignition switch is
turned to the “ON” position or the operation
mode is put in ON. If the display/indicator blinks while
driving E00627800039
If
the “ ”
display/indicator blinks, the Auto Stop
& Go (AS&G) system is malfunctioning and will
not operate.
We recommend you to consult a MITSUBISHI
MOTORS Authorized Service Point. Starting and driving
4-20
4
Page 211 of 368

Foot/demister position
Air flows to the leg area, the windscreen and the
door windows. Demister position
Air
flows mainly to the windscreen and the door
windows. CAUTION
l
When
using the mode selection dial be-
tween the “ ” and “ ” positions, pre-
vent fogging by pressing the air selection
switch to select outside air.
(Refer to “Air selection switch” on page
5-04.)
NOTE l With
the mode selection dial between the
“ ”
and “ ” positions, the air flows main-
ly to the upper part of the passenger compart-
ment. With the mode selection dial between
the “ ”
and “ ” positions, the air flows
mainly to the leg area.
l With the mode selection dial in the “ ”
po-
sition, a small amount of air flows to the wind-
screen and the door windows.
l With the mode selection dial between the
“ ”
and “ ” positions, the air flows main-
ly to the leg area. With the mode selection di-
al between the “ ”
and “ ” positions, the
air flows mainly to the windscreen and door
windows. Heater/Air conditioning
E00700500449
The
heater/air conditioning can only be used while
the engine is running.
Control panel E00700600541
Heater/Manual air conditioning
Automatic air conditioning A- Temperature control dial
B-
Air selection switch
C- Blower speed selection dial
D- Air conditioning switch E- Mode selection dialF- Rear window demister switch ® p. 3-57
NOTE l On vehicles with the heater, button (D) is not
available for use. The indicator below the but-
ton doesn’t come on even if it is pushed. l
On
vehicles with automatic air conditioning,
there is an interior air temperature sensor (G)
in the illustrated position.
Never place anything over the sensor, since
doing so will prevent it from functioning prop-
erly. Blower speed selection dial
E00700700249
Select the blower speed by turning the blower
speed selection dial clockwise or anticlockwise.
Turn
the dial clockwise to increase the air flow and
anticlockwise to decrease the air flow.
Heater/
Manual air conditioning Automatic air conditioning For pleasant driving
5-03 5
Page 212 of 368
Temperature control dial
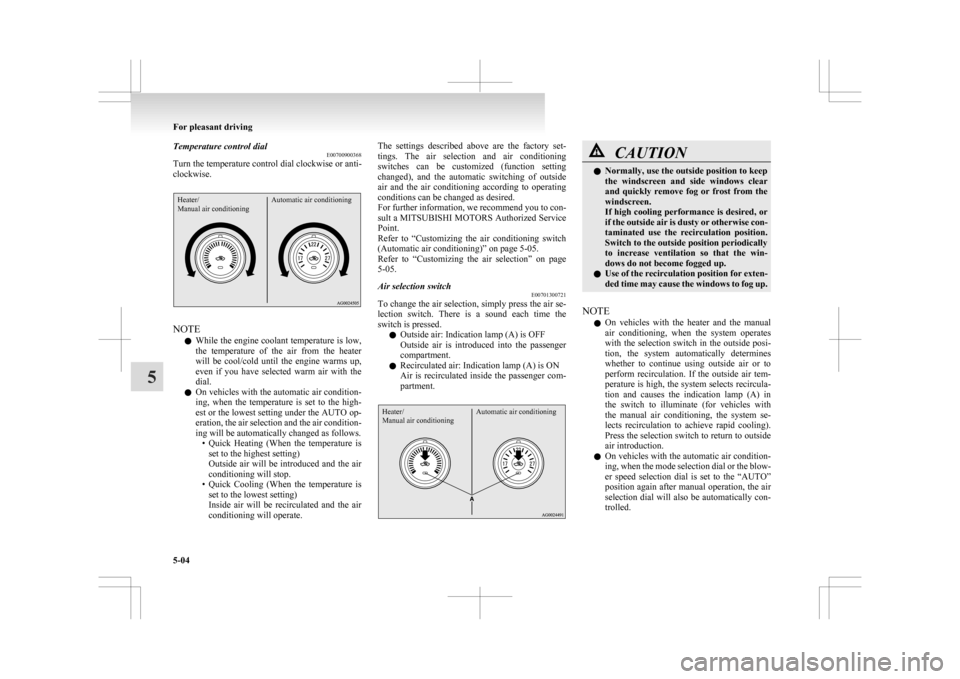
E00700900368
Turn the temperature control dial clockwise or anti-
clockwise.Heater/
Manual air conditioning Automatic air conditioningNOTE
l While
the engine coolant temperature is low,
the temperature of the air from the heater
will be cool/cold until the engine warms up,
even if you have selected warm air with the
dial.
l On vehicles with the automatic air condition-
ing, when the temperature is set to the high-
est or the lowest setting under the AUTO op-
eration, the air selection and the air condition-
ing will be automatically changed as follows.
• Quick Heating (When the temperature isset to the highest setting)
Outside air will be introduced and the air
conditioning will stop.
• Quick Cooling (When the temperature is set to the lowest setting)
Inside air will be recirculated and the air
conditioning will operate. The settings described above are the factory set-
tings.
The air selection and air conditioning
switches can be customized (function setting
changed), and the automatic switching of outside
air and the air conditioning according to operating
conditions can be changed as desired.
For further information, we recommend you to con-
sult a MITSUBISHI MOTORS Authorized Service
Point.
Refer to “Customizing the air conditioning switch
(Automatic air conditioning)” on page 5-05.
Refer to “Customizing the air selection” on page
5-05.
Air selection switch E00701300721
To change the air selection, simply press the air se-
lection
switch. There is a sound each time the
switch is pressed.
l Outside air: Indication lamp (A) is OFF
Outside air is introduced into the passenger
compartment.
l Recirculated air: Indication lamp (A) is ON
Air is recirculated inside the passenger com-
partment.
Heater/
Manual air conditioning Automatic air conditioning CAUTION
l
Normally, use the outside position to keep
the
windscreen and side windows clear
and quickly remove fog or frost from the
windscreen.
If high cooling performance is desired, or
if the outside air is dusty or otherwise con-
taminated use the recirculation position.
Switch to the outside position periodically
to increase ventilation so that the win-
dows do not become fogged up.
l Use of the recirculation position for exten-
ded time may cause the windows to fog up.
NOTE l On
vehicles with the heater and the manual
air conditioning, when the system operates
with the selection switch in the outside posi-
tion, the system automatically determines
whether to continue using outside air or to
perform recirculation. If the outside air tem-
perature is high, the system selects recircula-
tion and causes the indication lamp (A) in
the switch to illuminate (for vehicles with
the manual air conditioning, the system se-
lects recirculation to achieve rapid cooling).
Press the selection switch to return to outside
air introduction.
l On vehicles with the automatic air condition-
ing, when the mode selection dial or the blow-
er speed selection dial is set to the “AUTO”
position again after manual operation, the air
selection dial will also be automatically con-
trolled. For pleasant driving
5-04
5
Page 216 of 368
Demisting of the windscreen and door windows
E00702100768CAUTION
l
For safety, make sure you have a clear
view through all the windows.
Use the mode selection dial (“ ”
or “ ”) to re-
move frost or mist from the windscreen or door win-
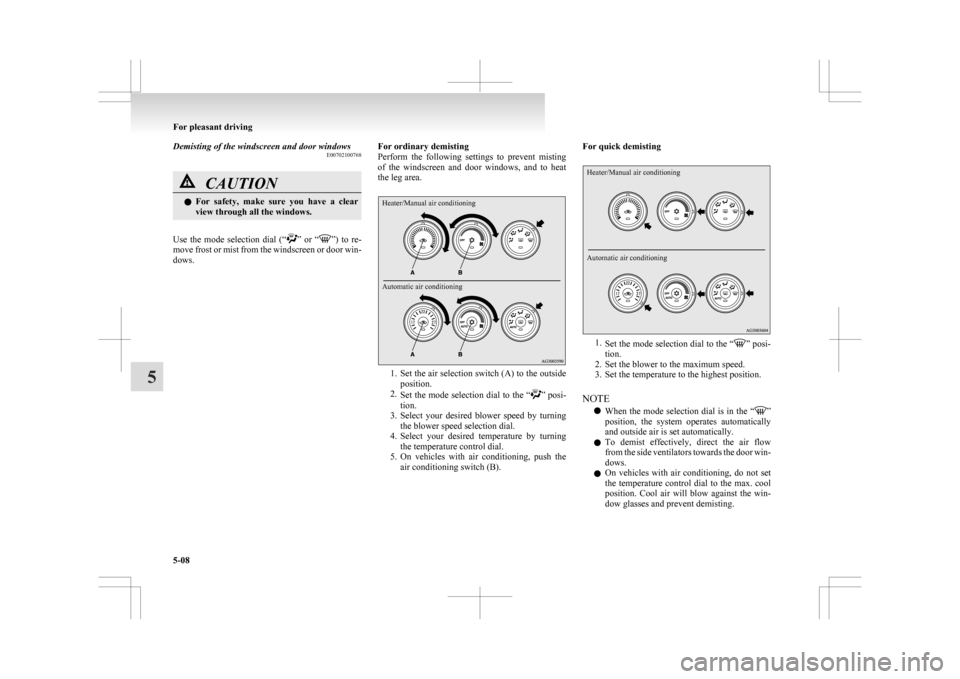
dows. For ordinary demisting
Perform
the following settings to prevent misting
of the windscreen and door windows, and to heat
the leg area.
Heater/Manual air conditioning
Automatic air conditioning 1. Set
the air selection switch (A) to the outside
position.
2. Set the mode selection dial to the “ ”
posi-
tion.
3. Select your desired blower speed by turning the blower speed selection dial.
4. Select your desired temperature by turning the temperature control dial.
5. On vehicles with air conditioning, push the air conditioning switch (B). For quick demisting
Heater/Manual air conditioning
Automatic air conditioning
1.
Set
the mode selection dial to the “ ” posi-
tion.
2.
Set the blower to the maximum speed.
3. Set the temperature to the highest position.
NOTE l When the mode selection dial is in the “ ”
position,
the system operates automatically
and outside air is set automatically.
l To demist effectively, direct the air flow
from the side ventilators towards the door win-
dows.
l On vehicles with air conditioning, do not set
the temperature control dial to the max. cool
position. Cool air will blow against the win-
dow glasses and prevent demisting. For pleasant driving
5-08
5
Page 217 of 368
l
For vehicles with the Auto Stop & Go
(AS&G) system, if the mode selection dial is
set to the demister position shown in the illus-
tration, the Auto Stop & Go (AS&G) system
will not operate and the engine will not stop
automatically even if the vehicle is stopped.
This is to ensure that good visibility is main-
tained.
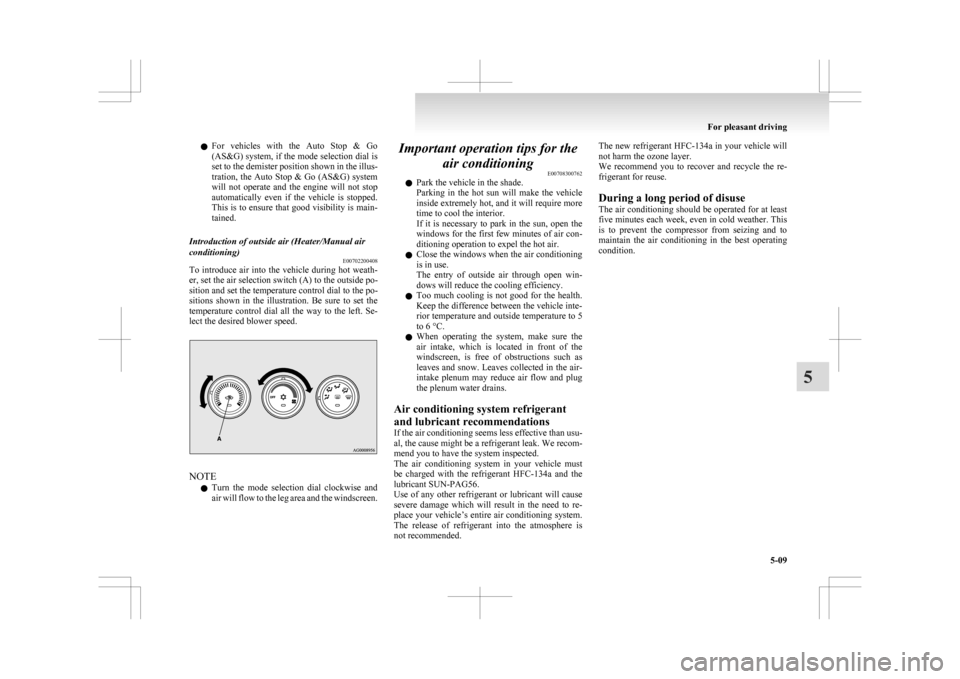
Introduction of outside air (Heater/Manual air
conditioning) E00702200408
To introduce air into the vehicle during hot weath-
er, set the air selection switch (A) to the outside po-
sition and set the temperature control dial to the po-
sitions
shown in the illustration. Be sure to set the
temperature control dial all the way to the left. Se-
lect the desired blower speed. NOTE
l Turn
the mode selection dial clockwise and
air will flow to the leg area and the windscreen. Important operation tips for the
air conditioning E00708300762
l Park the vehicle in the shade.
Parking
in the hot sun will make the vehicle
inside extremely hot, and it will require more
time to cool the interior.
If it is necessary to park in the sun, open the
windows for the first few minutes of air con-
ditioning operation to expel the hot air.
l Close the windows when the air conditioning
is in use.
The entry of outside air through open win-
dows will reduce the cooling efficiency.
l Too much cooling is not good for the health.
Keep the difference between the vehicle inte-
rior temperature and outside temperature to 5
to 6 °C.
l When operating the system, make sure the
air intake, which is located in front of the
windscreen, is free of obstructions such as
leaves and snow. Leaves collected in the air-
intake plenum may reduce air flow and plug
the plenum water drains.
Air conditioning system refrigerant
and lubricant recommendations
If the air conditioning seems less effective than usu-
al, the cause might be a refrigerant leak. We recom-
mend you to have the system inspected.
The air conditioning system in your vehicle must
be charged with the refrigerant HFC-134a and the
lubricant SUN-PAG56.
Use of any other refrigerant or lubricant will cause
severe damage which will result in the need to re-
place your vehicle’s entire air conditioning system.
The release of refrigerant into the atmosphere is
not recommended. The new refrigerant HFC-134a
in your vehicle will
not harm the ozone layer.
We recommend you to recover and recycle the re-
frigerant for reuse.
During a long period of disuse
The air conditioning should be operated for at least
five minutes each week, even in cold weather. This
is to prevent the compressor from seizing and to
maintain the air conditioning in the best operating
condition. For pleasant driving
5-09 5
Page 218 of 368

Air purifier
E00708400561
An
air filter has been incorporated into the air con-
ditioning so that pollen and dust are cleaned from
the air.
Replace the air filter periodically as its ability to
clean the air will be reduced as it collects pollen
and dirt. For the maintenance interval, refer to the
“SERVICE BOOKLET”.
NOTE
l Operation in certain conditions such as driv-
ing on a dusty road and frequent use of the
air conditioning can lead to reduction of serv-
ice life of the filter. When you feel that the
air flow is lower than normal or when the
windscreen or windows start to fog up easily,
replace the air filter.
We recommend you to have it checked. Audio system*
E00708502090
Type 1
Type 2 Type 1- LW/MW/FM digital turning radio with
CD player
Type
2- LW/MW/FM digital turning radio with
CD changer
For information on operations of the audio system
for vehicles equipped with MITSUBISHI Multi-Co-
munication system (MMCS), refer to the separate
owner’s manual.
The audio system can only be used when the igni-
tion switch or the operation mode is in ON or ACC. NOTE
l To
listen to the audio system while the en-
gine is not running, turn the ignition switch
to the “ACC” position or put the operation
mode in ACC.
If the ignition switch or the operation mode
is left in ACC, the accessory power will auto-
matically turn off after a certain period of
time and you will no longer be able to use
the audio system. The accessory power
comes on again if the ignition switch or the
engine switch is operated with it in the
“ACC” position. Refer to “ACC power auto-
cutout function” on pages 1-12 and 4-11.
l If a cellular phone is used inside the vehicle,
it may create noise from the audio equip-
ment. This does not mean that anything is
wrong with your audio equipment. In such a
case, use the cellular phone at a place as far
away as possible from the audio equipment.
l If foreign objects or water get into the audio
equipment, or if smoke or a strange odour
comes from it, immediately turn off the au-
dio system. We recommend you to have it
checked. Never try to repair it by yourself.
Avoid continuous usage without inspection
by a qualified person.
l The audio amplifier (if so equipped) is loca-
ted under the front right seat. Do not subject
the amplifier to a strong impact. It could dam-
age the amplifier or malfunctioning could re-
sult. For pleasant driving
5-10
5
Page 228 of 368
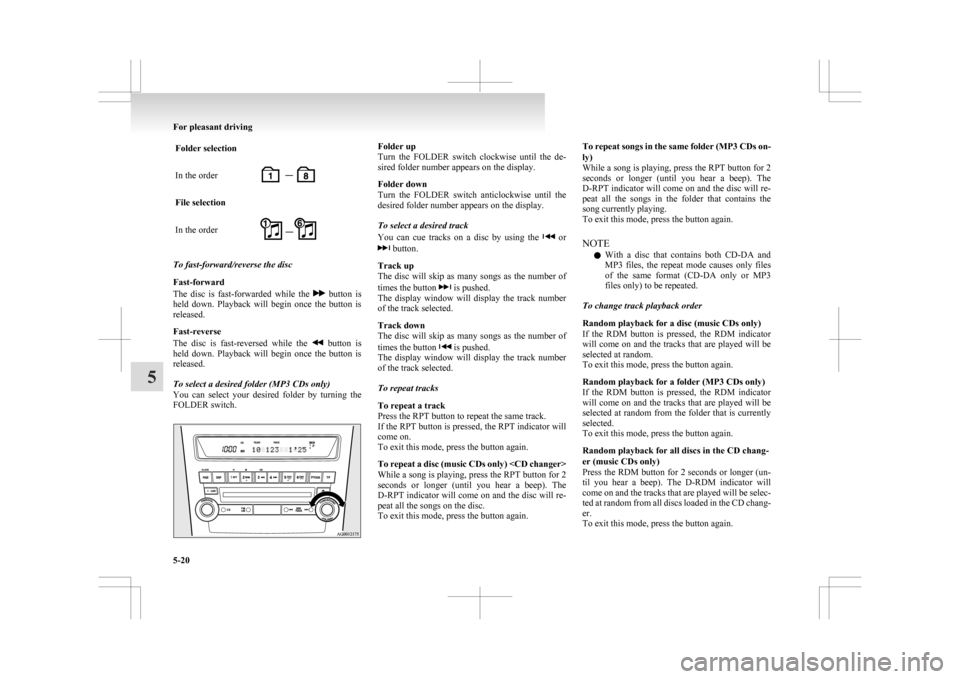
Folder selection
In the order
File selection
In the order
To fast-forward/reverse the disc
Fast-forward
The
disc is fast-forwarded while the button is
held
down. Playback will begin once the button is
released.
Fast-reverse
The disc is fast-reversed while the button is
held
down. Playback will begin once the button is
released.
To select a desired folder (MP3 CDs only)
You can select your desired folder by turning the
FOLDER switch. Folder up
Turn
the FOLDER switch clockwise until the de-
sired folder number appears on the display.
Folder down
Turn the FOLDER switch anticlockwise until the
desired folder number appears on the display.
To select a desired track
You can cue tracks on a disc by using the or
button.
Track up
The
disc will skip as many songs as the number of
times the button is pushed.
The
display window will display the track number
of the track selected.
Track down
The disc will skip as many songs as the number of
times the button is pushed.
The
display window will display the track number
of the track selected.
To repeat tracks
To repeat a track
Press the RPT button to repeat the same track.
If the RPT button is pressed, the RPT indicator will
come on.
To exit this mode, press the button again.
To repeat a disc (music CDs only)
While a song is playing, press the RPT button for 2
seconds or longer (until you hear a beep). The
D-RPT indicator will come on and the disc will re-
peat all the songs on the disc.
To exit this mode, press the button again. To repeat songs in the same folder (MP3 CDs on-
ly)
While
a song is playing, press the RPT button for 2
seconds or longer (until you hear a beep). The
D-RPT indicator will come on and the disc will re-
peat all the songs in the folder that contains the
song currently playing.
To exit this mode, press the button again.
NOTE
l With a disc that contains both CD-DA and
MP3 files, the repeat mode causes only files
of the same format (CD-DA only or MP3
files only) to be repeated.
To change track playback order
Random playback for a disc (music CDs only)
If the RDM button is pressed, the RDM indicator
will come on and the tracks that are played will be
selected at random.
To exit this mode, press the button again.
Random playback for a folder (MP3 CDs only)
If the RDM button is pressed, the RDM indicator
will come on and the tracks that are played will be
selected at random from the folder that is currently
selected.
To exit this mode, press the button again.
Random playback for all discs in the CD chang-
er (music CDs only)
Press the RDM button for 2 seconds or longer (un-
til you hear a beep). The D-RDM indicator will
come on and the tracks that are played will be selec-
ted at random from all discs loaded in the CD chang-
er.
To exit this mode, press the button again. For pleasant driving
5-20
5
Page 251 of 368

l
If this button is pressed in the voice recogni-
tion mode, the voice recognition mode will
be deactivated.
NOTE l When you press the SPEECH button to enter
voice recognition mode with a cellular phone
paired to the system, current information on
the cellular phone, such as “remaining bat-
tery life,” “signal strength” or “roaming,”
will be displayed on the audio display.*
*: Some cellular phones will not send this in-
formation to Bluetooth ®
2.0 interface.
l Call waiting and three-way calls can be used
by the Bluetooth ®
2.0 interface, only if it is
possible to use those services with your cellu-
lar phone.
Voice recognition function E00727300312
The Bluetooth ®
2.0 interface is equipped with a
voice recognition function.
Simply say voice commands and you can perform
various operations and make or receive hands-free
calls.
With the Bluetooth ®
2.0 interface, voice recogni-
tion is possible for English, French, Spanish, Ital-
ian, German, Dutch, Portuguese and Russian. The
factory setting is English. NOTE
l If
the voice command that you say differs
from the predefined command or cannot be
recognised due to ambient noise or some oth-
er reason, the Bluetooth ®
2.0 interface will
ask you for the voice command again up to 3
times.
l For best performance and further reduction
of ambient noise, the vehicle windows
should be closed while engaging the voice rec-
ognition function.
l Some voice commands have alternative com-
mands.
l Depending on the selected language, some
functions may not be available.
Selecting the Language 1. Press the SPEECH button.
2. Say “Setup”.
3. Say “Language.”
4. The voice guide will say “Select a language:English, French, Spanish, Italian, German,
Dutch, Portuguese or Russian” Say the de-
sired language. (Example: Say “English.”)
5. The voice guide will say “English (French, Spanish, Italian, German, Dutch, Portuguese
or Russian) selected. Is this correct?” Say
“Yes.”
Answer “No” to return to Step 4.
NOTE l The voice guide will repeat the same mes-
sage twice. The first message is in the cur-
rent language, and the second message is in
the selected language. l
If many entries are registered in the vehicle
phone book, changing the language will take
longer.
l Changing the language deletes the mobile
phone book imported to the Bluetooth ®
2.0
interface. If you wish to use it, you will have
to import it again.
6. When the voice guide says “English (French, Spanish, Italian, German, Dutch, Portuguese
or Russian) selected,” the language change
process will be completed and the system
will return to the main menu.
Useful voice commands E00760000019
Help function E00760100010
The Bluetooth ®
2.0 interface is equipped with a
help function.
If you say “Help” when the system is waiting for a
voice command input, the system will tell you a list
of the commands that can be used under the circum-
stances.
Cancelling E00760200011
There are two cancel functions.
If
you are at the main menu, say “Cancel” to exit
from the Bluetooth ®
2.0 interface.
If you are anywhere else within the system, say
“Cancel” to return to the main menu.
Confirmation function setting E00760400013
The Bluetooth ®
2.0 interface is equipped with a con-
firmation function. For pleasant driving
5-43 5