Page 60 of 218
Everything under control
58
Entering a distance manually
1.Select "Dist. to dest.".
2.Turn the MINI joystick to select the distance
to your destination.
3.Press the MINI joystick to apply the setting.
The distance is mandated automatically during
destination guidance.
Trip computer
The trip computer is suitable e.g. for a holi-
day trip.
1.Press the button.
This opens the start menu.
2.Move the MINI joystick to highlight "Naviga-
tion" and press the MINI joystick.
3.Select "Car Data".
4.Select "Trip computer".
>Departure time
>Driving time
>Distance traveled
>Average speed
>Average fuel consumption
To switch trip computer on/off and to reset all
values to zero:1.If necessary, move the highlight marker to
the third field from the top.
2.Press the MINI joystick.
Other menu items are displayed.
3.Select the desired menu item.
>"Start"
>"Stop"
>"Reset"
Page 61 of 218
MOBILITYAT A GLANCE CONTROLS DRIVING TIPS ENTERTAINMENT
59
NAVIGATION REFERENCE
Settings and information
Operating principle
Certain settings and information are only avail-
able when the ignition is switched on, the vehi-
cle is at a standstill and the doors are closed.
1Button for:
>Selecting display
>Setting values
>Confirming selected display or set values
>Calling up computer information562Calling up Check Control65
3Displaying vehicle check66
4Setting the time63
5Setting the date64
6Exiting the menu
Exiting displays
1.Briefly press the button in the turn indicator
lever repeatedly until "HOME" is displayed.
2.Press the button for a longer period.The display again shows the outside tempera-
ture and the time.
Displays are also exited if no entries are made
for approx. 8 seconds.
Page 62 of 218

Everything under control
60
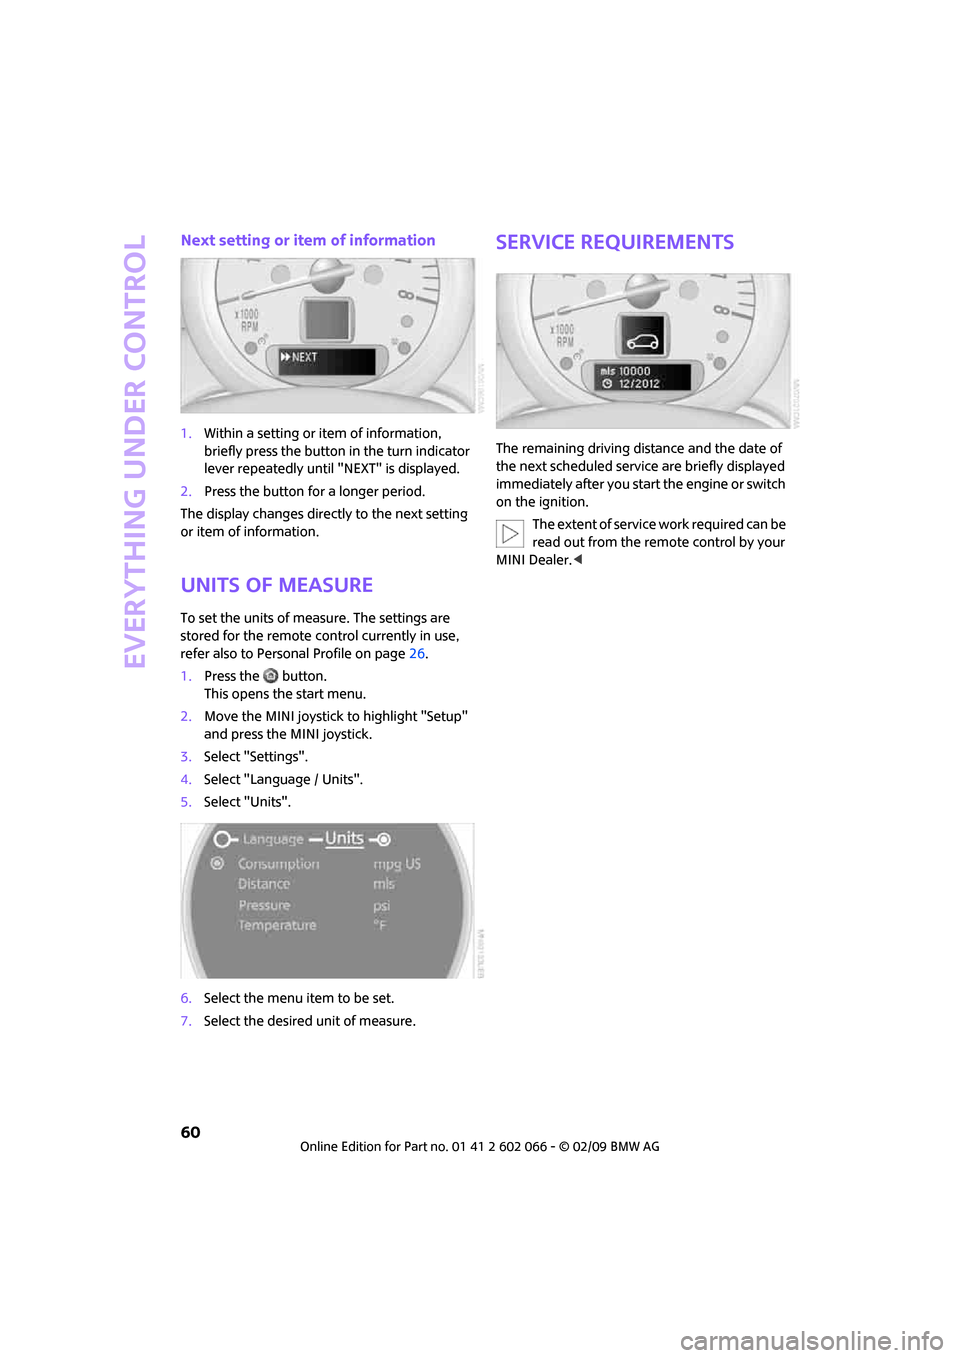
Next setting or item of information
1.Within a setting or item of information,
briefly press the button in the turn indicator
lever repeatedly until "NEXT" is displayed.
2.Press the button for a longer period.
The display changes directly to the next setting
or item of information.
Units of measure
To set the units of measure. The settings are
stored for the remote control currently in use,
refer also to Personal Profile on page26.
1.Press the button.
This opens the start menu.
2.Move the MINI joystick to highlight "Setup"
and press the MINI joystick.
3.Select "Settings".
4.Select "Language / Units".
5.Select "Units".
6.Select the menu item to be set.
7.Select the desired unit of measure.
Service requirements
The remaining driving distance and the date of
the next scheduled service are briefly displayed
immediately after you start the engine or switch
on the ignition.
The extent of service work required can be
read out from the remote control by your
MINI Dealer.<
Page 63 of 218
MOBILITYAT A GLANCE CONTROLS DRIVING TIPS ENTERTAINMENT
61
NAVIGATION REFERENCE
Possible displays
1Button for selecting information
2Engine oil
3Front brakes
4Rear brakes
5Vehicle check6Roadworthiness test
7Brake fluid
8Exit display59
9Next setting or item of information60
More information on the MINI Maintenance
System can be found on page170.
Supplementary information
You can have further information on the scope
of maintenance displayed on the Control Dis-
play, refer to page16.
1.Press the button.
This opens the start menu.
2.Move the MINI joystick to highlight "Setup"
and press the MINI joystick.
3.Select "Info sources".4.Select "Service Info".
5.Select "Service requirements".
6.If necessary, move the highlight mar
ker to the second field from the top. Select
"Status".
Page 64 of 218

Everything under control
62
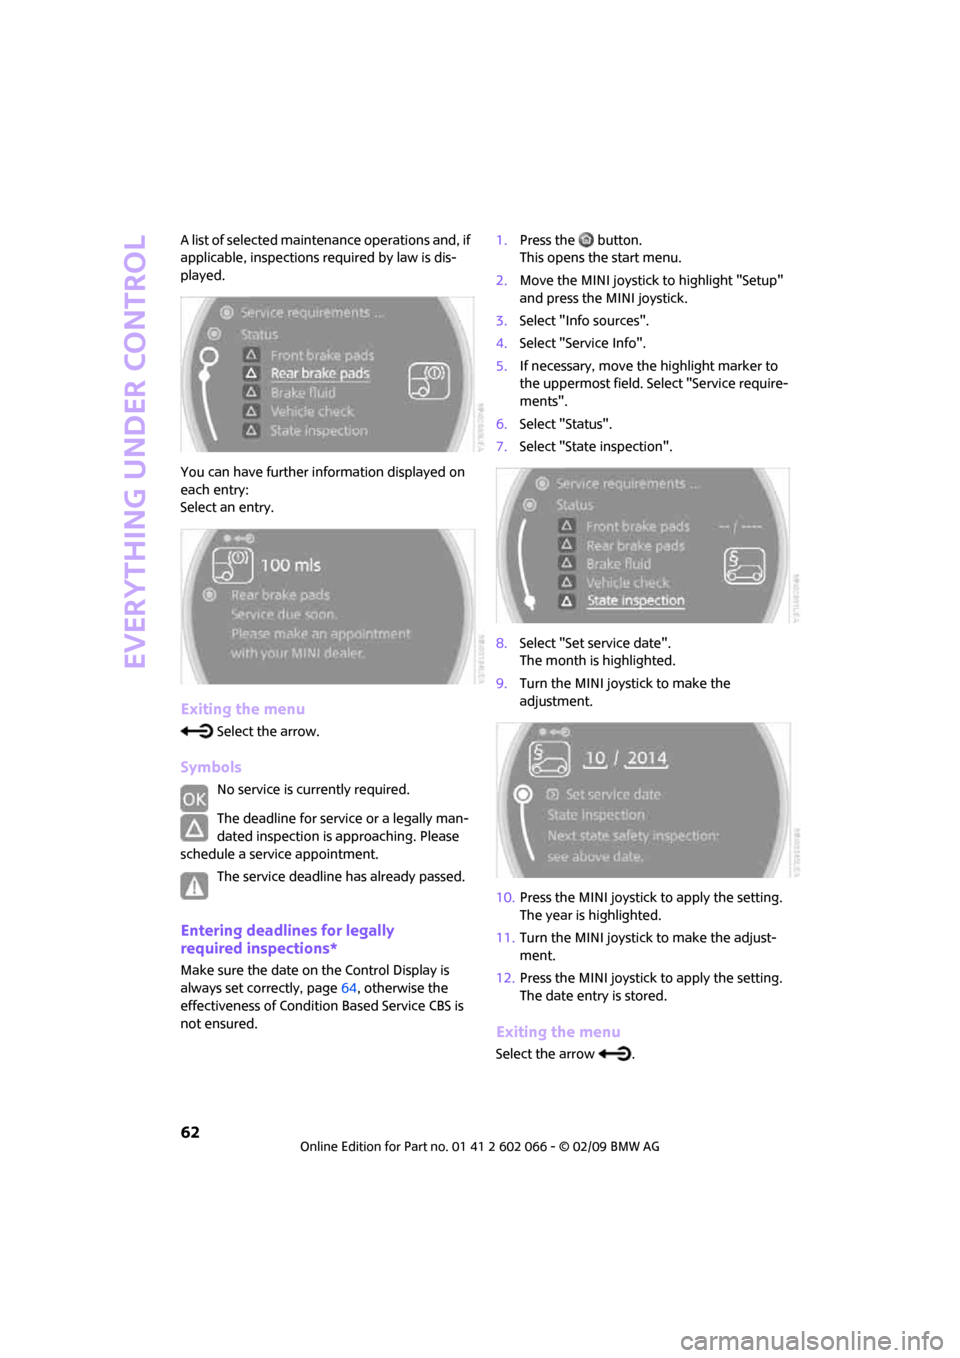
A list of selected maintenance operations and, if
applicable, inspections required by law is dis-
played.
You can have further information displayed on
each entry:
Select an entry.
Exiting the menu
Select the arrow.
Symbols
No service is currently required.
The deadline for service or a legally man-
dated inspection is approaching. Please
schedule a service appointment.
The service deadline has already passed.
Entering deadlines for legally
required inspections*
Make sure the date on the Control Display is
always set correctly, page64, otherwise the
effectiveness of Condition Based Service CBS is
not ensured.1.Press the button.
This opens the start menu.
2.Move the MINI joystick to highlight "Setup"
and press the MINI joystick.
3.Select "Info sources".
4.Select "Service Info".
5.If necessary, move the highlight marker to
the uppermost field. Select "Service require-
ments".
6.Select "Status".
7.Select "State inspection".
8.Select "Set service date".
The month is highlighted.
9.Turn the MINI joystick to make the
adjustment.
10.Press the MINI joystick to apply the setting.
The year is highlighted.
11.Turn the MINI joystick to make the adjust-
ment.
12.Press the MINI joystick to apply the setting.
The date entry is stored.
Exiting the menu
Select the arrow .
Page 65 of 218
MOBILITYAT A GLANCE CONTROLS DRIVING TIPS ENTERTAINMENT
63
NAVIGATION REFERENCE
Clock
In the tachometer
Setting the time
1.Briefly press the button in the turn indicator
lever repeatedly until "SET/INFO" is dis-
played.
2.Press and hold the button until the display
changes.
3.Briefly press the button repeatedly until the
symbol and "SET" are displayed.
4.Press and hold the button until the display
changes.
5.Press the button to set the hours.
6.Wait for the display to change to minutes.
7.Press the button to set the minutes.
8.Wait for the display to change.
The settings are stored.
On the onboard monitor
Setting the time
1.Press the button once or twice until the
start menu appears.
2.Move the MINI joystick to highlight "Setup"
and press the MINI joystick.
3.Turn the MINI joystick until "Settings" is
selected and press the MINI joystick.
4.Turn the MINI joystick until "Time / Date" is
selected and press the MINI joystick.
Page 66 of 218

Everything under control
64
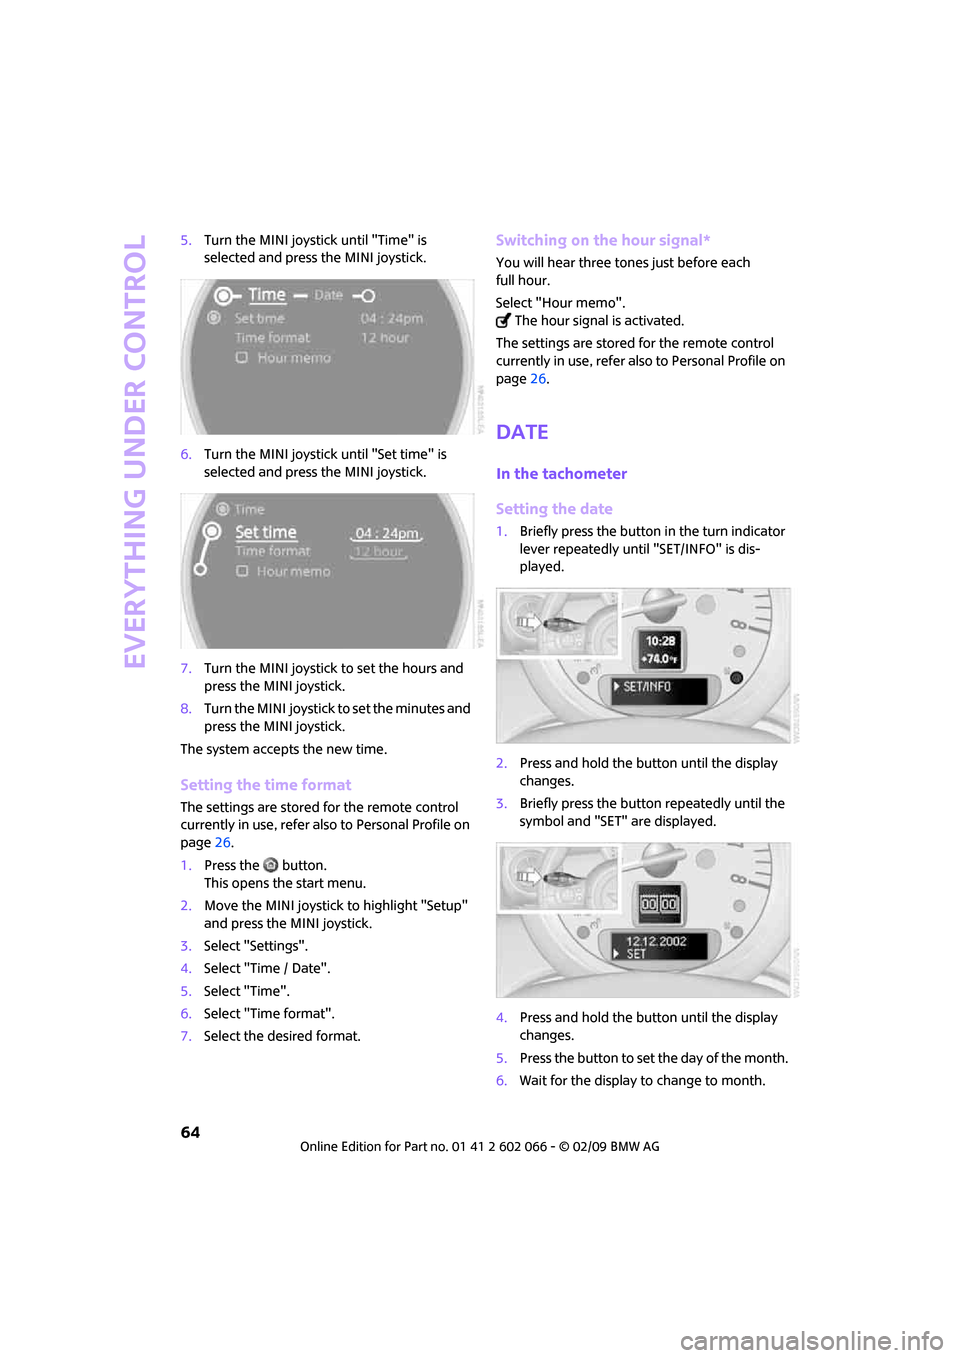
5.Turn the MINI joystick until "Time" is
selected and press the MINI joystick.
6.Turn the MINI joystick until "Set time" is
selected and press the MINI joystick.
7.Turn the MINI joystick to set the hours and
press the MINI joystick.
8.Turn the MINI joystick to set the minutes and
press the MINI joystick.
The system accepts the new time.
Setting the time format
The settings are stored for the remote control
currently in use, refer also to Personal Profile on
page26.
1.Press the button.
This opens the start menu.
2.Move the MINI joystick to highlight "Setup"
and press the MINI joystick.
3.Select "Settings".
4.Select "Time / Date".
5.Select "Time".
6.Select "Time format".
7.Select the desired format.
Switching on the hour signal*
You will hear three tones just before each
full hour.
Select "Hour memo".
The hour signal is activated.
The settings are stored for the remote control
currently in use, refer also to Personal Profile on
page26.
Date
In the tachometer
Setting the date
1.Briefly press the button in the turn indicator
lever repeatedly until "SET/INFO" is dis-
played.
2.Press and hold the button until the display
changes.
3.Briefly press the button repeatedly until the
symbol and "SET" are displayed.
4.Press and hold the button until the display
changes.
5.Press the button to set the day of the month.
6.Wait for the display to change to month.
Page 67 of 218

MOBILITYAT A GLANCE CONTROLS DRIVING TIPS ENTERTAINMENT
65
NAVIGATION REFERENCE
7.Set the month and year in the same way.
8.Wait for the display to change.
The settings are stored.
On the onboard monitor
Setting the date
1.Press the button.
This opens the start menu.
2.Move the MINI joystick to highlight "Setup"
and press the MINI joystick.
3.Select "Settings".
4.Select "Time / Date".
5.Select "Date".
6.Select "Set date".
7.Turn the MINI joystick to make the adjust-
ment.
8.Press the MINI joystick to apply the setting.
The next setting is highlighted.
9.Make the remaining adjustments. After the
last adjustment, the date is stored.
Setting the date format
The settings are stored for the remote control
currently in use, refer also to Personal Profile on
page26.
1.Press the button.
This opens the start menu.
2.Move the MINI joystick to highlight "Setup"
and press the MINI joystick.
3.Select "Settings".
4.Select "Time / Date".
5.Select "Date".
6.Select "Date format".7.Select the desired format.
Check Control
The concept
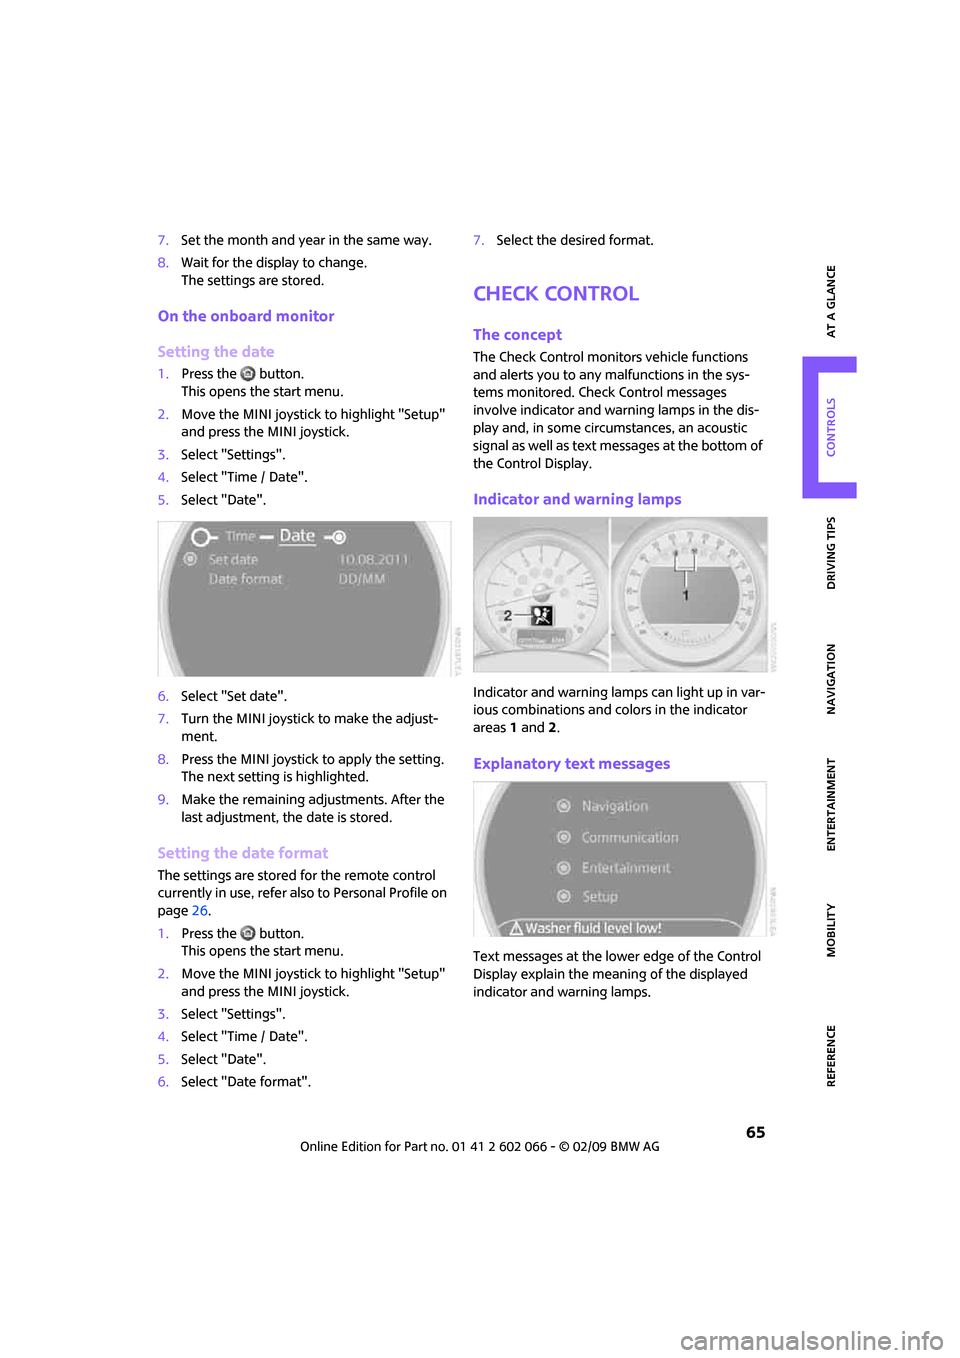
The Check Control monitors vehicle functions
and alerts you to any malfunctions in the sys-
tems monitored. Check Control messages
involve indicator and warning lamps in the dis-
play and, in some circumstances, an acoustic
signal as well as text messages at the bottom of
the Control Display.
Indicator and warning lamps
Indicator and warning lamps can light up in var-
ious combinations and colors in the indicator
areas 1 and2.
Explanatory text messages
Text messages at the lower edge of the Control
Display explain the meaning of the displayed
indicator and warning lamps.