Page 57 of 312

ILLUMINATED VISOR MIRROR (IF EQUIPPED)
Lift the mirror cover to turn on the
visor mirror lamps.
OVERHEAD CONSOLE (IF EQUIPPED)
The appearance of your vehicle’s overhead console will vary according to
your option package.
Storage compartment (if equipped)
Press the release on the door to
open the storage compartment.
The storage compartment may be
used to secure sunglasses or a
similar object.
ELECTRONIC COMPASS
The compass heading is displayed as one of N, NE, E, SE, S, SW, W and
NW in the center stack display.
The compass reading may be affected when you drive near large
buildings, bridges, power lines and powerful broadcast antenna. Magnetic
or metallic objects placed in, on or near the vehicle may also affect
compass accuracy.
Usually, when something affects the compass readings, the compass will
correct itself after a few days of operating your vehicle in normal
conditions. If the compass still appears to be inaccurate, a manual
calibration may be necessary. Refer toCompass calibration
adjustment.
2009 Mariner(mrn)
Owners Guide, 2nd Printing
USA(fus)
Driver Controls
57
Page 58 of 312
Most geographic areas (zones) have a magnetic north compass point that
varies slightly from the northerly direction on maps. This variation is four
degrees between adjacent zones and will become noticeable as the
vehicle crosses multiple zones. A correct zone setting will eliminate this
error. Refer toCompass zone adjustment.
Compass zone adjustment
1. Determine which magnetic zone
you are in for your geographic
location by referring to the zone
map.
2. Turn ignition to the on position.
3. Start the engine.
4. Press the SETUP control to select
the Update Zone function and
display the current ZONE XX in the
center stack display.
5. Continue to press the RESET
control until the correct zone
appears in the center stack display.
6. The direction will display after
the RESET control is released. The
zone is now updated.
1 2 3
4
5
6 7 8 9 101112 13 14 15
2009 Mariner(mrn)
Owners Guide, 2nd Printing
USA(fus)
Driver Controls
58
Page 59 of 312

Compass calibration adjustment
Perform compass calibration in an open area free from steel structures
and high voltage lines. For optimum calibration, turn off all electrical
accessories (heater/air conditioning, wipers, etc.) and make sure all
vehicle doors are shut.
1. Start the vehicle.
2. To calibrate, press and hold the
RESET control for approximately
ten seconds until CAL appears.
Release the control.
3. Slowly drive the vehicle in a
circle (less than 3 mph [5 km/h]) until the CAL display changes to the
direction value. It may take up to five circles to complete calibration.
4. The compass is now calibrated.
CENTER CONSOLE
Your vehicle is equipped with a variety of console features. These
include:
1. Cupholders
2. Utility compartment console lid
has a CD holder, a business card
holder and two pen holders. The
utility compartment has a removable
bin with coin holder slots, a sliding
tray, a cell phone holder and CD
holders
3. Rear power point
4. Rear cupholders
5. Small storage trays and (if equipped) an ambient light control switch
WARNING:Use only soft cups in the cupholders. Hard objects
can injure you in a collision.
2009 Mariner(mrn)
Owners Guide, 2nd Printing
USA(fus)
Driver Controls
59
Page 60 of 312
The tray and inside bin can be
removed to open up space to fit a
laptop computer, MP3 players, CDs
or handbags. To remove, open the
console lid and pull the bin straight
up and out from the console
housing.
The sliding tray and inside bin can
be hooked on the side or rear of the
console for extra storage.
AUXILIARY POWER POINT (12VDC)
Power outlets are designed for accessory plugs only. Do not insert
any other object in the power outlet as this will damage the
outlet and blow the fuse. Do not hang any type of accessory or
accessory bracket from the plug. Improper use of the power
outlet can cause damage not covered by your warranty.
2009 Mariner(mrn)
Owners Guide, 2nd Printing
USA(fus)
Driver Controls
60
Page 61 of 312

The auxiliary power point is located
in the instrument panel.
A second auxiliary power point is
located on the rear side of the
center console.
Do not use the power point for
operating the cigarette lighter
element (if equipped).
To prevent the fuse from being
blown, do not use the power
point(s) over the vehicle capacity of 12 VDC/180W. If the power point or
cigar lighter socket is not working, a fuse may have blown. Refer to
Fuses and relaysin theRoadside Emergencieschapter for information
on checking and replacing fuses.
To have full capacity usage of your power point, the engine is required to
be running to avoid unintentional discharge of the battery. To prevent
the battery from being discharged:
•do not use the power point longer than necessary when the engine is
not running,
•do not leave battery chargers, video game adapters, computers and
other devices plugged in overnight or when the vehicle is parked for
extended periods.
Always keep the power point caps closed when not being used.
Cigar/Cigarette lighter (if equipped)
Do not plug optional electrical accessories into the cigarette lighter
socket.
Do not hold the lighter in with your hand while it is heating, this will
damage the lighter element and socket. The lighter will be released from
its heating position when it is ready to be used.
Note:Improper use of the lighter can cause damage not covered by your
warranty, and can result in fire or serious injury.
POWER WINDOWS (IF EQUIPPED)
WARNING:Do not leave children unattended in the vehicle and
do not let children play with the power windows. They may
seriously injure themselves.
2009 Mariner(mrn)
Owners Guide, 2nd Printing
USA(fus)
Driver Controls
61
Page 62 of 312

WARNING:When closing the power windows, you should verify
they are free of obstructions and ensure that children and/or
pets are not in the proximity of the window openings.
Press and pull the window switches
to open and close windows.
•Push down (to the first detent)
and hold the switch to open.
•Pull up and hold the switch to
close.
Rear Window Buffeting:When one or both of the rear windows are
open, the vehicle may demonstrate a wind throb or buffeting noise; this
noise can be alleviated by lowering a front window approximately two to
three inches.
One touch down (AUTO)
Allows the driver’s window to open
fully without holding the control
down. Push the switch completely
down to the second detent and
release quickly. The window will
open fully. Momentarily press the
switch to any position to stop the
window operation.
Window lock
The window lock feature allows only
the driver to operate the power
windows.
To lock out all the window controls
(except for the driver’s) press the
right side of the control. Press the
left side to restore the window
controls.
Accessory delay
With accessory delay, the window switches, moon roof (if equipped) and
audio system may be used for up to 10 minutes after the ignition switch
is turned to the off position or until either front door is opened.
2009 Mariner(mrn)
Owners Guide, 2nd Printing
USA(fus)
Driver Controls
62
Page 63 of 312

INTERIOR MIRROR
The interior rear view mirror has two pivot points on the support arm
which lets you adjust the mirror up or down and from side to side.
WARNING:Do not adjust the mirror while the vehicle is in
motion.
Automatic dimming interior rear view mirror (if equipped)
Your vehicle may be equipped with an interior rear view mirror which
has an auto-dimming function. The electronic day/night mirror will
change from the normal (high reflective) state to the non-glare
(darkened) state when bright lights (glare) reach the mirror. When the
mirror detects bright light from behind the vehicle, it will automatically
adjust (darken) to minimize glare.
Without microphone
With microphone
The mirror will automatically return to the normal state whenever the
vehicle is placed in R (Reverse) to ensure a bright clear view when
backing up.
Do not block the sensors on the front and back of the interior
rear view mirror since this may impair proper mirror
performance.
Do not clean the housing or glass of any mirror with harsh
abrasives, fuel or other petroleum-based cleaning products.
EXTERIOR MIRRORS
Power side view mirrors
WARNING:Do not adjust the mirror while the vehicle is in
motion.
2009 Mariner(mrn)
Owners Guide, 2nd Printing
USA(fus)
Driver Controls
63
Page 64 of 312

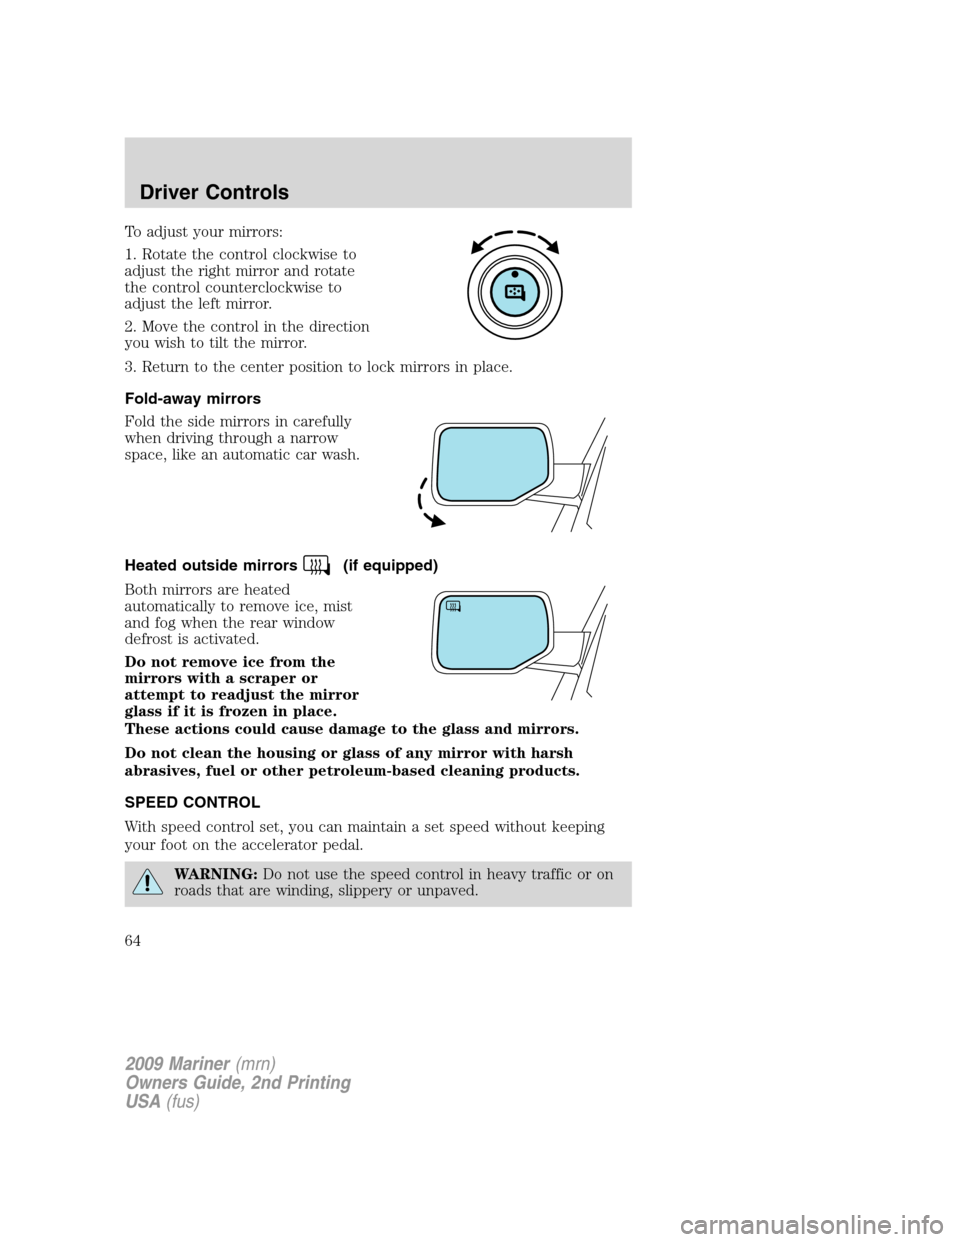
To adjust your mirrors:
1. Rotate the control clockwise to
adjust the right mirror and rotate
the control counterclockwise to
adjust the left mirror.
2. Move the control in the direction
you wish to tilt the mirror.
3. Return to the center position to lock mirrors in place.
Fold-away mirrors
Fold the side mirrors in carefully
when driving through a narrow
space, like an automatic car wash.
Heated outside mirrors
(if equipped)
Both mirrors are heated
automatically to remove ice, mist
and fog when the rear window
defrost is activated.
Do not remove ice from the
mirrors with a scraper or
attempt to readjust the mirror
glass if it is frozen in place.
These actions could cause damage to the glass and mirrors.
Do not clean the housing or glass of any mirror with harsh
abrasives, fuel or other petroleum-based cleaning products.
SPEED CONTROL
With speed control set, you can maintain a set speed without keeping
your foot on the accelerator pedal.
WARNING:Do not use the speed control in heavy traffic or on
roads that are winding, slippery or unpaved.
2009 Mariner(mrn)
Owners Guide, 2nd Printing
USA(fus)
Driver Controls
64