2009 MERCEDES-BENZ E-CLASS SALOON warning light
[x] Cancel search: warning lightPage 110 of 373

Parking
G
Risk of accident
Only remove the key from the ignition lock
when the vehicle is stationary, as you cannot
steer the vehicle with the key removed.
Never leave children unsupervised in the vehi-
cle. They could release the parking brake. This
could lead to a serious or fatal accident. G
Risk of fire
Make sure that the exhaust system does not
under any circumstances come into contact
with easily ignitable material such as dry grass
or petrol. Otherwise, the flammable material
may ignite and set the vehicle on fire.
To ensure that the vehicle is secured against
rolling away unintentionally:
R the parking brake must be applied
R on vehicles with manual transmission,
engage first gear or reverse gear
R on vehicles with automatic transmission*,
the transmission must be in position Pand
the key must be removed from the ignition
lock
R on steep uphill or downhill gradients, turn
the front wheels towards the kerb
Parking brake X
To apply: depress parking brake ;firmly.
The J warning lamp in the instrument
cluster lights up if the engine is running. X
To release: depress the brake pedal and
keep it depressed.
On vehicles with automatic transmission*,
the selector lever/parking lock is released.
X Pull release handle :.
The J warning lamp in the instrument
cluster goes out. Switching off the engine
G
Risk of accident
If the engine is not running, there is no power
assistance for the steering and brakes. Steer-
ing and braking will then require significantly
greater effort.
As a result, you might lose control of the vehi-
cle, cause an accident and injure yourself and
others.
Therefore, do not switch off the engine while
you are driving.
Vehicles with manual transmission X
Shift to either first or reverse gear.
X Turn the key to position 0(Y page 75) in
the ignition lock and remove it.
The immobiliser is activated.
Vehicles with automatic transmission* X
Standard vehicles: shift the transmission
to position P. X
AMG vehicles: press thePbutton :. Driving and parking
107Controls
* optional
212_AKB; 2; 4, en-GB
mkalafa,
Version: 2.11.8.1 2009-05-05T14:17:16+02:00 - Seite 107 Z
Dateiname: 6515346702_buchblock.pdf; erzeugt am 07. May 2009 14:16:05; WK
Page 120 of 373
Downshifting
G
Risk of accident
Do not shift down to brake on a slippery road
surface. This could cause the drive wheels to
lose their grip, and the vehicle could skid.
X Pull the left-hand paddle ( Ypage 114).
The automatic transmission shifts down to
the next gear.
i For maximum acceleration, pull the left-
hand steering wheel gearshift paddle until
the transmission selects the optimum gear
for the current speed.
Kickdown
i On vehicles with AMG engines, it is not
possible to use kickdown in manual drive
program M. Instrument cluster
Points to remember
You will find an illustration of the instrument
cluster in the "At a glance" section
(Y page 27). G
Risk of accident
If the instrument cluster or the multi-function
display fails, then no display messages can be
shown.
You will not then be able to see information
about the vehicle status, such as speed and
outside temperature, warning and indicator
lamps, display messages or the failure of sys-
tems. The vehicle’s handling characteristics
may be affected. Adapt your driving style and
speed accordingly.
Immediately consult a qualified specialist
workshop which has the necessary specialist
knowledge and tools to carry out the work
required. Mercedes-Benz recommends that
you use a Mercedes-Benz Service Centre for
this purpose. In particular, work relevant to
safety or on safety-related systems must be
carried out at a qualified specialist workshop. Coolant temperature display
The coolant temperature gauge is in the
instrument cluster on the right-hand side.
Under normal operating conditions and with
the specified coolant level, the coolant tem-
perature may rise to 120 †. The coolant tem-
perature may rise to the top end of the scale
at high outside temperatures and on long
uphill stretches. Speedometer with segments
The segments in the speedometer indicate
which speed range is available.
Cruise control mode:
The segments light up from the stored speed
to the maximum speed.
Variable Speedtronic mode:
The segments light up from the start of the
scale to the selected limit speed.
Distronic Plus* mode:
One or two segments around the stored
speed light up. Rev counter
The red band in the rev counter indicates the
engine's overrevving range. The fuel supply is
interrupted to protect the engine when the
red band is reached.
! Do not drive in the overrevving range.
Doing so will damage the engine. Outside temperature display
G
Risk of accident
At temperatures just above freezing point, the
road could be icy, particularly in wooded areas
or on bridges. The vehicle could start skidding
if you fail to adapt your driving style. You
should therefore always adapt your driving
style and speed to suit the weather condi-
tions. Inst
rument cluster
117Controls
* optional
212_AKB; 2; 4, en-GB
mkalafa
,V ersion: 2.11.8.1
2009-05-05T14:17:16+02:00 - Seite 117 Z
Dateiname: 6515346702_buchblock.pdf; erzeugt am 07. May 2009 14:16:09; WK
Page 124 of 373
Function
C
Service
(Ypage 130) menu
R calls up display messages
(Y page 252)
R Tyre pressure loss warning
(Y page 226) or checks the tyre
pressure electroni-
cally* (Y page 228)
R ASSYST PLUS service interval dis-
play (Y page 239) D
Settings
menu (Ypage 131) The number of menus shown depends on the
optional equipment in the vehicle.
The Audio, Navi* and Telmenus are dis-
played slightly differently in vehicles with an
audio system and vehicles with COMAND
APS*. The examples given in this Owner's
Manual apply to vehicles equipped with
COMAND APS*. Trip menu
i Reset the trip meter or trip computer
(Y page 122).
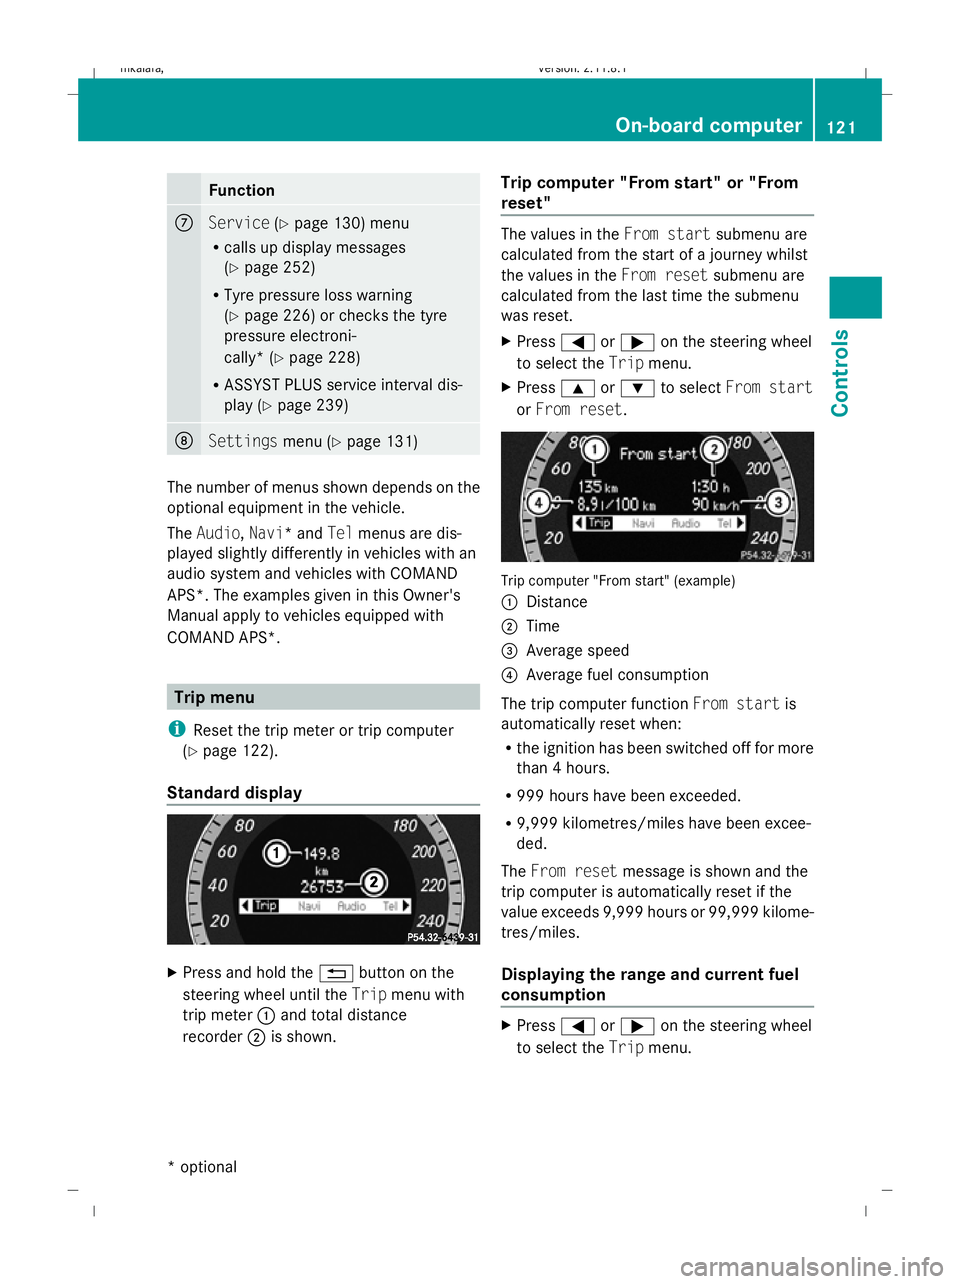
Standard display X
Press and hold the %button on the
steering wheel until the Tripmenu with
trip meter :and total distance
recorder ;is shown. Trip computer "From start" or "From
reset" The values in the
From startsubmenu are
calculated from the start of a journey whilst
the values in the From resetsubmenu are
calculated from the last time the submenu
was reset.
X Press =or; on the steering wheel
to select the Tripmenu.
X Press 9or: to select From start
or From reset. Trip computer "From start" (example)
:
Distance
; Time
= Average speed
? Average fuel consumption
The trip computer function From startis
automatically reset when:
R the ignition has been switched off for more
than 4 hours.
R 999 hours have been exceeded.
R 9,999 kilometres/miles have been excee-
ded.
The From reset message is shown and the
trip computer is automatically reset if the
value exceeds 9,999 hours or 99,999 kilome-
tres/miles.
Displaying the range and current fuel
consumption X
Press =or; on the steering wheel
to select the Tripmenu. On-board computer
121Controls
* optional
212_AKB; 2; 4, en-GB
mkalafa
,V ersion: 2.11.8.1
2009-05-05T14:17:16+02:00 - Seite 121 Z
Dateiname: 6515346702_buchblock.pdf; erzeugt am 07. May 2009 14:16:12; WK
Page 134 of 373
R
call up display messages (Y page 251)
R reset the tyre pressure loss warning system
(Y page 226) or check the tyre pressure
electronically* (Y page 228)
R call up the service due date (Y page 239)Settings menu
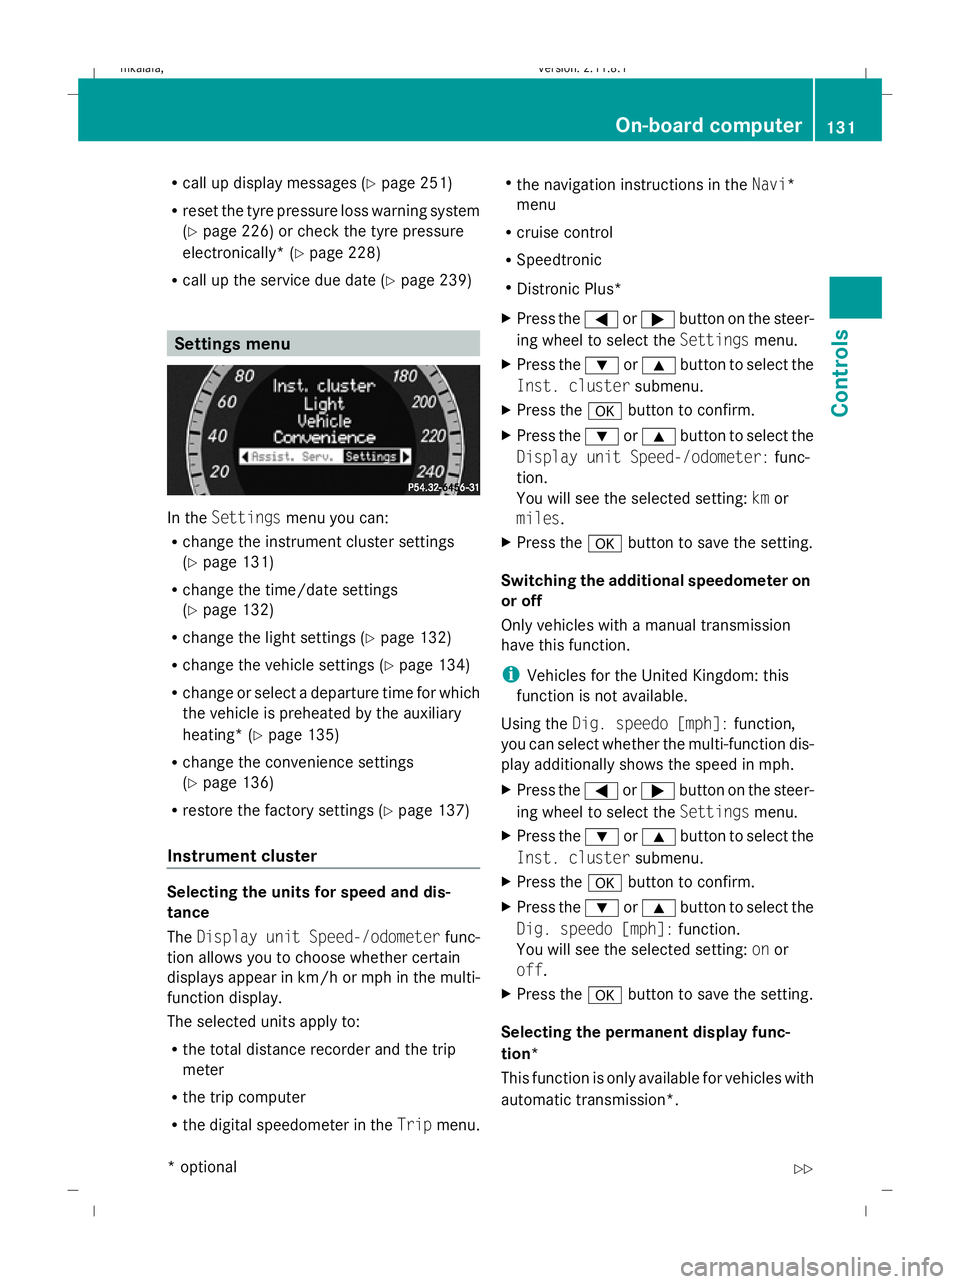
In the
Settings menu you can:
R change the instrument cluster settings
(Y page 131)
R change the time/date settings
(Y page 132)
R change the light settings ( Ypage 132)
R change the vehicle settings (Y page 134)
R change or select a departure time for which
the vehicle is preheated by the auxiliary
heating* (Y page 135)
R change the convenience settings
(Y page 136)
R restore the factory settings (Y page 137)
Instrument cluster Selecting the units for speed and dis-
tance
The
Display unit Speed-/odometer func-
tion allows you to choose whether certain
displays appear in km/h or mph in the multi-
function display.
The selected units apply to:
R the total distance recorder and the trip
meter
R the trip computer
R the digital speedometer in the Tripmenu. R
the navigation instructions in the Navi*
menu
R cruise control
R Speedtronic
R Distronic Plus*
X Press the =or; button on the steer-
ing wheel to select the Settingsmenu.
X Press the :or9 button to select the
Inst. cluster submenu.
X Press the abutton to confirm.
X Press the :or9 button to select the
Display unit Speed-/odometer: func-
tion.
You will see the selected setting: kmor
miles.
X Press the abutton to save the setting.
Switching the additional speedometer on
or off
Only vehicles with a manual transmission
have this function.
i Vehicles for the United Kingdom: this
function is not available.
Using the Dig. speedo [mph]: function,
you can select whether the multi-function dis-
play additionally shows the speed in mph.
X Press the =or; button on the steer-
ing wheel to select the Settingsmenu.
X Press the :or9 button to select the
Inst. cluster submenu.
X Press the abutton to confirm.
X Press the :or9 button to select the
Dig. speedo [mph]: function.
You will see the selected setting: onor
off.
X Press the abutton to save the setting.
Selecting the permanent display func-
tion*
This function is only available for vehicles with
automatic transmission*. On-board computer
131Controls
* optional
212_AKB; 2; 4, en-GB
mkalafa
,V ersion: 2.11.8.1
2009-05-05T14:17:16+02:00 - Seite 131 Z
Dateiname: 6515346702_buchblock.pdf; erzeugt am 07. May 2009 14:16:15; WK
Page 143 of 373
Adjustment in 10 km/h increments
X
Briefly press the cruise control lever
beyond the pressure point, up :for a
higher speed or down ?for a lower speed.
The last speed stored is increased or
reduced.
Deactivating cruise control There are several ways to deactivate cruise
control:
X
Briefly press the cruise control lever for-
wards B.
or
X Brake.
or
X Briefly press the cruise control lever in the
direction of arrow A.
Variable Speedtronic is selected. LIM indi-
cator lamp ;in the cruise control lever
lights up.
Cruise control is automatically deactivated if:
R you depress the parking brake.
R you drive at less than 30 km/h
R ESP ®
intervenes or you deactivate ESP ®
R you change into neutral in a vehicle with
manual transmission while driving or if the
clutch is depressed for longer than 6 sec-
onds
R on vehicles with manual transmission, you
shift to a higher gear and as a result the
engine speed is too low
R you move the selector lever to Non vehi-
cles with automatic transmission* while
driving
If cruise control is deactivated, you will hear
a warning tone. You see the Cruise con‐
trol off message in the multi-function dis-
play for approximately five seconds.
i The last speed stored is cleared when you
switch off the engine. Distronic Plus*
i Distronic Plus is not available in all coun-
tries.
Distronic Plus regulates the speed and auto-
matically maintains the distance to the vehi-
cle in front. It brakes automatically in order
to avoid exceeding the set speed. On long and
steep downhill gradients, especially if the
vehicle is laden or towing a trailer, you must
select shift range 1,2or 3in good time. By
doing so, you will make use of the braking
effect of the engine, which relieves the load
on the brake system and prevents the brakes
from overheating and wearing too quickly. G
Risk of accident
Do not change down for additional engine
braking on a slippery road surface. This could
cause the drive wheels to lose their grip and
the vehicle could skid. G
Risk of accident
Distronic Plus is only an aid designed to assist
driving. The driver is fully responsible for the
vehicle's distance from other vehicles, the
vehicle's speed and for braking in good time.
Distronic Plus does not react to:
R pedestrians
R stationary obstacles on the road, e.g. stop-
ped or parked vehicles
R oncoming and crossing traffic
Distronic Plus may not detect narrow vehicles
driving in front, e.g. motorcycles, or vehicles
driving on a different line. Therefore, always
pay attention to traffic conditions even when
Distronic Plus is activated. Otherwise, you
may fail to recognise dangers in time, cause
an accident and injure yourself and others.
If a slower-moving vehicle is detected in front,
Distronic Plus causes your vehicle to brake
and maintain a preset distance to the vehicle
in front. 140
Driving systemsCont
rols
* optional
212_AKB; 2; 4, en-GB
mkalafa
,V ersion: 2.11.8.1
2009-05-05T14:17:16+02:00 - Seite 140
Dateiname: 6515346702_buchblock.pdf; erzeugt am 07. May 2009 14:16:17; WK
Page 144 of 373

G
Risk of accident
Distronic Plus cannot take account of road
and traffic conditions. If Distronic does not
recognise or no longer recognises the vehicle
in front, do not activate Distronic or, if it is
already active, deactivate it. This is especially
the case:
R before corners
R in filter lanes
R when changing to a lane with faster moving
traffic
R in complex driving situations or where the
lanes are diverted, e.g. at motorway/road-
way construction sites
Otherwise, Distronic Plus maintains the cur-
rent speed or accelerates up to the set speed.
Distronic Plus cannot take account of weather
conditions. Deactivate, or do not activate,
Distronic Plus:
R if the roads are slippery, snow-covered or
icy. The wheels could lose their grip when
braking or accelerating. The vehicle could
start to skid.
R if the sensors are dirty or there is poor vis-
ibility, e.g. due to snow, rain or fog. Dis-
tance control may be impaired.
Always pay attention to traffic conditions
even when Distronic Plus is activated. Other-
wise, you may fail to recognise dangers in
time, cause an accident and injure yourself
and others.
The radar sensor system is automatically
deactivated near radio telescope facilities
(Y page 362).
If you want Distronic Plus to assist you, the
radar sensor system must be activated and
operational.
If no car is driving in front of you, Distronic
Plus works like cruise control in the speed
range between 30 km/h and 200 km/h. If a
vehicle is driving in front of you, Distronic Plus
works in the speed range between 0 km/h
and 200 km/h. Do not use Distronic Plus while driving on
roads with steep gradients. G
Risk of accident
Distronic Plus brakes your vehicle at a maxi-
mum of 4m/s2
depending on its speed. This
corresponds to approximately 40% of your
vehicle's maximum brake force. You must
also apply the brakes yourself if this braking
power is not sufficient.
If Distronic Plus detects a risk of collision with
a vehicle in front, an intermittent warning tone
sounds. In addition, the ·distance warn-
ing lamp in the instrument cluster lights up.
Brake to avoid a collision.
Cruise control lever With the cruise control lever you can operate
Distronic Plus and variable Speedtronic.
The LIM indicator lamp on the cruise control
lever indicates which system you have selec-
ted:
R
LIM indicator lamp off:
Distronic Plus is selected.
R LIM indicator lamp lit:
Variable Speedtronic is selected. :
To store the current speed or a higher
speed
; To adjust the specified distance
= LIM indicator lamp
? To store the current speed or call up the
last stored speed
A To store the current speed or a lower
speed Driving systems
141Controls
212_AKB; 2; 4, en-GB
mkalafa,V ersion: 2.11.8.1
2009-05-05T14:17:16+02:00 - Seite 141 Z
Dateiname: 6515346702_buchblock.pdf; erzeugt am 07. May 2009 14:16:17; WK
Page 153 of 373
Making adjustments in 1 km/h incre-
ments X
Briefly press the cruise control lever to the
pressure point, up :for a higher speed or
down ?for a lower speed.
or
X Keep the cruise control lever pressed to the
pressure point until the desired speed is
set. Press the cruise control lever, up :
for a higher speed or down ?for a lower
speed.
Adjustment in 10 km/h increments X
Briefly press the cruise control lever
beyond the pressure point, up :for a
higher speed or down ?for a lower speed.
or
X Keep the cruise control lever pressed
beyond the pressure point until the desired
speed is set. Press the cruise control lever,
up : for a higher speed or down ?for a
lower speed.
Deactivating variable Speedtronic There are several ways to deactivate variable
Speedtronic:
X
Briefly press the cruise control lever for-
wards B.
or
X Briefly press the cruise control lever in the
direction of arrow A.
LIM indicator lamp ;in the cruise control
lever goes out. Variable Speedtronic is
deactivated.
Cruise control or Distronic Plus* is selec-
ted.
Variable Speedtronic is automatically deacti-
vated:
R when you depress the accelerator pedal
beyond the pressure point (kickdown) but
only if your current speed does not differ by
more than 20 km/h from the stored speed. You will hear a warning tone if this is the
case.
R on vehicles with manual transmission, if
you shift to a higher gear and as a result the
engine speed is too low. G
Risk of accident
It is not possible to deactivate variable Speed-
tronic by braking.
i The last speed stored is cleared when you
switch off the engine.
Permanent Speedtronic i
Permanent Speedtronic is only available
in certain countries.
You can use the on-board computer to limit
the speed permanently to a value between
160 km/h (e.g. for driving with winter tyres)
and the maximum speed.
Just before the stored speed is reached, it
appears in the multi-function display.
Permanent Speedtronic remains active, even
if variable Speedtronic is deactivated.
You cannot exceed the stored limit speed,
even if you depress the accelerator pedal
beyond the pressure point (kickdown).
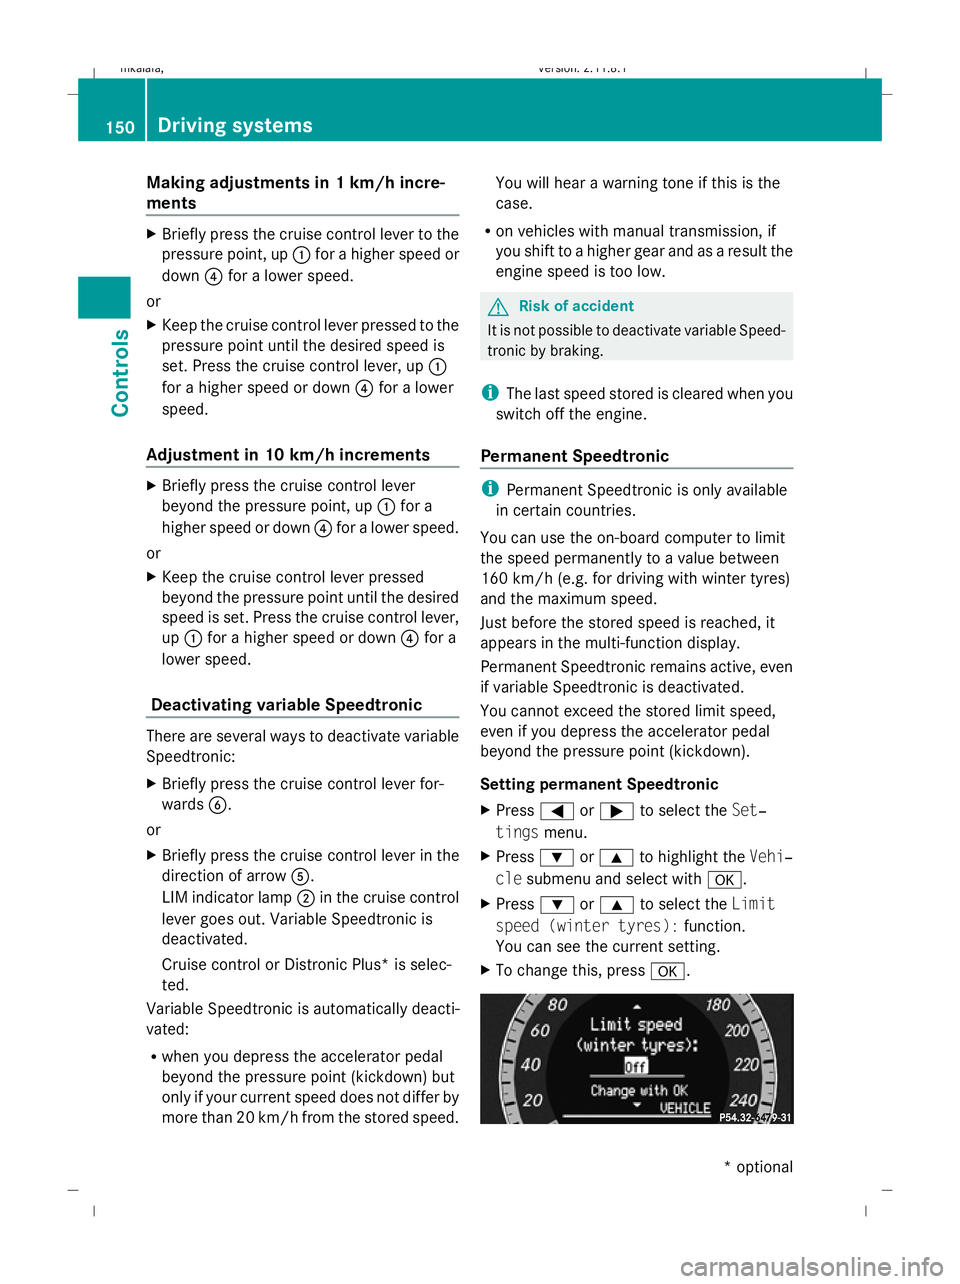
Setting permanent Speedtronic
X Press =or; to select the Set‐
tings menu.
X Press :or9 to highlight the Vehi‐
cle submenu and select with a.
X Press :or9 to select the Limit
speed (winter tyres): function.
You can see the current setting.
X To change this, press a.150
Driving systemsControls
* optional
212_AKB; 2; 4, en-GB
mkalafa,
Version: 2.11.8.1 2009-05-05T14:17:16+02:00 - Seite 150
Dateiname: 6515346702_buchblock.pdf; erzeugt am 07. May 2009 14:16:20; WK
Page 161 of 373

Front sensors
Centre Approximately 100 cm
Corners Approximately 60 cm
Rear sensors
Centre Approximately 120 cm
Corners Approximately 80 cm
!
When parking, pay particular attention to
objects above or below the sensors, such
as flower pots or trailer towbars. PARK-
TRONIC does not detect such objects when
they are in the immediate vicinity of the
vehicle. You could damage the vehicle or
the objects.
Ultrasonic sources such as an automatic
car wash, a lorry's compressed-air brakes
or a pneumatic drill could cause PARK-
TRONIC to malfunction.
Minimum distance Centre Approximately 20 cm
Corners Approximately 15 cm
If there is an obstacle within this range, all
warning displays light up and a tone sounds.
If the distance falls below the minimum clear-
ance, it may no longer be shown.
Warning displays
The warning displays show the distance
between the sensors and the obstacle. The
warning display for the front area is located
on the dashboard above the centre air vents.
The warning display for the rear area is loca-
ted on the roof lining in the rear compart-
ment. Warning display for front area
:
Left-hand side of the vehicle
; Right-hand side of the vehicle
= Indicator segments
The warning display for each side of the vehi-
cle is divided into five yellow and two red seg-
ments. PARKTRONIC is operational if yellow
indicator segments =light up.
The gear lever position or, in the case of auto-
matic transmission*, the selector lever posi-
tion determines which warning display is
active when the engine is running:
Manual transmission: Selector lever
position Warning display
Forwards gear
or
Neutral
Front area activated
Reverse gear
Rear and front areas
activated
Automatic transmission*:
Selector lever
position Warning display
D
Front area activated
R
or N Rear and front areas
activated
P
No areas activated158
Driving systemsControls
* optional
212_AKB; 2; 4, en-GB
mkalafa
,V ersion: 2.11.8.1
2009-05-05T14:17:16+02:00 - Seite 158
Dateiname: 6515346702_buchblock.pdf; erzeugt am 07. May 2009 14:16:23; WK