2009 MAZDA MODEL B4000 CAB PLUS 4 TRUCK wheel
[x] Cancel search: wheelPage 151 of 288

underbody structure. Use a frame-mounted weight distributing hitch for
trailers over 2,000 lb. (907 kg).
Do not install a single or multi-clamp type bumper hitch, or a hitch
which attaches to the axle. Underbody mounted hitches are acceptable if
they are installed properly. Follow the towing instructions of a reputable
rental agency.
Whenever a trailer hitch and hardware are removed, make sure all
mounting holes in the underbody are properly sealed to prevent noxious
gases or water from entering.
Safety chains
Always connect the trailer’s safety chains to the frame or hook retainers
of the vehicle hitch. To connect the trailer’s safety chains, cross the
chains under the trailer tongue and allow slack for turning corners.
If you use a rental trailer, follow the instructions that the rental agency
gives to you.
Do not attach safety chains to the bumper.
Trailer brakes
Electric brakes and manual, automatic or surge-type trailer brakes are
safe if installed properly and adjusted to the manufacturer’s
specifications. The trailer brakes must meet local and Federal
regulations.
WARNING:Do not connect a trailer’s hydraulic brake system
directly to your vehicle’s brake system. Your vehicle may not
have enough braking power and your chances of having a collision
greatly increase.
The braking system of the tow vehicle is rated for operation at the
GVWR not GCWR.
Trailer lamps
Trailer lamps are required on most towed vehicles. Make sure all running
lights, brake lights, turn signals and hazard lights are working. Contact
your authorized dealer or trailer rental agency for proper instructions
and equipment for hooking up trailer lamps.
Using a step bumper
The optional step bumper is equipped with an integral hitch and requires
only a ball with a 3/4 inch (19 mm) shank diameter. The bumper has a
2,000 lb (907 kg) trailer weight and 200 lb (91 kg) tongue weight
capability.
2009 B-Series (mbs)
Owners Guide, 1st Printing
USA (fus)
Tires, Wheels and Loading
151
Page 152 of 288

The rated capacities (as shown in this guide) for trailer towing with the
factory bumper are only valid when the trailer hitch ball is installed
directly into the ball hole in the bumper. Addition of bracketry to either
lower the ball hitch position or extend the ball hitch rearward will
significantly increase the loads on the bumper and its attachments. This
can result in the failure of the bumper or the bumper attachments. Use
of any type of hitch extensions should be considered abuse.
Trailer tow connector
The trailer tow connector is located
under the rear bumper, on the
driver’s side of the vehicle.
Refer to the following chart for information regarding the
factory-equipped trailer tow connector:
Trailer tow connector
ColorFunction Comment
1. Dark Green Trailer right-hand turn signal Circuit activated when brake
pedal is depressed or when
ignition is on and right-hand
turn signal is applied.
2. Yellow Trailer left-hand turn signal Circuit activated when brake
pedal is depressed or when
ignition is on and left-hand
turn signal is applied.
3. Tan/White Tail lamp Relay controlled circuit
activated when the park
lamps/headlamps are on.
4. White Ground Matching vehicle circuit
returns to battery’s negative
ground.
1
2
34
2009 B-Series(mbs)
Owners Guide, 1st Printing
USA (fus)
Tires, Wheels and Loading
152
Page 156 of 288

STARTING
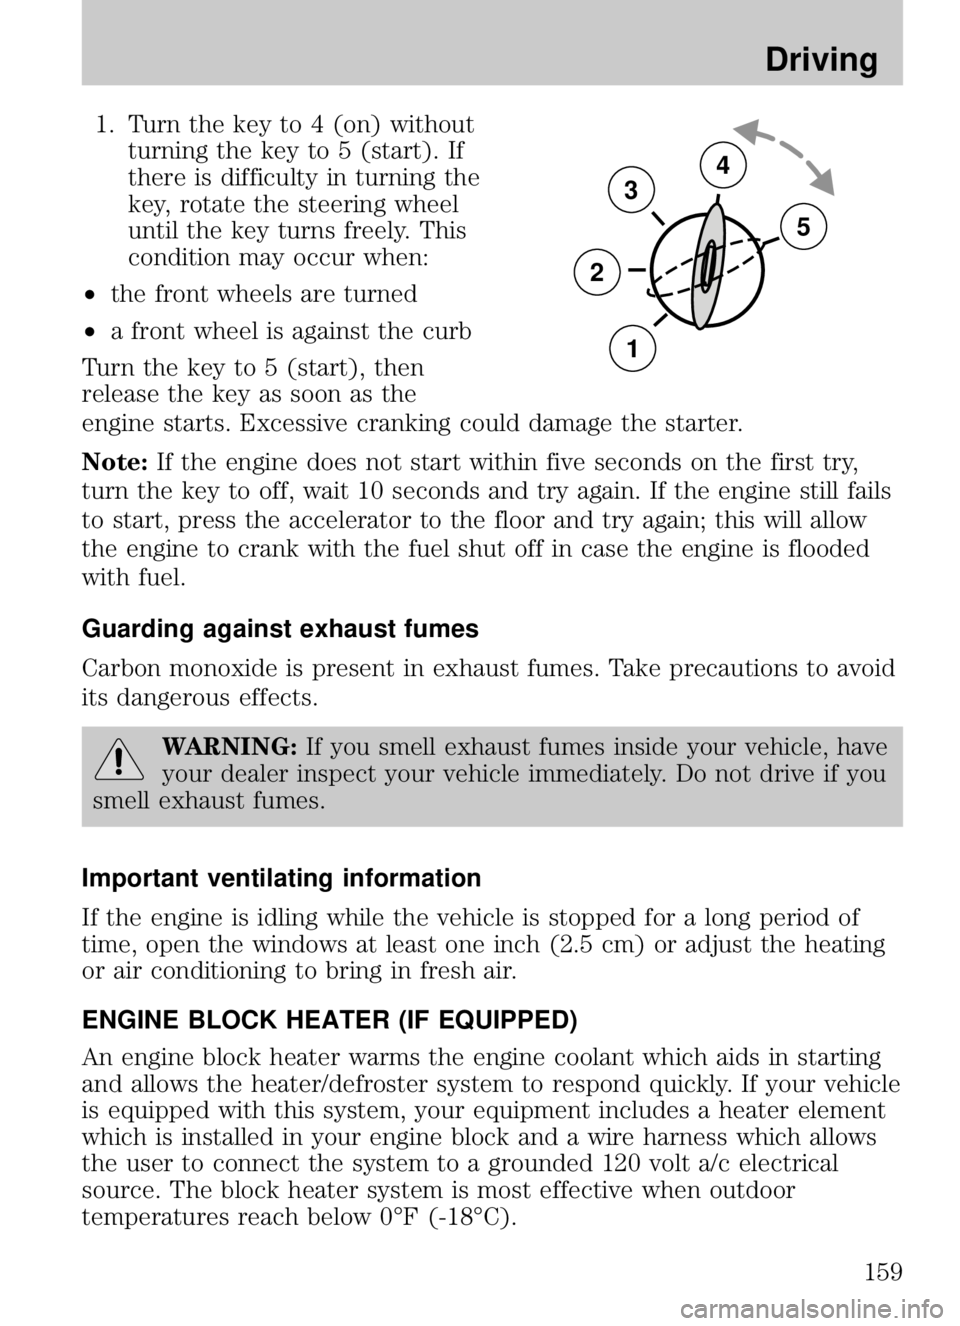
Positions of the ignition1. Accessory — allows the electrical accessories such as
the radio to operate while the
engine is not running.
2. Lock — locks the steering wheel, automatic transmission
gearshift lever and allows key
removal. For vehicles equipped
with a manual transmission, you
must depress the ignition
release lever to release the key.
3. Off — shuts off the engine and all accessories without locking the steering wheel.
4. On — all electrical circuits operational. Warning lights illuminated. Key position when driving.
5. Start — cranks the engine. Release the key as soon as the engine starts.
Preparing to start your vehicle
Engine starting is controlled by the powertrain control system.
Note: This system meets all Canadian Interference-Causing Equipment
standard requirements regulating the impulse electrical field strength of
radio noise.
When starting a fuel-injected engine, don’t press the accelerator before
or during starting. Only use the accelerator when you have difficulty
starting the engine. For more information on starting the vehicle, refer to
Starting the engine in this chapter.
WARNING:Extended idling at high engine speeds can produce
very high temperatures in the engine and exhaust system,
creating the risk of fire or other damage.
WARNING: Do not park, idle, or drive your vehicle in dry grass
or other dry ground cover. The emission system heats up the
engine compartment and exhaust system, which can start a fire.
3
1
2
5
4
2009 B-Series (mbs)
Owners Guide, 1st Printing
USA (fus)
Driving
156
Page 159 of 288

1. Turn the key to 4 (on) withoutturning the key to 5 (start). If
there is difficulty in turning the
key, rotate the steering wheel
until the key turns freely. This
condition may occur when:
• the front wheels are turned
• a front wheel is against the curb
Turn the key to 5 (start), then
release the key as soon as the
engine starts. Excessive cranking could damage the starter.
Note: If the engine does not start within five seconds on the first try,
turn the key to off, wait 10 seconds and try again. If the engine still fails
to start, press the accelerator to the floor and try again; this will allow
the engine to crank with the fuel shut off in case the engine is flooded
with fuel.
Guarding against exhaust fumes
Carbon monoxide is present in exhaust fumes. Take precautions to avoid
its dangerous effects.
WARNING: If you smell exhaust fumes inside your vehicle, have
your dealer inspect your vehicle immediately. Do not drive if you
smell exhaust fumes.
Important ventilating information
If the engine is idling while the vehicle is stopped for a long period of
time, open the windows at least one inch (2.5 cm) or adjust the heating
or air conditioning to bring in fresh air.
ENGINE BLOCK HEATER (IF EQUIPPED)
An engine block heater warms the engine coolant which aids in starting
and allows the heater/defroster system to respond quickly. If your vehicle
is equipped with this system, your equipment includes a heater element
which is installed in your engine block and a wire harness which allows
the user to connect the system to a grounded 120 volt a/c electrical
source. The block heater system is most effective when outdoor
temperatures reach below 0°F (-18°C).
3
2
1
5
4
2009 B-Series (mbs)
Owners Guide, 1st Printing
USA (fus)
Driving
159
Page 162 of 288

has continuous vibration or shudder in the steering wheel while braking,
the vehicle should be inspected by an authorized dealer.
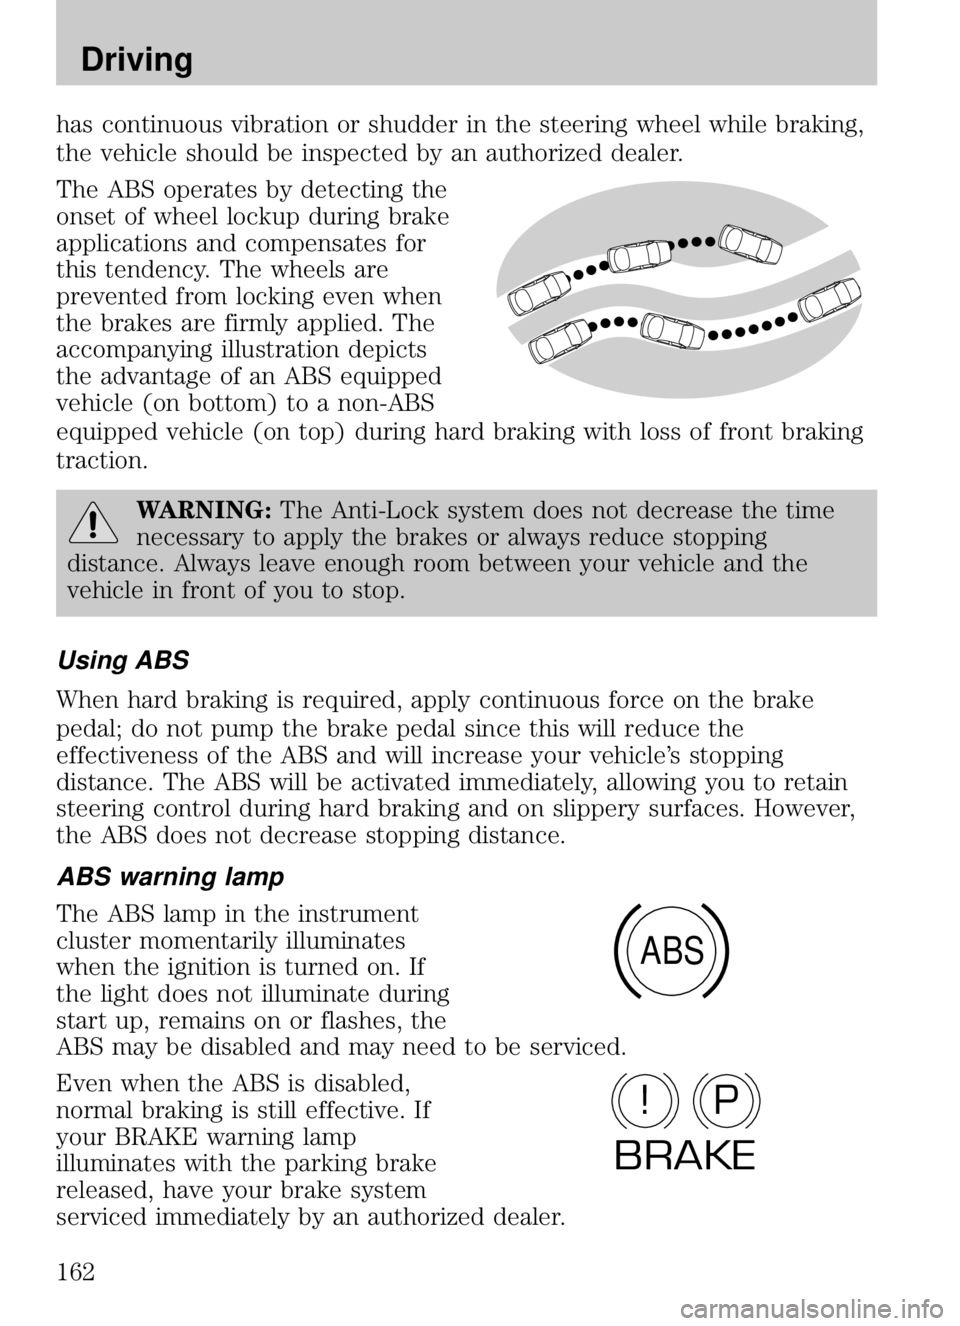
The ABS operates by detecting the
onset of wheel lockup during brake
applications and compensates for
this tendency. The wheels are
prevented from locking even when
the brakes are firmly applied. The
accompanying illustration depicts
the advantage of an ABS equipped
vehicle (on bottom) to a non-ABS
equipped vehicle (on top) during hard braking with loss of front braking
traction.
WARNING:The Anti-Lock system does not decrease the time
necessary to apply the brakes or always reduce stopping
distance. Always leave enough room between your vehicle and the
vehicle in front of you to stop.
Using ABS
When hard braking is required, apply continuous force on the brake
pedal; do not pump the brake pedal since this will reduce the
effectiveness of the ABS and will increase your vehicle’s stopping
distance. The ABS will be activated immediately, allowing you to retain
steering control during hard braking and on slippery surfaces. However,
the ABS does not decrease stopping distance.
ABS warning lamp
The ABS lamp in the instrument
cluster momentarily illuminates
when the ignition is turned on. If
the light does not illuminate during
start up, remains on or flashes, the
ABS may be disabled and may need to be serviced.
Even when the ABS is disabled,
normal braking is still effective. If
your BRAKE warning lamp
illuminates with the parking brake
released, have your brake system
serviced immediately by an authorized dealer.
ABS
P!
BRAKE
2009 B-Series (mbs)
Owners Guide, 1st Printing
USA (fus)
Driving
162
Page 166 of 288

In an emergency, to disable the malfunctioning brake-shift interlock
feature in order to shift the vehicle from P(Park) follow these steps:
WARNING:To prevent vehicle movement when following this
procedure, park on a level surface, ensure parking brake is set,
and block the rear wheels.
1. Apply the parking brake. Turn key to the 2 (lock) and then remove the key;
2. Disconnect the negative (Black) battery cable from the battery;
3. Insert the key and turn to 3 (off). Shift to N (Neutral);
4. Reconnect the negative (Black) battery cable to the battery;
5. Start the vehicle.
See your authorized dealer for service immediately.
WARNING: If your brake lamps are not working properly or if
you have disconnected the vehicle battery cables, the vehicle
brake lamps and hazard flashers may not properly warn traffic of a
vehicle breakdown or approaching danger, which can increase the risk
of serious injury or death. To minimize the risk of serious injury or
death, be aware of your surroundings, use other hazard signaling
devices if available, and move the vehicle to a safe location away from
traffic as soon as possible.
WARNING: Do not drive your vehicle until you verify that the
brakelamps are working.
WARNING: Always set the parking brake fully and make sure
the gearshift is latched in P (Park). Turn the ignition to the lock
position and remove the key whenever you leave your vehicle.
WARNING: If the parking brake is fully released, but the brake
warning lamp remains illuminated, the brakes may not be
working properly. See your authorized dealer.
2009 B-Series (mbs)
Owners Guide, 1st Printing
USA (fus)
Driving
166
Page 167 of 288

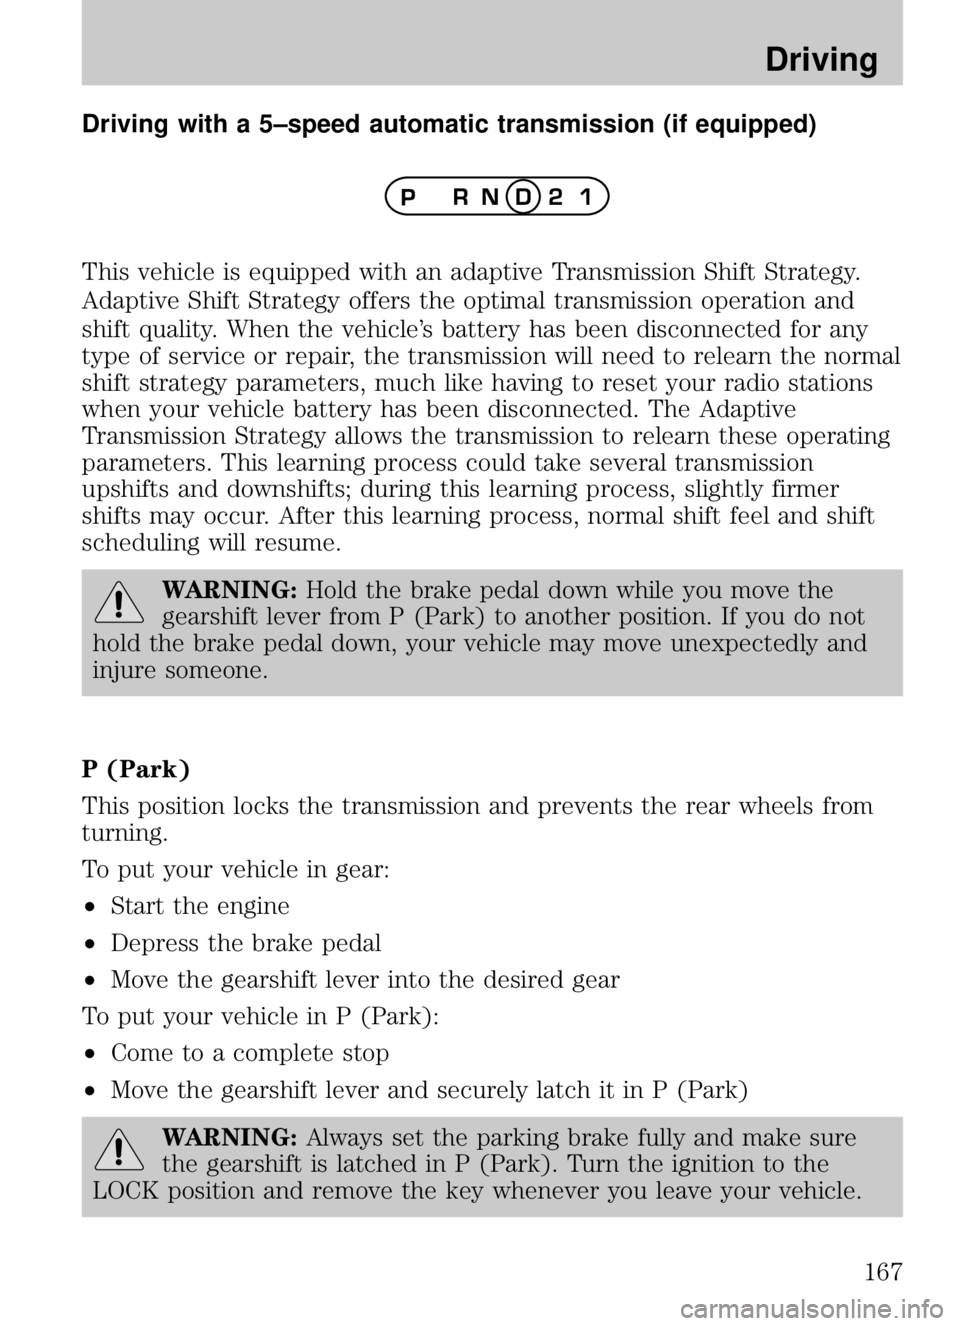
Driving with a 5–speed automatic transmission (if equipped)
This vehicle is equipped with an adaptive Transmission Shift Strategy.
Adaptive Shift Strategy offers the optimal transmission operation and
shift quality. When the vehicle’s battery has been disconnected for any
type of service or repair, the transmission will need to relearn the normal
shift strategy parameters, much like having to reset your radio stations
when your vehicle battery has been disconnected. The Adaptive
Transmission Strategy allows the transmission to relearn these operating
parameters. This learning process could take several transmission
upshifts and downshifts; during this learning process, slightly firmer
shifts may occur. After this learning process, normal shift feel and shift
scheduling will resume.
WARNING:Hold the brake pedal down while you move the
gearshift lever from P (Park) to another position. If you do not
hold the brake pedal down, your vehicle may move unexpectedly and
injure someone.
P (Park)
This position locks the transmission and prevents the rear wheels from
turning.
To put your vehicle in gear:
• Start the engine
• Depress the brake pedal
• Move the gearshift lever into the desired gear
To put your vehicle in P (Park):
• Come to a complete stop
• Move the gearshift lever and securely latch it in P (Park)
WARNING: Always set the parking brake fully and make sure
the gearshift is latched in P (Park). Turn the ignition to the
LOCK position and remove the key whenever you leave your vehicle.
2009 B-Series (mbs)
Owners Guide, 1st Printing
USA (fus)
Driving
167
Page 172 of 288

Removing the key
Turn the ignition off, push the
release lever (located above the
ignition), then turn the key toward
you and remove the key.
If your vehicle gets stuck in mud or snow
If your vehicle gets stuck in mud or snow, it may be rocked out by
shifting between forward and reverse gears, stopping between shifts in a
steady pattern. Press lightly on the accelerator in each gear.
Do not rock the vehicle if the engine is not at normal operating
temperature or damage to the transmission may occur.
Do not rock the vehicle for more than a minute or damage to the
transmission and tires may occur, or the engine may overheat.
FOUR-WHEEL DRIVE (4WD) OPERATION (IF EQUIPPED)
WARNING:For important information regarding safe operation
of this type of vehicle, see Preparing to drive your vehicle in this
chapter.
Four–wheel drive (4WD) supplies power to all four wheels. 4WD should
not be operated on dry pavement; driveline damage may occur.
If equipped with the Electronic Shift 4WD System, and 4WD Low
is selected while the vehicle is moving above 3 mph (5 km/h), the
4WD system will not engage. This is normal and should be no
reason for concern. Refer toShifting to/from 4WD Low for proper
operation.
4WD system indicator lights
• 4x4 - Momentarily illuminates
when the vehicle is started.
Illuminates when 4H (4WD High)
is engaged.
PUSH
4x4
2009 B-Series (mbs)
Owners Guide, 1st Printing
USA (fus)
Driving
172