2009 MAZDA MODEL B4000 CAB PLUS 4 TRUCK warning light
[x] Cancel search: warning lightPage 162 of 288

has continuous vibration or shudder in the steering wheel while braking,
the vehicle should be inspected by an authorized dealer.
The ABS operates by detecting the
onset of wheel lockup during brake
applications and compensates for
this tendency. The wheels are
prevented from locking even when
the brakes are firmly applied. The
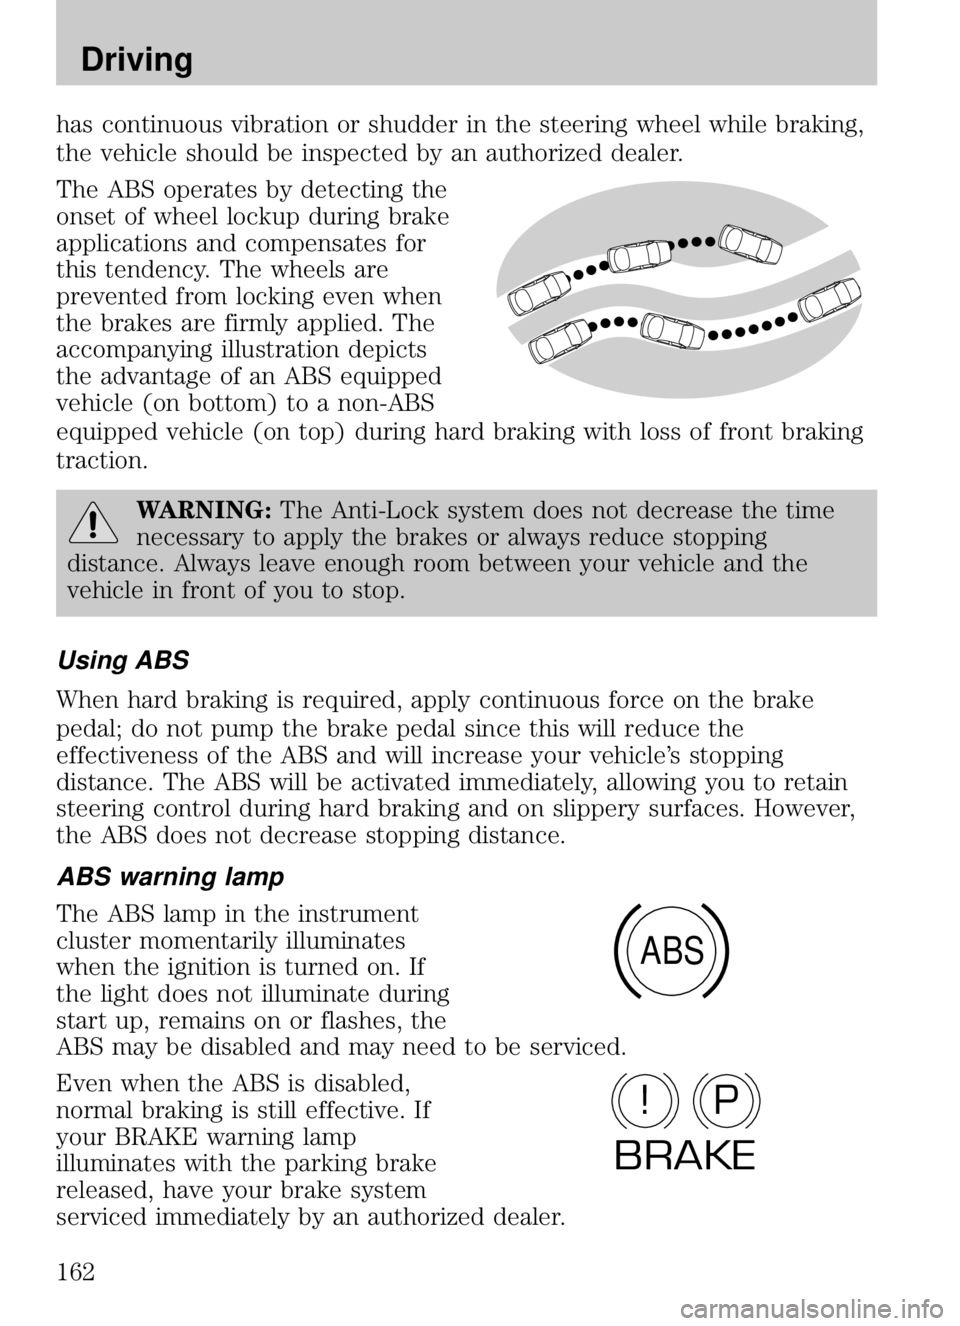
accompanying illustration depicts
the advantage of an ABS equipped
vehicle (on bottom) to a non-ABS
equipped vehicle (on top) during hard braking with loss of front braking
traction.
WARNING:The Anti-Lock system does not decrease the time
necessary to apply the brakes or always reduce stopping
distance. Always leave enough room between your vehicle and the
vehicle in front of you to stop.
Using ABS
When hard braking is required, apply continuous force on the brake
pedal; do not pump the brake pedal since this will reduce the
effectiveness of the ABS and will increase your vehicle’s stopping
distance. The ABS will be activated immediately, allowing you to retain
steering control during hard braking and on slippery surfaces. However,
the ABS does not decrease stopping distance.
ABS warning lamp
The ABS lamp in the instrument
cluster momentarily illuminates
when the ignition is turned on. If
the light does not illuminate during
start up, remains on or flashes, the
ABS may be disabled and may need to be serviced.
Even when the ABS is disabled,
normal braking is still effective. If
your BRAKE warning lamp
illuminates with the parking brake
released, have your brake system
serviced immediately by an authorized dealer.
ABS
P!
BRAKE
2009 B-Series (mbs)
Owners Guide, 1st Printing
USA (fus)
Driving
162
Page 167 of 288

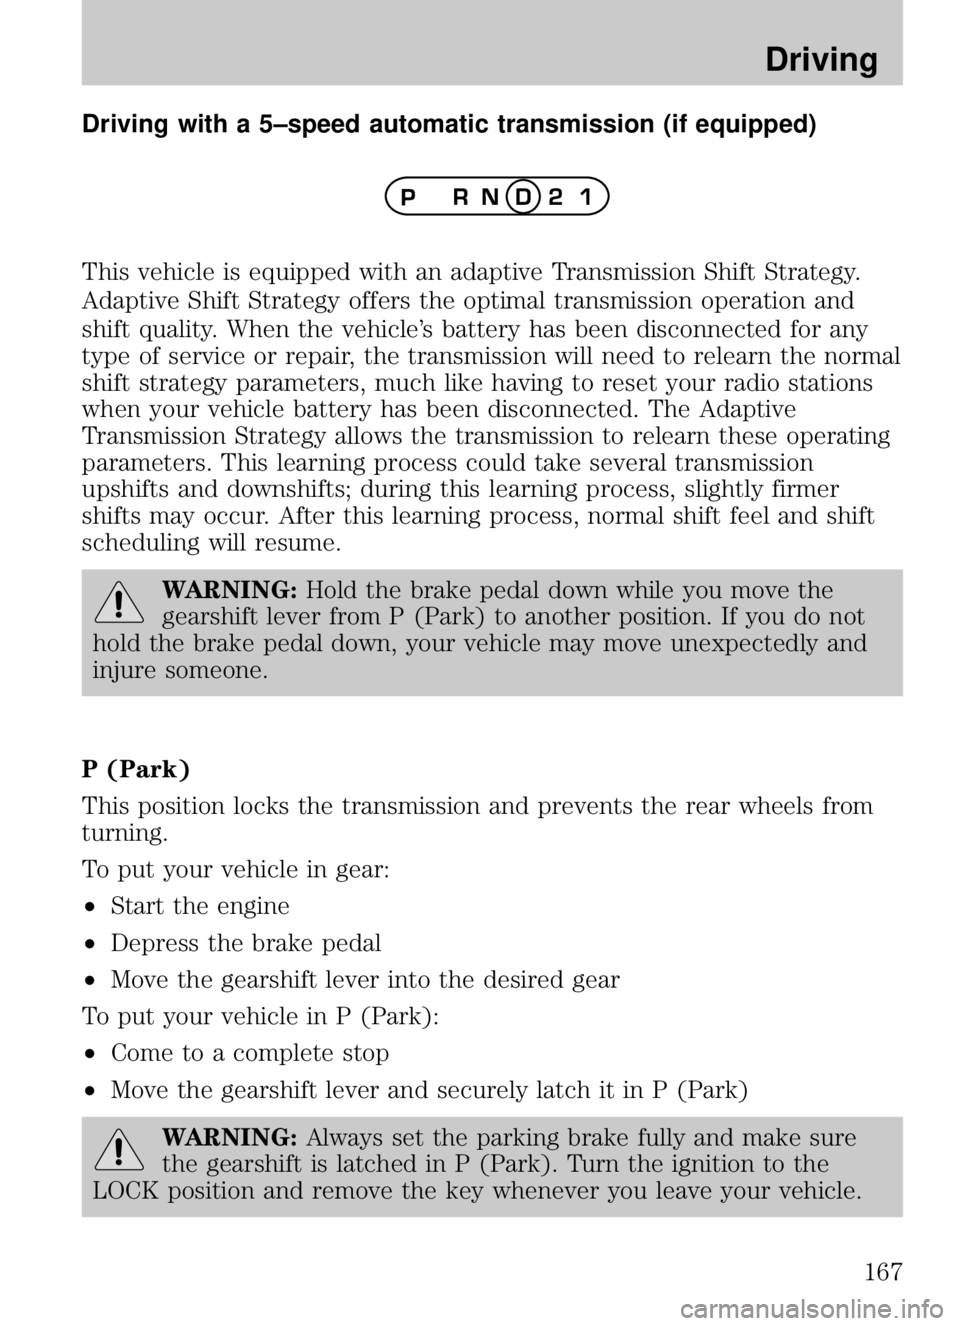
Driving with a 5–speed automatic transmission (if equipped)
This vehicle is equipped with an adaptive Transmission Shift Strategy.
Adaptive Shift Strategy offers the optimal transmission operation and
shift quality. When the vehicle’s battery has been disconnected for any
type of service or repair, the transmission will need to relearn the normal
shift strategy parameters, much like having to reset your radio stations
when your vehicle battery has been disconnected. The Adaptive
Transmission Strategy allows the transmission to relearn these operating
parameters. This learning process could take several transmission
upshifts and downshifts; during this learning process, slightly firmer
shifts may occur. After this learning process, normal shift feel and shift
scheduling will resume.
WARNING:Hold the brake pedal down while you move the
gearshift lever from P (Park) to another position. If you do not
hold the brake pedal down, your vehicle may move unexpectedly and
injure someone.
P (Park)
This position locks the transmission and prevents the rear wheels from
turning.
To put your vehicle in gear:
• Start the engine
• Depress the brake pedal
• Move the gearshift lever into the desired gear
To put your vehicle in P (Park):
• Come to a complete stop
• Move the gearshift lever and securely latch it in P (Park)
WARNING: Always set the parking brake fully and make sure
the gearshift is latched in P (Park). Turn the ignition to the
LOCK position and remove the key whenever you leave your vehicle.
2009 B-Series (mbs)
Owners Guide, 1st Printing
USA (fus)
Driving
167
Page 172 of 288

Removing the key
Turn the ignition off, push the
release lever (located above the
ignition), then turn the key toward
you and remove the key.
If your vehicle gets stuck in mud or snow
If your vehicle gets stuck in mud or snow, it may be rocked out by
shifting between forward and reverse gears, stopping between shifts in a
steady pattern. Press lightly on the accelerator in each gear.
Do not rock the vehicle if the engine is not at normal operating
temperature or damage to the transmission may occur.
Do not rock the vehicle for more than a minute or damage to the
transmission and tires may occur, or the engine may overheat.
FOUR-WHEEL DRIVE (4WD) OPERATION (IF EQUIPPED)
WARNING:For important information regarding safe operation
of this type of vehicle, see Preparing to drive your vehicle in this
chapter.
Four–wheel drive (4WD) supplies power to all four wheels. 4WD should
not be operated on dry pavement; driveline damage may occur.
If equipped with the Electronic Shift 4WD System, and 4WD Low
is selected while the vehicle is moving above 3 mph (5 km/h), the
4WD system will not engage. This is normal and should be no
reason for concern. Refer toShifting to/from 4WD Low for proper
operation.
4WD system indicator lights
• 4x4 - Momentarily illuminates
when the vehicle is started.
Illuminates when 4H (4WD High)
is engaged.
PUSH
4x4
2009 B-Series (mbs)
Owners Guide, 1st Printing
USA (fus)
Driving
172
Page 175 of 288

•It may be safer to stay on the apron or shoulder of the road and slow
down gradually before returning to the pavement. You may lose
control if you do not slow down or if you turn the steering wheel too
sharply or abruptly.
• It often may be less risky to strike small objects, such as highway
reflectors, with minor damage to your vehicle rather than attempt a
sudden return to the pavement which could cause the vehicle to slide
sideways out of control or roll over. Remember, your safety and the
safety of others should be your primary concern.
WARNING: Vehicles with a higher center of gravity such as
utility and four-wheel drive vehicles handle differently than
vehicles with a lower center of gravity. Utility and four-wheel drive
vehicles are not designed for cornering at speeds as high as passenger
cars any more than low-slung sports cars are designed to perform
satisfactorily under off-road conditions. Avoid sharp turns, excessive
speed and abrupt maneuvers in these vehicles. Failure to drive
cautiously could result in an increased risk of loss of vehicle control,
vehicle rollover, personal injury and death.
If your vehicle gets stuck
If your vehicle gets stuck in mud or snow it may be rocked out by
shifting between forward and reverse gears, stopping between shifts, in a
steady pattern. Press lightly on the accelerator in each gear.
Do not rock the vehicle if the engine is not at normal operating
temperature or damage to the transmission may occur.
Do not rock the vehicle for more than a few minutes or damage
to the transmission and tires may occur or the engine may
overheat.
WARNING: Do not spin the wheels at over 35 mph (56 km/h).
The tires may fail and injure a passenger or bystander.
Emergency maneuvers
• In an unavoidable emergency situation where a sudden sharp turn
must be made, remember to avoid “over-driving” your vehicle, i.e.,
turn the steering wheel only as rapidly and as far as required to avoid
the emergency. Excessive steering will result in less vehicle control,
not more. Additionally, smooth variations of the accelerator and/or
brake pedal pressure should be utilized if changes in vehicle speed are
2009 B-Series (mbs)
Owners Guide, 1st Printing
USA (fus)
Driving
175
Page 186 of 288

Fuse/RelayLocation Fuse Amp
Rating Passenger Compartment Fuse
Panel Description
29 20A Cigar lighter, Diagnostic connector
(OBD II)
30 5A Power mirrors
31 20A Front park lamps, Rear park
lamps, License plate lamps,
Dimmer switch, Trailer tow park
lamps
32 5A Brake switch (logic), Brake-shift
interlock
33 5A Instrument cluster battery feed
(B+)
34 20A Power point
35 15A Power locks
Power distribution box
The power distribution box is
located in the engine compartment.
The power distribution box contains
high-current fuses that protect your
vehicle’s main electrical systems
from overloads.
WARNING: Always disconnect the battery before servicing
fuses.
WARNING: To reduce risk of electrical shock, always replace
the cover to the Power Distribution Box before reconnecting the
battery or refilling fluid reservoirs.
If the battery has been disconnected and reconnected, refer to the
Battery section of the Maintenance and specifications chapter.
2009 B-Series(mbs)
Owners Guide, 1st Printing
USA (fus)
Roadside Emergencies
186
Page 197 of 288

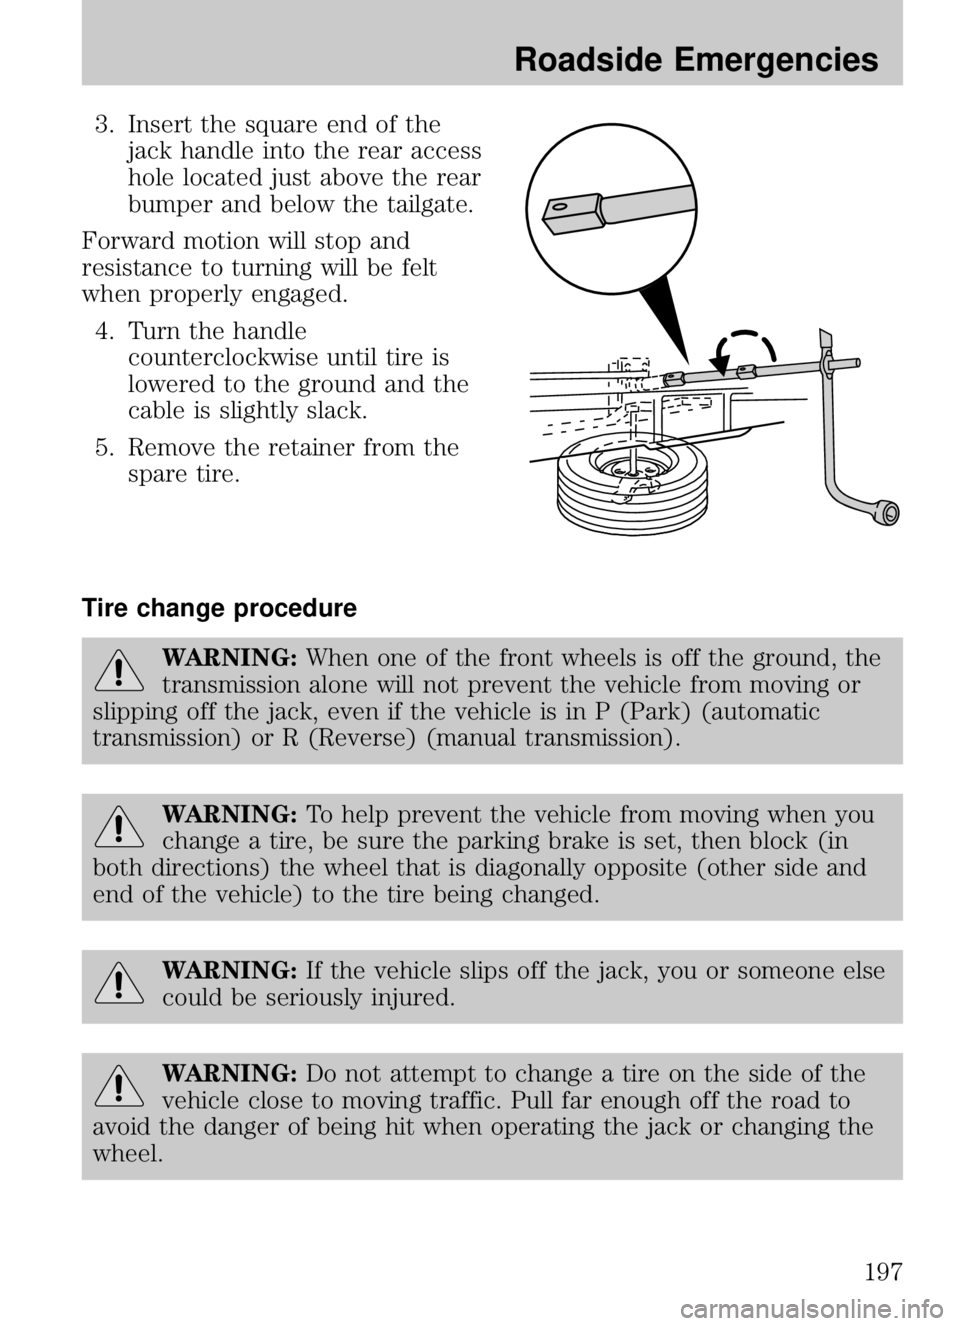
3. Insert the square end of thejack handle into the rear access
hole located just above the rear
bumper and below the tailgate.
Forward motion will stop and
resistance to turning will be felt
when properly engaged. 4. Turn the handle counterclockwise until tire is
lowered to the ground and the
cable is slightly slack.
5. Remove the retainer from the spare tire.
Tire change procedure
WARNING: When one of the front wheels is off the ground, the
transmission alone will not prevent the vehicle from moving or
slipping off the jack, even if the vehicle is in P (Park) (automatic
transmission) or R (Reverse) (manual transmission).
WARNING: To help prevent the vehicle from moving when you
change a tire, be sure the parking brake is set, then block (in
both directions) the wheel that is diagonally opposite (other side and
end of the vehicle) to the tire being changed.
WARNING: If the vehicle slips off the jack, you or someone else
could be seriously injured.
WARNING: Do not attempt to change a tire on the side of the
vehicle close to moving traffic. Pull far enough off the road to
avoid the danger of being hit when operating the jack or changing the
wheel.
2009 B-Series (mbs)
Owners Guide, 1st Printing
USA (fus)
Roadside Emergencies
197
Page 246 of 288

WARNING:Batteries normally produce explosive gases which
can cause personal injury. Therefore, do not allow flames, sparks
or lighted substances to come near the battery. When working near the
battery, always shield your face and protect your eyes. Always provide
proper ventilation.
WARNING: When lifting a plastic-cased battery, excessive
pressure on the end walls could cause acid to flow through the
vent caps, resulting in personal injury and/or damage to the vehicle or
battery. Lift the battery with a battery carrier or with your hands on
opposite corners.
WARNING: Keep batteries out of reach of children. Batteries
contain sulfuric acid. Avoid contact with skin, eyes or clothing.
Shield your eyes when working near the battery to protect against
possible splashing of acid solution. In case of acid contact with skin or
eyes, flush immediately with water for a minimum of 15 minutes and
get prompt medical attention. If acid is swallowed, call a physician
immediately.
WARNING: Battery posts, terminals and related accessories
contain lead and lead compounds. Wash hands after handling.
Because your vehicle’s engine is electronically controlled by a computer,
some control conditions are maintained by power from the battery. When
the battery is disconnected or a new battery is installed, the engine must
relearn its idle and fuel trim strategy for optimum driveability and
performance. To begin this process: 1. With the vehicle at a complete stop, set the parking brake.
2. Put the gearshift in P (Park) (automatic transmission) or the neutral position (manual transmission), turn off all accessories and start the
engine.
3. Run the engine until it reaches normal operating temperature.
4. Allow the engine to idle for at least one minute.
5. Turn the A/C on and allow the engine to idle for at least one minute.
6. Drive the vehicle to complete the relearning process.
2009 B-Series (mbs)
Owners Guide, 1st Printing
USA (fus)
Maintenance and Specifications
246
Page 255 of 288

WARNING:The flow of fuel through a fuel pump nozzle can
produce static electricity, which can cause a fire if fuel is
pumped into an ungrounded fuel container.
Use the following guidelines to avoid electrostatic charge build-up when
filling an ungrounded fuel container:
• Place approved fuel container on
the ground.
• DO NOT fill a fuel container while
it is in the vehicle (including the
cargo area/pickup bed).
• Keep the fuel pump nozzle in contact with the fuel container while
filling.
• DO NOT use a device that would hold the fuel pump handle in the fill
position.
Fuel Filler Cap
Your fuel tank filler cap has an indexed design with a 1/4 turn on/off
feature.
When fueling your vehicle: 1. Turn the engine off.
2. Carefully turn the filler cap counterclockwise 1/4 of a turn to remove it.
3. Pull to remove the cap from the fuel filler pipe.
4. To install the cap, align the tabs on the cap with the notches on the filler pipe.
5. Turn the filler cap clockwise 1/4 of a turn until it clicks at least once.
If the check fuel cap light
or a “check fuel cap” message comes on,
the fuel filler cap may not be properly installed. The light or message can
come on after several driving events after you’ve refueled your vehicle.
At the next opportunity, safely pull off of the road, remove the fuel filler
cap, align the cap properly and reinstall it. The check fuel cap
light
or “check fuel cap” message may not reset immediately; it may
take several driving cycles for the check fuel cap light
or “check fuel
cap” message to turn off. A driving cycle consists of an engine start-up
(after four or more hours with the engine off) followed by city and
highway driving.
2009 B-Series (mbs)
Owners Guide, 1st Printing
USA (fus)
Maintenance and Specifications
255