Page 34 of 280
REAR CONSOLE CLIMATE CONTROLS (IF EQUIPPED)
•TEMP:Press to increase or
decrease airflow temperature.
•FAN:Press to increase or
decrease the fan speed.
REAR WINDOW DEFROSTER
The rear defroster control is located
on the instrument panel.
Press the rear defroster control to
clear the rear window of thin ice
and fog. A small LED will illuminate
when the rear defroster is activated.
The ignition must be in the on position to operate the rear window
defroster.
The defroster turns off automatically after a predetermined amount of
time or when the ignition is turned off. To manually turn off the
defroster, press the control again.
Do not use razor blades or other sharp objects to clean the inside
of the rear window or to remove decals from the inside of the
rear window. This may cause damage to the heated grid lines and
will not be covered by your warranty.
R
2009 Town Car(tow)
Owners Guide, 1st Printing
USA(fus)
Climate Controls
34
Page 46 of 280
MULTI-FUNCTION LEVER
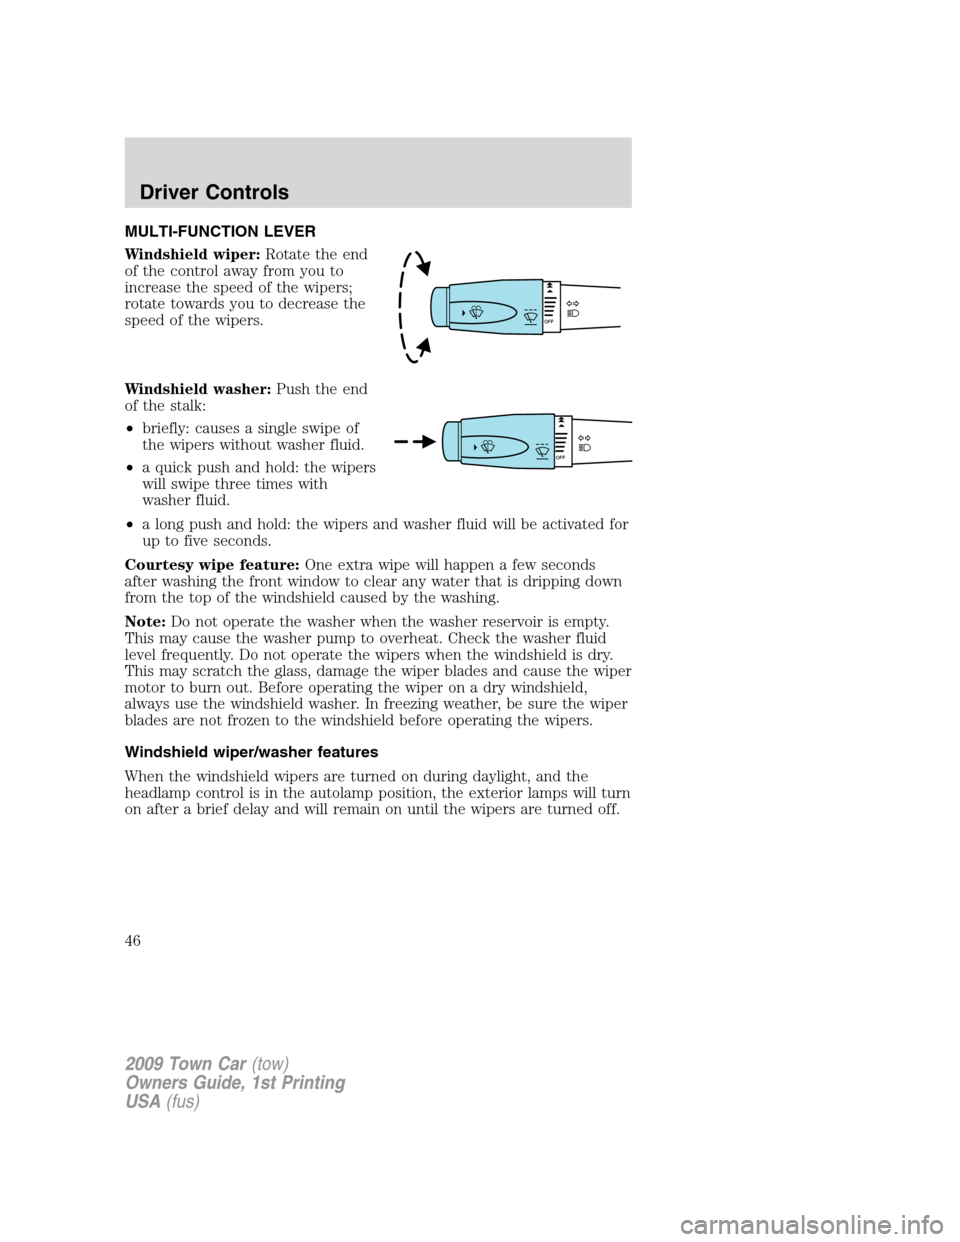
Windshield wiper:Rotate the end
of the control away from you to
increase the speed of the wipers;
rotate towards you to decrease the
speed of the wipers.
Windshield washer:Push the end
of the stalk:
•briefly: causes a single swipe of
the wipers without washer fluid.
•a quick push and hold: the wipers
will swipe three times with
washer fluid.
•a long push and hold: the wipers and washer fluid will be activated for
up to five seconds.
Courtesy wipe feature:One extra wipe will happen a few seconds
after washing the front window to clear any water that is dripping down
from the top of the windshield caused by the washing.
Note:Do not operate the washer when the washer reservoir is empty.
This may cause the washer pump to overheat. Check the washer fluid
level frequently. Do not operate the wipers when the windshield is dry.
This may scratch the glass, damage the wiper blades and cause the wiper
motor to burn out. Before operating the wiper on a dry windshield,
always use the windshield washer. In freezing weather, be sure the wiper
blades are not frozen to the windshield before operating the wipers.
Windshield wiper/washer features
When the windshield wipers are turned on during daylight, and the
headlamp control is in the autolamp position, the exterior lamps will turn
on after a brief delay and will remain on until the wipers are turned off.
2009 Town Car(tow)
Owners Guide, 1st Printing
USA(fus)
Driver Controls
46
Page 47 of 280
TILT STEERING WHEEL
To adjust the steering wheel:
1. Pull and hold the steering wheel
release control toward you.
2. Move the steering wheel up or
down until you find the desired
location.
3. Release the steering wheel
release control. This will lock the
steering wheel in position.
WARNING:Never adjust the steering wheel when the vehicle is
moving.
ILLUMINATED VISOR MIRROR (IF EQUIPPED)
Lift the mirror cover to turn on the
visor mirror lamps.
Slide on rod feature (if
equipped)
Rotate the visor towards the side
window and extend it rearward for
additional sunlight coverage.
Note:To stow the visor back into
the headliner, visor must be
retracted before moving it back
towards the windshield.
2009 Town Car(tow)
Owners Guide, 1st Printing
USA(fus)
Driver Controls
47
Page 50 of 280
Remote seat adjustment lockout
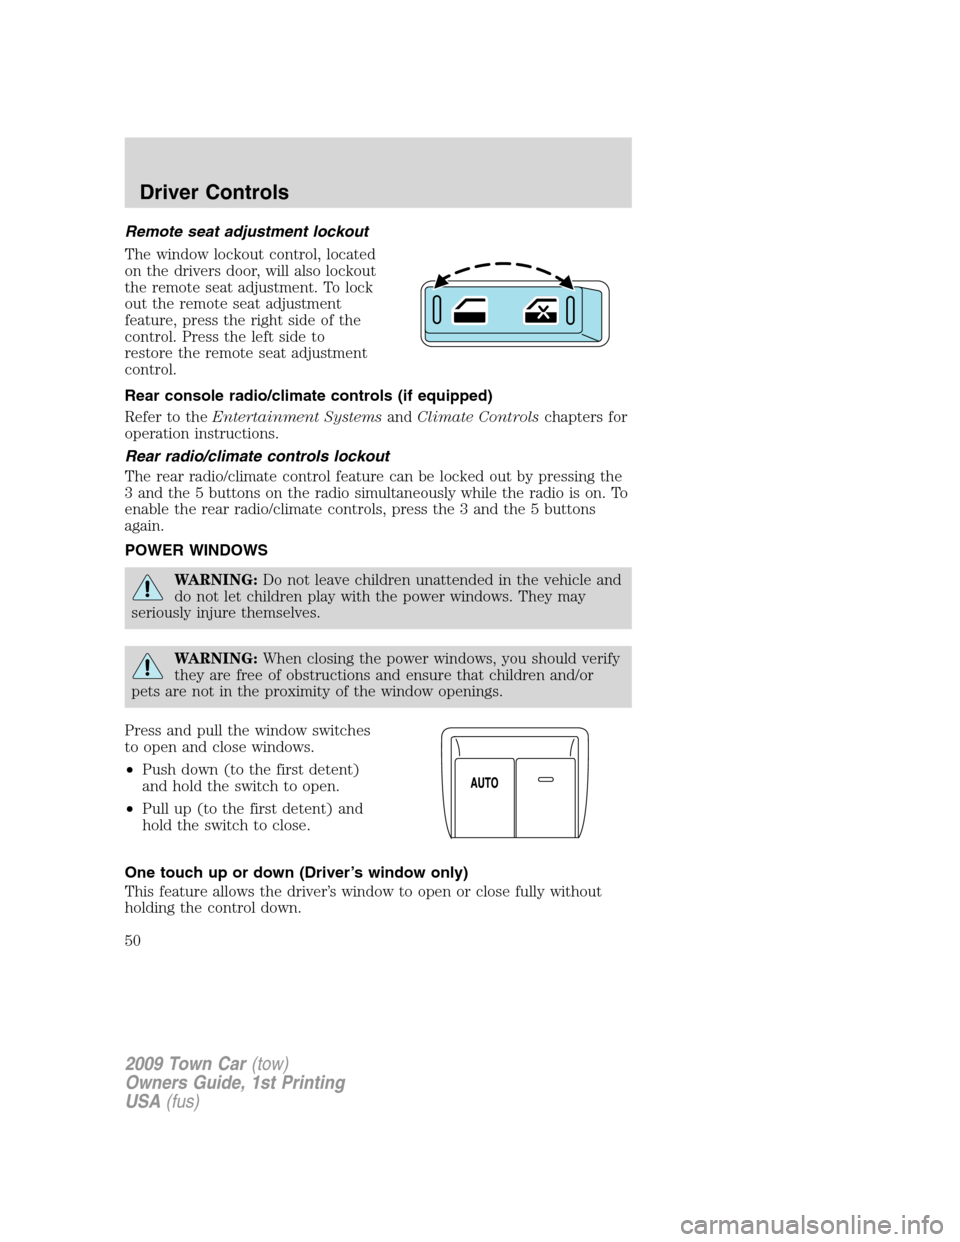
The window lockout control, located
on the drivers door, will also lockout
the remote seat adjustment. To lock
out the remote seat adjustment
feature, press the right side of the
control. Press the left side to
restore the remote seat adjustment
control.
Rear console radio/climate controls (if equipped)
Refer to theEntertainment SystemsandClimate Controlschapters for
operation instructions.
Rear radio/climate controls lockout
The rear radio/climate control feature can be locked out by pressing the
3 and the 5 buttons on the radio simultaneously while the radio is on. To
enable the rear radio/climate controls, press the 3 and the 5 buttons
again.
POWER WINDOWS
WARNING:Do not leave children unattended in the vehicle and
do not let children play with the power windows. They may
seriously injure themselves.
WARNING:When closing the power windows, you should verify
they are free of obstructions and ensure that children and/or
pets are not in the proximity of the window openings.
Press and pull the window switches
to open and close windows.
•Push down (to the first detent)
and hold the switch to open.
•Pull up (to the first detent) and
hold the switch to close.
One touch up or down (Driver’s window only)
This feature allows the driver’s window to open or close fully without
holding the control down.
2009 Town Car(tow)
Owners Guide, 1st Printing
USA(fus)
Driver Controls
50
Page 51 of 280
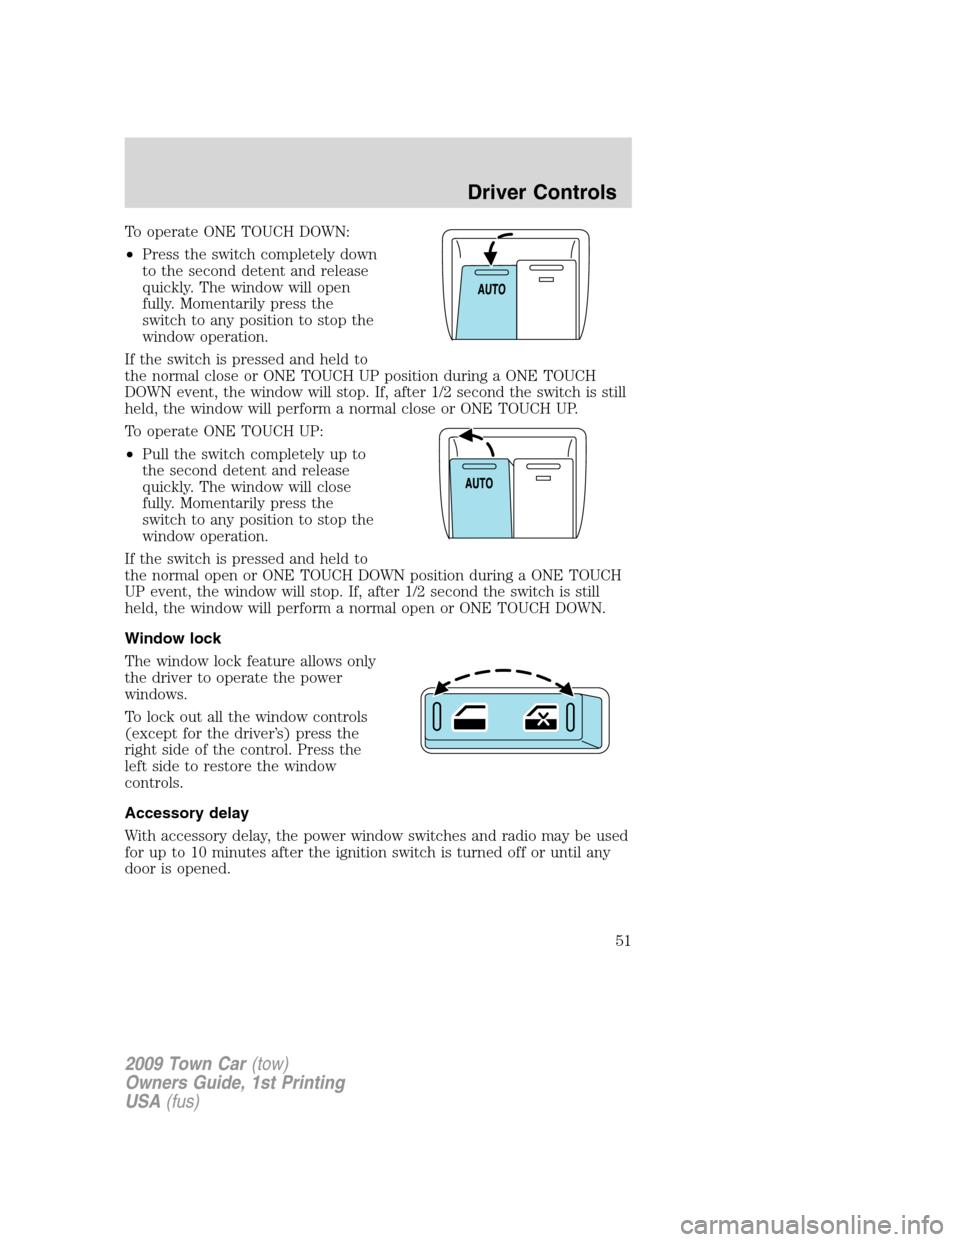
To operate ONE TOUCH DOWN:
•Press the switch completely down
to the second detent and release
quickly. The window will open
fully. Momentarily press the
switch to any position to stop the
window operation.
If the switch is pressed and held to
the normal close or ONE TOUCH UP position during a ONE TOUCH
DOWN event, the window will stop. If, after 1/2 second the switch is still
held, the window will perform a normal close or ONE TOUCH UP.
To operate ONE TOUCH UP:
•Pull the switch completely up to
the second detent and release
quickly. The window will close
fully. Momentarily press the
switch to any position to stop the
window operation.
If the switch is pressed and held to
the normal open or ONE TOUCH DOWN position during a ONE TOUCH
UP event, the window will stop. If, after 1/2 second the switch is still
held, the window will perform a normal open or ONE TOUCH DOWN.
Window lock
The window lock feature allows only
the driver to operate the power
windows.
To lock out all the window controls
(except for the driver’s) press the
right side of the control. Press the
left side to restore the window
controls.
Accessory delay
With accessory delay, the power window switches and radio may be used
for up to 10 minutes after the ignition switch is turned off or until any
door is opened.
2009 Town Car(tow)
Owners Guide, 1st Printing
USA(fus)
Driver Controls
51
Page 53 of 280
EXTERIOR MIRRORS
Power side view mirrors
WARNING:Do not adjust the mirror while the vehicle is in
motion.
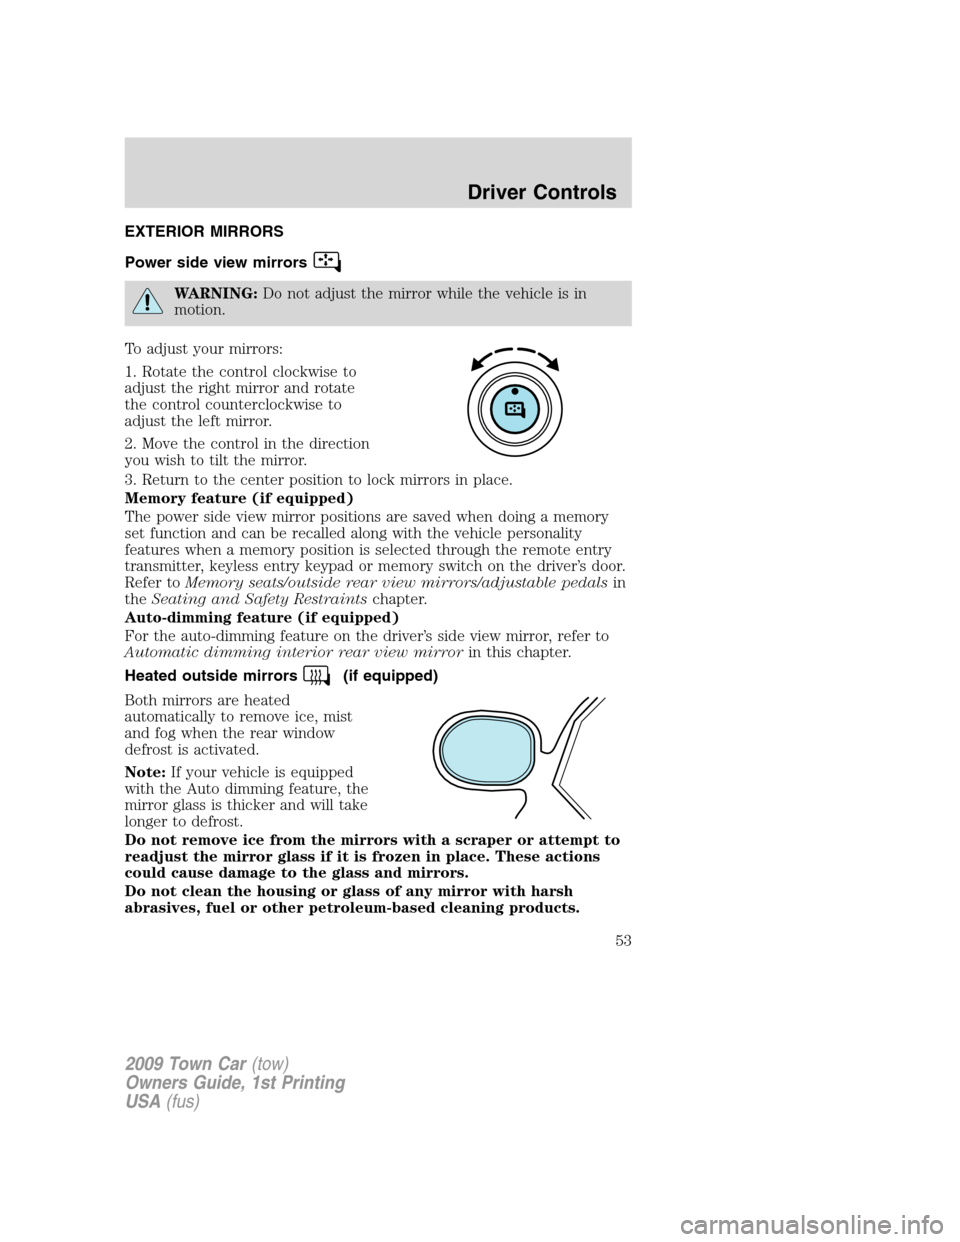
To adjust your mirrors:
1. Rotate the control clockwise to
adjust the right mirror and rotate
the control counterclockwise to
adjust the left mirror.
2. Move the control in the direction
you wish to tilt the mirror.
3. Return to the center position to lock mirrors in place.
Memory feature (if equipped)
The power side view mirror positions are saved when doing a memory
set function and can be recalled along with the vehicle personality
features when a memory position is selected through the remote entry
transmitter, keyless entry keypad or memory switch on the driver’s door.
Refer toMemory seats/outside rear view mirrors/adjustable pedalsin
theSeating and Safety Restraintschapter.
Auto-dimming feature (if equipped)
For the auto-dimming feature on the driver’s side view mirror, refer to
Automatic dimming interior rear view mirrorin this chapter.
Heated outside mirrors
(if equipped)
Both mirrors are heated
automatically to remove ice, mist
and fog when the rear window
defrost is activated.
Note:If your vehicle is equipped
with the Auto dimming feature, the
mirror glass is thicker and will take
longer to defrost.
Do not remove ice from the mirrors with a scraper or attempt to
readjust the mirror glass if it is frozen in place. These actions
could cause damage to the glass and mirrors.
Do not clean the housing or glass of any mirror with harsh
abrasives, fuel or other petroleum-based cleaning products.
2009 Town Car(tow)
Owners Guide, 1st Printing
USA(fus)
Driver Controls
53
Page 178 of 280
You may experience a decrease in peak performance when the engine is
cold when operating on E
85ethanol.
Do not crank the engine for more than 10 seconds at a time as starter
damage may occur. If the engine fails to start, turn the key to off and
wait 30 seconds before trying again.
Do not use starting fluid such as ether in the air intake system. Such
fluid could cause immediate explosive damage to the engine and possible
personal injury.
If you should experience cold weather starting problems on E
85ethanol,
and neither an alternative brand of E
85ethanol nor an engine block
heater is available, the addition of unleaded gasoline to your tank will
improve cold starting performance. Your vehicle is designed to operate
on E
85ethanol alone, unleaded gasoline alone, or any mixture of the two.
SeeChoosing the right fuelin theMaintenance and Specifications
chapter for more information on ethanol.
If the engine fails to start using the preceding instructions
(flexible fuel vehicles only)
1. Press and hold down the accelerator 1/3 to 1/2 way to floor, then
crank the engine.
2. When the engine starts, release the key, then gradually release the
accelerator pedal as the engine speeds up. If the engine still fails to start,
repeat Step 1.
Guarding against exhaust fumes
Carbon monoxide is present in exhaust fumes. Take precautions to avoid
its dangerous effects.
WARNING:If you smell exhaust fumes inside your vehicle, have
your dealer inspect your vehicle immediately. Do not drive if you
smell exhaust fumes.
Important ventilating information
If the engine is idling while the vehicle is stopped for a long period of
time, open the windows at least one inch (2.5 cm) or adjust the heating
or air conditioning to bring in fresh air.
ENGINE BLOCK HEATER (IF EQUIPPED)
An engine block heater warms the engine coolant which aids in starting
and allows the heater/defroster system to respond quickly. If your vehicle
2009 Town Car(tow)
Owners Guide, 1st Printing
USA(fus)
Driving
178
Page 202 of 280
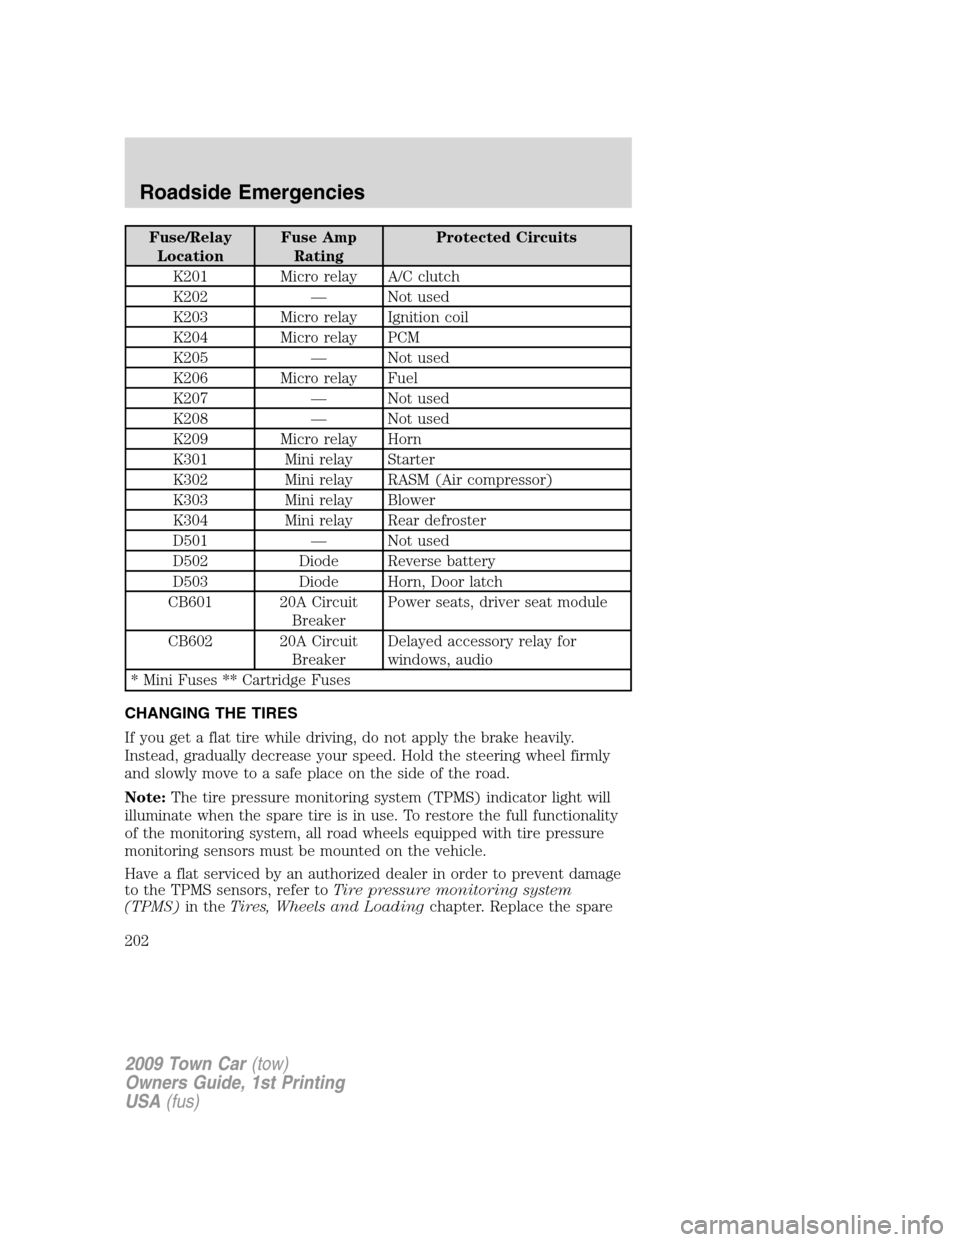
Fuse/Relay
LocationFuse Amp
RatingProtected Circuits
K201 Micro relay A/C clutch
K202 — Not used
K203 Micro relay Ignition coil
K204 Micro relay PCM
K205 — Not used
K206 Micro relay Fuel
K207 — Not used
K208 — Not used
K209 Micro relay Horn
K301 Mini relay Starter
K302 Mini relay RASM (Air compressor)
K303 Mini relay Blower
K304 Mini relay Rear defroster
D501 — Not used
D502 Diode Reverse battery
D503 Diode Horn, Door latch
CB601 20A Circuit
BreakerPower seats, driver seat module
CB602 20A Circuit
BreakerDelayed accessory relay for
windows, audio
* Mini Fuses ** Cartridge Fuses
CHANGING THE TIRES
If you get a flat tire while driving, do not apply the brake heavily.
Instead, gradually decrease your speed. Hold the steering wheel firmly
and slowly move to a safe place on the side of the road.
Note:The tire pressure monitoring system (TPMS) indicator light will
illuminate when the spare tire is in use. To restore the full functionality
of the monitoring system, all road wheels equipped with tire pressure
monitoring sensors must be mounted on the vehicle.
Have a flat serviced by an authorized dealer in order to prevent damage
to the TPMS sensors, refer toTire pressure monitoring system
(TPMS)in theTires, Wheels and Loadingchapter. Replace the spare
2009 Town Car(tow)
Owners Guide, 1st Printing
USA(fus)
Roadside Emergencies
202