2009 LINCOLN NAVIGATOR instrument panel
[x] Cancel search: instrument panelPage 116 of 375

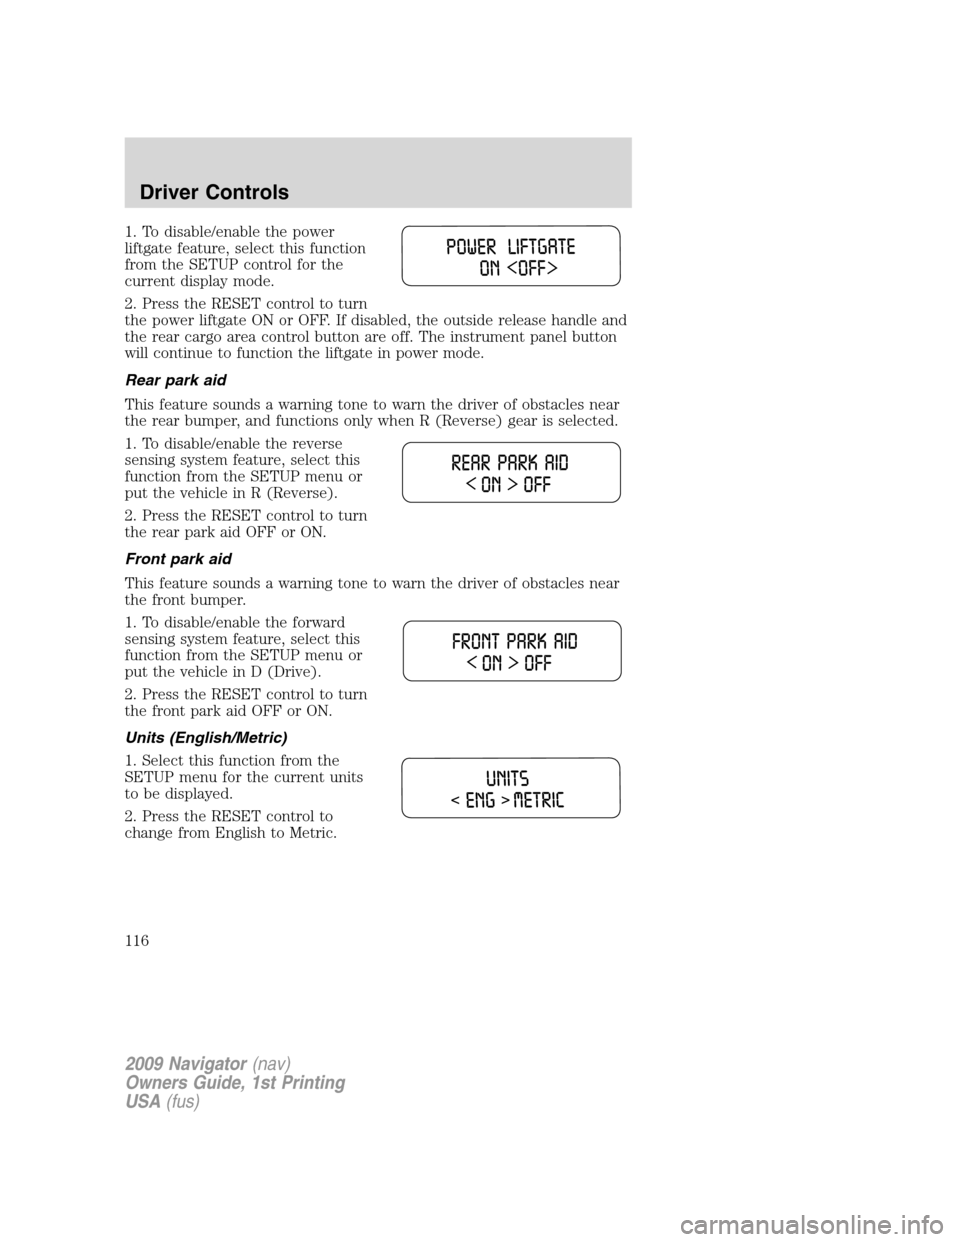
1. To disable/enable the power
liftgate feature, select this function
from the SETUP control for the
current display mode.
2. Press the RESET control to turn
the power liftgate ON or OFF. If disabled, the outside release handle and
the rear cargo area control button are off. The instrument panel button
will continue to function the liftgate in power mode.
Rear park aid
This feature sounds a warning tone to warn the driver of obstacles near
the rear bumper, and functions only when R (Reverse) gear is selected.
1. To disable/enable the reverse
sensing system feature, select this
function from the SETUP menu or
put the vehicle in R (Reverse).
2. Press the RESET control to turn
the rear park aid OFF or ON.
Front park aid
This feature sounds a warning tone to warn the driver of obstacles near
the front bumper.
1. To disable/enable the forward
sensing system feature, select this
function from the SETUP menu or
put the vehicle in D (Drive).
2. Press the RESET control to turn
the front park aid OFF or ON.
Units (English/Metric)
1. Select this function from the
SETUP menu for the current units
to be displayed.
2. Press the RESET control to
change from English to Metric.
2009 Navigator(nav)
Owners Guide, 1st Printing
USA(fus)
Driver Controls
116
Page 123 of 375

OIL LIFE CHANGE SOON— Displayed when the engine oil life
remaining is 10% or less. When oil life left is between 10% and 0%, the
XX% OIL LIFE CHANGE SOON message will be displayed.
OIL CHANGE REQUIRED— Displayed when the oil life left reaches
0%, the OIL CHANGE REQUIRED message will be displayed.
An oil change is required whenever indicated by the message center and
according to the recommended maintenance schedule. USE ONLY
RECOMMENDED ENGINE OILS.
To reset the oil monitoring system to 100% after each oil change
(approximately 7,500 miles [12,000 km] or six months) perform the
following:
POSITIVE RETENTION FLOOR MAT
WARNING:Do not install additional floor mats on top of the
factory installed floor mats as they may interfere with the
accelerator or the brake pedals.
Position the driver floor mat so that
the eyelet is over the pointed end of
the retention post and rotate
forward to lock in. Make sure that
the mat does not interfere with the
operation of the accelerator or the
brake pedal. To remove the floor
mat, reverse the installation
procedure.
POWER LIFTGATE
The liftgate can be operated by the following:
•instrument panel control button
•key fob button
•outside control button
•control button in the rear cargo area
Note:The liftgate can be reversed with a second press on a control
button or key fob and can be manually closed at any time.
2009 Navigator(nav)
Owners Guide, 1st Printing
USA(fus)
Driver Controls
123
Page 125 of 375

To open the liftgate from the
Instrument panel:
Press the button once to open the
liftgate, press it again to close.
To open the liftgate with the remote entry transmitter:
Press
twice within three seconds to fully unlatch and open the
liftgate. Refer toRemote entry systemin theLocks and Security
chapter.
To open the liftgate with outside
liftgate control button (manual
actuation):
1. To open, unlock the liftgate with
the remote entry transmitter or
power door unlock control.
2. To open the liftgate, push the
control button located in the top of
the liftgate pull cup handle.
Note:For the best performance
allow the power system to open the liftgate after releasing the control
button. Continued upward force after unlatching may activate the
obstacle detection feature and stop the power operation.
Note:If weight is added to the gate (bike rack, snow, etc.) the gate may
automatically start a power close event immediately after a power open.
In this mode a unique continuous chime will sound.
To close the liftgate with the
rear cargo area control button:
Press and release the control on the
left rear quarter panel to close the
liftgate. The chime will beep once if
conditions are not correct to start
an operation (i.e., the vehicle is out
of park). In a normal close, the
chime will begin just before the gate
starts to move and continue for total
of three seconds.
Note:The rear cargo area control button is disabled when the liftgate is
latched (fully closed).
2009 Navigator(nav)
Owners Guide, 1st Printing
USA(fus)
Driver Controls
125
Page 126 of 375

WARNING:Keep clear of the liftgate when activating the rear
switch.
Note:The liftgate movement direction can be reversed with a second
press of the instrument panel, or the rear cargo area control button, or a
second double press of the remote entry transmitter button.
To manually operate the liftgate:
1. Disable the liftgate power function, refer to theMessage centerin this
chapter.
2. Open and close the liftgate as you would a standard liftgate.
Note:In case of operation in extreme cold -40° F (-40° C), or on
extreme inclines, manual operation of the liftgate is suggested.
Obstacle detection
The power liftgate system is equipped with an obstacle detection feature.
If the power liftgate is closing, the system is designed to reverse to full
open when it encounters a solid obstacle. A three second chime is also
sounded when an obstacle is detected. Once the obstacle is removed, the
liftgate can be closed under power.
If the power liftgate is opening, the system is designed to stop when it
encounters a solid obstacle. A chime will sound for three seconds while
the obstacle is present.
Resetting the power liftgate:
The power liftgate may not operate under these conditions. If any of
these conditions occur, the power liftgate must be reset.
•a low voltage or dead battery
•disconnected battery
•the liftgate is manually closed and left ajar (unlatched)
To reset the power liftgate:
1. Disconnect the battery for 20 seconds then, reconnect the battery.
2. Manually close and fully latch the liftgate.
3. Power open the liftgate by using the remote entry transmitter or
instrument panel button.
2009 Navigator(nav)
Owners Guide, 1st Printing
USA(fus)
Driver Controls
126
Page 127 of 375

Note:If the power liftgate system is turned off in the message center,
the system cannot be activated with the outside release handle or rear
cargo area control button. The system will need to be turned on to
resume operation with the outside release handle or rear cargo area
control button. The power liftgate is still operational through the use of
the remote entry transmitter and instrument panel button when the
power liftgate is turned off in the message center.
Liftgate ajar signal
If the liftgate or liftgate glass are not fully latched, you will receive a
“LIFTGATE or LIFTGLASS AJAR” message on the instrument panel. If
you see this message, check both the liftgate glass and liftgate door to
ensure they are fully latched.
WARNING:Make sure the liftgate is closed to prevent exhaust
fumes from being drawn into the vehicle. If you must drive with
the liftgate open, keep the vents open so outside air comes into the
vehicle.
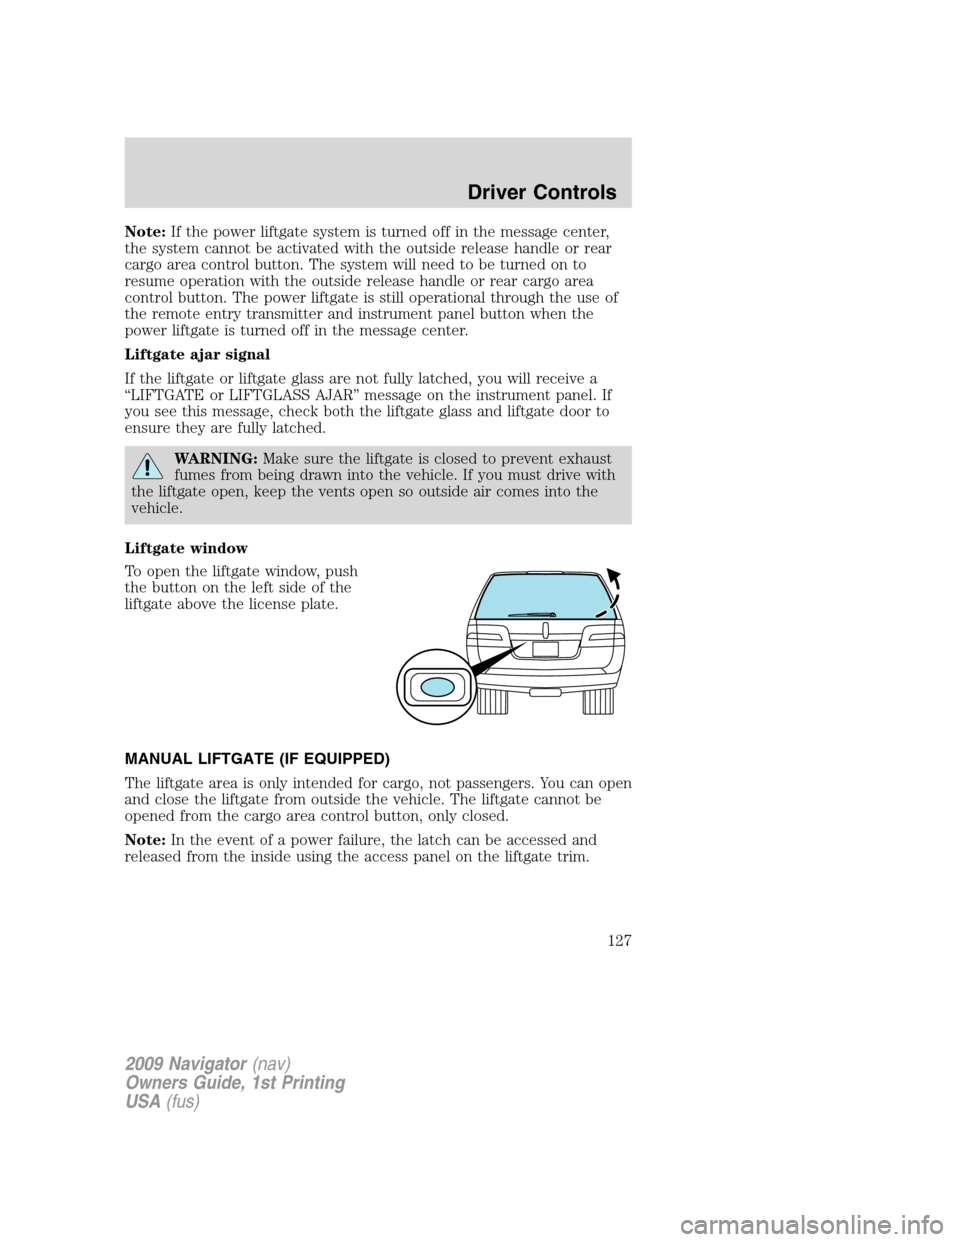
Liftgate window
To open the liftgate window, push
the button on the left side of the
liftgate above the license plate.
MANUAL LIFTGATE (IF EQUIPPED)
The liftgate area is only intended for cargo, not passengers. You can open
and close the liftgate from outside the vehicle. The liftgate cannot be
opened from the cargo area control button, only closed.
Note:In the event of a power failure, the latch can be accessed and
released from the inside using the access panel on the liftgate trim.
2009 Navigator(nav)
Owners Guide, 1st Printing
USA(fus)
Driver Controls
127
Page 147 of 375

Anti-theft indicator
The anti-theft indicator is located in the instrument panel cluster.
•When the ignition is in the off
position, the indicator will flash
once every two seconds to
indicate the SecuriLock™ system
is functioning as a theft
deterrent.
•When the ignition is in the on position, the indicator will glow for
three seconds to indicate normal system functionality.
If a problem occurs with the SecuriLock™ system, the indicator will flash
rapidly or glow steadily when the ignition is in the on position. If this
occurs, the vehicle will not start and should be taken to an authorized
dealer for service.
Automatic arming
The vehicle is armed immediately after switching the ignition to the off
position.
The theft indicator will flash every
two seconds to act as a theft
deterrent when the vehicle is
armed.
Automatic disarming
The vehicle is disarmed immediately after the ignition is turned to the on
position.
The theft indicator will illuminate for three seconds and then go out. If
the theft indicator stays on for an extended period of time or flashes
rapidly, have the system serviced by your authorized dealer.
Replacement Integrated Keyless Transmitters (IKT) and coded keys
Note:Your vehicle comes equipped with two Integrated Keyhead
Transmitters (IKTs). The IKT functions as both a programmed ignition
key that operates all the locks and starts the vehicle, as well as a remote
keyless entry transmitter. A maximum of eight coded keys can be
programmed to your vehicle; only four of these eight keys can be IKTs
with remote entry functionality.
2009 Navigator(nav)
Owners Guide, 1st Printing
USA(fus)
Locks and Security
147
Page 179 of 375

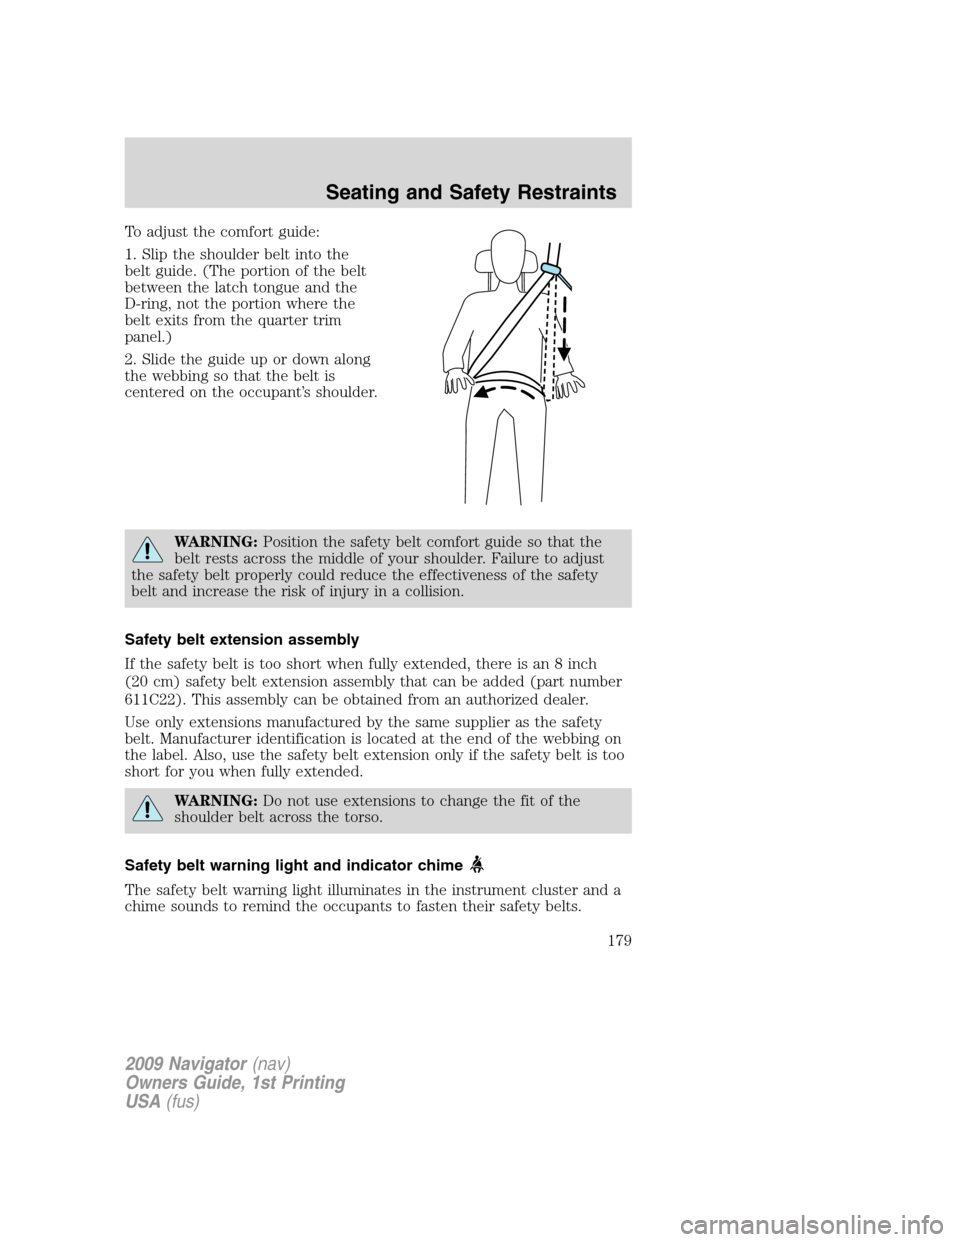
To adjust the comfort guide:
1. Slip the shoulder belt into the
belt guide. (The portion of the belt
between the latch tongue and the
D-ring, not the portion where the
belt exits from the quarter trim
panel.)
2. Slide the guide up or down along
the webbing so that the belt is
centered on the occupant’s shoulder.
WARNING:Position the safety belt comfort guide so that the
belt rests across the middle of your shoulder. Failure to adjust
the safety belt properly could reduce the effectiveness of the safety
belt and increase the risk of injury in a collision.
Safety belt extension assembly
If the safety belt is too short when fully extended, there is an 8 inch
(20 cm) safety belt extension assembly that can be added (part number
611C22). This assembly can be obtained from an authorized dealer.
Use only extensions manufactured by the same supplier as the safety
belt. Manufacturer identification is located at the end of the webbing on
the label. Also, use the safety belt extension only if the safety belt is too
short for you when fully extended.
WARNING:Do not use extensions to change the fit of the
shoulder belt across the torso.
Safety belt warning light and indicator chime
The safety belt warning light illuminates in the instrument cluster and a
chime sounds to remind the occupants to fasten their safety belts.
2009 Navigator(nav)
Owners Guide, 1st Printing
USA(fus)
Seating and Safety Restraints
179
Page 242 of 375

Follow these guidelines to ensure safe towing:
•Stay within your vehicle’s load limits .If exceeded, cargo should be
removed from the trailer and/or the vehicle until all weights are within
specified limits.
•Thoroughly prepare your vehicle for towing. Refer toPreparing to
towin this chapter.
•Use extra caution when driving while trailer towing. Refer toDriving
while you towin this chapter.
•Service your vehicle more frequently if you tow a trailer. Refer to the
severe duty schedule in the scheduled maintenance guide.
•Do not tow a trailer until your vehicle has been driven at least
500 miles (800 km). Additionally, during the first 500 miles (800 km)
that you tow a trailer, do not drive over 70 mph (113 km/h) and do
not make starts at full throttle.
•Refer to the instructions included with towing accessories for the
proper installation and adjustment specifications.
Trailer towing (standard equipment):
Your vehicle is equipped with a integrated trailer hitch and a Class I
(4-pin) trailer electrical connector. The 4-pin connector supplies power
to tail lamps, stop lamps, and turn lamps. See the trailer towing chart for
the trailer towing weight recommendation.
Trailer towing (optionally equipped trailer tow package):
The optional trailer tow package includes heavy duty trailer tow wiring.
Both a Class I (4-pin) and IV (7-pin) trailer electrical connector are
provided. Under the instrument panel a electrical connector is provided
for a customer supplied aftermarket electronic brake controller. For
installing a customer supplied electronic brake controller, a electrical
jumper harness and trailer tow electrical instructions are included with
the optional trailer tow package.
The kit containing a electrical jumper and trailer tow electrical
instructions may be purchased from any authorized dealer (Part number
4L1Z-14A348-AA)
Note:Before towing a trailer, make sure the trailer brakes (if equipped)
and lamps are properly connected and functional. Electronic trailer
brakes (if equipped) refer to the instructions provided by the
aftermarket electronic brake controller manufacture for determining
trailer brake functionality.
2009 Navigator(nav)
Owners Guide, 1st Printing
USA(fus)
Tires, Wheels and Loading
242