2009 LINCOLN NAVIGATOR key
[x] Cancel search: keyPage 75 of 194

FUEL ECONOMY SCREEN
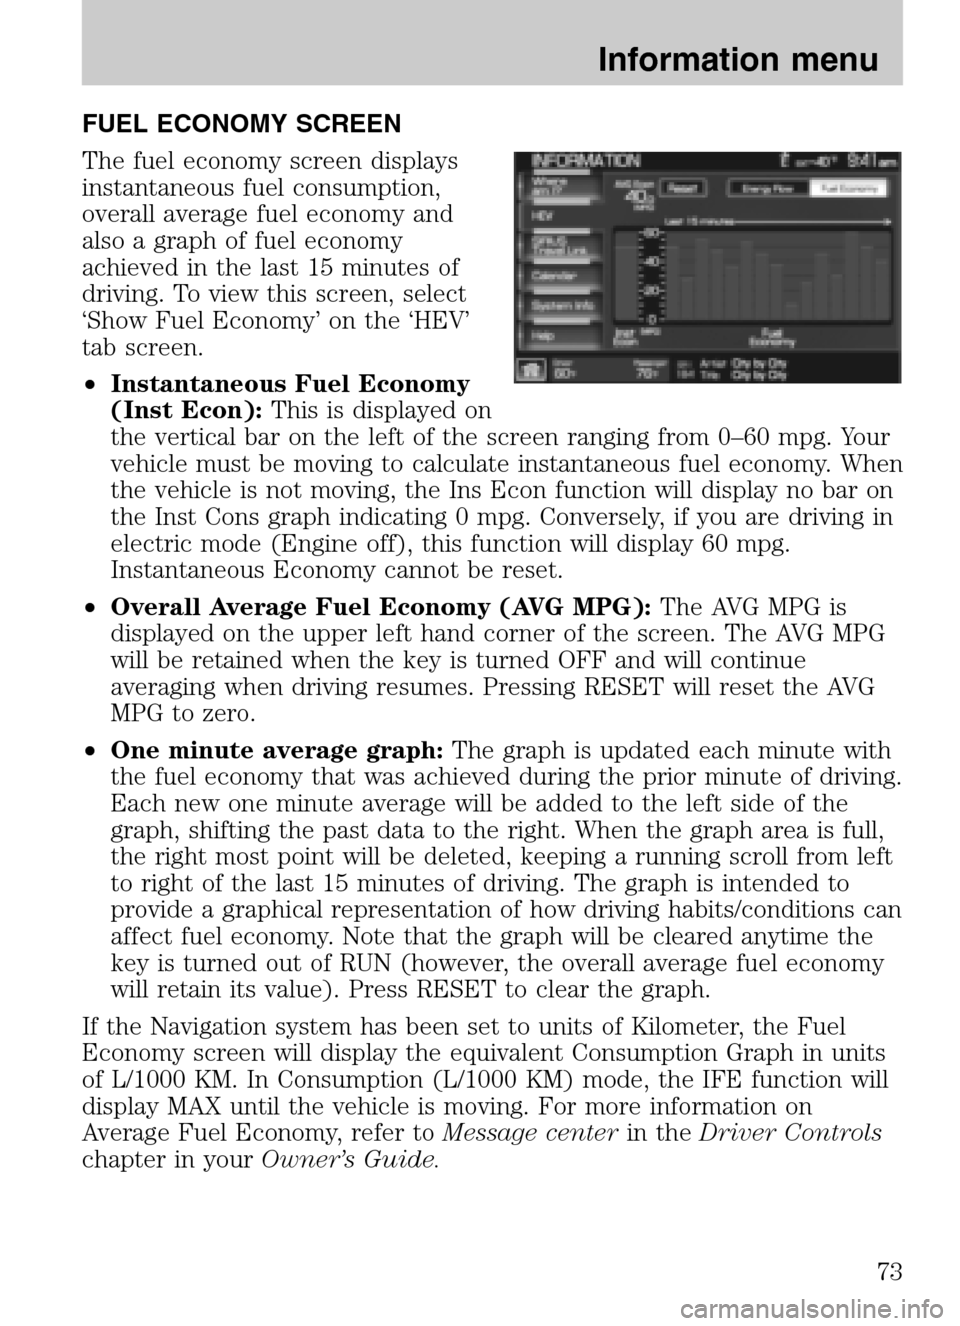
The fuel economy screen displays
instantaneous fuel consumption,
overall average fuel economy and
also a graph of fuel economy
achieved in the last 15 minutes of
driving. To view this screen, select
‘Show Fuel Economy’ on the ‘HEV’
tab screen.
• Instantaneous Fuel Economy
(Inst Econ): This is displayed on
the vertical bar on the left of the screen ranging from 0–60 mpg. Your
vehicle must be moving to calculate instantaneous fuel economy. When
the vehicle is not moving, the Ins Econ function will display no bar on
the Inst Cons graph indicating 0 mpg. Conversely, if you are driving in
electric mode (Engine off), this function will display 60 mpg.
Instantaneous Economy cannot be reset.
• Overall Average Fuel Economy (AVG MPG): The AVG MPG is
displayed on the upper left hand corner of the screen. The AVG MPG
will be retained when the key is turned OFF and will continue
averaging when driving resumes. Pressing RESET will reset the AVG
MPG to zero.
• One minute average graph: The graph is updated each minute with
the fuel economy that was achieved during the prior minute of driving.
Each new one minute average will be added to the left side of the
graph, shifting the past data to the right. When the graph area is full,
the right most point will be deleted, keeping a running scroll from left
to right of the last 15 minutes of driving. The graph is intended to
provide a graphical representation of how driving habits/conditions can
affect fuel economy. Note that the graph will be cleared anytime the
key is turned out of RUN (however, the overall average fuel economy
will retain its value). Press RESET to clear the graph.
If the Navigation system has been set to units of Kilometer, the Fuel
Economy screen will display the equivalent Consumption Graph in units
of L/1000 KM. In Consumption (L/1000 KM) mode, the IFE function will
display MAX until the vehicle is moving. For more information on
Average Fuel Economy, refer to Message centerin theDriver Controls
chapter in your Owner’s Guide.
2009 Centerstack (ng1)
Supplement
USA (fus)
Information menu
73
Page 90 of 194

Edit allows you to name/change the
entry, add/edit a phone number,
add/edit the icon or set the entry as
a favorite destination. (These are
destination presets which work
similarly to the audio presets. Once
set, the favorite destinations appear
at the bottom of the Quick
destination entry screen for
one-touch fast entry.)
Previous Destination: Select to access your ’Previous Destination List’.
The navigation system can store up to 20 recently used destinations and
waypoints. Destinations already present in the list will not be duplicated.
When a new entry is added to the list, the oldest one will be removed.
• Set as Dest: Select this feature to set the current entry as your
destination. The screen will display the destination map screen
showing the selected destination. You can then select to set it as a
final destination or a waypoint.
• Delete: Select to delete individual entries.
• Delete all: Select to delete all entries.
Phone Number: This feature allows
you to search for a destination using
the phone number of a saved POI or
Address Book entry by entering the
phone number on the keypad on the
screen. After the number is entered,
the system will ask you to confirm
the name under which the phone
number is registered.
Map: You can select any point on
the map to set as a destination or
waypoint by using the map cursor.
2009 Centerstack (ng1)
Supplement
USA (fus)
Setting a destination
88
Page 91 of 194

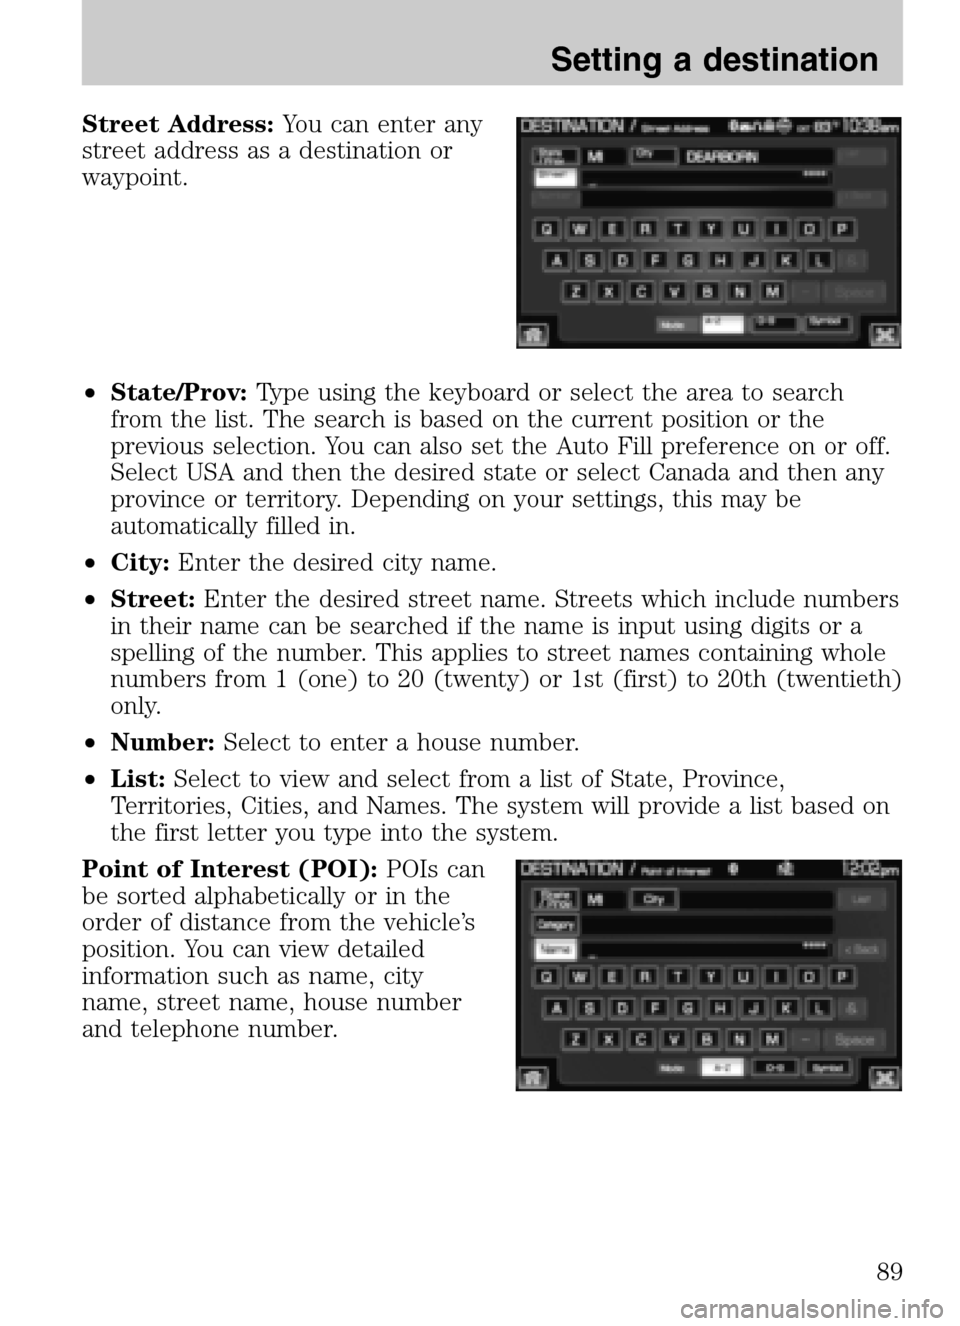
Street Address:You can enter any
street address as a destination or
waypoint.
• State/Prov: Type using the keyboard or select the area to search
from the list. The search is based on the current position or the
previous selection. You can also set the Auto Fill preference on or off.
Select USA and then the desired state or select Canada and then any
province or territory. Depending on your settings, this may be
automatically filled in.
• City: Enter the desired city name.
• Street: Enter the desired street name. Streets which include numbers
in their name can be searched if the name is input using digits or a
spelling of the number. This applies to street names containing whole
numbers from 1 (one) to 20 (twenty) or 1st (first) to 20th (twentieth)
only.
• Number: Select to enter a house number.
• List: Select to view and select from a list of State, Province,
Territories, Cities, and Names. The system will provide a list based on
the first letter you type into the system.
Point of Interest (POI): POIs can
be sorted alphabetically or in the
order of distance from the vehicle’s
position. You can view detailed
information such as name, city
name, street name, house number
and telephone number.
2009 Centerstack (ng1)
Supplement
USA (fus)
Setting a destination
89
Page 92 of 194

•State/Prov: Type using the keyboard or select the area to search
from the list. The search is based on the current position or the
previous selection. You can also set the Auto Fill preference on or off.
Select USA and then the desired state or select Canada and then any
province or territory. Depending on your settings, this may be
automatically filled in.
• City: Enter the desired city name.
• Category: Select the desired POI category or subcategory.
• Name: Select to search for a POI using a full or partial name.
• List: Select to view and select from a list of State, Province,
Territories, Cities, and Names. The system will provide a list based on
the first letter you type into the system.
Freeway Exit/Entrance: Your
navigation system allows you to
enter a freeway name and then you
can select an entrance or exit to
that freeway. The entrance/exit can
be sorted alphabetically or in the
order of distance from the vehicle’s
position. The selected entrance/exit
can then be selected as a final
destination or waypoint.
• State/Prov: Type using the keyboard or select the area to search
from the list. The search is based on the current position or the
previous selection. You can also set the Auto Fill preference on or off.
Select USA and then the desired state or select Canada and then any
province or territory. Depending on your settings, this may be
automatically filled in.
• Freeway: The Smart Speller will help enter a valid freeway in the
area specified.
• List: Select to view and select from a list of State, Province,
Territories, Cities, and Names. The system will provide a list based on
the first letter you type into the system.
2009 Centerstack (ng1)
Supplement
USA (fus)
Setting a destination
90
Page 93 of 194

Intersection:You can set an
intersection as a destination. Enter
the name of the first street and then
the first letter of the second. The
system will pull up a list of possible
matches based on that letter. Select
the desired street. You can sort the
list alphabetically or in order of
distance from the vehicle.
• State/Prov: Type using the keyboard or select the area to search
from the list. The search is based on the current position or the
previous selection. You can also set the Auto Fill preference on or off.
Select USA and then the desired state or select Canada and then any
province or territory. Depending on your settings, this may be
automatically filled in.
• City: Enter the desired city name.
• Street #1: Enter the desired street name. Streets which include
numbers in their name can be searched if the name is input using
digits or a spelling of the number. This applies to street names
containing whole numbers from 1 (one) to 20 (twenty) or 1st (first)
to 20th (twentieth) only.
• Street #2: Enter the name of the second street or simply the first
letter of the second street for a list of possible matches.
• List: Select to view and select from a list of State, Province,
Territories, Cities, and Names. The system will provide a list based on
the first letter you type into the system.
POI CATEGORIES
Your system offers a variety of POI (Points of Interest) categories.
Note: Some entries are present in multiple categories.
The main categories are as follows:
• Food / drink & dining •Automotive
• Travel & transportation •Shopping
• Financial •Entertainment & arts
• Emergency •Recreation & sports
• Community •Government
• Health & medicine •Domestic services
2009 Centerstack (ng1)
Supplement
USA (fus)
Setting a destination
91
Page 118 of 194

Indexing:A process in which SYNC builds a voice recognition grammar
for the media content of your digital media player. While indexing, SYNC
will play already indexed media if Autoplay is on. However, voice
recognition is not available for the media until the indexing process is
complete.
Metadata: Descriptive tags embedded in your digital media which
provide SYNC with information such as ARTIST, ALBUM, GENRE and
TRACK.
Pairing: To use your Bluetoothenabled cellular phone with SYNC, you
must go through a pairing (bonding) process. “Pairing” is a special
process used when two devices connect for the first time. The pairing
process is used to generate a link key that is used for authentication
purposes during subsequent Bluetoothconnections between the two
devices.
PIN (Personal Identification number): This six digit number
(sometimes referred to as a passkey) will be shown in the radio display
during the pairing process with your Bluetoothenabled device. You do
not need to write down this number as it will only be used for that
specific pairing procedure.
POI: Point(s) Of Interest
PROV: Province
PTY: Program Type
RDS: Radio Data System
SAT: Satellite Radio
SCV: Speed Compensated Volume
Smart Speller: Feature that provides a number of available candidates
matching partial input entered by the user.
Touchscreen: A touch-sensitive screen that lets the user make choices
by touching icons or graphical buttons on the screen.
Waypoint: An intermediate stop or destination before the final
destination.
FREQUENTLY ASKED QUESTIONS (FAQS)
How do I turn off the Navigation System?
Press and hold the Volume control for at least 3 seconds.
2009 Centerstack (ng1)
Supplement
USA (fus)
General Information
116
Page 122 of 194

2. The screen will read NO PHONE
CONNECTED. Press the ‘Settings’
tab on the touchscreen.
3. Press ‘Add’.
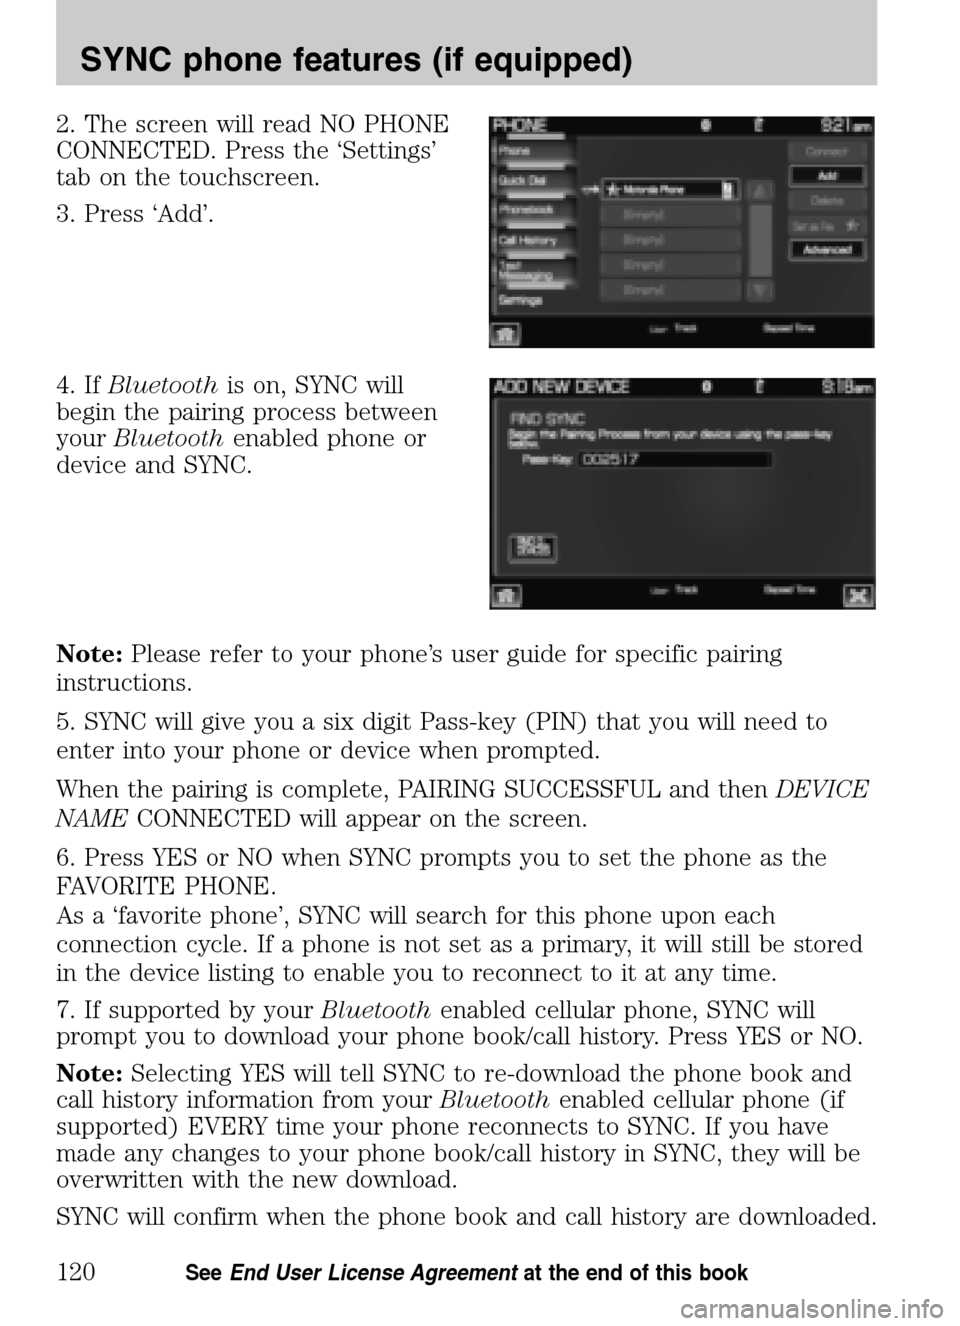
4. If Bluetooth is on, SYNC will
begin the pairing process between
your Bluetooth enabled phone or
device and SYNC.
Note: Please refer to your phone’s user guide for specific pairing
instructions.
5. SYNC will give you a six digit Pass-key (PIN) that you will need to
enter into your phone or device when prompted.
When the pairing is complete, PAIRING SUCCESSFUL and then DEVICE
NAME CONNECTED will appear on the screen.
6. Press YES or NO when SYNC prompts you to set the phone as the
FAVORITE PHONE.
As a ‘favorite phone’, SYNC will search for this phone upon each
connection cycle. If a phone is not set as a primary, it will still be stored
in the device listing to enable you to reconnect to it at any time.
7. If supported by your Bluetoothenabled cellular phone, SYNC will
prompt you to download your phone book/call history. Press YES or NO.
Note: Selecting YES will tell SYNC to re-download the phone book and
call history information from your Bluetoothenabled cellular phone (if
supported) EVERY time your phone reconnects to SYNC. If you have
made any changes to your phone book/call history in SYNC, they will be
overwritten with the new download.
SYNC will confirm when the phone book and call history are downloaded.
2009 Centerstack (ng1)
Supplement
USA (fus)
SYNC phone features (if equipped)
120SeeEnd User License Agreement at the end of this book
Page 123 of 194

Making a call using your navigation system
Making a phone call using SYNC is easy.
Press PHONE and select from one of the following:
• Use the keypad on the ‘Phone’
tab to manually enter a phone
number and press SEND.
OR
• Select the ‘Phonebook’ tab (if the
desired number is saved in the
downloaded phone book
information).
• Use the quick sort buttons to
browse to the desired contact.
• Select the desired contact and
press
‘Dial’.
Note: This is a phone dependent feature.
OR
• Select the ‘Call History’ tab (if the
desired number is saved in the
downloaded call history
information).
• Select the desired contact and
press
‘Dial’.
Note: This is a phone dependent feature.
2009 Centerstack (ng1)
Supplement
USA (fus)
SYNC phone features (if equipped)
121SeeEnd User License Agreement at the end of this book