2009 KIA Sportage electric
[x] Cancel search: electricPage 293 of 371
69
In case of an emergency
Engine compartment1. Turn the ignition switch and allother switches off.
2. Remove the fuse box cover by pressing the taps on both ends
and pulling up.
3. Check the removed fuse; replace it if it is blown. To remove or insert
the fuse, use the fuse puller in the
driver's side panel in the vehicle.
4. Push in a new fuse of the same rating, and make sure it fits tightly
in the clips.
If it fits loosely, consult an Authorized
Kia Dealer.
✽ ✽ NOTICEAfter checking the fuse box in the
engine compartment, securely
install the fuse box cover. If not,
electrical failures may occur from
water leaking in.
Main fuseIf the ALT fuse is blown, it must be
removed as follows:
1. Disconnect the negative battery
cable.
2. Remove the screws shown in the picture above.
3. Replace the fuse with a new one of the same rating.
4. Reinstall in the reverse order of removal.✽ ✽NOTICEIf the ALT fuse is blown, consult an
Authorized Kia Dealer.
1
2
3
4
5
6
7
8
9
1KMB4006
1KMA4008
Page 295 of 371
611
In case of an emergency
1
2
3
4
5
6
7
8
9
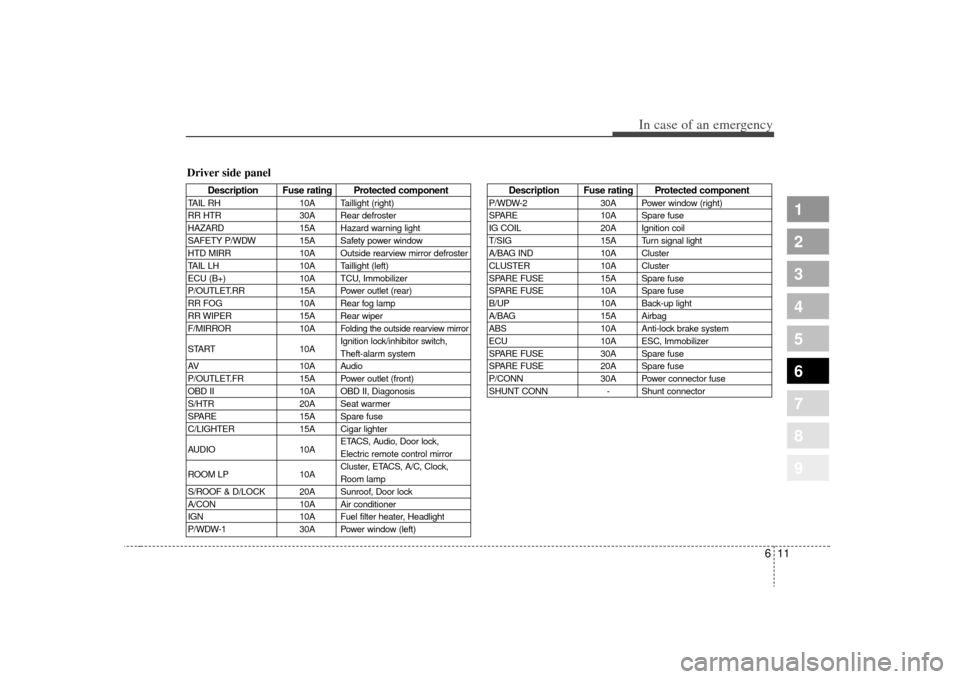
Description Fuse rating Protected component
TAIL RH10A Taillight (right)
RR HTR 30A Rear defroster
HAZARD 15A Hazard warning light
SAFETY P/WDW 15A Safety power window
HTD MIRR 10A Outside rearview mirror defroster
TAIL LH 10A Taillight (left)
ECU (B+) 10A TCU, Immobilizer
P/OUTLET.RR 15A Power outlet (rear)
RR FOG 10A Rear fog lamp
RR WIPER 15A Rear wiper
F/MIRROR 10A
Folding the outside rearview mirror
START10AIgnition lock/inhibitor switch,
Theft-alarm system
AV 10A Audio
P/OUTLET.FR 15A Power outlet (front)
OBD II 10A OBD II, Diagonosis
S/HTR 20A Seat warmer
SPARE 15A Spare fuse
C/LIGHTER 15A Cigar lighter
AUDIO 10AETACS, Audio, Door lock,
Electric remote control mirror
ROOM LP 10ACluster, ETACS, A/C, Clock,
Room lamp
S/ROOF & D/LOCK 20A Sunroof, Door lock
A/CON 10A Air conditioner
IGN 10A Fuel filter heater, Headlight
P/WDW-1 30A Power window (left)
Description Fuse rating Protected component
P/WDW-230A Power window (right)
SPARE 10A Spare fuse
IG COIL 20A Ignition coil
T/SIG 15A Turn signal light
A/BAG IND 10A Cluster
CLUSTER 10A Cluster
SPARE FUSE 15A Spare fuse
SPARE FUSE 10A Spare fuse
B/UP 10A Back-up light
A/BAG 15A Airbag
ABS 10A Anti-lock brake system
ECU 10A ESC, Immobilizer
SPARE FUSE 30A Spare fuse
SPARE FUSE 20A Spare fuse
P/CONN 30A Power connector fuse
SHUNT CONN - Shunt connector
Driver side panel
Page 297 of 371
613
In case of an emergency
1
2
3
4
5
6
7
8
9
Power connector fuseYour vehicle is equipped with a
power connector fuse to prevent bat-
tery discharge if your vehicle is
parked without being operated for
prolonged periods. Use the following
procedures before parking the vehi-
cle for prolonged period.
1. Turn off the engine.
2. Turn off the headlights and taillights.
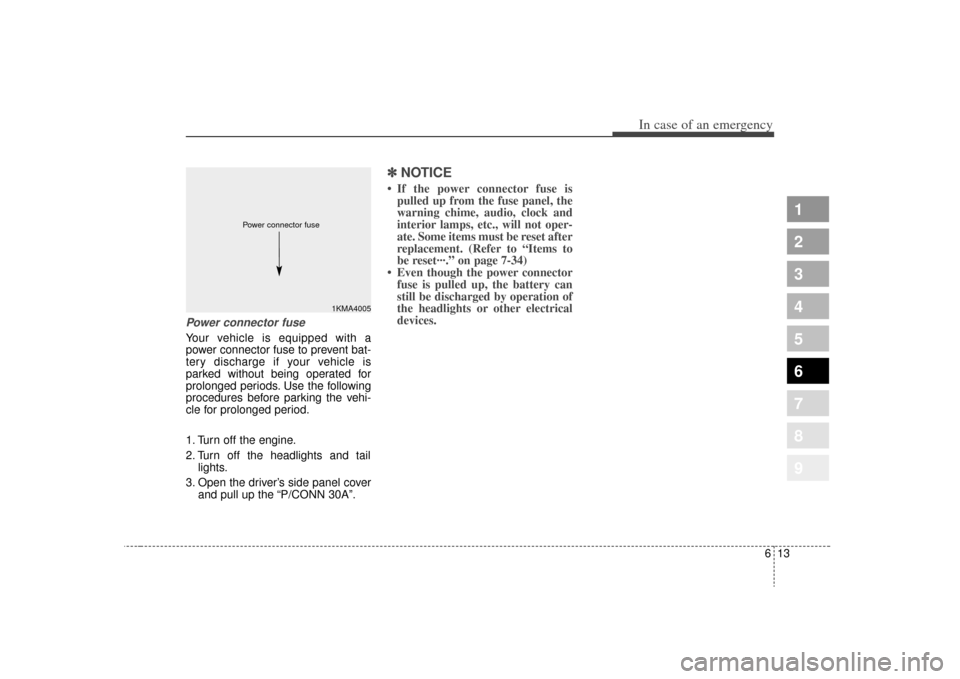
3. Open the driver’s side panel cover and pull up the “P/CONN 30A”.
✽ ✽NOTICE• If the power connector fuse is
pulled up from the fuse panel, the
warning chime, audio, clock and
interior lamps, etc., will not oper-
ate. Some items must be reset after
replacement. (Refer to “Items to
be reset···.” on page 7-34)
• Even though the power connector fuse is pulled up, the battery can
still be discharged by operation of
the headlights or other electrical
devices.
1KMA4005
Power connector fuse
Page 343 of 371
Maintenance34
7
1
2
3
4
5
6
7
8
9
For best battery service : Keep the battery securely mount-
ed.
Keep the battery top clean and dry.
Keep the terminals and connec- tions clean, tight, and coated with
petroleum jelly or terminal grease.
Rinse any spilled electrolyte from the battery immediately with a
solution of water and baking soda.
If the vehicle is not going to be used for an extended time, discon-
nect the battery cables.
Battery recharging Your vehicle has a maintenance-free,
calcium-based battery.
If the battery becomes dischargedin a short time (because, for exam-
ple, the headlights or interior lights
were left on while the vehicle was
not in use), recharge it by slow
charging (trickle) for 10 hours.
If the battery gradually discharges because of high electric load while
the vehicle is being used, recharge
it at 20-30A for two hours.Items to be reset after the batteryhas been discharged or the bat-tery has been disconnected. Clock (See Chapter 3)
Sunroof (See Chapter 3)
Trip computer (See Chapter 4)
Compass (See Chapter 4)
Climate control system (See Chapter 4)
Audio (See Chapter 3)
1KMN5030
(Continued) An inappropriately dis-
posed battery can be
harmful to the environ-
ment and human health.
Dispose the battery
according to your local
law(s) or regulation.
When lifting a plastic-cased battery, excessive pressure on
the case may cause battery
acid to leak, resulting in per-
sonal injury. Lift with a battery
carrier or with your hands on
opposite corners.
Never attempt to recharge the battery when the battery
cables are connected.
The electrical ignition system works with high voltage.
Never touch these compo-
nents with the engine running
or the ignition switched on.
Failure to follow the above
warnings can result in serious
bodily injury or death.
Page 359 of 371
Maintenance50
7
1
2
3
4
5
6
7
8
9
EXTERIOR CARE Exterior general caution It is very important to follow the label
directions when using any chemical
cleaner or polish. Read all warning
and caution statements that appear
on the label.Finish maintenanceWashing To help protect your vehicle’s finish
from rust and deterioration, wash it
thoroughly and frequently at least
once a month with lukewarm or cold
water.
If you use your vehicle for off-road
driving, you should wash it after each
off-road trip. Pay special attention to
the removal of any accumulation of
salt, dirt, mud, and other foreign
materials. Make sure the drain holes
in the lower edges of the doors and
rocker panels are kept clear and
clean.
Insects, tar, tree sap, bird droppings,
industrial pollution and similar
deposits can damage your vehicle’s
finish if not removed immediately. Even prompt washing with plain
water may not completely remove all
these deposits. A mild soap, safe for
use on painted surfaces, may be
used.
After washing, rinse the vehicle thor-
oughly with lukewarm or cold water.
Do not allow soap to dry on the fin-
ish.
✽ ✽
NOTICEDo not use strong soap, chemical
detergents or hot water, and do not
wash the vehicle in direct sunlight or
when the body of the vehicle is
warm.
WARNING -
Wet brakes
After washing the vehicle, test
the brakes while driving slowly
to see if they have been affected
by water. If braking performance
is impaired, dry the brakes by
applying them lightly while
maintaining a slow forward
speed.
OJB037800
CAUTION
Water washing in the engine compartment including highpressure water washing maycause the failure of electricalcircuits located in the enginecompartment.
Never allow water or other liq- uids come in contact withelectrical/electronic compo-nents inside the vehicle asthis may damage them.
Page 362 of 371
753
Maintenance
1
2
3
4
5
6
7
8
9
INTERIOR CARE Interior general precautions Prevent caustic solutions such as
perfume and cosmetic oil from con-
tacting the dashboard because they
may cause damage or discoloration.
If they do contact the dashboard,
wipe them off immediately. See the
instructions that follow for the proper
way to clean vinyl.✽ ✽NOTICENever allow water or other liquids to
come in contact with electrical/elec-
tronic components inside the vehicle
as this may damage them.
Cleaning the upholstery and
interior trim Vinyl Remove dust and loose dirt from
vinyl with a whisk broom or vacuum
cleaner. Clean vinyl surfaces with a
vinyl cleaner.Fabric Remove dust and loose dirt from fab-
ric with a whisk broom or vacuum
cleaner. Clean with a mild soap solu-
tion recommended for upholstery or
carpets. Remove fresh spots imme-
diately with a fabric spot cleaner. If
fresh spots do not receive immediate
attention, the fabric can be stained
and its color can be affected. Also, its
fire-resistant properties can be
reduced if the material is not proper-
ly maintained.✽ ✽NOTICEUsing anything but recommended
cleaners and procedures may affect
the fabric’s appearance and fire-
resistant properties.
Cleaning the lap/shoulder belt
webbing Clean the belt webbing with any mild
soap solution recommended for
cleaning upholstery or carpet. Follow
the instructions provided with the
soap. Do not bleach or re-dye the
webbing because this may weaken
it.Cleaning the interior window
glass If the interior glass surfaces of the
vehicle become fogged (that is, cov-
ered with an oily, greasy or waxy
film), they should be cleaned with
glass cleaner. Follow the directions
on the glass cleaner container.✽ ✽NOTICEDo not scrape or scratch the inside
of the rear window. This may result
in damage to the rear window
defroster grid.
Page 369 of 371

Index29
1
2
3
4
5
6
7
8
9
Air cleaner . . . . . . . . . . . . . . . . . . . . . . . . . . . . . . . . 7-29
Airbags-supplemental restraint system. . . . . . . . . . 3-55
Audio system . . . . . . . . . . . . . . . . . . . . . . . . . . . . . 3-106
Automatic climate control system . . . . . . . . . . . . . . 4-70
Automatic transaxle . . . . . . . . . . . . . . . . . . . . . 4-6, 7-25
Battery . . . . . . . . . . . . . . . . . . . . . . . . . . . . . . . . . . . 7-\
33
Before driving . . . . . . . . . . . . . . . . . . . . . . . . . . . . . . 5-5
Brake system . . . . . . . . . . . . . . . . . . . . . . . . . . . . . . 4-18
Brakes and clutch . . . . . . . . . . . . . . . . . . . . . . . . . . 7-22
Climate control air filter . . . . . . . . . . . . . . . . . . . . . 7-30
Compass . . . . . . . . . . . . . . . . . . . . . . . . . . . . . . . . . . 4-49\
Cruise control system . . . . . . . . . . . . . . . . . . . . . . . 4-28
Defroster . . . . . . . . . . . . . . . . . . . . . . . . . . . . . . . . . 4-59
Door locks . . . . . . . . . . . . . . . . . . . . . . . . . . . . . . . . . 3-9
Electrical circuit protection. . . . . . . . . . . . . . . . . . . . 6-7
Electronic stability control . . . . . . . . . . . . . . . . . . . 4-32
Emergency starting . . . . . . . . . . . . . . . . . . . . . . . . . . 6-4Emission control system . . . . . . . . . . . . . . . . . . . . . . 5-3
Engine compartment . . . . . . . . . . . . . . . . . . . . . . . . 7-15
Engine cooling system . . . . . . . . . . . . . . . . . . . . . . . 7-19
Engine oil and oil filter . . . . . . . . . . . . . . . . . . . . . . 7-17
Explanation of scheduled maintenance items . . . . . . 7-8
Exterior care . . . . . . . . . . . . . . . . . . . . . . . . . . . . . . 7-50
Four wheel drive (4WD) . . . . . . . . . . . . . . . . . . . . . 4-12
Fuel filler lid . . . . . . . . . . . . . . . . . . . . . . . . . . . . . . 3-81
Fuel requirements . . . . . . . . . . . . . . . . . . . . . . . . . . . 5-2
Gauges . . . . . . . . . . . . . . . . . . . . . . . . . . . . . . . . . . . 4-\
36
Hazard warning flasher. . . . . . . . . . . . . . . . . . . . . . 4-60
Homelink® wireless control system . . . . . . . . . . . . 5-45
Hood . . . . . . . . . . . . . . . . . . . . . . . . . . . . . . . . . . . . \
. 3-80
How to use this manual . . . . . . . . . . . . . . . . . . . . . . . 1-2
If you have a flat tire . . . . . . . . . . . . . . . . . . . . . . . . 6-19
Ignition switch . . . . . . . . . . . . . . . . . . . . . . . . . . . . . . 4-2
Immobilizer system . . . . . . . . . . . . . . . . . . . . . . . . . . 3-6
In case of an emergency while driving . . . . . . . . . . . 6-2
Instrument cluster . . . . . . . . . . . . . . . . . . . . . . . . . . 4-35ABCDE
GFHI