2009 KIA Sportage display
[x] Cancel search: displayPage 140 of 371
3131
Knowing your vehicle
1
2
3
4
5
6
7
8
9
In case USB is connected to the mul-
tiple terminal inside the console on
the right hand side of the driver’s
seat. When USB is connected, the
‘USB’ icon will be displayed on the
top right corner of the display screen.1. AUX Selection ButtonIf USB is not connected, it switches
to the USB mode from the Radio and
CD mode to play the song files
stored in the USB.
If AUX is not connected, it is invalid
key.2. Track Moving Button Press the [SEEK ] button forless than 0.8 second to play from
the beginning of the song currently
played.
Press the button for less than 0.8
second and press it again within 1
second to move to and play the pre-
vious track.
Press the button for 0.8 second or
longer to play the song in reverse
direction in fast speed. Press the [SEEK ] button for
less
than 0.8 second to move to the
next track.
Press the button for 0.8 second or
longer to play the song in forward
direction in fast speed.
3. INFO Selection ButtonDisplays the information of the file
currently played in the order of FILE
NAME
➟TITLE
➟ARTIST
➟ALBUM
➟
FOLDER
➟TOTAL FILE
➟FILE NAME
➟… (Displays no information if the
file has no song information.)4. Folder moving Button Moves [FLDR ] button child fold- er of the current folder and displays
the first song in the folder. Press
TUNE/ENTER button to move to
the folder displayed. It will play the
first song in the folder.
Moves [FLDR ] button parent folder and displays the first song in
the folder. Press TUNE/ENTER
button to move to the folder dis-
played. It will play the first song in
the folder.
5. TUNE/ENTER ButtonTurn this button clockwise to display
the songs next to the currently
played song.
Turn the button counterclockwise to
display the songs before the current-
ly played song.
Press the button to skip to and play
the selected song.6. RANDOM Playback ButtonPress the button for less than 0.8
second to start or stop the random
playback of the songs in the current
folder.
Press the button for more than 0.8
second to randomly play the entire
songs in the USB device.
Press the button again to cancel the
mode.
Page 143 of 371
Knowing your vehicle134
3
1
2
3
4
5
6
7
8
9
In case the iPod exclusive cable is
connected to the multiple terminal
inside the console on the right hand
side of the driver’s seat. When the
iPod is connected, the ‘iPod’ icon will
be displayed on the top right corner
of the display screen.1. iPod Selection ButtonIf iPod is connected, it switches to
the iPod mode from the Radio and
CD mode to play the song files
stored in the iPod.
If there are no CD and AUX mode
from the Radio mode, it displays "NO
MEDIA".2. Track Moving Button Press the [SEEK ] b utton for less
than 0.8 second to play from the
beginning of the song currently
played.
Press the button for less than 0.8
second and press it again within 1
second to move to and play the
previous track. Press the button for
0.8 second or longer to play the
song in reverse direction in fast
speed. Press the [SEEK ] button for
less
than 0.8 second to move to the
next track.
Press the button for 0.8 second or
longer to play the song in forward
direction in fast speed.
3. INFO Selection ButtonDisplays the information of the file
currently played in the order of FILE
NAME
➟TITLE
➟ARTIST
➟ALBUM
➟
FILE NAME
➟… (Displays no infor-
mation if the file has no song infor-
mation.)
4. Category Selection ButtonMoves to the upper category from
currently played category of the iPod.
To move to (play) the category
(song) displayed, press TUNE/
ENTER key.
You will be able to search through
the lower category of the selected
category.
The order of iPod’s category is
SONG, ALBUMES, ARTISTS, GEN-
RES, and iPod.
5. TUNE/ENTER ButtonWhen you turn the button clockwise,
it will display the songs (category)
next to the song currently played
(category in the same level).
Also, when you turn the button coun-
terclockwise, it will display the songs
(category) before the song currently
played (category in the same level).
If you want to listen to the song dis-
played in the song category, press
the button, then it will skip to the
selected song and play.6. RANDOM Playback ButtonPress the button for less than 0.8
second to activate or deactivate the
random playback of the songs within
the current category.
Press the button for longer than 0.8
second to randomly play all songs in
the entire album of the iPod.
Press the button once again to can-
cel the mode.7. REPEAT Selection ButtonRepeats the song currently played.
Page 146 of 371
3137
Knowing your vehicle
1
2
3
4
5
6
7
8
9
How to Use SIRIUS Satellite
RadioYour vehicle is equipped with a 90
day complimentary period of SIRIUS
Satellite Radio so you have access
to over 130 channels of music, infor-
mation, and entertainment program-
ming.ActivationIn order to extend or reactivate your
subscription to SIRIUS Satellite
Radio, you will need to contact SIR-
IUS Customer Care at 888-539-
7474. Have your 12 digit SID
(Sirius Identification Number)/ESN
(Electronic Serial Number) ready. To
retrieve the SID/ESN, turn on the
radio, press the “SAT” button, and
tune to channel zero. Please note
that the vehicle will need to be turned
on, in Sirius mode, and have an
unobstructed view of the sky in order
for the radio to receive the activation
signal.
1. SATELLITE RADIO Selectionbutton (SIRIUS Satellite
Radio)Press the [SAT] button to switch to
SIRIUS Satellite Radio. It cycles
through the different bands as noted
below.
SAT1➝SAT2➝SAT3➝SAT12. Channel Selection Button When the [SEEK ] button is
pressed, it decreases automatically
select channel.
When the [SEEK ] button is pressed, it increases automatically
select channel.3. Power ON/OFF button and Volume knobTurns on/off the radio when the IGNI-
TION SWITCH is on ACC or ON. If
the knob is turned to the right, it
increases the volume; if it is turned to
the left, it decreases the volume.
4. SCAN Selection ButtonWhen the button is pressed, it auto-
matically only scans the radio sta-
tions upwards. The sound hearing for
10 seconds per all searched station
preset.
The SCAN feature steps through
each channel, starting from the initial
channel, for ten seconds.
Press the [SCAN] button again to
stop the scan feature and to listen to
the currently selected channel.5. MUTE Selection ButtonWhen the [MUTE] key is pressed,
the display will say "AUDIO MUTE"
and the audio will be muted.
Page 147 of 371
Knowing your vehicle138
3
1
2
3
4
5
6
7
8
9
6. INFO Selection ButtonDisplays the information of the chan-
nel currently played by in the order of
CATEGORY NAME
➟ARTIST NAME
➟COMPOSER NAME
➟CHANNEL
NAME
➟...(CAT /CH Selection)
Displays the information of the chan-
nel currently played in the order of
SONG TITLE
➟ARTIST NAME
➟
COMPOSER NAME
➟... (CH/TITLE
Selection) (If there is no information
of COMPOSER NAME, it returns to
main display.)
7. SETUP Selection ButtonPress this button to adjust to the
SCROLL, SDVC, SIRIUS and adjust-
ment modes.
If no action is taken for 5 seconds
after pressing the button, it will return
to the play mode. (After entering SET
UP mode, move between items
using the left, right and PUSH func-
tions of the TUNE button.)
The set up item changes from
SCROLL
➟ SDVC
➟SIRIUS
➟SCROLL
➟...
8. CAT/FOLDER ButtonPress this button to turn to the
Category search mode. Turn the tune
knob to see available categories.
Press the tune button to go to the
desired category.9. TUNE knob /ENTER ButtonTurn this button clockwise by one
notch to increase the channel.
Turn this button counterclockwise by
one notch to decrease the channel.
Press this button while holding SET
UP button to activate / inactivate the
item to.
Select SET UP item using left and
right function of the Tune button.10. Preset Selection ButtonPush [1]~[6] buttons less than 0.8
second to play the channel saved in
each button.
Hold down the preset button for 0.8
second or longer to save current
channel to the respective button with
a beep.
Troubleshooting1. Antenna Error
If this message is displayed, the
antenna or antenna cable is broken
or unplugged. Please consult with
your Kia dealership.
2. Acquiring Signal
If this message is displayed, it
means that the antenna is covered
and that the SIRIUS Satellite Radio
signal is not available. Ensure the
antenna is uncovered and has a
clear view of the sky.
Page 185 of 371
Driving your vehicle38
4
1
2
3
4
5
6
7
8
9
Trip computer (if equipped)The trip computer is a microcomput-
er-controlled driver information sys-
tem that displays information related
to driving, including distance traveled
("tripmeter"), driving time, average
fuel consumption and distance to
empty on the LCD. All stored driving
information is reset if the battery is
disconnected.
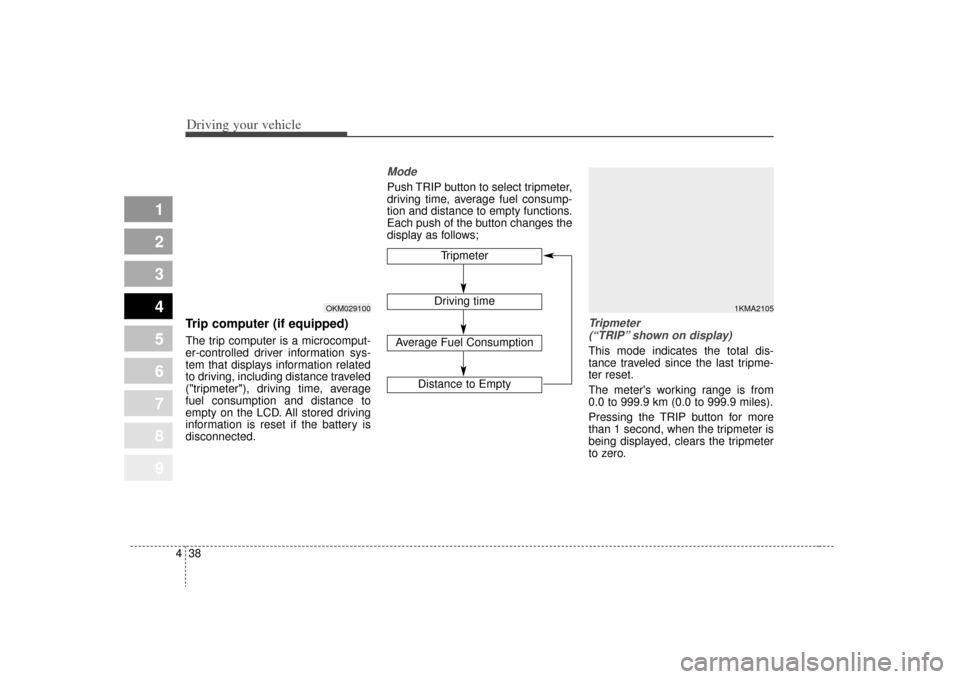
ModePush TRIP button to select tripmeter,
driving time, average fuel consump-
tion and distance to empty functions.
Each push of the button changes the
display as follows;
Tripmeter
(“TRIP” shown on display)This mode indicates the total dis-
tance traveled since the last tripme-
ter reset.
The meter's working range is from
0.0 to 999.9 km (0.0 to 999.9 miles).
Pressing the TRIP button for more
than 1 second, when the tripmeter is
being displayed, clears the tripmeter
to zero.
Tripmeter
Driving time
Average Fuel Consumption
Distance to Empty
1KMA2105
OKM029100
Page 186 of 371
439
Driving your vehicle
1
2
3
4
5
6
7
8
9
Driving time (“E/T” shown on display)This mode indicates the total time
traveled since the last driving time
reset.
Even if the vehicle is not in motion,
the driving time keeps going while
the engine is running.
Pressing the TRIP button for more
than 1 second, when the driving time
is being displayed, clears the driving
time to zero.
Average fuel consumption(“AVG.” shown on display)This mode calculates the average
fuel consumption from the total fuel
used and the distance since the last
average consumption reset. The total
fuel used is calculated from the fuel
consumption input. For an accurate
calculation, drive more than 500 m
(0.3 miles).
The meter's working range is from
0.0 to 99.9 l/100 km (0.0 to 99.9
miles per gallon).
Distance to empty (“RANGE”shown on display)This mode indicates the estimated
distance to empty based on the cur-
rent fuel in the fuel tank and the
amount of fuel delivered to the
engine. When the remaining distance
is below 50 km (30 miles), a blinking
“----” symbol will be displayed.
1KMC2107
1KMC2108
1KMC2106
Page 196 of 371
449
Driving your vehicle
1
2
3
4
5
6
7
8
9
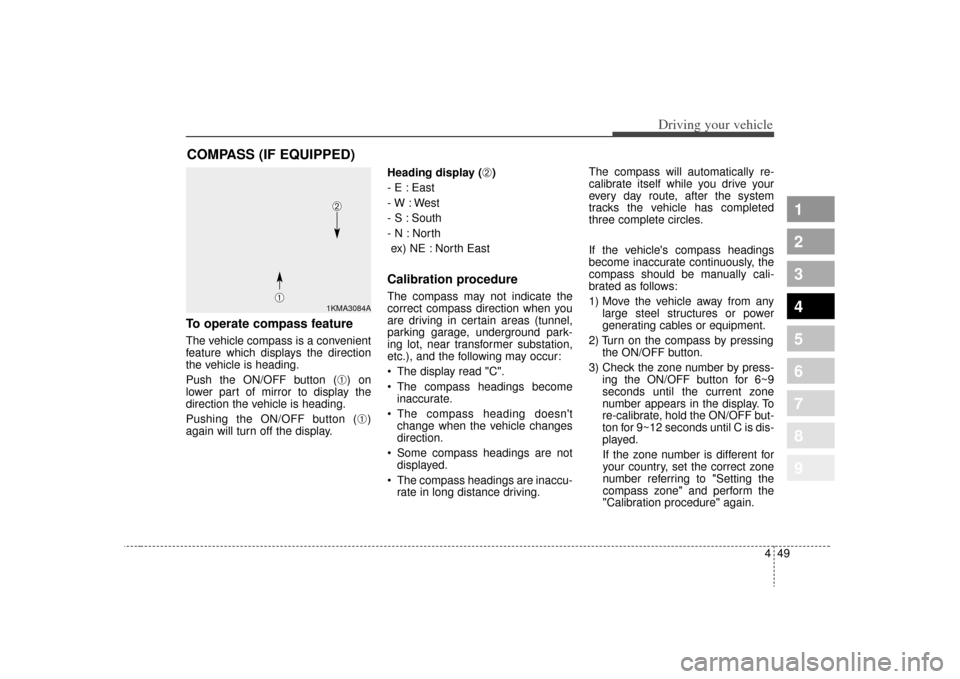
To operate compass featureThe vehicle compass is a convenient
feature which displays the direction
the vehicle is heading.
Push the ON/OFF button (
➀) on
lower part of mirror to display the
direction the vehicle is heading.
Pushing the ON/OFF button (➀)
again will turn off the display. Heading display (
➁)
- E : East
- W : West
- S : South
- N : North ex) NE : North East
Calibration procedureThe compass may not indicate the
correct compass direction when you
are driving in certain areas (tunnel,
parking garage, underground park-
ing lot, near transformer substation,
etc.), and the following may occur:
The display read "C".
The compass headings become inaccurate.
The compass heading doesn't change when the vehicle changes
direction.
Some compass headings are not displayed.
The compass headings are inaccu- rate in long distance driving. The compass will automatically re-
calibrate itself while you drive your
every day route, after the system
tracks the vehicle has completed
three complete circles.
If the vehicle's compass headings
become inaccurate continuously, the
compass should be manually cali-
brated as follows:
1) Move the vehicle away from any
large steel structures or power
generating cables or equipment.
2) Turn on the compass by pressing the ON/OFF button.
3) Check the zone number by press- ing the ON/OFF button for 6~9
seconds until the current zone
number appears in the display. To
re-calibrate, hold the ON/OFF but-
ton for 9~12 seconds until C is dis-
played.
If the zone number is different for
your country, set the correct zone
number referring to "Setting the
compass zone" and perform the
"Calibration procedure" again.
COMPASS (IF EQUIPPED)
1KMA3084A
➀
➁
Page 197 of 371
Driving your vehicle50
4
1
2
3
4
5
6
7
8
9
4) Make sure the vehicle windshield
wipers are turned off.
5) Drive your vehicle in at least 2 complete (either clockwise or
counter-clockwise) circles at less
than 8 km/h (5 mph) until the com-
pass heading appears. Driving in
a circle in right-handed direction
and opposite direction is possible
and if possible, stop the wiper
operation.
6) If the vehicle's compass headings become inaccurate again, repeat
steps 1 through 6 above.✽ ✽NOTICEIf new vehicle is first driven or if the
battery has been disconnected, do
the calibration procedure as above.
Setting the compass zoneThis compass must be set to com-
pensate for the variation between
true north and magnetic north. To set
variation:
1. Find your current location and
variance zone number on the zone
map.
2. Press and hold the ON/OFF but- ton for 6~9 seconds. The current
zone number will appear in the
display.
3. Release and press the ON/OFF button until the new zone number
appears in the display. After you
stop pressing the button in, the
display will show a compass direc-
tion within a few seconds.
✽ ✽NOTICE1. Do not install a ski rack, antenna,
etc. that are attached to the vehi-
cle using a magnet as anything
attached to the roof of the vehicle
with a magnet will effect compass
operation.
2. If the compass deviates from the correct indication soon after
repeated adjustment, have the
compass checked at an authorized
dealer.
3. The compass may not indicate the correct compass point in tunnels
or while driving up or down a
steep hill.
(The compass returns to the cor-
rect compass point when the vehi-
cle moves to an area where the
geomagnetism is stabilized.)