2009 KIA Sportage light
[x] Cancel search: lightPage 278 of 371
Driving tips46
5
1
2
3
4
5
6
7
8
9
ProgrammingYour vehicle may require the ignition
switch to be turned to the ACC posi-
tion for programming and/or opera-
tion of HomeLink. It is also recom-
mended that a new battery be
replaced in the hand-held transmitter
of the device being programmed to
HomeLink for quicker training and
accurate transmission of the radio-
frequency.
Follow these steps to train your
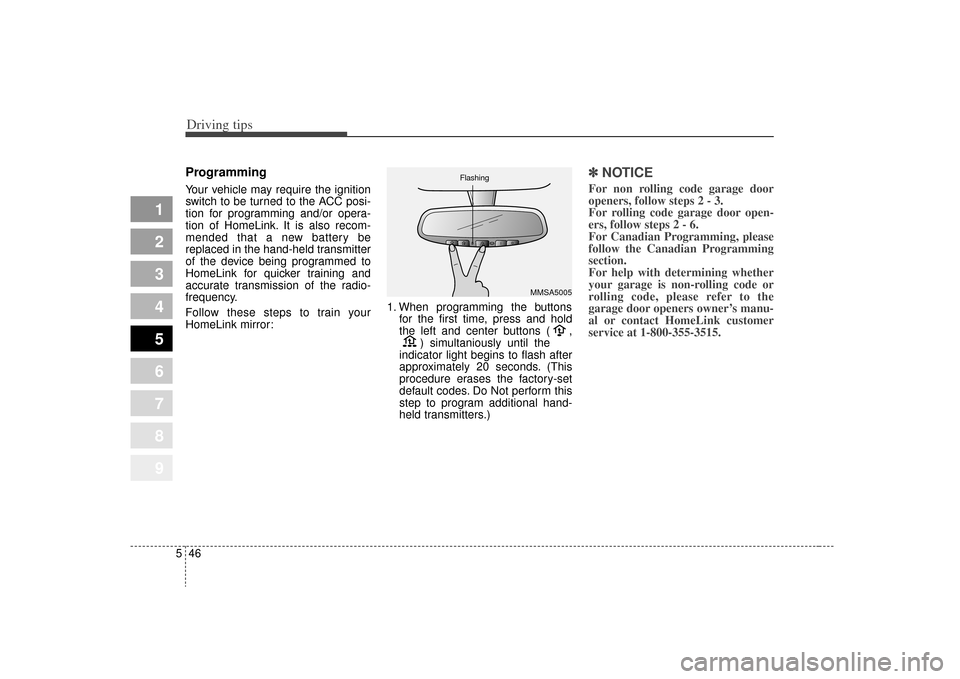
HomeLink mirror: 1. When programming the buttons
for the first time, press and hold
the left and center buttons ( , ) simultaniously until the
indicator light begins to flash after
approximately 20 seconds. (This
procedure erases the factory-set
default codes. Do Not perform this
step to program additional hand-
held transmitters.)
✽ ✽ NOTICEFor non rolling code garage door
openers, follow steps 2 - 3.
For rolling code garage door open-
ers, follow steps 2 - 6.
For Canadian Programming, please
follow the Canadian Programming
section.
For help with determining whether
your garage is non-rolling code or
rolling code, please refer to the
garage door openers owner’s manu-
al or contact HomeLink customer
service at 1-800-355-3515.
MMSA5005
Flashing
Page 279 of 371
547
Driving tips
1
2
3
4
5
6
7
8
9
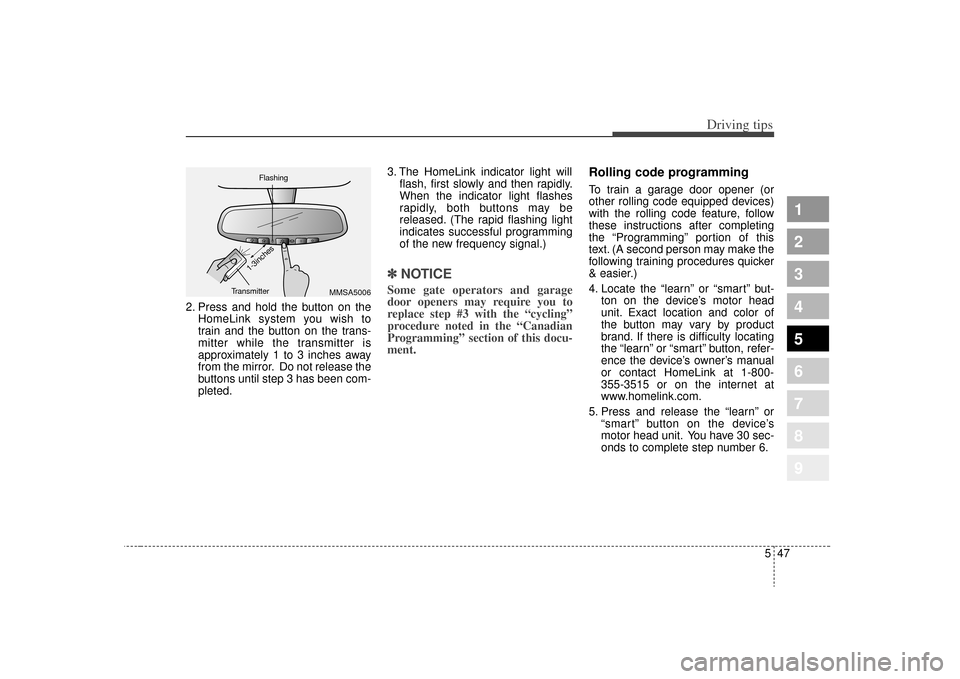
2. Press and hold the button on theHomeLink system you wish to
train and the button on the trans-
mitter while the transmitter is
approximately 1 to 3 inches away
from the mirror. Do not release the
buttons until step 3 has been com-
pleted. 3. The HomeLink indicator light will
flash, first slowly and then rapidly.
When the indicator light flashes
rapidly, both buttons may be
released. (The rapid flashing light
indicates successful programming
of the new frequency signal.)
✽ ✽NOTICESome gate operators and garage
door openers may require you to
replace step #3 with the “cycling”
procedure noted in the “Canadian
Programming” section of this docu-
ment.
Rolling code programmingTo train a garage door opener (or
other rolling code equipped devices)
with the rolling code feature, follow
these instructions after completing
the “Programming” portion of this
text. (A second person may make the
following training procedures quicker
& easier.)
4. Locate the “learn” or “smart” but-
ton on the device’s motor head
unit. Exact location and color of
the button may vary by product
brand. If there is difficulty locating
the “learn” or “smart” button, refer-
ence the device’s owner’s manual
or contact HomeLink at 1-800-
355-3515 or on the internet at
www.homelink.com.
5. Press and release the “learn” or “smart” button on the device’s
motor head unit. You have 30 sec-
onds to complete step number 6.
MMSA5006
Flashing
Transmitter
1-3inches
Page 280 of 371
Driving tips48
5
1
2
3
4
5
6
7
8
9
6. Return to the vehicle and firmly
press and release the pro-
grammed HomeLink button up to
three times. The rolling code
equipped device should now rec-
ognize the HomeLink signal and
activate when the HomeLink but-
ton is pressed. The remaining two
buttons may now be programmed
if this has not previously been
done. Refer to the “Programming”
portion of this text.
Operating HomeLink To operate, simply press the pro-
grammed HomeLink button.
Activation will now occur for the
trained product (garage door, securi-
ty system, entry door lock, estate
gate, or home or office lighting). For
convenience, the hand-held trans-
mitter of the device may also be used
at any time. The HomeLink Wireless
Controls System (once programmed)
or the original hand-held transmitter
may be used to activate the device
(e.g. garage door, entry door lock,
etc.). In the event that there are still
programming difficulties, contact
HomeLink at 1-800-355-3515 or on
the internet at www.homelink.com.
Erasing programmed
HomeLink buttonsTo erase the three programmed but-
tons (individual buttons cannot be
erased):
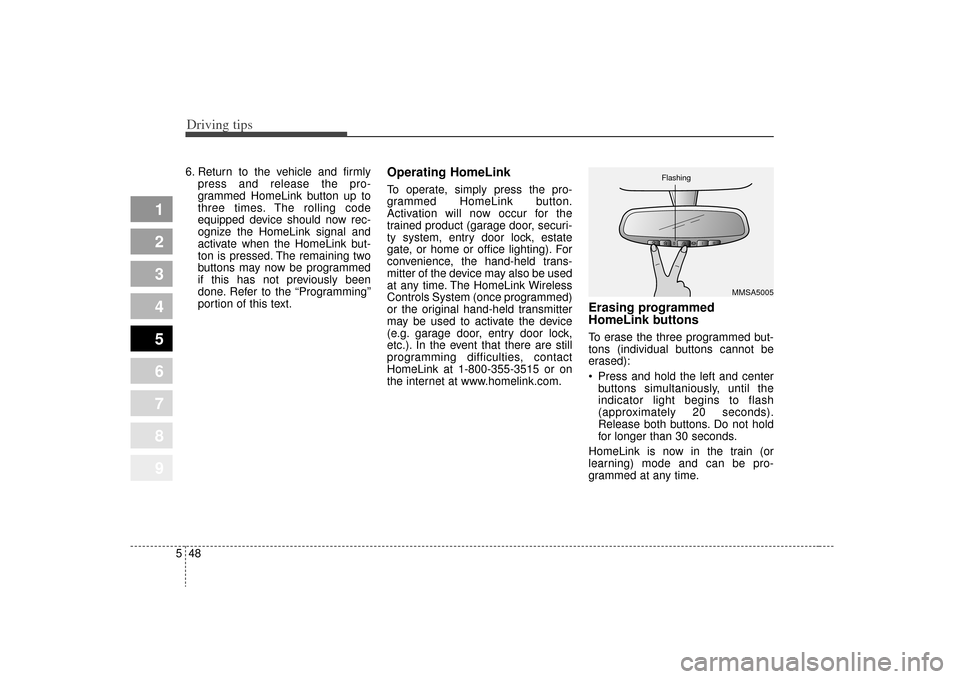
Press and hold the left and centerbuttons simultaniously, until the
indicator light begins to flash
(approximately 20 seconds).
Release both buttons. Do not hold
for longer than 30 seconds.
HomeLink is now in the train (or
learning) mode and can be pro-
grammed at any time.
MMSA5005
Flashing
Page 281 of 371
549
Driving tips
1
2
3
4
5
6
7
8
9
Reprogramming a single
HomeLink buttonTo program a device to HomeLink
using a HomeLink button previously
trained, follow these steps:
1. Press and hold the desiredHomeLink button. Do NOT release
until step 4 has been completed.
2. When the indicator light begins to flash slowly (after 20 seconds),
position the hand-held transmitter
1 to 3 inches away from the
HomeLink surface.
3. Press and hold the hand-held transmitter button (or press and
“cycle” - as described in
“Canadian Programming” above).
4. The HomeLink indicator light will flash, first slowly and then rapidly.
When the indicator light begins to
flash rapidly, release both buttons.
The previous device has now been
erased and the new device can be
activated by pushing the HomeLink
button that has just been pro-
grammed. This procedure will not
affect any other programmed
HomeLink buttons.
Gate operator programming &
canadian programmingDuring programming, your hand-held
transmitter may automatically stop
transmitting. Continue to press and
hold the HomeLink button (note
steps 2 through 4 in the
“Programming” portion of this text)
while you press and re-press
(“cycle”) your handheld transmitter
every two seconds until the frequen-
cy signal has been learned. The indi-
cator light will flash slowly and then
rapidly after several seconds upon
successful training.✽ ✽ NOTICEIf programming a garage door open-
er or gate, it is advised to unplug the
device during the “cycling” process
to prevent possible motor burn-up.
AccessoriesIf you would like additional informa-
tion on the HomeLink Wireless
Control System, HomeLink compati-
ble products, or to purchase other
accessories such as the HomeLink®
Lighting Package, please contact
HomeLink at 1-800-355-3515 or on
the internet at www.homelink.com.
Page 286 of 371

In case of an emergency26ROAD WARNING Hazard warning flasher The hazard warning flasher serves
as a warning to other drivers to exer-
cise extreme caution when
approaching, overtaking, or passing
your vehicle. It should be used when-
ever emergency repairs are being
made or when the vehicle is stopped
near the edge of a roadway.Depress the flasher switch with the
ignition switch in any position. The
flasher switch is located in the center
console switch panel. All turn signal
lights will flash simultaneously.
• The hazard warning flasher oper-
ates whether your vehicle is run-
ning or not.
The turn signals do not work when the hazard flasher is on.
Care must be taken when using the hazard warning flasher while
the vehicle is being towed.
If the engine stalls at a cross-
road or crossingIf the engine stalls at a crossroad or
crossing, set the shift lever in the N
(Neutral) position and then push the
vehicle to a safe place.If you have a flat tire while dri-
vingIf a tire goes flat while you are dri-
ving:
1. Take your foot off the accelerator pedal and let the car slow down
while driving straight ahead. Do
not apply the brakes immediately
or attempt to pull off the road as
this may cause a loss of control.
When the car has slowed to such
a speed that it is safe to do so,
brake carefully and pull off the
road. Drive off the road as far as
possible and park on firm, level
ground.
If you are on a divided highway, do
not park in the median area
between the two traffic lanes.
1
2
3
4
5
6
7
8
9
OKM049109
IN CASE OF AN EMER-
GENCY WHILE DRIVING
Page 291 of 371
67
In case of an emergency
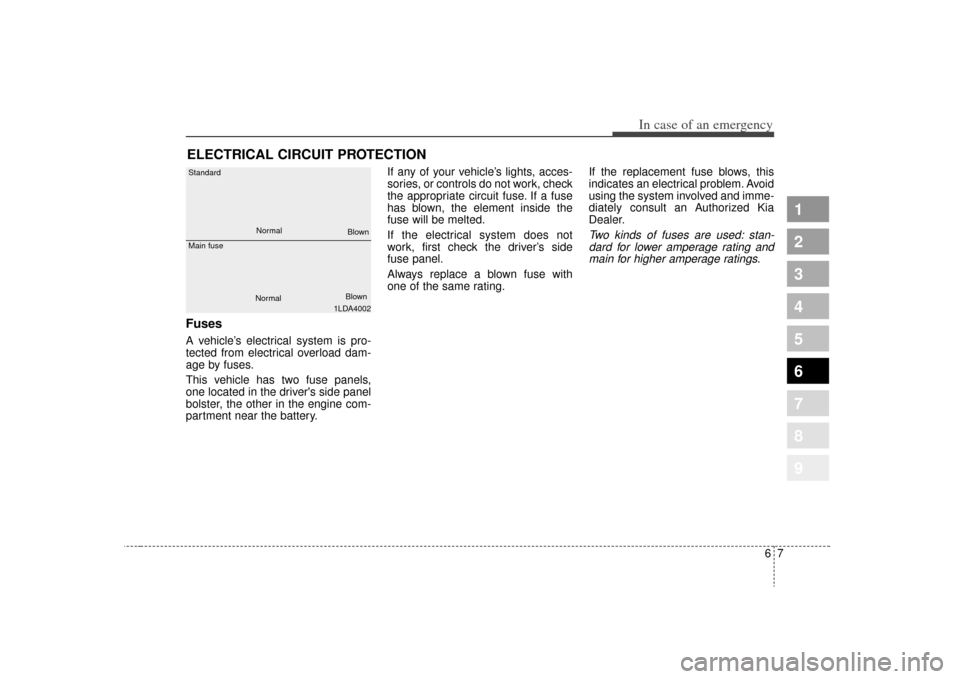
ELECTRICAL CIRCUIT PROTECTION Fuses A vehicle’s electrical system is pro-
tected from electrical overload dam-
age by fuses.
This vehicle has two fuse panels,
one located in the driver's side panel
bolster, the other in the engine com-
partment near the battery.If any of your vehicle’s lights, acces-
sories, or controls do not work, check
the appropriate circuit fuse. If a fuse
has blown, the element inside the
fuse will be melted.
If the electrical system does not
work, first check the driver’s side
fuse panel.
Always replace a blown fuse with
one of the same rating.
If the replacement fuse blows, this
indicates an electrical problem. Avoid
using the system involved and imme-
diately consult an Authorized Kia
Dealer.
Two kinds of fuses are used: stan-
dard for lower amperage rating andmain for higher amperage ratings.
1
2
3
4
5
6
7
8
9
1LDA4002
Standard
Main fuse
NormalNormal
Blown
Blown
Page 292 of 371
In case of an emergency86Fuse replacement ✽
✽NOTICEDo not use a screwdriver or any
other metal object to remove fuses
because it may cause a short circuit
and damage the system.
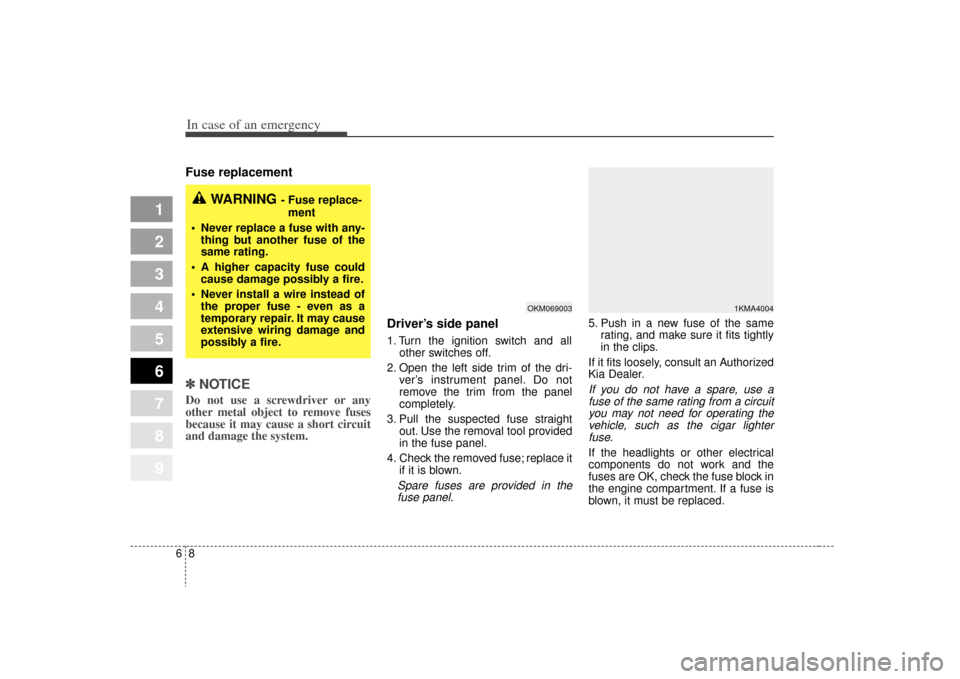
Driver’s side panel1. Turn the ignition switch and all
other switches off.
2. Open the left side trim of the dri- ver’s instrument panel. Do not
remove the trim from the panel
completely.
3. Pull the suspected fuse straight out. Use the removal tool provided
in the fuse panel.
4. Check the removed fuse; replace it if it is blown.Spare fuses are provided in thefuse panel.
5. Push in a new fuse of the same rating, and make sure it fits tightly
in the clips.
If it fits loosely, consult an Authorized
Kia Dealer.If you do not have a spare, use a fuse of the same rating from a circuityou may not need for operating thevehicle, such as the cigar lighterfuse.If the headlights or other electrical
components do not work and the
fuses are OK, check the fuse block in
the engine compartment. If a fuse is
blown, it must be replaced.
1
2
3
4
5
6
7
8
9
OKM069003
1KMA4004
WARNING
- Fuse replace-
ment
Never replace a fuse with any- thing but another fuse of the
same rating.
A higher capacity fuse could cause damage possibly a fire.
Never install a wire instead of the proper fuse - even as a
temporary repair. It may cause
extensive wiring damage and
possibly a fire.
Page 295 of 371
611
In case of an emergency
1
2
3
4
5
6
7
8
9
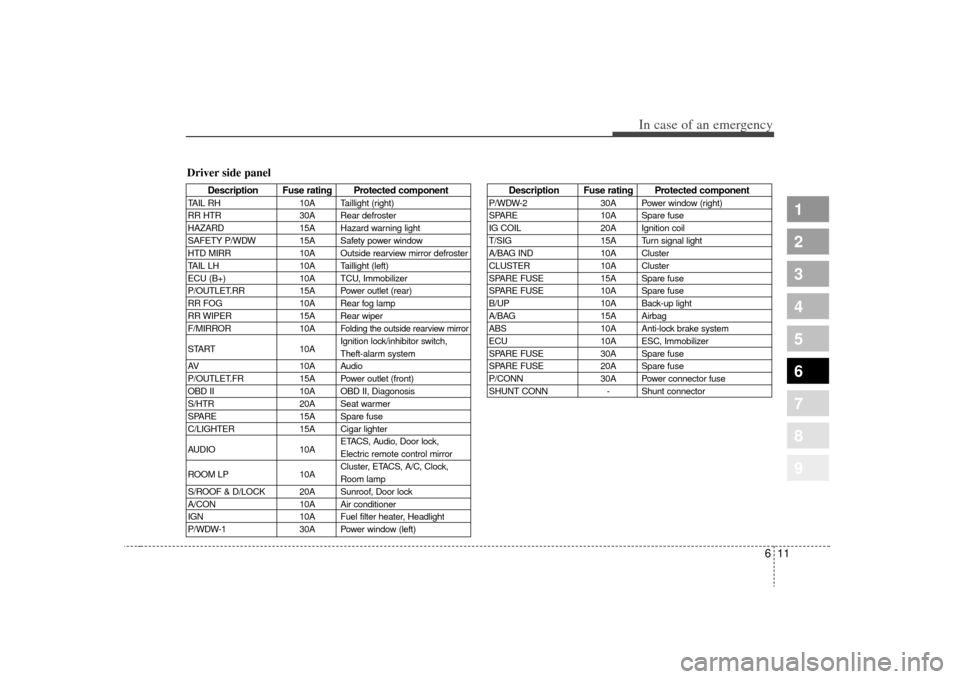
Description Fuse rating Protected component
TAIL RH10A Taillight (right)
RR HTR 30A Rear defroster
HAZARD 15A Hazard warning light
SAFETY P/WDW 15A Safety power window
HTD MIRR 10A Outside rearview mirror defroster
TAIL LH 10A Taillight (left)
ECU (B+) 10A TCU, Immobilizer
P/OUTLET.RR 15A Power outlet (rear)
RR FOG 10A Rear fog lamp
RR WIPER 15A Rear wiper
F/MIRROR 10A
Folding the outside rearview mirror
START10AIgnition lock/inhibitor switch,
Theft-alarm system
AV 10A Audio
P/OUTLET.FR 15A Power outlet (front)
OBD II 10A OBD II, Diagonosis
S/HTR 20A Seat warmer
SPARE 15A Spare fuse
C/LIGHTER 15A Cigar lighter
AUDIO 10AETACS, Audio, Door lock,
Electric remote control mirror
ROOM LP 10ACluster, ETACS, A/C, Clock,
Room lamp
S/ROOF & D/LOCK 20A Sunroof, Door lock
A/CON 10A Air conditioner
IGN 10A Fuel filter heater, Headlight
P/WDW-1 30A Power window (left)
Description Fuse rating Protected component
P/WDW-230A Power window (right)
SPARE 10A Spare fuse
IG COIL 20A Ignition coil
T/SIG 15A Turn signal light
A/BAG IND 10A Cluster
CLUSTER 10A Cluster
SPARE FUSE 15A Spare fuse
SPARE FUSE 10A Spare fuse
B/UP 10A Back-up light
A/BAG 15A Airbag
ABS 10A Anti-lock brake system
ECU 10A ESC, Immobilizer
SPARE FUSE 30A Spare fuse
SPARE FUSE 20A Spare fuse
P/CONN 30A Power connector fuse
SHUNT CONN - Shunt connector
Driver side panel