2009 KIA Sephia ABS
[x] Cancel search: ABSPage 203 of 291

Driving tips20
5
1
2
3
4
5
6
7
8
9
Safety chains You should always attach chains
between your vehicle and your trail-
er. Cross the safety chains under the
tongue of the trailer so that the
tongue will not drop to the road if it
becomes separated from the hitch.
Instructions about safety chains may
be provided by the hitch manufactur-
er or by the trailer manufacturer.
Follow the manufacturer’s recom-
mendation for attaching safety
chains. Always leave just enough
slack so you can turn with your trail-
er. And, never allow safety chains to
drag on the ground.
Trailer brakes If your trailer weighs more than the
maximum weight for a trailer without
brakes, then the trailer needs its own
brakes. You must consult with a
knowledgeable and reputable trailer
vendor to determine which brake
equipped trailer is right for your
needs. Be sure to read and follow the
instructions for the trailer brakes so
you’ll be able to install, adjust and
maintain them properly.
Driving with a trailer Towing a trailer requires experience.
You must gain that experience slow-
ly and carefully which practicing with
an unloaded or lightly loaded trailer.
Before setting out for the open road,
you must get to know your trailer.
Acquaint yourself with the feel of
handling and braking with the trailer.
And always keep in mind that the
vehicle you are driving is now a good
deal longer and not nearly so
responsive as your vehicle is by
itself.
Before you start, check the trailer
hitch and platform, safety chains,
electrical connector(s), lights, tires
and mirror adjustment. If the trailer
has electric brakes, start your vehicle
and trailer moving and then apply the
trailer brake controller by hand to be
sure the brakes are working. This lets
you check your electrical connection
at the same time.
During your trip, check occasionally
to be sure that the load is secure,
and that the lights and any trailer
brakes are still working.
WARNING
Do not use a trailer with its own
brakes unless you are absolute-
ly certain that you have properly
set up the brake system. This is
not a task for amateurs. Use an
experienced, competent trailer
shop for this work.
Page 206 of 291

523
Driving tips
1
2
3
4
5
6
7
8
9
Parking on hills Generally, if you have a trailer
attached to your vehicle, you should
not park your vehicle on a hill. People
can be seriously or fatally injured,
and both your vehicle and the trailer
can be damaged if unexpectedly roll
down hill.
However, if you ever have to park
your trailer on a hill, here’s how to do
it:
1. Pull the vehicle into the parkingspace. Turn the steering wheel in
the direction of the curb (right if
headed down hill, left if headed up
hill). 2. If the vehicle has a manual
transaxle, place the car in neutral.
If the vehicle has an automatic
transaxle, place the car in P
(Park).
3. Set the parking brake and shut off the vehicle.
4. Place chocks under the trailer wheels on the down hill side of the
wheels.
5. Start the vehicle, hold the brakes, shift to neutral, release the parking
brake and slowly release the
brakes until the trailer chocks
absorb the load.
6. Reapply the brakes, reapply the parking brake and shift the vehicle
to R (Reverse) for manual
transaxle or P (Park) for automatic
transaxle.
7. Shut off the vehicle and release the vehicle brakes but leave the
parking brake set.
When you are ready to leave after
parking on a hill 1. With the manual transaxle in Neutral or automatic transaxle in P
(Park), apply your brakes and hold
the brake pedal down while you:
and
2. Slowly remove your foot from the brake pedal.
3. Drive slowly forward until the trail- er is clear of the chocks.
4. Stop and have someone pick up and store the chocks.
WARNING
- Parking on a
hill
Parking your vehicle on a hill
with a trailer attached could
cause serious injury or death,
should the trailer break loose.
WARNING
- Parking brake
It can be dangerous to get out of
your vehicle if the parking brake
is not firmly set or if the engine
is still running. In either case
the vehicle can move suddenly.
You or others could be serious-
ly or fatally injured.
Page 225 of 291

In case of an emergency16
6
1
2
3
4
5
6
7
8
9
Description Fuse rating Protected component
ATM 20A Automatic transaxle control
ECU1 10A Engine control unit
STOP 15A Stop light
F/WIPER 20A Front wiper
R/FOG 10A Rear fog light
F/FOG 15A Front fog light
LO HDLP 15A Headlight (low)
HI HDLP 15A Headlight (high)
A/CON 10A Air conditioner
F/PUMP 15A Fuel pump
T/OPEN 10A Trunk lid opener
FOLD 10A Outside rearview mirror folding
HORN 10A Horn
DEICE 15A Deicer
INJ 15A Injection
SNSR 10A O2 sensor
ECU2 30A Engine control unit
SPARE 10A spare fuse
SPARE 15A spare fuse
SPARE 20A spare fuse
SPARE 30A spare fuse
ABS2 30A Anti-lock brake system
ABS1 30A Anti-lock brake system
IP B+ 50A In panel B+
Description Fuse rating Protected component
BLOWER30A Blower
IGN2 30A Ignition
IGN1 30A Ignition
RAD 30A Radiator fan
COND 20A Condenser fan
ALT 120A Alternater
ATM - Automatic transaxle control relay
WIPER - Wiper relay
F/FOG - Front fog light relay
LO HDLP - Headlight relay (low)
HI HDLP - Headlight relay (high)
A/CON - Air conditioner relay
F/PUMP - Fuel pump
DRL - Daytime running light relay
COND2 - Condenser fan relay
HORN - Horn relay
MAIN - Main relay
START - Start motor relay
RAD - Radiator fan relay
COND - Condenser fan relay
Engine compartment
Page 226 of 291

617
In case of an emergency
1
2
3
4
5
6
7
8
9
Driver-side knee bolster
Description Fuse rating Protected component
START10A Start motor
SRF/D_LOCK 20A Sunroof, Door lock
HAZARD 10A Hazard warning flasher
A/CON 10A Air conditioner
CLUSTER 10A Cluster
RKE 10A Remote keyless entry
S/HTR 20A Seat warmer
C/LIGHTER 15A Cigar lighter
A/BAG 15A Air bag
R/WIPER 15A Rear wiper
AUDIO 10A Audio
ABS 10A Anti-lock brake system
ACC/PWR 15A Accessory / Power socket
ROOM 15A Room lamp
IGN 10A Ignition
ECU 10A Engine control unit
TAIL RH 10A Tail light (right)
T/SIG 10A Turn signal light
RR/HTR 30A Rear window defroster
P/WDW LH 25A Power window (left)
HTD/MIRR 10A Outside rearview mirror heater
P/WDW RH 25A Power window (right)
TAIL LH 10A Tail light (left)
Description Fuse rating Protected component
RR/HTR - Rear window defroster relay
RESISTOR - Resistor
P/WDW - Power window relay
POWER - Accessory / Power socket relay
TAIL - Tail light relay
Page 237 of 291

In case of an emergency28
6
1
2
3
4
5
6
7
8
9
6. Loosen the wheel lug nuts coun-
terclockwise one turn each, but do
not remove any nut until the tire
has been raised off the ground. 7. Place the jack at the front or rear
jacking position closest to the tire
you are changing. Place the jack
at the designated locations under
the frame. The jacking positions
are plates welded to the frame
with two tabs and a raised dot to
index with the jack. 8. Insert the jack handle into the jack
and turn it clockwise, raising the
vehicle until the tire just clears the
ground. This measurement is
approximately 30 mm (1.2 in).
Before removing the wheel lug
nuts, make sure the vehicle is sta-
ble and that there is no chance for
movement or slippage.
9. Remove the wheel lug nuts by turning them counterclockwise,
then remove the wheel.
10. Mount the spare tire into position and install the wheel lug nuts
with the beveled edge inward.
WARNING
- Jack location
To reduce the possibility of
injury, be sure to use only the
jack provided with the vehicle
and in the correct jack position;
never use any other part of the
vehicle for jack support.
1LDN4016
1LDA4015
OLD046014
Page 269 of 291

731
Maintenance
1
2
3
4
5
6
7
8
9
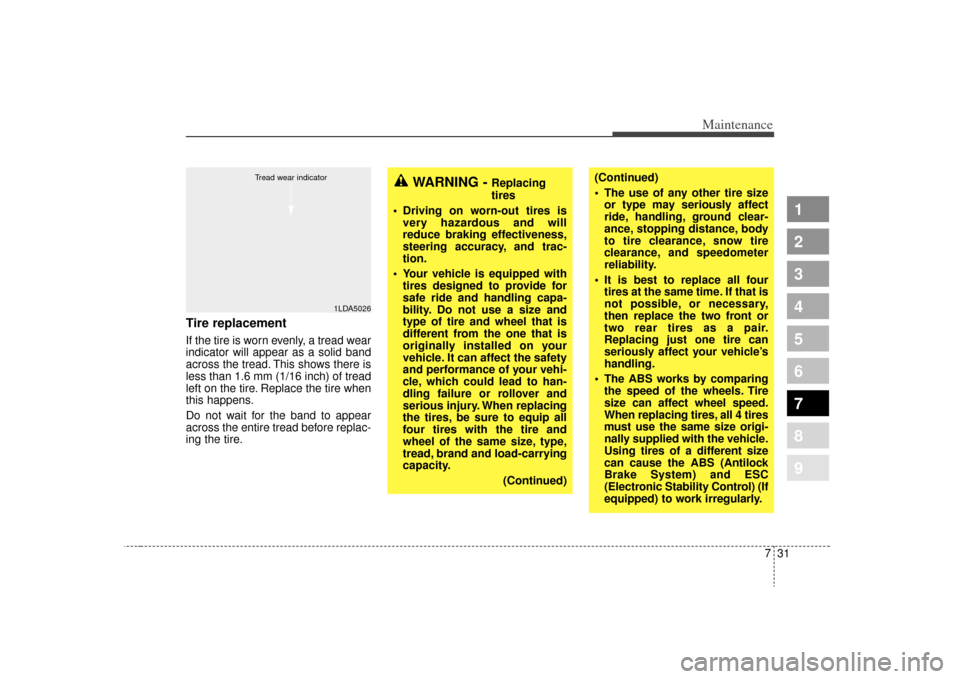
Tire replacementIf the tire is worn evenly, a tread wear
indicator will appear as a solid band
across the tread. This shows there is
less than 1.6 mm (1/16 inch) of tread
left on the tire. Replace the tire when
this happens.
Do not wait for the band to appear
across the entire tread before replac-
ing the tire.
1LDA5026
Tread wear indicator
WARNING -
Replacing
tires
Driving on worn-out tires is very hazardous and will
reduce braking effectiveness,
steering accuracy, and trac-
tion.
Your vehicle is equipped with tires designed to provide for
safe ride and handling capa-
bility. Do not use a size and
type of tire and wheel that is
different from the one that is
originally installed on your
vehicle. It can affect the safety
and performance of your vehi-
cle, which could lead to han-
dling failure or rollover and
serious injury. When replacing
the tires, be sure to equip all
four tires with the tire and
wheel of the same size, type,
tread, brand and load-carrying
capacity.
(Continued)
(Continued)
The use of any other tire sizeor type may seriously affect
ride, handling, ground clear-
ance, stopping distance, body
to tire clearance, snow tire
clearance, and speedometer
reliability.
It is best to replace all four tires at the same time. If that is
not possible, or necessary,
then replace the two front or
two rear tires as a pair.
Replacing just one tire can
seriously affect your vehicle’s
handling.
The ABS works by comparing the speed of the wheels. Tire
size can affect wheel speed.
When replacing tires, all 4 tires
must use the same size origi-
nally supplied with the vehicle.
Using tires of a different size
can cause the ABS (Antilock
Brake System) and ESC
(Electronic Stability Control) (If
equipped) to work irregularly.