2009 KIA Sedona fuel
[x] Cancel search: fuelPage 129 of 356

Features of your vehicle120
3Checking operation All warning lights are checked by turning
the ignition switch ON (do not start the
engine). Any light that does not illuminate
should be checked by an Authorized Kia
Dealer.
After starting the engine, check to make
sure that all warning lights are off. If any
are still on, this indicates a situation that
needs attention. When releasing the
parking brake, the brake system warning
light should go off. The fuel warning light
will stay on if the fuel level is low.
Air bag warning lightThis warning light will illuminate for
approximately 6 seconds each time you
turn the ignition switch to the ON posi-
tion.
If this indicator does not go out, or if it illu-
minates while the vehicle is being driven,
see an authorized Kia Dealer for immedi-
ate service.Anti-lock brake system
(ABS) warning light This light illuminates if the key is turned
to ON and goes off in approximately 3
seconds if the system is operating nor-
mally.
If the light stays on, you may have a
problem with your ABS system. Contact
an authorized Kia dealer as soon as pos-
sible.
Electronic brake force
distribution (EBD) sys-
tem warning lightIf two warning lights illumi-
nate at the same time while
driving, your vehicle has a
problem with ABS and EBD
system.
In this case, your ABS system and regu-
lar brake system may not work normally.
Have the vehicle checked by an
Authorized Kia Dealer as soon as possi-
ble.
WARNINGS AND INDICATORS
WARNING
If the both ABS and Brake warning
lights are ON and stay ON, your
vehicle’s brake system will not work
normally. So you may experience an
unexpected and dangerous situa-
tion during sudden braking. In this
case, avoid high speed driving and
abrupt braking. Have your vehicle
checked by Authorized Kia Dealer
as soon as possible.
AIR
BAG
Page 132 of 356

3 123
Features of your vehicle
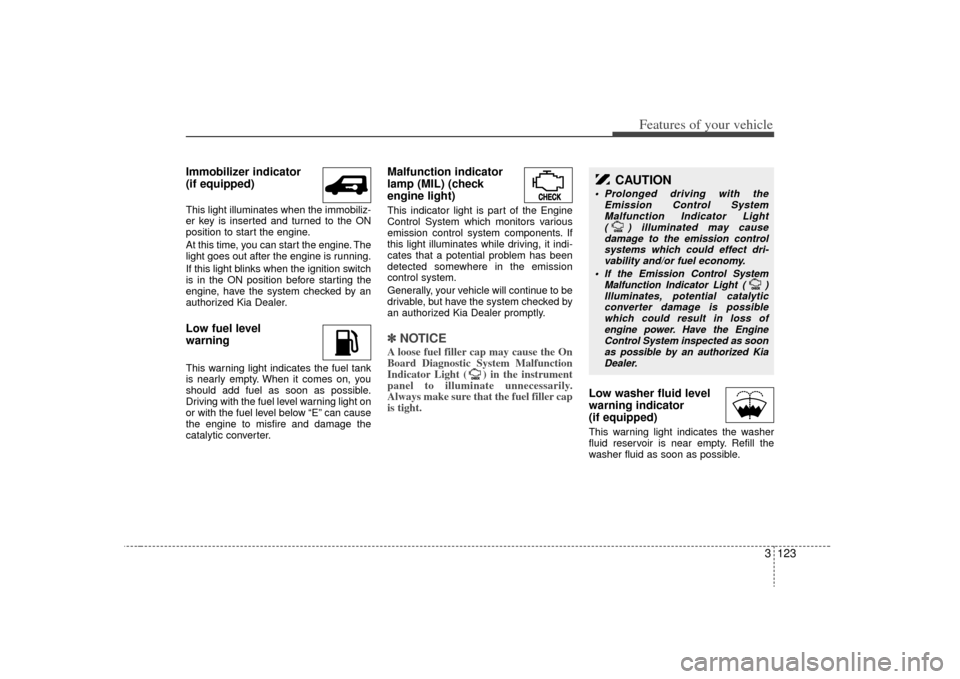
Immobilizer indicator
(if equipped)This light illuminates when the immobiliz-
er key is inserted and turned to the ON
position to start the engine.
At this time, you can start the engine. The
light goes out after the engine is running.
If this light blinks when the ignition switch
is in the ON position before starting the
engine, have the system checked by an
authorized Kia Dealer.Low fuel level
warningThis warning light indicates the fuel tank
is nearly empty. When it comes on, you
should add fuel as soon as possible.
Driving with the fuel level warning light on
or with the fuel level below “E” can cause
the engine to misfire and damage the
catalytic converter.
Malfunction indicator
lamp (MIL) (check
engine light)This indicator light is part of the Engine
Control System which monitors various
emission control system components. If
this light illuminates while driving, it indi-
cates that a potential problem has been
detected somewhere in the emission
control system.
Generally, your vehicle will continue to be
drivable, but have the system checked by
an authorized Kia Dealer promptly.✽ ✽NOTICE A loose fuel filler cap may cause the On
Board Diagnostic System Malfunction
Indicator Light ( ) in the instrument
panel to illuminate unnecessarily.
Always make sure that the fuel filler cap
is tight.
Low washer fluid level
warning indicator
(if equipped) This warning light indicates the washer
fluid reservoir is near empty. Refill the
washer fluid as soon as possible.
CAUTION
Prolonged driving with the
Emission Control SystemMalfunction Indicator Light ( ) illuminated may cause damage to the emission controlsystems which could effect dri-vability and/or fuel economy.
If the
Emission
Control System
Malfunction Indicator Light ( ) Illuminates, potential catalytic converter damage is possiblewhich could result in loss ofengine power. Have the Engine Control System inspected as soonas possible by an authorized KiaDealer.
Page 255 of 356

47
Driving your vehicle
Transaxle rangesP (park)Always come to a complete stop before
shifting into P (Park). This position locks
the transaxle and prevents the front
wheels from rotating.
R (reverse)Use this position to drive the vehicle
backward.
N (neutral)The wheels and transaxle are not locked.
The vehicle will roll freely even on the
slightest incline unless the parking brake
or service brakes are applied.D (drive)This is the normal forward driving posi-
tion. The transaxle will automatically shift
through a 5-gear sequence, providing the
best fuel economy and power.
For extra power when passing another
vehicle or climbing grades, depress the
accelerator fully, at which time the
transaxle will automatically downshift to
the next lower gear.✽ ✽NOTICEAlways come to a complete stop before
shifting into D (Drive).
(Continued)
Never leave a child unattended in
a vehicle.
CAUTION
The transaxle may be damaged ifyou shift into P (Park) while the vehicle is in motion.
CAUTION
Always come to a complete stopbefore shifting into or out of R(Reverse); you may damage the transaxle if you shift into R whilethe vehicle is in motion, except as explained in “Rocking the Vehicle”,in this manual.
WARNING
Shifting into P (Park) while the vehicle is in motion will cause the
drive wheels to lock which will
cause you to lose control of the
vehicle.
Do not use the P (Park) position in place of the parking brake.
Always make sure the shift lever
is latched in the P (Park) position
so that it cannot be moved unless
the lock release button is pushed
in, AND set the parking brake
fully.
Before leaving the driver’s seat, always make sure the shift lever
is in the P (PARK) position. Set
the parking brake fully, shut the
engine off and take the key with
you. Unexpected and sudden
vehicle movement can occur if
you do not follow these precau-
tions in the order specified.
(Continued)
Page 273 of 356

425
Driving your vehicle
Your vehicle's fuel economy depends
mainly on your style of driving, where you
drive and when you drive.
Each of these factors affects how many
kilometers (miles) you can get from a
liter (gallon) of fuel. To operate your vehi-
cle as economically as possible, use the
following driving suggestions to help
save money in both fuel and repairs:
Avoid lengthy warm-up idling. Once theengine is running smoothly, begin driv-
ing. Remember, engine warm-up may
take a little longer on cold days.
Save fuel by accelerating slowly after stopping.
Keep the engine in tune and follow the recommended periodic maintenance
schedule. This will increase the life of
all parts and lower your operating
costs. Do not use the air conditioner unnec-
essarily.
Slow down when driving on rough roads.
For longer tire life and better fuel econ- omy, always keep the tires inflated to
the recommended pressures.
Maintain a safe distance from other vehicles to avoid sudden stops. This
will reduce wear on brake linings and
pads. Driving in such a way will also
save fuel because extra fuel is required
to accelerate back to driving speed.
Do not carry unnecessary weight in the vehicle.
Do not rest your foot on the brake pedal while driving. This can cause
needless wear, possible damage to the
brakes, and poor fuel economy.
Improper wheel alignment results in faster tire wear and lower fuel econo-
my. Open windows at high speeds can
reduce fuel economy.
Fuel economy is less in crosswinds and headwinds. To help offset some of
this loss, slow down when driving in
these conditions.
Keeping a vehicle in good operating con-
dition is important both for economy and
safety. Therefore, have an authorized Kia
dealer perform scheduled inspections
and maintenance.ECONOMICAL OPERATION
WARNING
- Engine off dur- ing motion
Never turn the engine off to coast
down hills or anytime the vehicle is
in motion. The power steering and
power brakes will not function
properly without the engine run-
ning. Instead, keep the engine on
and downshift to an appropriate
gear for engine braking effect. In
addition, turning off the ignition
while driving could engage the
steering wheel lock resulting in
loss of vehicle steering which could
cause serious injury or death.
Page 277 of 356

429
Driving your vehicle
Your vehicle can tow a trailer. To identify
what the vehicle trailering capacity is for
your vehicle, you should read the infor-
mation in “Weight of the Trailer” that
appears later in this section.
Remember that trailering is different than
just driving your vehicle by itself.
Trailering means changes in handling,
durability, and fuel economy. Successful,
safe trailering requires correct equip-
ment, and it has to be used properly.This section contains many time-tested,
important trailering tips and safety rules.
Many of these are important for your
safety and that of your passengers.
Please read this section carefully before
you pull a trailer.
Load-pulling components such as the
engine, transaxle, wheel assemblies, and
tires are forced to work harder against
the load of the added weight. The engine
is required to operate at relatively higher
speeds and under greater loads. This
additional burden generates extra heat.
The trailer also adds considerably to
wind resistance, increasing the pulling
requirements.
Hitches It's important to have the correct hitch
equipment. Crosswinds, large trucks
going by, and rough roads are a few rea-
sons why you’ll need the right hitch. Here
are some rules to follow:
Will you have to make any holes in the
body of your vehicle when you install a
trailer hitch? If you do, then be sure to
seal the holes later when you remove
the hitch.
If you don’t seal them, deadly carbon
monoxide (CO) from your exhaust can
get into your vehicle, as well as dirt and
water.
The bumpers on your vehicle are not intended for hitches. Do not attach
rental hitches or other bumper-type
hitches to them. Use only a frame-
mounted hitch that does not attach to
the bumper.
Item kg (lbs.)
Maximum trailer Without trailer brakes 453 (1000)
weight With trailer brakes 1587 (3500)
Maximum permissible static vertical
load on the coupling device 158 (350)
CAUTION
Pulling a trailer improperly can
damage your vehicle and result in costly repairs not covered by yourwarranty. To pull a trailer correctly,follow the advice in this section.
Page 305 of 356

63
Maintenance
MAINTENANCE SCHEDULE
MAINTENANCEINTERVALS
MAINTENANCE
ITEM
Engine control system
Kilometers or time in months, whichever comes first
× 1,000 km 8 16 24 32 40 48 56 64 72 80 88 96 104 112 120 128
# Months 4 8 12 16 20 24 28 32 36 40 44 48 52 56 60 64
Engine oil & engine oil filter (1) R R R R R R RRRRRRR RRR
Drive belts (tension) I I I I
Cooling system hoses & connections I I I I I
Engine coolant (1) I I I I I R IIIIIRI III
Fuel filter RR
Fuel tank cap, lines, EVAP canister and hoses
II
Fuel tank air filter I R I R I
Air cleaner element (2) I I I I I R IIIIIRI III
Ignition wires I I
Spark plugs
PCV valve (if equipped) I I I I
Idle speed I I I I I
Valve clearance (3) IReplace every 160,000 km
Page 309 of 356

67
Maintenance
OWNER MAINTENANCE Owner maintenance schedule The following lists are vehicle checks and
inspections that should be performed by
the owner or an Authorized Kia Dealer at
the frequencies indicated to help ensure
safe, dependable operation of your vehi-
cle.
Any adverse conditions should be
brought to the attention of your dealer as
soon as possible.
These Owner Maintenance Checks are
generally not covered by warranties and
you may be charged for labor, parts and
lubricants used.When you stop for fuel: Check the engine oil level.
Check coolant level in coolant reser-voir.
Check the windshield washer fluid level.
Look for low or under-inflated tires.
While operating your vehicle: Note any changes in the sound of the exhaust or any smell of exhaust fumes
in the vehicle.
Check for vibrations in the steering wheel. Notice any increased steering
effort or looseness in the steering
wheel, or change in its straight-ahead
position.
Notice if your vehicle constantly turns slightly or “pulls” to one side when trav-
eling on smooth, level road.
When stopping, listen and check for unusual sounds, pulling to one side,
increased brake pedal travel or “hard-
to-push” brake pedal.
If any slipping or changes in the oper- ation of your transaxle occurs, check
the transaxle fluid level.
Check automatic transaxle P (Park) function.
Check parking brake.
Check for fluid leaks under your vehicle (water dripping from the air condition-
ing system during or after use is nor-
mal).
At least monthly: Check coolant level in the coolantrecovery reservoir.
Check the operation of all exterior lights, including the stoplights, turn sig-
nals and hazard warning flashers.
Check the inflation pressures of all tires including the spare.At least twice a year (i.e., every Spring and Fall): Check radiator, heater and air condi- tioning hoses for leaks or damage.
Check windshield washer spray and wiper operation. Clean wiper blades
with clean cloth dampened with wash-
er fluid.
Check headlight alignment.
Check muffler, exhaust pipes, shields and clamps.
Check the lap/shoulder belts for wear and function.
Check for worn tires and loose wheel lug nuts.
WARNING
Be careful when checking your
engine coolant level when the
engine is hot. Scalding hot coolant
and steam may blow out under
pressure. This could cause burns or
other serious injury.
Page 327 of 356

625
Maintenance
Description Fuse ratingProtected component
ENG7.5A Automatic shift lever switch, Vehicle speed sensor, Inhibitor switch, Transaxle control module,
Input speed sensor, Output speed sensor, Back-up lamp switch, Fuel filter
IG1 7.5A Trip computer, Buzzer(Back warning system), Cluster, ESC switch, Ambient temperature sensor, Generator
ABS 7.5A ABS control module, ESC control module, Yaw rate sensor, Steering angle sensor
AIRBAG 15A Air bag control module
ALTERNATOR - Generator relay
SHUNT - Shunt connector
Description Fuse rating Protected component
RR D/LOCK20A Sliding door lock relay, Sliding door unlock relay, Sliding door lock actuator, Tailgate lock actuator
RR WIPER 15A Rear wiper relay, Rear wiper motor
RR DEFOG 25A Rear window defroster relay, Rear window defroster
POWER TAIL GATE 30A Power tailgate module
P/QUARTER 10A Power rear quarter glass open relay, Power rear quarter glass close relay, Power rear quarter glass motor
RR P/WIN-RH 25A Sliding door power window relay(Right), Sliding door power window motor(Right)
RR P/WIN-LH 25A Sliding door power window relay(Left), Sliding door power window motor(Left)
PSD-RH 30A Power sliding door module(Right)
PSD-LH 30A Power sliding door module(Left)
LUGGAGE 7.5A Step lamp, Power tailgate ON/OFF switch, Tailgate lamp
FUEL DOOR 15A Fuel filler lid relay, Fuel filler lid actuator
RR P/OTLT-LH 15A Rear power outlet(Left)
RR P/OTLT-RH 15A Rear power outlet(Right)
RR DEFOG RELAY - Rear window defroster relayRear cargo area panel