2009 KIA Rio ECU
[x] Cancel search: ECUPage 51 of 219

Knowing your vehicle42
3Placing a passenger safety belt
into the auto lock modeThe use of the auto lock mode will
ensure that the normal movement of the
child in the vehicle does not cause the
safety belt to be pulled out and loosen
the firmness of its hold on the child
restraint system. To secure a child
restraint system, use the following proce-
dure.
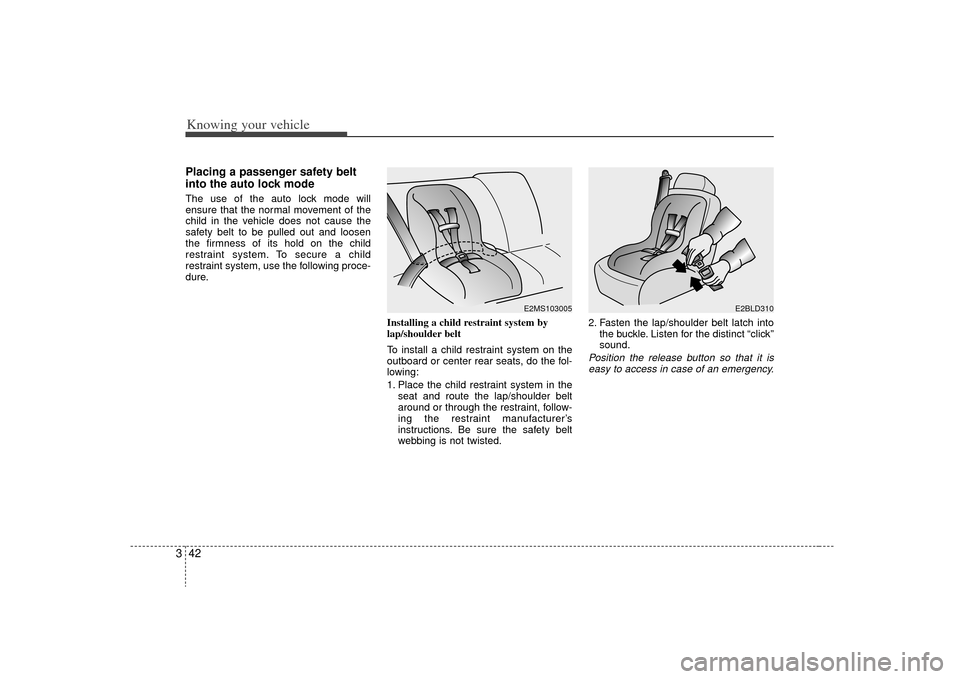
Installing a child restraint system by
lap/shoulder belt
To install a child restraint system on the
outboard or center rear seats, do the fol-
lowing:
1. Place the child restraint system in theseat and route the lap/shoulder belt
around or through the restraint, follow-
ing the restraint manufacturer’s
instructions. Be sure the safety belt
webbing is not twisted. 2. Fasten the lap/shoulder belt latch into
the buckle. Listen for the distinct “click”
sound.
Position the release button so that it iseasy to access in case of an emergency.
E2MS103005
E2BLD310
Page 53 of 219

Knowing your vehicle44
3When the safety belt is allowed to
retract to its fully stowed position, the
retractor will automatically switch
from the “Auto Lock” mode to the
emergency lock mode for normal
adult usage.
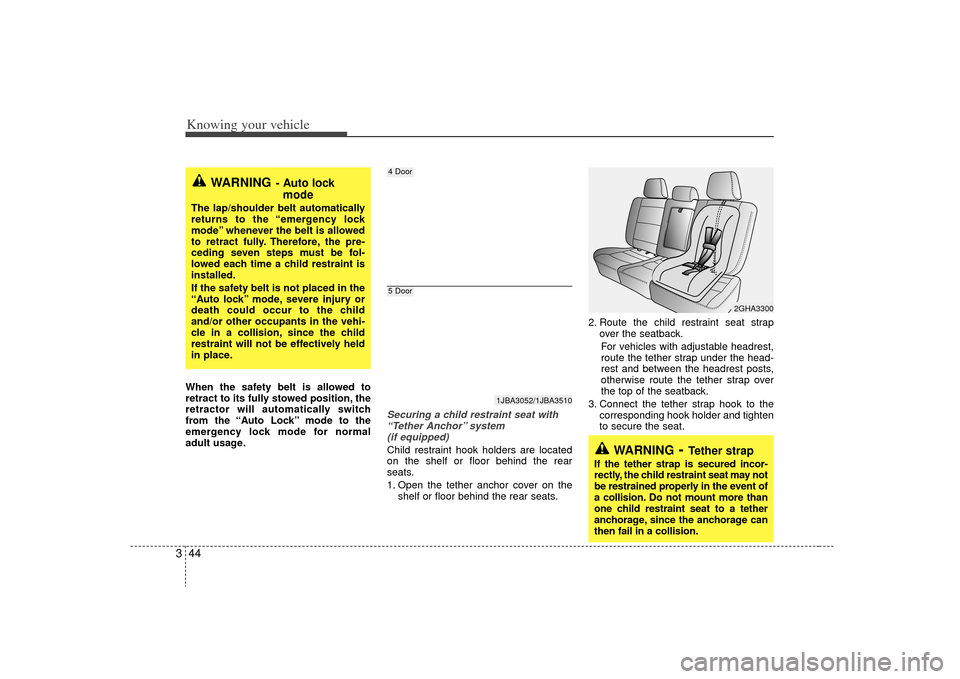
Securing a child restraint seat with
“Tether Anchor” system (if equipped) Child restraint hook holders are located
on the shelf or floor behind the rear
seats.
1. Open the tether anchor cover on the shelf or floor behind the rear seats. 2. Route the child restraint seat strap
over the seatback.
For vehicles with adjustable headrest,
route the tether strap under the head-
rest and between the headrest posts,
otherwise route the tether strap over
the top of the seatback.
3. Connect the tether strap hook to the corresponding hook holder and tighten
to secure the seat.
WARNING
- Auto lockmode
The lap/shoulder belt automatically
returns to the “emergency lock
mode” whenever the belt is allowed
to retract fully. Therefore, the pre-
ceding seven steps must be fol-
lowed each time a child restraint is
installed.
If the safety belt is not placed in the
“Auto lock” mode, severe injury or
death could occur to the child
and/or other occupants in the vehi-
cle in a collision, since the child
restraint will not be effectively held
in place.
1JBA3052/1JBA3510
4 Door5 Door
2GHA3300
WARNING
- Tether strap
If the tether strap is secured incor-
rectly, the child restraint seat may not
be restrained properly in the event of
a collision. Do not mount more than
one child restraint seat to a tether
anchorage, since the anchorage can
then fail in a collision.
Page 54 of 219

345
Knowing your vehicle
Child seat lower anchorsSome child seat manufacturers make
child restraint seats that are labeled as
LATCH or LATCH-compatible child
restraint system. LATCH stands for
"Lower Anchors and Tethers for
Children". These seats include two rigid
or webbing mounted attachments that
connect to two LATCH anchors at specif-
ic seating positions in your vehicle. This
type of child restraint seat eliminates the
need to use seat belts to attach the child
seat in the rear seats.Child restraint symbols are located on
the left and right rear seat backs to indi-
cate the position of the lower anchors for
child restraints.
WARNING
- Child restraint
check
Check that the child restraint sys-
tem is secured by pushing and
pulling it in different directions.
Incorrectly fitted child restraints
may swing, twist, tip or come away
causing death or injury.
WARNING
- Child restraintanchorage
Child restraint anchorages are
designed to withstand only those
loads imposed by correctly fitted
child restraints. Under no circum-
stances are they to be used for
adult seat belts or harnesses or
for attaching other items or
equipment to the vehicle.
The tether strap may not work properly if attached somewhere
other than the correct tether
anchor.
1JBA3157
1JBN3053
Lower AnchorLower Anchor
Position Indicator
Page 55 of 219

Knowing your vehicle46
3
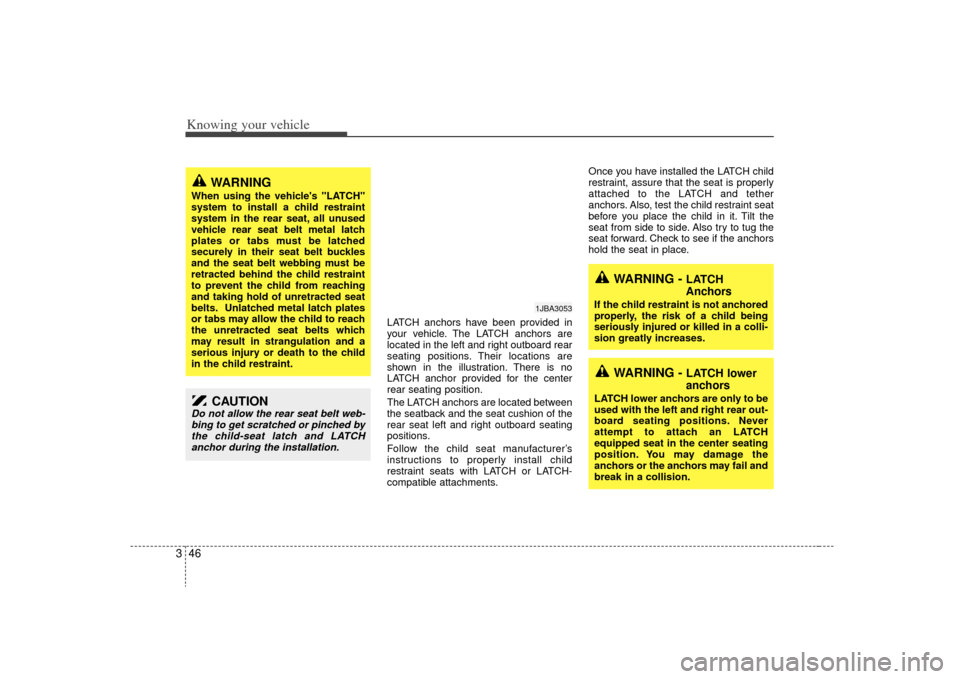
LATCH anchors have been provided in
your vehicle. The LATCH anchors are
located in the left and right outboard rear
seating positions. Their locations are
shown in the illustration. There is no
LATCH anchor provided for the center
rear seating position.
The LATCH anchors are located between
the seatback and the seat cushion of the
rear seat left and right outboard seating
positions.
Follow the child seat manufacturer’s
instructions to properly install child
restraint seats with LATCH or LATCH-
compatible attachments. Once you have installed the LATCH child
restraint, assure that the seat is properly
attached to the LATCH and tether
anchors. Also, test the child restraint seat
before you place the child in it. Tilt the
seat from side to side. Also try to tug the
seat forward. Check to see if the anchors
hold the seat in place.
WARNING -
LATCH
Anchors
If the child restraint is not anchored
properly, the risk of a child being
seriously injured or killed in a colli-
sion greatly increases.
WARNING -
LATCH lower
anchors
LATCH lower anchors are only to be
used with the left and right rear out-
board seating positions. Never
attempt to attach an LATCH
equipped seat in the center seating
position. You may damage the
anchors or the anchors may fail and
break in a collision.
WARNING
When using the vehicle's "LATCH"
system to install a child restraint
system in the rear seat, all unused
vehicle rear seat belt metal latch
plates or tabs must be latched
securely in their seat belt buckles
and the seat belt webbing must be
retracted behind the child restraint
to prevent the child from reaching
and taking hold of unretracted seat
belts. Unlatched metal latch plates
or tabs may allow the child to reach
the unretracted seat belts which
may result in strangulation and a
serious injury or death to the child
in the child restraint.
1JBA3053
CAUTION
Do not allow the rear seat belt web-
bing to get scratched or pinched by the child-seat latch and LATCHanchor during the installation.
Page 61 of 219

Knowing your vehicle52
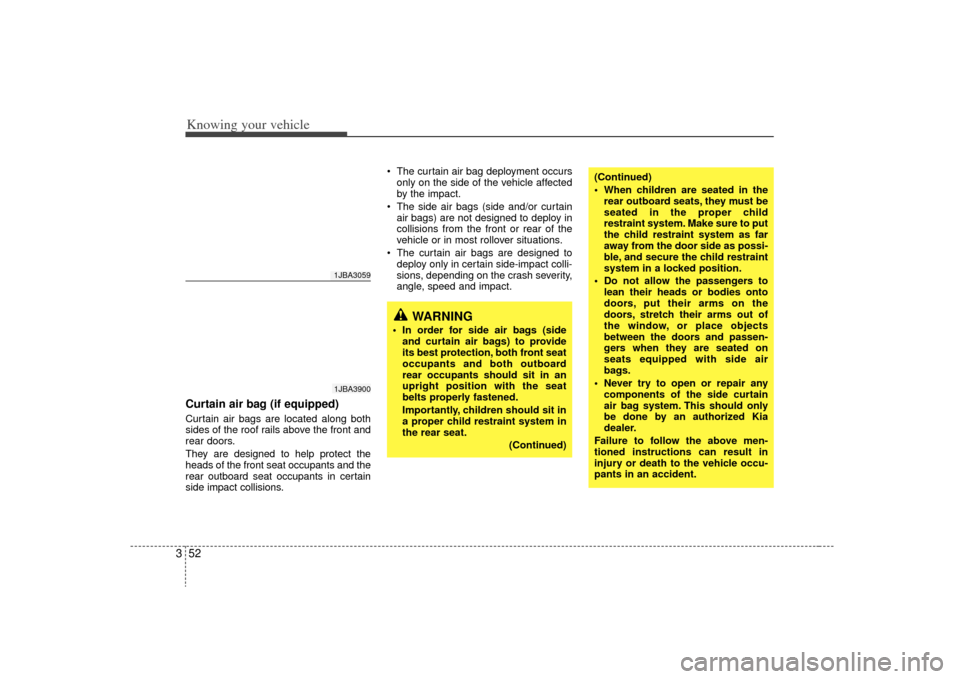
3Curtain air bag (if equipped)Curtain air bags are located along both
sides of the roof rails above the front and
rear doors.
They are designed to help protect the
heads of the front seat occupants and the
rear outboard seat occupants in certain
side impact collisions. The curtain air bag deployment occurs
only on the side of the vehicle affected
by the impact.
The side air bags (side and/or curtain air bags) are not designed to deploy in
collisions from the front or rear of the
vehicle or in most rollover situations.
The curtain air bags are designed to deploy only in certain side-impact colli-
sions, depending on the crash severity,
angle, speed and impact.
1JBA30591JBA3900
WARNING
In order for side air bags (sideand curtain air bags) to provide
its best protection, both front seat
occupants and both outboard
rear occupants should sit in an
upright position with the seat
belts properly fastened.
Importantly, children should sit in
a proper child restraint system in
the rear seat.
(Continued)
(Continued)
When children are seated in therear outboard seats, they must be
seated in the proper child
restraint system. Make sure to put
the child restraint system as far
away from the door side as possi-
ble, and secure the child restraint
system in a locked position.
Do not allow the passengers to lean their heads or bodies onto
doors, put their arms on the
doors, stretch their arms out of
the window, or place objects
between the doors and passen-
gers when they are seated on
seats equipped with side air
bags.
Never try to open or repair any components of the side curtain
air bag system. This should only
be done by an authorized Kia
dealer.
Failure to follow the above men-
tioned instructions can result in
injury or death to the vehicle occu-
pants in an accident.
Page 69 of 219

Knowing your vehicle60
3
Air bag warning lightThe purpose of air bag warning light in
your instrument panel is to alert you of a
potential problem with your air bag -
Supplemental Restraint System (SRS).
When the ignition switch is turned ON,
the indicator light should blink or illumi-
nate for approximately 6 seconds, then
go off.
Have the system checked if:
The light does not turn on briefly when
you turn the ignition ON.
The light stays on after the engine starts.
The light comes on while the vehicle is in motion.
Air bag (Supplemental Restraint
System) service Your Supplemental Restraint System is
virtually maintenance-free. There are no
parts which you can service.
You must have the system serviced
under the following circumstances:
If an air bag ever inflates, the air bagmust be replaced. Do not try to remove
or discard the air bag by yourself. This
must be done by an authorized Kia
dealer.
If the air bag warning indicator light alerts you to a problem, have the air
bag system checked as soon as possi-
ble. Otherwise, your air bag system
may be ineffective.
WARNING
Never put child restraint in thefront passenger seat. If the front
passenger air bag inflates, it may
cause severe or fatal injuries.
When children are seated in the rear outboard seats in which cur-
tain air bags are equipped, be
sure to put the child restraint sys-
tem as far away from the door
side as possible, and secure the
child restraint system to be
locked in position.
Inflation of side or curtain air bag
(if equipped) could cause severe
injury or death due to the expan-
sion impact.
CAUTION
- No modification
Do not modify any part of the air bagsystem. Modification could makethe air bag system ineffective or could cause unnecessary deploy-ment.
W7-147
Page 71 of 219

Knowing your vehicle62
3Outside the vehicle To open the trunk, insert the key into
the lock and turn it to the right (clock-
wise).
To close the trunk, use both hands to push the trunk lid down. Check to see
if the trunk is completely shut.
Trunk room lampTrunk room lamp turns on when the trunk
is opened. It remains on until the trunk is
securely closed.✽ ✽ NOTICEMake sure to close the trunk securely. If
it remains open while engine is not run-
ning, it may cause battery discharge
because trunk room lamp remains on.
TRUNK (IF EQUIPPED)
1JBN3079
1JBA3076
PROPOSITION 65
WARNING
Engine exhaust and a wide variety
of automobile components and
parts, including components found
in the interior furnishings in a vehi-
cle, contain or emit chemicals
known to the State of California to
cause cancer and birth defects and
reproductive harm. In addition, cer-
tain fluids contained in vehicles
and certain products of component
wear contain or emit chemicals
known to the State of California to
cause cancer and birth defects or
other reproductive harm.
Page 74 of 219

365
Knowing your vehicle
Closing the hood1. Before closing the hood, check the fol-lowing:
must be correctly installed.
bustible material must be removed
from the engine compartment.
2. Secure the support rod in its clip.
3. Lower the hood to about 30 cm (12 inches) height and then let it drop to
properly lock in place.
Make sure the hood is properly locked
before driving.
FUEL FILLER LID 1. Stop the engine.
2. To open the fuel filler lid, pull the release lever. (if equipped)
CAUTION
- Hood
Before closing the hood, make sure that all engine parts andtools have been removed fromthe engine area and that no one’s hands are near the hood opening.
Do not leave gloves, rags or any other combustible material in theengine compartment. Doing somay cause a heat-induced fire.
CAUTION
To avoid injury from sharp edges, itis recommended that protective gloves be worn if there is a need toopen the fuel filler door manually.
1JBA3207
5 Door