Page 171 of 502
NOTE:Be extremely careful when putting up the soft
top to prevent the doors from getting scratched. It may be
helpful to open the rear doors.
1. Install the door frames, if removed. Refer to “Door
Frame” in this section.
2. Undo the straps used to secure the top in the down
position and store in secure location.
3. Open the swing gate.
4. Grasp the folded side bows and lift to the top of the
rear door frames.
NOTE: Help from another person will ease this opera-
tion.
3
UNDERSTANDING THE FEATURES OF YOUR VEHICLE 169
Page 181 of 502
23. Close the header latches and return the sun visors to
their secured position.SUNRIDER�(TWO-DOOR MODELS) — IF
EQUIPPED
CAUTION!
Operating the top, opening a door or lowering a
window while the top is wet may allow water to drip
into the vehicle’s interior.
NOTE: If you are going to be driving faster than 40 mph
(64 km/h) with the Sunrider� feature open, it is recom-
mended that you remove the rear window of the vehicle.3
UNDERSTANDING THE FEATURES OF YOUR VEHICLE 179
Page 184 of 502
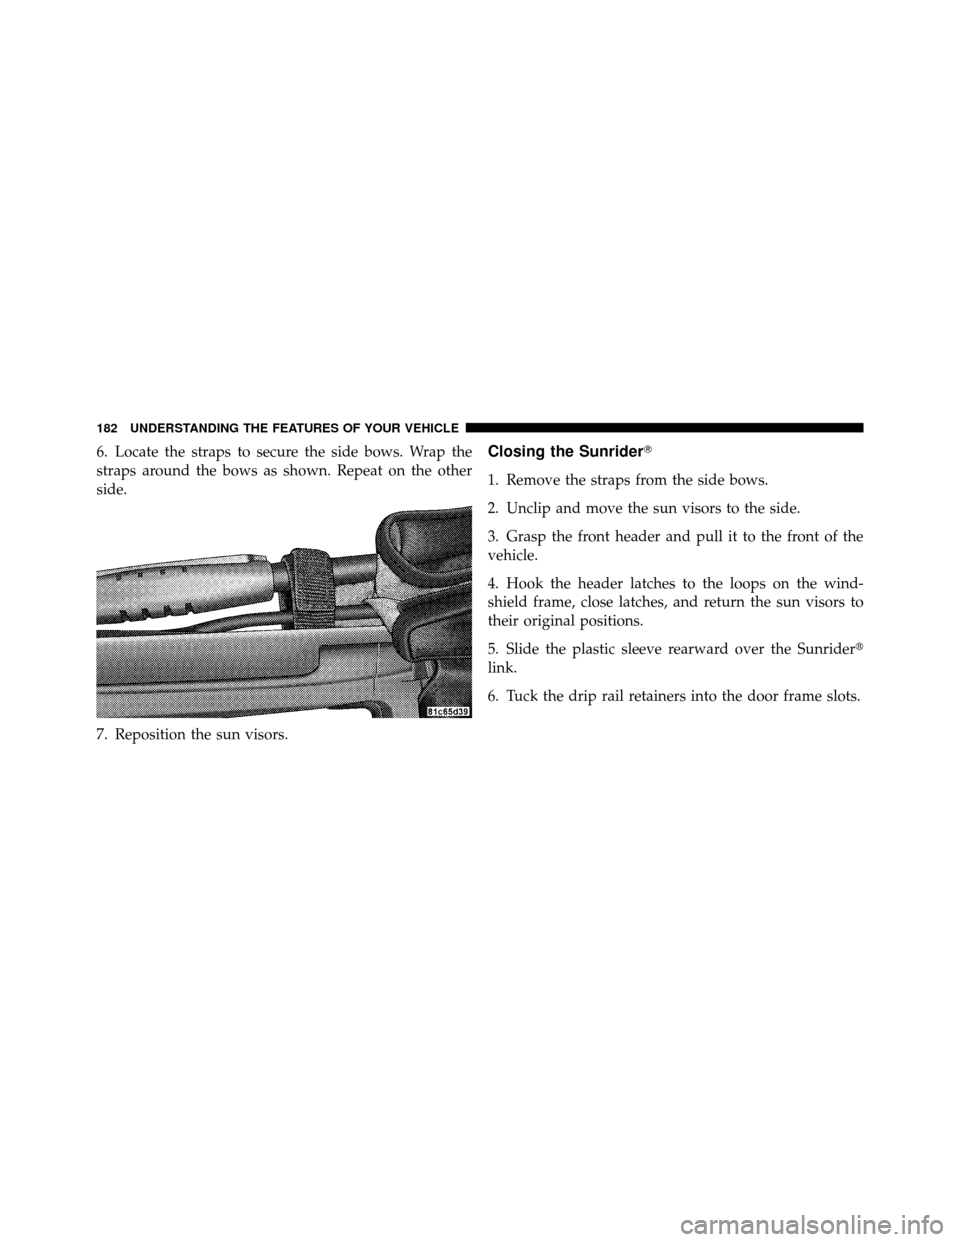
6. Locate the straps to secure the side bows. Wrap the
straps around the bows as shown. Repeat on the other
side.
7. Reposition the sun visors.Closing the Sunrider�
1. Remove the straps from the side bows.
2. Unclip and move the sun visors to the side.
3. Grasp the front header and pull it to the front of the
vehicle.
4. Hook the header latches to the loops on the wind-
shield frame, close latches, and return the sun visors to
their original positions.
5. Slide the plastic sleeve rearward over the Sunrider�
link.
6. Tuck the drip rail retainers into the door frame slots.
182 UNDERSTANDING THE FEATURES OF YOUR VEHICLE
Page 187 of 502
5. Fold back the front section of the top and gently rest
the header on top of the rear portion of the deck.6. Fold the top material so that the plastic retainers form
a “W” as shown. Enter the vehicle and move the material
into two folds. Ensure that the straps are securely stowed.
7. Close the front header latches.
3
UNDERSTANDING THE FEATURES OF YOUR VEHICLE 185
Page 188 of 502

8. Secure the top by using the two provided straps. Each
strap will wrap around the side bow and Velcro�to itself;
use one strap on each side of the vehicle.
To Close
Perform the above steps in the opposite order.
NOTE: Failure to fold the fabric rearward will allow the
material to sag and may block the rearview mirror.FOLDING WINDSHIELD
The fold-down windshield and removable side bars on
your vehicle are structural elements that can provide
some protection in some accidents. The windshield also
provides some protection against weather, road debris
and intrusion of small branches and other objects.
Do not drive your vehicle on-road with the windshield
down and the side bars removed as you lose the protec-
tion these structural elements can provide.
If required for certain off-road uses, the side bars can be
removed and the windshield folded down. However, the
protection afforded by these features is then lost. If you
remove the side bars and fold down the windshield,
drive slowly and cautiously. It is recommended that the
speed of the vehicle be limited to 10 mph (16 km/h), with
low range operation preferred if you are driving off-road
with the windshield folded down.
186 UNDERSTANDING THE FEATURES OF YOUR VEHICLE
Page 189 of 502

Raise the windshield and reinstall the side bars as soon as
the task that required their removal is completed and
before you return to on-road driving. Both you and your
passenger should wear seat belts at all times, on-road and
off-road, regardless of whether the windshield is raised
or folded down.
Outside rearview mirrors are mounted on the doors. If
you choose to remove the doors, see your authorized
dealer for a replacement cowl-mounted outside mirror.
Federal law requires outside mirrors on vehicles for
on-road use.
WARNING!
Carefully follow these warnings to help protect
against personal injury:
•Do not drive your vehicle on-road with the wind-
shield down.(Continued)
WARNING! (Continued)
•Do not drive your vehicle unless the windshield is
securely fastened, either up or down.
•Eye protection, such as goggles, should be worn at
all times when the windshield is down.
•Be sure that you carefully follow the instructions
for raising the windshield. Make sure that the
folding windshield, windshield wipers, side bars,
and all associated hardware and fasteners are
correctly and tightly assembled before driving
your vehicle. Failure to follow these instructions
may prevent your vehicle from providing you and
your passengers protection in some accidents.
•If you remove the doors, store them outside the
vehicle. In the event of an accident, a loose door
may cause personal injury.
3
UNDERSTANDING THE FEATURES OF YOUR VEHICLE 187
Page 191 of 502
CAUTION!
Do not remove the head impact foam from the side
bars, as damage to the foam may result.NOTE:
Store all of the mounting bolts in their original
threaded holes and tighten for safekeeping.
5. Remove the side bar assembly, and reattach the sport
bar Velcro� covering.
6. To safely store the side bars in your vehicle, use four
cinch straps (available from your authorized dealer).
Attach the straps through the slots located on the floor
behind the folded rear seat at the front of the storage bin
cover.
WARNING!
You or others could be injured if you carry the side
bars loose in your vehicle. Remove the side bars from
the vehicle or securely store them as described or
they may cause personal injury if an accident occurs.
See your authorized dealer for the cinch straps.
3
UNDERSTANDING THE FEATURES OF YOUR VEHICLE 189
Page 192 of 502
7. Remove the windshield wiper arms by first pulling
the wiper away from the windshield and out to the
“lock” position. Unsnap the wiper arm nut caps, and
remove the retaining nuts. Lift the wiper arms off and
store them in the center console or securely behind the
rear seat.
NOTE:It may be necessary to use a battery terminal
puller tool in order to separate the wiper arms from the
shaft after the nuts have been removed.
8. Remove the lower windshield plates by removing the
six black round-headed Torx� head screws (using a #40
Torx� head driver) on each side of the base of the
windshield. 9. Lower the windshield gently until it contacts the
rubber hood bumpers.
10. Secure the windshield by passing a cinch strap
through the footman hoop on the center of the hood and
on the center of the windshield frame. Tighten the strap
to secure the windshield in place.
190 UNDERSTANDING THE FEATURES OF YOUR VEHICLE