Page 72 of 457

Airbag Warning Light
The light should come on and remain on for six to eight
seconds as a bulb check when the ignition switch is first
turned ON. If the LED is not lit during starting, have it
checked. If the light stays on, flickers, or comes on while
driving, have the system checked by an authorized
dealer.
Defroster
Check operation by selecting the defrost mode and place
the blower control on high speed. You should be able to
feel the air directed against the windshield. See your
authorized dealer for service if your defroster is
inoperable.
Periodic Safety Checks You Should Make Outside
The Vehicle
Tires
Examine tires for excessive tread wear or uneven wear
patterns. Check for stones, nails, glass, or other objects
lodged in the tread. Inspect tread and sidewall for cuts or
cracks. Check the wheel nuts for tightness. Check the
tires (including spare) for proper pressure.
Lights
Have someone observe the operation of exterior lights
while you work the controls. Check turn signal and high
beam indicator lights on the instrument panel.
Fluid Leaks
Check the area under the vehicle after overnight parking
for fuel, engine coolant, oil or other fluid leaks. Also, if
gasoline fumes are detected or fuel, power steering fluid,
transmission fluid or brake fluid leaks are suspected, the
cause should be located and corrected immediately.
70 THINGS TO KNOW BEFORE STARTING YOUR VEHICLE
Page 172 of 457

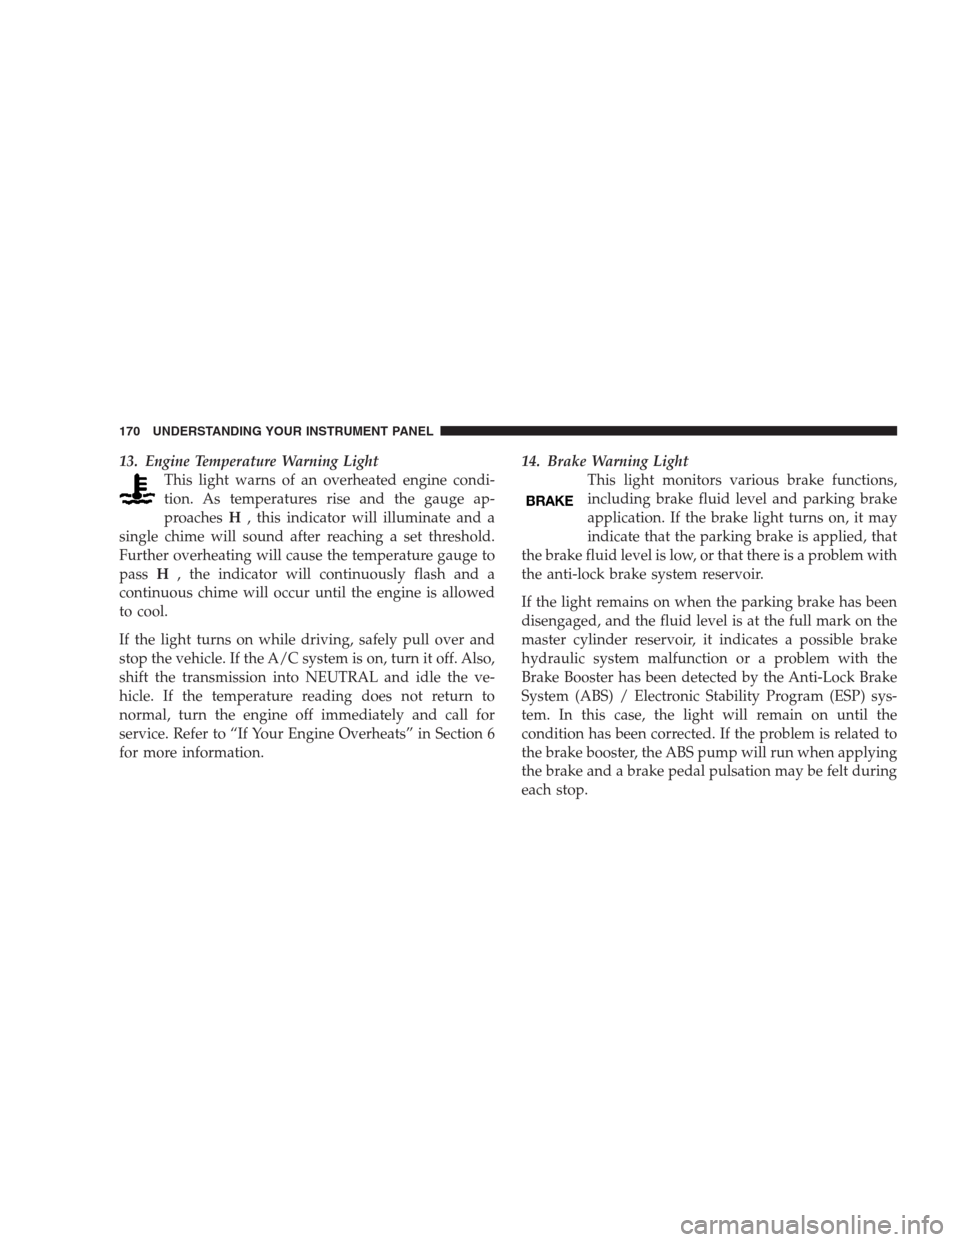
13. Engine Temperature Warning Light
This light warns of an overheated engine condi-
tion. As temperatures rise and the gauge ap-
proachesH, this indicator will illuminate and a
single chime will sound after reaching a set threshold.
Further overheating will cause the temperature gauge to
passH, the indicator will continuously flash and a
continuous chime will occur until the engine is allowed
to cool.
If the light turns on while driving, safely pull over and
stop the vehicle. If the A/C system is on, turn it off. Also,
shift the transmission into NEUTRAL and idle the ve-
hicle. If the temperature reading does not return to
normal, turn the engine off immediately and call for
service. Refer to “If Your Engine Overheats” in Section 6
for more information.14. Brake Warning Light
This light monitors various brake functions,
including brake fluid level and parking brake
application. If the brake light turns on, it may
indicate that the parking brake is applied, that
the brake fluid level is low, or that there is a problem with
the anti-lock brake system reservoir.
If the light remains on when the parking brake has been
disengaged, and the fluid level is at the full mark on the
master cylinder reservoir, it indicates a possible brake
hydraulic system malfunction or a problem with the
Brake Booster has been detected by the Anti-Lock Brake
System (ABS) / Electronic Stability Program (ESP) sys-
tem. In this case, the light will remain on until the
condition has been corrected. If the problem is related to
the brake booster, the ABS pump will run when applying
the brake and a brake pedal pulsation may be felt during
each stop.
170 UNDERSTANDING YOUR INSTRUMENT PANEL
Page 271 of 457

CAUTION! (Continued)
•Driving through standing water may cause dam-
age to your vehicle’s drivetrain components. Al-
ways inspect your vehicle’s fluids (i.e., engine oil,
transmission/transaxle, axle, etc.) for signs of con-
tamination (i.e., fluid that is milky or foamy in
appearance) after driving through standing water.
Do not continue to operate the vehicle if any fluid
appears contaminated, as this may result in further
damage. Such damage is not covered by the New
Vehicle Limited Warranty.
•Getting water inside your vehicle’s engine can
cause it to lock up and stall out, and cause serious
internal damage to the engine. Such damage is not
covered by the New Vehicle Limited Warranty.
WARNING!
•Driving through standing water limits your vehi-
cle’s traction capabilities. Do not exceed 5 mph
(8 km/h) when driving through standing water.
•Driving through standing water limits your vehi-
cle’s braking capabilities, which increases stop-
ping distances. Therefore, after driving through
standing water, drive slowly and lightly press on
the brake pedal several times to dry the brakes.
•Getting water inside your vehicle’s engine can
cause it to lock up and stall out, and leave you
stranded.
•Failure to follow these warnings may result in
injuries that are serious or fatal to you, your
passengers, and others around you.
STARTING AND OPERATING 269
5
Page 349 of 457

Towing Tips
Before setting out on a trip, practice turning, stopping
and backing the trailer in an area away from heavy
traffic.
Towing Tips — Automatic Transmission
The automatic transmission fluid and filter should be
changed if you REGULARLY tow a trailer for more than
45 minutes of continuous operation. Refer to the “Main-
tenance Schedule” in Section 8 for transmission fluid
change intervals.
NOTE:Check the automatic transmission fluid level
before towing.
Towing Tips — Electronic Speed Control (If
Equipped)
�
Do not use in hilly terrain or with heavy loads.
�When using the speed control, if you experience speed
drops greater than 10 mph (16 km/h), disengage until
you can get back to cruising speed.
�Use speed control in flat terrain and with light loads to
maximize fuel efficiency.
Towing Tips — Cooling System
To reduce the potential for engine and transmission
overheating, take the following actions:
�City Driving
When stopped for short periods of time, put transmission
in NEUTRAL but do not increase engine idle speed.
�Highway Driving
Reduce speed.
�Air Conditioning
Turn off temporarily.
STARTING AND OPERATING 347
5
Page 388 of 457

Automatic Transaxle (CVT)
Selection Of Lubricant
It is important that the proper lubricant is used in the
transaxle to assure optimum transaxle performance. Use
only the manufacturer’s recommended transmission
fluid which has been formulated with special metal to
metal friction coefficient additives to provide the proper
steel belt traction on the drive and driven pulleys. Refer
to “Fluids, Lubricants, and Genuine Parts” in this section
for the correct fluid type.
CAUTION!
Using a transmission fluid other than the manufac-
turer’s recommended fluid will cause belt slip and
result in a complete transmission failure! Refer to
“Fluids, Lubricants, and Genuine Parts” in this sec-
tion for the correct fluid type.
Fluid Level Check
The fluid level in the automatic transaxle should be
checked only by a trained technician.
Fluid And Filter Changes
Refer to the “Maintenance Schedule” in Section 8 for the
correct maintenance interval.
Special Additives
Do not add any materials (other than leak detection dyes)
to Continuously Variable Transaxle (CVT) Fluid
(CVTF+4). CVTF+4 is an engineered product and its
performance may be impaired by supplemental
additives.
Manual Transaxle
Lubricant Selection
Use only the manufacturers recommended transmission
fluid. Refer to “Fluids, Lubricants, and Genuine Parts” in
this section for the correct fluid type.
386 MAINTAINING YOUR VEHICLE
Page 408 of 457
Chassis
Component Fluid, Lubricant, or Genuine Part
Automatic Transaxle (CVT) MOPAR�CVTF + 4 Automatic Transmission Fluid
Manual Transaxle MOPAR�ATF+4 Automatic Transmission Fluid
Rear Drive Assembly (RDA) MOPAR�Gear & Axle Lubricant SAE 80W-90 API GL 5 or equivalent non-
synthetic product.
Power Transfer Unit (PTU) MOPAR�Gear & Axle Lubricant SAE 80W-90 API GL 5 or equivalent non-
synthetic product.
Brake Master Cylinder MOPAR�DOT 3, SAE J1703 should be used. If DOT 3, SAE J1703 brake
fluid is not available, then DOT 4 is acceptable. Use only recommended
brake fluids or equivalent.
Power Steering Reservoir MOPAR�Power Steering Fluid +4 or ATF+4 Automatic Transmission
Fluid.
406 MAINTAINING YOUR VEHICLE
Page 412 of 457
Once a Month
•Check the tire pressure and look for unusual wear or
damage.
•Inspect the battery and clean and tighten the terminals
as required.
•Check the fluid levels of coolant reservoir, brake
master cylinder, power steering and transmission and
add as needed.
•Check all lights and other electrical items for correct
operation.At Each Oil Change
•Change the engine oil filter.
•Inspect the brake hoses and lines.
•Check the manual transmission fluid level.
CAUTION!
Failure to perform the required maintenance items
may result in damage to the vehicle.
Required Maintenance Intervals
Refer to the Maintenance Schedules on the following
pages for the required maintenance intervals.
410 MAINTENANCE SCHEDULES
8
M
A
I
N
T
E
N
A
N
C
E
S
C
H
E
D
U
L
E
S
Page 416 of 457

48,000 Miles (80,000 km) or 48 Months Maintenance Service
Schedule
❏Change the engine oil and engine oil filter.
❏Rotate tires.
❏If using your vehicle for any of the following: Dusty or off-road conditions. Inspect the
engine air cleaner filter; replace if necessary.
❏Inspect the brake linings; replace if necessary.
❏Replace the air conditioning filter.
❏Inspect the CV joints.
❏Inspect exhaust system.
❏Inspect the front suspension, tie rod ends and boot seals; replace if necessary.
❏Change the manual transmission fluid if using your vehicle for any of the following: trailer
towing, snow plowing, heavy loading, taxi, police, delivery service (commercial service),
off-road, desert operation or more than 50% of your driving is at sustained speeds during hot
weather, above 90°F (32°C).
Odometer Reading Date
Repair Order # Dealer Code
Signature Authorized Chrysler Dealer
54,000 Miles (90,000 km) or
54 Months Maintenance
Service Schedule
❏Change the engine oil and engine oil
filter.
❏Rotate tires.
Odometer Reading Date
Repair Order # Dealer Code
Signature Authorized Chrysler Dealer
414 MAINTENANCE SCHEDULES
8
M
A
I
N
T
E
N
A
N
C
E
S
C
H
E
D
U
L
E
S