Page 129 of 457

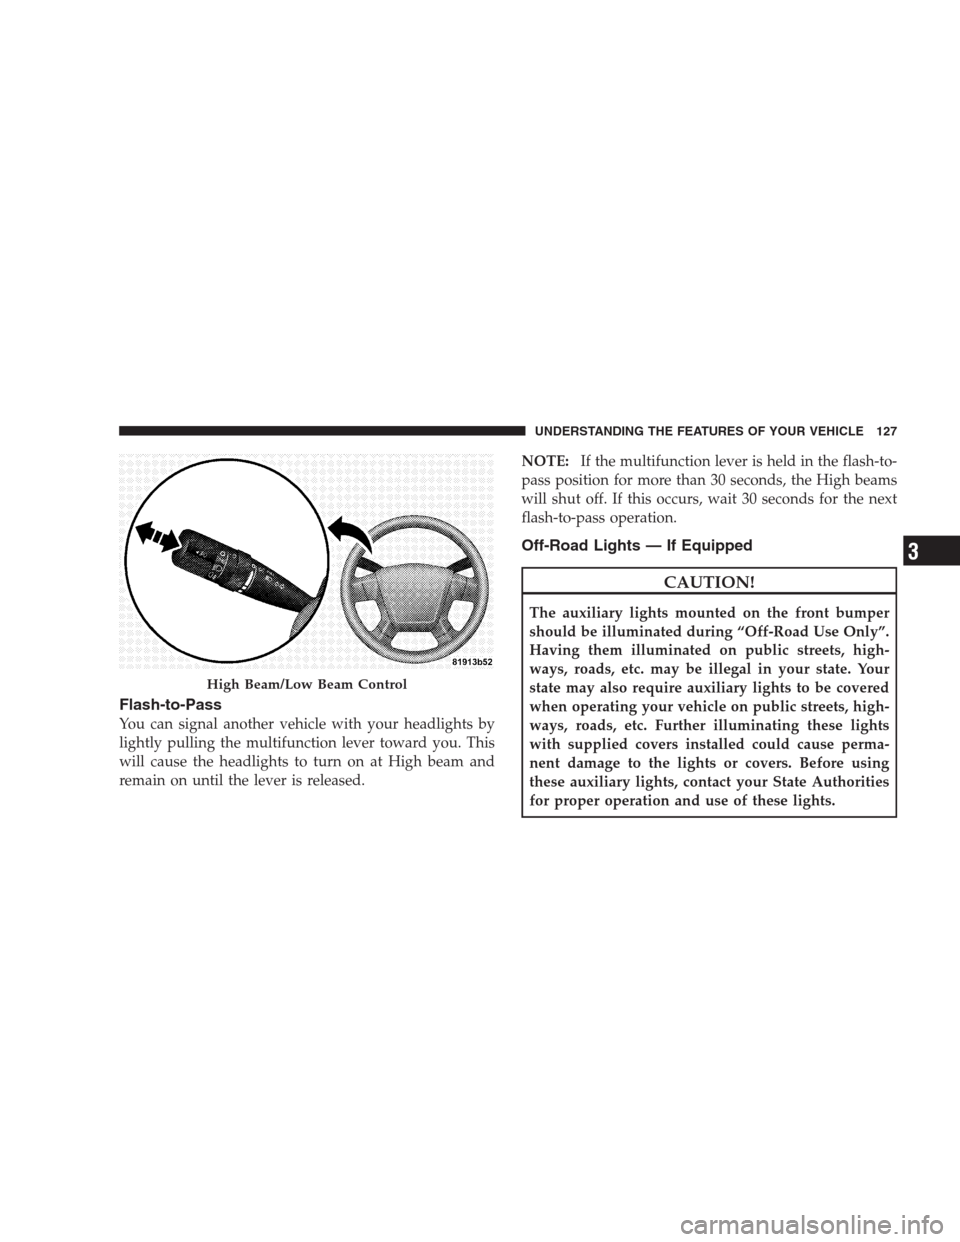
Flash-to-Pass
You can signal another vehicle with your headlights by
lightly pulling the multifunction lever toward you. This
will cause the headlights to turn on at High beam and
remain on until the lever is released.NOTE:If the multifunction lever is held in the flash-to-
pass position for more than 30 seconds, the High beams
will shut off. If this occurs, wait 30 seconds for the next
flash-to-pass operation.
Off-Road Lights — If Equipped
CAUTION!
The auxiliary lights mounted on the front bumper
should be illuminated during “Off-Road Use Only”.
Having them illuminated on public streets, high-
ways, roads, etc. may be illegal in your state. Your
state may also require auxiliary lights to be covered
when operating your vehicle on public streets, high-
ways, roads, etc. Further illuminating these lights
with supplied covers installed could cause perma-
nent damage to the lights or covers. Before using
these auxiliary lights, contact your State Authorities
for proper operation and use of these lights.
High Beam/Low Beam Control
UNDERSTANDING THE FEATURES OF YOUR VEHICLE 127
3
Page 130 of 457
The auxiliary Off-Road lights can be turned on when
off-road conditions require additional lighting. To turn
the auxiliary Off-Road light on, turn on the High beam
headlights and press the top of the switch. To turn off the
auxiliary Off-Road lights press the bottom of the switch.
NOTE:The High beam headlights must be on for the
auxiliary Off-Road lights to operate.
Off-Road Light Switch
128 UNDERSTANDING THE FEATURES OF YOUR VEHICLE
Page 131 of 457
Map/Reading Lights
These lights are mounted between the sun visors above
the rear view mirror. Each light is turned on by pressing
the button. Press the button a second time to turn the
light off. The lights also come on when a door is opened
or the dimmer control is turned fully upward, past the
second detent.
NOTE:The lights will remain on until the switch is
pressed a second time, so be sure they have been turned
off before leaving the vehicle. They will not turn off
automatically.
Map/Reading Lights
UNDERSTANDING THE FEATURES OF YOUR VEHICLE 129
3
Page 138 of 457

Manual Transaxle
Depressing the clutch pedal will disengage the speed
control. A slight increase in engine RPM before the speed
control disengages is normal.
Vehicles equipped with manual transaxles may need to
be shifted into a lower gear to climb hills without speed
loss.
WARNING!
Electronic Speed Control can be dangerous where the
system can’t maintain a constant speed. Your vehicle
could go too fast for the conditions, and you could
lose control. An accident could be the result. Do not
use Electronic Speed Control in heavy traffic or on
roads that are winding, icy, snow-covered, or slip-
pery.
To Accelerate For Passing
Depress the accelerator as you would normally. When the
pedal is released, the vehicle will return to the set speed.
Using Electronic Speed Control On Hills
NOTE:The Electronic Speed Control system maintains
speed up and down hills. A slight speed change on
moderate hills is normal.
On steep hills a greater speed loss or gain may occur so
it may be preferable to drive without Electronic Speed
Control.
GARAGE DOOR OPENER — IF EQUIPPED
HomeLink�replaces up to three remote controls (hand-
held transmitters) that operate devices such as garage
door openers, motorized gates, lighting, or home security
systems. The HomeLink�unit operates off your vehicle’s
battery.
136 UNDERSTANDING THE FEATURES OF YOUR VEHICLE
Page 140 of 457

Programming HomeLink�
Before You Begin
If you have not trained any of the HomeLink�buttons,
erase all channels before you begin training.
To do this, press and hold the two outside buttons for
20 seconds until the red indicator flashes.
It is recommended that a new battery be placed in the
hand-held transmitter of the device being programmed
to HomeLink�for more efficient training and accurate
transmission of the radio-frequency signal.
Your vehicle should be parked outside of the garage
when programming.
1. Turn the ignition switch to the ON/RUN position.
2. Hold the battery side of the hand-held transmitter
away from the HomeLink�button you wish to program.Place the hand-held transmitter 1–3 in (3-8 cm) away
from the HomeLink�button you wish to program while
keeping the indicator light in view.
3. Simultaneously press and hold both the chosen
HomeLink�button and the hand-held transmitter button
until the HomeLink�indicator changes from a slow to a
rapidly blinking light, then release both the HomeLink�
and hand-held transmitter buttons.
Watch for the HomeLink�indicator to change flash rates.
When it changes, it is programmed. It may take up to
30 seconds, or longer in rare cases. The garage door may
open and close while you train.
NOTE:
•Some gate operators and garage door openers may
require you to replace Step 3 with procedures noted in
the “Gate Operator/Canadian Programming” section.
138 UNDERSTANDING THE FEATURES OF YOUR VEHICLE
Page 141 of 457

•After training a HomeLink�channel, if the garage
door does not operate with HomeLink�and the ga-
rage door opener was manufactured after 1995, the
garage door opener may have a rolling code. If so,
proceed to the heading “Programming A Rolling Code
System.”
4. Press and hold the just-trained HomeLink�button
and observe the indicator light.
If the indicator light stays on constantly, programming is
complete and the garage door (or device) should activate
when the HomeLink�button is pressed.
If the indicator light blinks rapidly for two seconds, and
then turns to a constant light, continue with program-
ming for a Rolling Code.
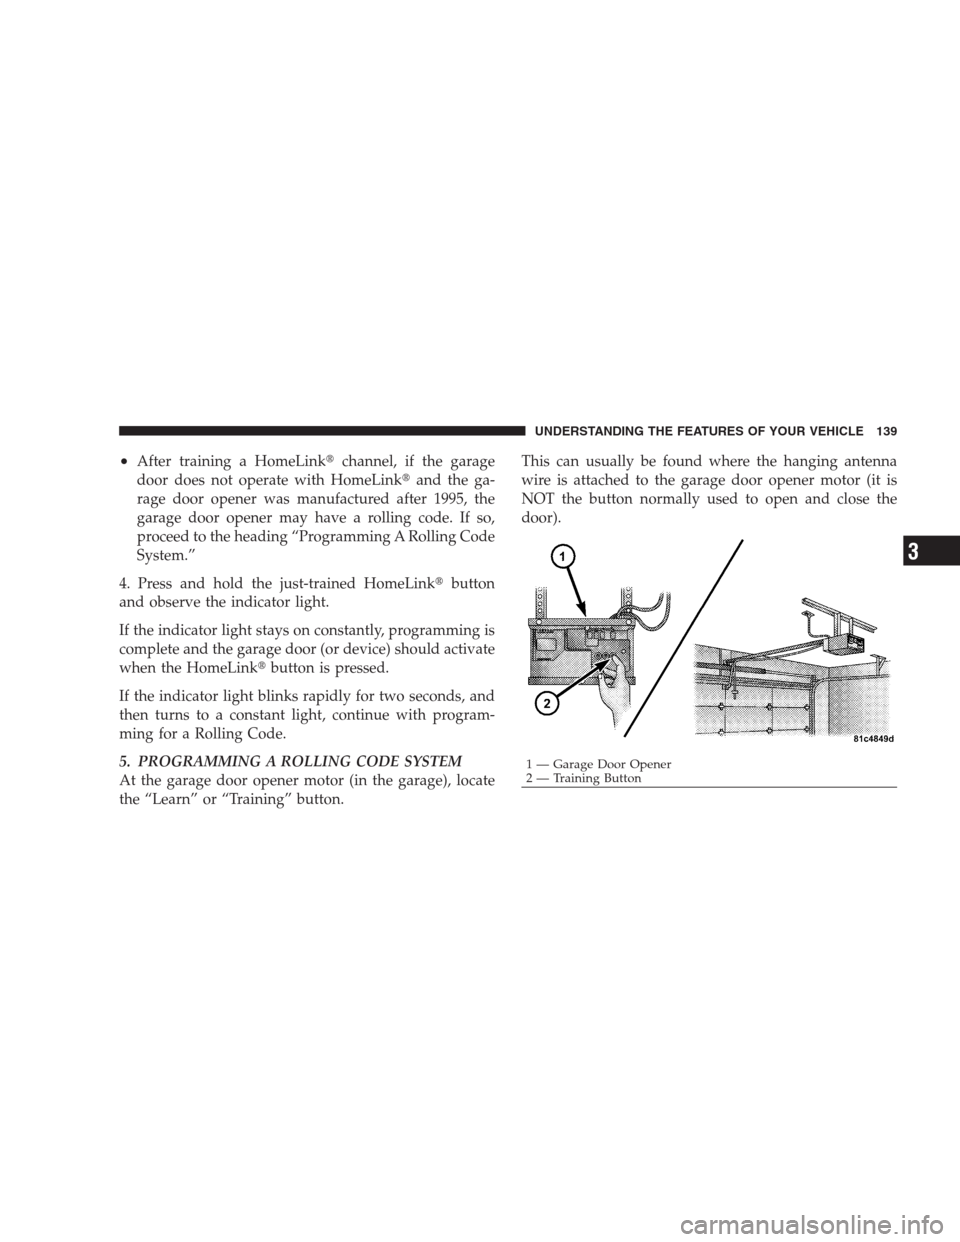
5. PROGRAMMING A ROLLING CODE SYSTEM
At the garage door opener motor (in the garage), locate
the “Learn” or “Training” button.This can usually be found where the hanging antenna
wire is attached to the garage door opener motor (it is
NOT the button normally used to open and close the
door).
1 — Garage Door Opener
2 — Training ButtonUNDERSTANDING THE FEATURES OF YOUR VEHICLE 139
3
Page 143 of 457

has successfully accepted the frequency signal. The
indicator light will flash slowly and then rapidly when
fully trained.
If you unplugged the device for training, plug it back in
at this time.
Then proceed with Step 4 under “Programming
HomeLink�” earlier in this section.
Using HomeLink�
To operate, simply press and release the programmed
HomeLink�button. Activation will now occur for the
trained device (i.e., garage door opener, gate operator,
Security system, entry door lock, home/office lighting,
etc. The hand-held transmitter of the device may also be
used at any time.
Reprogramming A Single HomeLink�Button
To re-program a channel that has been previously
trained, follow these steps:1. Turn the ignition switch to the ON/RUN position.
2. Press and hold the desired HomeLink�button until
the indicator light begins to flash after 20 seconds.Do not
release the button.
3.Without releasing the button,proceed with Program-
ming Homelink�Step 2 and follow all remaining steps.
Security
It is advised to erase all channels before you sell or turn
in your vehicle.
To do this, press and hold the two outside buttons for
20 seconds until the red indicator flashes. Note that all
channels will be erased. Individual channels cannot be
erased.
The HomeLink�Universal Transceiver is disabled when
the Vehicle Security Alarm is active.
UNDERSTANDING THE FEATURES OF YOUR VEHICLE 141
3
Page 145 of 457
POWER SUNROOF — IF EQUIPPED
The power sunroof switch is located in the reading light.WARNING!
•Never leave children in a vehicle, with the key in
the ignition switch. Occupants, particularly unat-
tended children, can become entrapped by the
power sunroof while operating the power sunroof
switch. Such entrapment may result in serious
injury or death.
•In an accident, there is a greater risk of being
thrown from a vehicle with an open sunroof. You
could also be seriously injured or killed. Always
fasten your seat belt properly and make sure all
passengers are properly secured too.
•Do not allow small children to operate the sun-
roof. Never allow fingers or other body parts, or
any object to project through the sunroof opening.
Injury may result.Power Sunroof Switch
UNDERSTANDING THE FEATURES OF YOUR VEHICLE 143
3