Page 127 of 457
NOTE:The fog lights will only operate with the head-
lights on Low beam. Selecting High beam headlights will
turn off the fog lights.
Daytime Running Lights (DRL) — If Equipped
The High beam lights will come on as Daytime Running
Lights (DRL) at DRL intensity (lower), whenever the
ignition is ON, the engine is running, the headlight
switch is off, the parking brake is off, the turn signal is
off, and the shift lever is in any position except PARK.
Front Fog Lights Control
UNDERSTANDING THE FEATURES OF YOUR VEHICLE 125
3
Page 128 of 457
Turn Signals
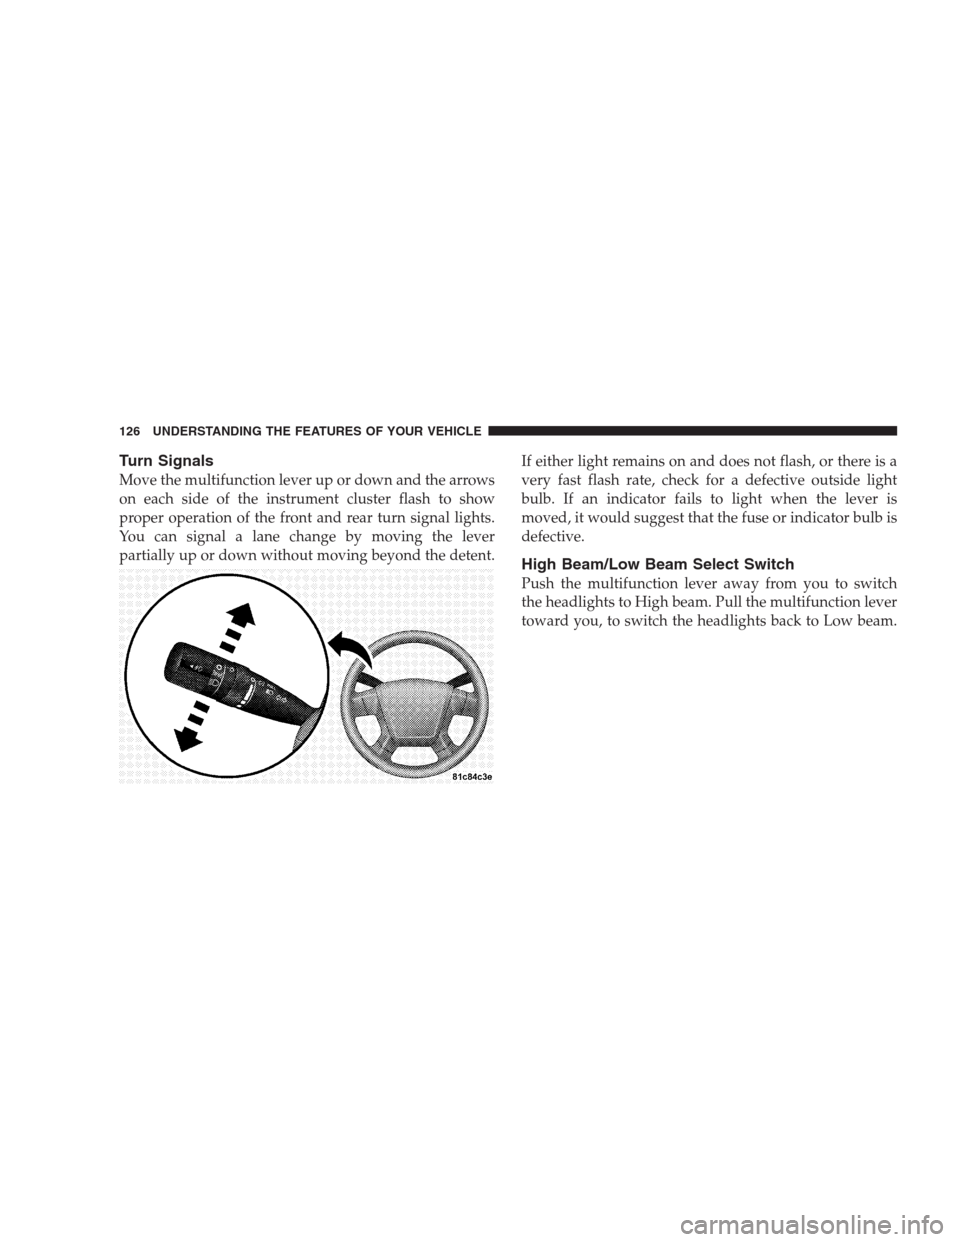
Move the multifunction lever up or down and the arrows
on each side of the instrument cluster flash to show
proper operation of the front and rear turn signal lights.
You can signal a lane change by moving the lever
partially up or down without moving beyond the detent.If either light remains on and does not flash, or there is a
very fast flash rate, check for a defective outside light
bulb. If an indicator fails to light when the lever is
moved, it would suggest that the fuse or indicator bulb is
defective.
High Beam/Low Beam Select Switch
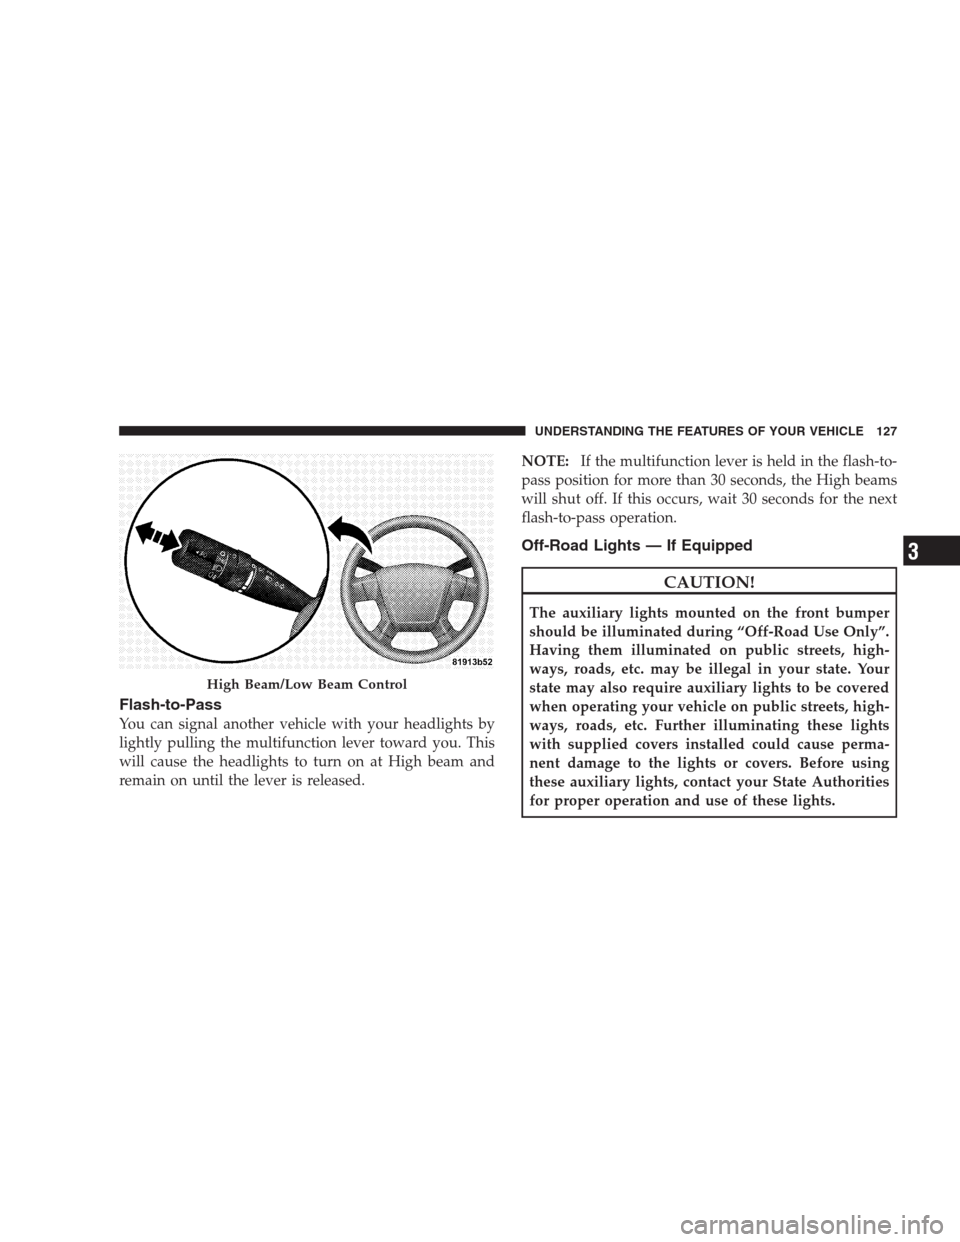
Push the multifunction lever away from you to switch
the headlights to High beam. Pull the multifunction lever
toward you, to switch the headlights back to Low beam.
126 UNDERSTANDING THE FEATURES OF YOUR VEHICLE
Page 129 of 457
Flash-to-Pass
You can signal another vehicle with your headlights by
lightly pulling the multifunction lever toward you. This
will cause the headlights to turn on at High beam and
remain on until the lever is released.NOTE:If the multifunction lever is held in the flash-to-
pass position for more than 30 seconds, the High beams
will shut off. If this occurs, wait 30 seconds for the next
flash-to-pass operation.
Off-Road Lights — If Equipped
CAUTION!
The auxiliary lights mounted on the front bumper
should be illuminated during “Off-Road Use Only”.
Having them illuminated on public streets, high-
ways, roads, etc. may be illegal in your state. Your
state may also require auxiliary lights to be covered
when operating your vehicle on public streets, high-
ways, roads, etc. Further illuminating these lights
with supplied covers installed could cause perma-
nent damage to the lights or covers. Before using
these auxiliary lights, contact your State Authorities
for proper operation and use of these lights.
High Beam/Low Beam Control
UNDERSTANDING THE FEATURES OF YOUR VEHICLE 127
3
Page 135 of 457
TILT STEERING COLUMN
To tilt the steering column, push down on the lever below
the turn signal control lever. With one hand firmly on the
wheel, move the steering column up or down as desired.
Push the lever back up to lock the column firmly in place.WARNING!
Tilting the steering column while the vehicle is
moving is dangerous. Without a stable steering col-
umn, you could lose control of the vehicle and have
an accident. Adjust the column only while the ve-
hicle is stopped. Be sure it is locked before driving.
Tilting Steering Column Control
UNDERSTANDING THE FEATURES OF YOUR VEHICLE 133
3
Page 140 of 457
Programming HomeLink�
Before You Begin
If you have not trained any of the HomeLink�buttons,
erase all channels before you begin training.
To do this, press and hold the two outside buttons for
20 seconds until the red indicator flashes.
It is recommended that a new battery be placed in the
hand-held transmitter of the device being programmed
to HomeLink�for more efficient training and accurate
transmission of the radio-frequency signal.
Your vehicle should be parked outside of the garage
when programming.
1. Turn the ignition switch to the ON/RUN position.
2. Hold the battery side of the hand-held transmitter
away from the HomeLink�button you wish to program.Place the hand-held transmitter 1–3 in (3-8 cm) away
from the HomeLink�button you wish to program while
keeping the indicator light in view.
3. Simultaneously press and hold both the chosen
HomeLink�button and the hand-held transmitter button
until the HomeLink�indicator changes from a slow to a
rapidly blinking light, then release both the HomeLink�
and hand-held transmitter buttons.
Watch for the HomeLink�indicator to change flash rates.
When it changes, it is programmed. It may take up to
30 seconds, or longer in rare cases. The garage door may
open and close while you train.
NOTE:
•Some gate operators and garage door openers may
require you to replace Step 3 with procedures noted in
the “Gate Operator/Canadian Programming” section.
138 UNDERSTANDING THE FEATURES OF YOUR VEHICLE
Page 142 of 457
6. Firmly press and release the “Learn” or “Training”
button. The name and color of the button may vary by
manufacturer.
NOTE:There are 30 seconds in which to initiate the next
step after the “Learn” button has been pressed.
7. Return to the vehicle and press the programmed
HomeLink�button twice (holding the button for two
seconds each time). If the device is plugged in and
activates, programming is complete.
If the device does not activate, press the button a third
time (for two seconds) to complete the training.
If you have any problems, or require assistance, please
call toll-free 1–800–355–3515 or, on the Internet at
www.HomeLink.com for information or assistance.
To program the remaining two HomeLink�buttons,
repeat each step for each remaining button. DO NOT
erase the channels.Gate Operator/Canadian Programming
Canadian radio-frequency laws require transmitter sig-
nals to “time-out” (or quit) after several seconds of
transmission – which may not be long enough for
HomeLink�to pick up the signal during programming.
Similar to this Canadian law, some U.S. gate operators are
designed to “time-out” in the same manner.
It may be helpful to unplug the device during the cycling
process to prevent possible overheating of the garage
door or gate motor.
If you are having difficulties programming a garage door
opener or a gate operator, replace “Programming
HomeLink�” Step 3 with the following:
3. Continue to press and hold the HomeLink�button
while you press and release - every two seconds
(“cycle”) your hand-held transmitter until HomeLink�
140 UNDERSTANDING THE FEATURES OF YOUR VEHICLE
Page 143 of 457

has successfully accepted the frequency signal. The
indicator light will flash slowly and then rapidly when
fully trained.
If you unplugged the device for training, plug it back in
at this time.
Then proceed with Step 4 under “Programming
HomeLink�” earlier in this section.
Using HomeLink�
To operate, simply press and release the programmed
HomeLink�button. Activation will now occur for the
trained device (i.e., garage door opener, gate operator,
Security system, entry door lock, home/office lighting,
etc. The hand-held transmitter of the device may also be
used at any time.
Reprogramming A Single HomeLink�Button
To re-program a channel that has been previously
trained, follow these steps:1. Turn the ignition switch to the ON/RUN position.
2. Press and hold the desired HomeLink�button until
the indicator light begins to flash after 20 seconds.Do not
release the button.
3.Without releasing the button,proceed with Program-
ming Homelink�Step 2 and follow all remaining steps.
Security
It is advised to erase all channels before you sell or turn
in your vehicle.
To do this, press and hold the two outside buttons for
20 seconds until the red indicator flashes. Note that all
channels will be erased. Individual channels cannot be
erased.
The HomeLink�Universal Transceiver is disabled when
the Vehicle Security Alarm is active.
UNDERSTANDING THE FEATURES OF YOUR VEHICLE 141
3
Page 170 of 457

4. Oil Pressure Warning Light
This light indicates low engine oil pressure. The
light should turn on momentarily when the engine
is started. If the light turns on while driving, stop the
vehicle and shut off the engine as soon as possible. A
chime will sound for four minutes when this light turns
on.
Do not operate the vehicle until the cause is corrected.
This light does not show how much oil is in the engine.
The engine oil level must be checked under the hood.
5. Low Fuel Light
When the fuel level reaches approximately 2.0 gal
(7.8 L) this light will turn on, and remain on until
fuel is added.
6. Speedometer
Indicates vehicle speed.7. Airbag Warning Light
This light turns on and remains on for seven
seconds as a bulb check, when the ignition
switch is first turned ON. If the light is not on
during starting, stays on, or turns on while
driving, have the system inspected by an authorized
dealer as soon as possible.
8. Turn Signal Indicators
The arrow will flash with the exterior turn signal
when the turn signal lever is operated.
9. High Beam Indicator
This indicator shows that the headlights are on
high beam. Push the multifunction lever forward
to switch the headlights to high beam, and pull toward
yourself (normal position) to return to low beam.
168 UNDERSTANDING YOUR INSTRUMENT PANEL