Page 175 of 457

WARNING!
A hot engine cooling system is dangerous. You or
others could be badly burned by steam or boiling
coolant. You may want to call an authorized dealer-
ship for service if your vehicle overheats. If you
decide to look under the hood yourself, see Section 7
of this manual. Follow the warnings under the Cool-
ing System Pressure Cap paragraph.
18. Cruise Indicator — If Equipped
This indicator shows that the Speed Control
System is ON.
19. Cruise SET Indicator — If Equipped
This indicator shows that the Speed Control System is
SET.20. Shift Lever Indicator
This display indicator shows the automatic transmission
shift lever selection.
NOTE:You must apply the brakes before shifting from
PARK.
21. Odometer/Trip Odometer Reset Button
Press this button to change the display from odometer to
either of the two trip odometer settings. Trip A or Trip B
will appear when in the trip odometer mode. Push in and
hold the button for two seconds to reset the trip odometer
to 0 miles (0 km). The odometer must be in Trip mode to
reset.
22. Tire Pressure Monitoring Telltale Light
Each tire, including the spare (if provided),
should be checked monthly, when cold and
inflated to the inflation pressure recommended
by the vehicle manufacturer on the vehicle
placard or tire inflation pressure label. (If your vehicle
UNDERSTANDING YOUR INSTRUMENT PANEL 173
4
Page 179 of 457

the key is in the ON/RUN position before engine start. If
the light does not come on when turning the key from
OFF to ON/RUN, have the condition checked promptly.
Certain conditions such as a loose or missing gas cap,
poor fuel quality, etc., may illuminate the light after
engine start. The vehicle should be serviced if the light
stays on through several of your typical driving cycles. In
most situations the vehicle will drive normally and will
not require towing.
If the MIL flashes when the engine is running, serious
conditions may exist that could lead to immediate loss of
power or severe catalytic converter damage. The vehicle
should be serviced as soon as possible if this occurs.
27. Hill Descent Indicator — If Equipped
The symbol illuminates (is armed) when the
4WD Lock switch is activated and the trans-
mission range indicator is in LOW or REVERSE
position (Off-Road Mode).28. Front Fog Light Indicator — If Equipped
This light shows when the front fog lights are on.
29. Electronic Stability Program (ESP) Indicator
Light/Traction Control System (TCS) Indicator Light
If this indicator light flashes during accelera-
tion, apply as little throttle as possible. While
driving, ease up on the accelerator. Adapt your
speed and driving to the prevailing road con-
ditions, and do not switch off the Electronic Stability
Program (ESP), or Traction Control System (TCS).
30. Electronic Stability Program (ESP) Indicator Light
The malfunction lamp for the Electronic Stabil-
ity Program (ESP) is combined with Brake
Assist System (BAS). The yellow “ESP/BAS
Warning Lamp” comes on when the ignition
switch is turned to the “ON” position. They should go
out with the engine running. If the “ESP/BAS Warning
UNDERSTANDING YOUR INSTRUMENT PANEL 177
4
Page 253 of 457
STARTING AND OPERATING
CONTENTS
�Starting Procedures.................... 256
▫Manual Transmission — If Equipped....... 256
▫Automatic Transmission — If Equipped..... 256
▫Normal Starting..................... 256
▫Extremely Cold Weather
(Below�20°F Or�29°C)............... 257
▫If Engine Fails To Start................. 257
▫After Starting....................... 258�Manual Transaxle — If Equipped........... 258
▫5–Speed Manual Transaxle.............. 258
▫Recommended Shift Speeds............. 260
▫Downshifting....................... 260
�Automatic Transaxle — If Equipped......... 260
▫Brake/Transmission Interlock System...... 261
▫Automatic Transaxle Ignition Interlock
System............................ 262
▫Gear Ranges........................ 262
5
Page 254 of 457

�AutoStick�— If Equipped............... 264
▫Operation.......................... 264
▫General Information................... 265
�Four-Wheel Drive Operation — If Equipped . . . 266
�Driving On Slippery Surfaces............. 266
▫Acceleration........................ 266
▫Traction........................... 267
�Driving Through Water.................. 267
▫Flowing/Rising Water................. 268
▫Shallow Standing Water................ 268
�On-Road Driving Tips.................. 270
�Off-Road Driving Tips.................. 270▫When To Use Low (L Off-Road) With The
4WD Lock Lever Engaged.............. 271
▫Simultaneous Brake And Throttle
Operation.......................... 271
▫Driving In Snow, Mud And Sand......... 271
▫Crossing Obstacles (Rocks And Other High
Points)............................ 273
▫Hill Climbing....................... 276
▫Driving Through Water................ 278
▫Airing Down For Off-Road Driving........ 281
▫Vehicle Recovery..................... 282
▫After Driving Off-Road................ 284
�Power Steering........................ 286
▫Power Steering Fluid Check............. 286
252 STARTING AND OPERATING
Page 255 of 457

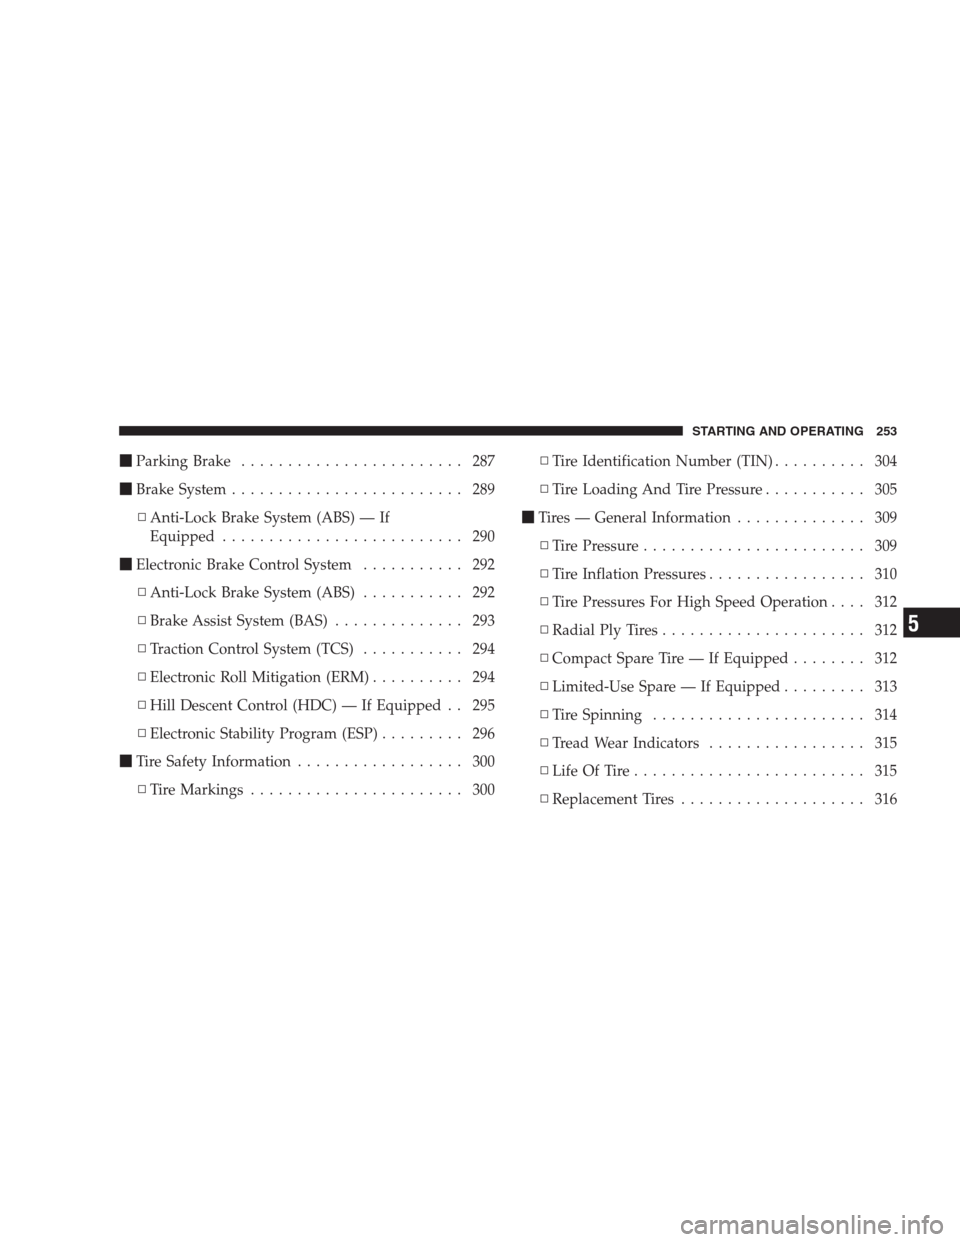
�Parking Brake........................ 287
�Brake System......................... 289
▫Anti-Lock Brake System (ABS) — If
Equipped.......................... 290
�Electronic Brake Control System........... 292
▫Anti-Lock Brake System (ABS)........... 292
▫Brake Assist System (BAS).............. 293
▫Traction Control System (TCS)........... 294
▫Electronic Roll Mitigation (ERM).......... 294
▫Hill Descent Control (HDC) — If Equipped . . 295
▫Electronic Stability Program (ESP)......... 296
�Tire Safety Information.................. 300
▫Tire Markings....................... 300▫Tire Identification Number (TIN).......... 304
▫Tire Loading And Tire Pressure........... 305
�Tires — General Information.............. 309
▫Tire Pressure........................ 309
▫Tire Inflation Pressures................. 310
▫Tire Pressures For High Speed Operation.... 312
▫Radial Ply Tires...................... 312
▫Compact Spare Tire — If Equipped........ 312
▫Limited-Use Spare — If Equipped......... 313
▫Tire Spinning....................... 314
▫Tread Wear Indicators................. 315
▫Life Of Tire......................... 315
▫Replacement Tires.................... 316
STARTING AND OPERATING 253
5
Page 258 of 457

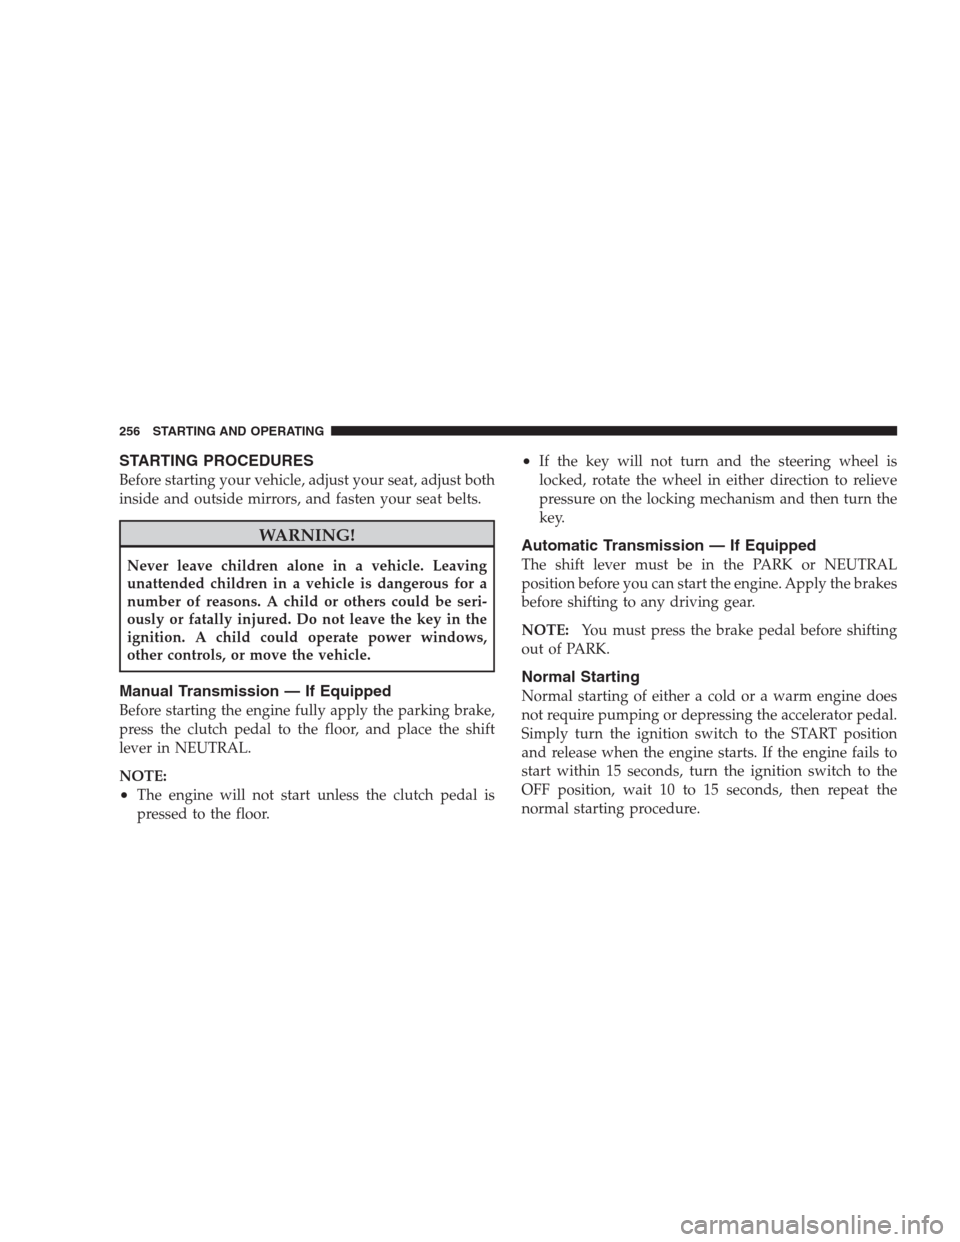
STARTING PROCEDURES
Before starting your vehicle, adjust your seat, adjust both
inside and outside mirrors, and fasten your seat belts.
WARNING!
Never leave children alone in a vehicle. Leaving
unattended children in a vehicle is dangerous for a
number of reasons. A child or others could be seri-
ously or fatally injured. Do not leave the key in the
ignition. A child could operate power windows,
other controls, or move the vehicle.
Manual Transmission — If Equipped
Before starting the engine fully apply the parking brake,
press the clutch pedal to the floor, and place the shift
lever in NEUTRAL.
NOTE:
•The engine will not start unless the clutch pedal is
pressed to the floor.
•If the key will not turn and the steering wheel is
locked, rotate the wheel in either direction to relieve
pressure on the locking mechanism and then turn the
key.
Automatic Transmission — If Equipped
The shift lever must be in the PARK or NEUTRAL
position before you can start the engine. Apply the brakes
before shifting to any driving gear.
NOTE:You must press the brake pedal before shifting
out of PARK.
Normal Starting
Normal starting of either a cold or a warm engine does
not require pumping or depressing the accelerator pedal.
Simply turn the ignition switch to the START position
and release when the engine starts. If the engine fails to
start within 15 seconds, turn the ignition switch to the
OFF position, wait 10 to 15 seconds, then repeat the
normal starting procedure.
256 STARTING AND OPERATING
Page 260 of 457
CAUTION!
To prevent damage to the starter, do not crank the
engine for more than 15 seconds at a time. Wait 10 to
15 seconds before trying again.
After Starting
The idle speed will automatically decrease as the engine
warms up.
MANUAL TRANSAXLE — IF EQUIPPED
5–Speed Manual Transaxle
WARNING!
You or others could be injured if you leave the
vehicle unattended without having the parking
brake fully applied. The parking brake should al-
ways be applied when the driver is not in the vehicle,
especially on an incline.
258 STARTING AND OPERATING
Page 262 of 457

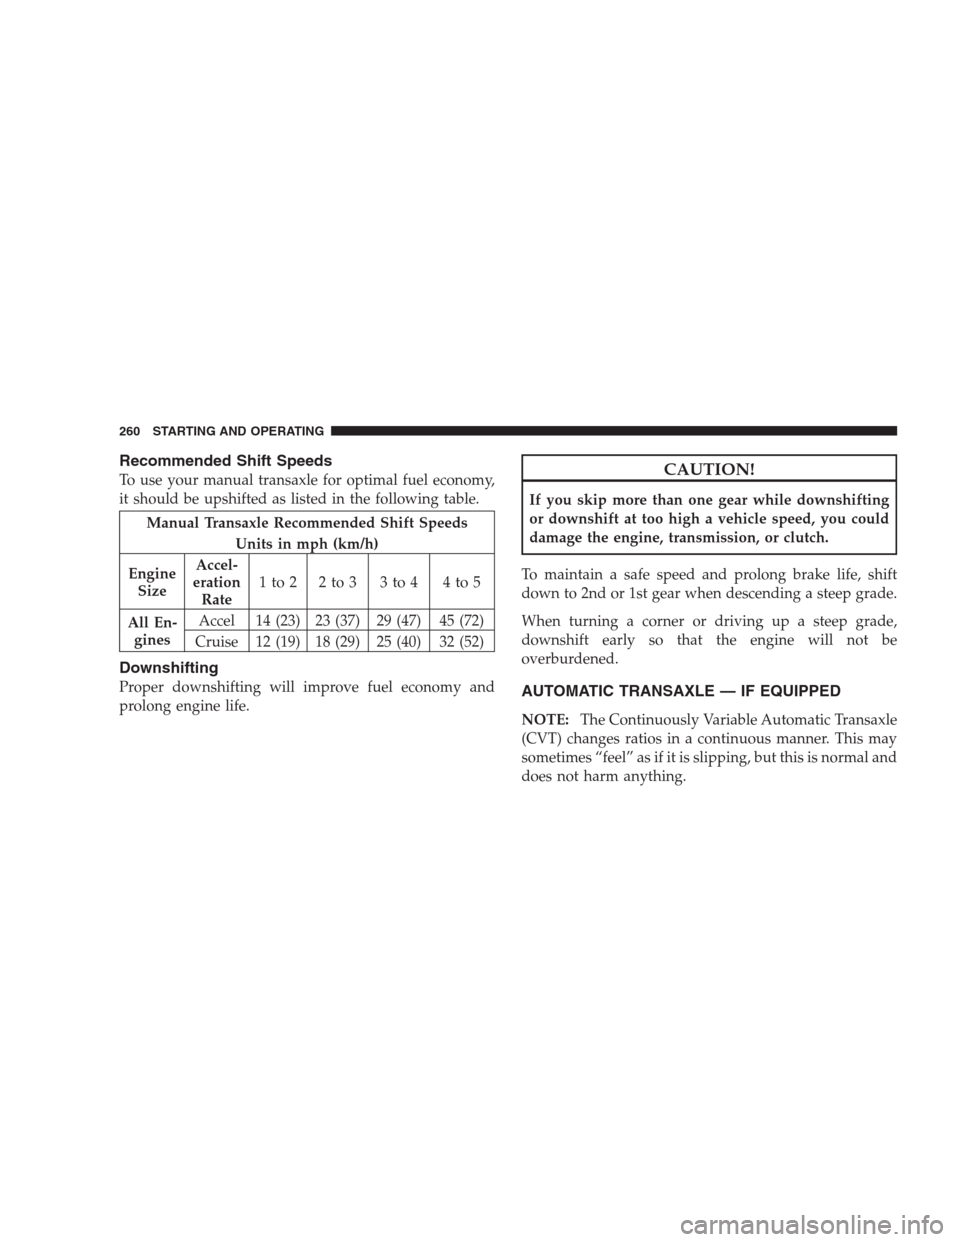
Recommended Shift Speeds
To use your manual transaxle for optimal fuel economy,
it should be upshifted as listed in the following table.
Manual Transaxle Recommended Shift Speeds
Units in mph (km/h)
Engine
SizeAccel-
eration
Rate1to2 2to3 3to4 4to5
All En-
ginesAccel 14 (23) 23 (37) 29 (47) 45 (72)
Cruise 12 (19) 18 (29) 25 (40) 32 (52)
Downshifting
Proper downshifting will improve fuel economy and
prolong engine life.
CAUTION!
If you skip more than one gear while downshifting
or downshift at too high a vehicle speed, you could
damage the engine, transmission, or clutch.
To maintain a safe speed and prolong brake life, shift
down to 2nd or 1st gear when descending a steep grade.
When turning a corner or driving up a steep grade,
downshift early so that the engine will not be
overburdened.
AUTOMATIC TRANSAXLE — IF EQUIPPED
NOTE:The Continuously Variable Automatic Transaxle
(CVT) changes ratios in a continuous manner. This may
sometimes “feel” as if it is slipping, but this is normal and
does not harm anything.
260 STARTING AND OPERATING