Page 141 of 521
WINDSHIELD WIPERS AND WASHERS
The front and rear wipers and washers are operated by a
switch in the right side control lever. Turn the end of the
control lever to select Low, High, or one of the five speed
sensitive intermittent windshield wiper speeds. Refer to
“Speed Sensitive Intermittent Wiper System” in this
section. For information on the rear wiper and washer,
refer to “Rear Window Features” in this section.
NOTE:Always remove any buildup of snow that pre-
vents the windshield wiper blades from returning to the
off position. If the windshield wiper switch is turned off,
and the blades cannot return to the off position, damage
to the wiper motor may occur.
Windshield Wiper/Washer Switch
UNDERSTANDING THE FEATURES OF YOUR VEHICLE 139
3
Page 164 of 521
Pinch Protect Override
If a known obstruction (ice, debris, etc.) prevents closing
the sunroof, press the switch forward and hold for two
seconds after the reversal occurs. This allows the sunroof
to move towards the closed position.
NOTE:Pinch protection is disabled while the switch is
pressed.
Venting Sunroof — Express
Press and release the�Vent�button, and the sunroof will
open to the vent position. This is called “Express Vent”,
and will occur regardless of sunroof position. During
Express Vent operation, any movement of the switch will
stop the sunroof.
Sunshade Operation
The sunshade can be opened manually. However, the
sunshade will open automatically as the sunroof opens.NOTE:The sunshade cannot be closed if the sunroof is
open.
Wind Buffeting
Wind buffeting can be described as the perception of
pressure on the ears or a helicopter-type sound in the
ears. Your vehicle may exhibit wind buffeting with the
windows down, or the sunroof (if equipped) in certain
open or partially open positions. This is a normal occur-
rence and can be minimized. If the buffeting occurs with
the rear windows open, open the front and rear windows
together to minimize the buffeting. If the buffeting occurs
with the sunroof open, adjust the sunroof opening to
minimize the buffeting or open any window.
Sunroof Maintenance
Use only a nonabrasive cleaner and a soft cloth to clean
the glass panel.
162 UNDERSTANDING THE FEATURES OF YOUR VEHICLE
Page 174 of 521
The cargo load floor is held by spring loaded latches. In
order to use the cargo load floor, use the following
procedure:
NOTE: The cargo load floor latches should not be
used as cargo tie-downs.
1. Flip up pull loop(s) so they are perpendicular (straight
up) to the top surface of the tray.
2. Pull up on loop(s) and twist 90 degrees, so they are
parallel to the slotted hole in tray.
3. Lift the tray over the loop(s), and reposition the tray.
4. Pull up on the loop(s) and twist 90 degrees, so they are
perpendicular (straight up) to the slotted hole in tray.
5. Push the loop(s) back down, so they are parallel to the
top of the tray.REAR WINDOW FEATURES
Rear Window Wiper/Washer
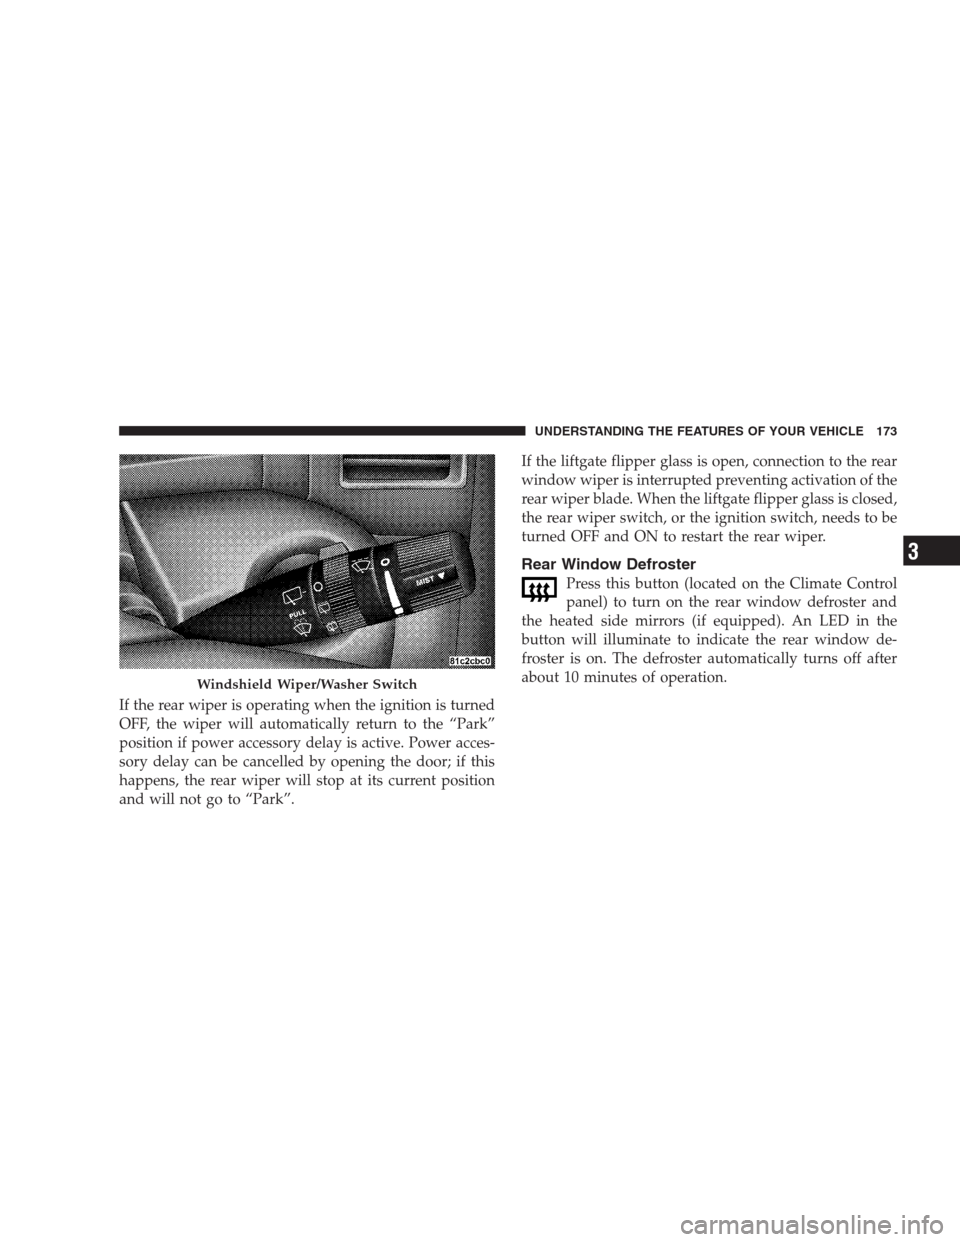
A switch on the right side of the steering column controls
operation of the rear wiper/washer function. Rotating
the center of the switch forward to the on position will
activate the wiper. The rear wiper operates in an inter-
mittent mode only. Rotating the center of the switch all
the way forward will turn on the wash function. The
wash pump will continue to operate as long as the button
is pressed. Upon release, the wipers will cycle two times
before returning to the set position.
172 UNDERSTANDING THE FEATURES OF YOUR VEHICLE
Page 175 of 521
If the rear wiper is operating when the ignition is turned
OFF, the wiper will automatically return to the “Park”
position if power accessory delay is active. Power acces-
sory delay can be cancelled by opening the door; if this
happens, the rear wiper will stop at its current position
and will not go to “Park”.If the liftgate flipper glass is open, connection to the rear
window wiper is interrupted preventing activation of the
rear wiper blade. When the liftgate flipper glass is closed,
the rear wiper switch, or the ignition switch, needs to be
turned OFF and ON to restart the rear wiper.
Rear Window Defroster
Press this button (located on the Climate Control
panel) to turn on the rear window defroster and
the heated side mirrors (if equipped). An LED in the
button will illuminate to indicate the rear window de-
froster is on. The defroster automatically turns off after
about 10 minutes of operation.
Windshield Wiper/Washer Switch
UNDERSTANDING THE FEATURES OF YOUR VEHICLE 173
3
Page 176 of 521
CAUTION!
•To avoid damaging the electrical conductors of the
rear window defroster, do not use scrapers, sharp
instruments, or abrasive window cleaners on the
interior surface of the window.
•Labels can be peeled off after soaking with warm
water.
ROOF LUGGAGE RACK — IF EQUIPPED
The crossbars and siderails are designed to carry the
weight on vehicles equipped with a luggage rack. The
load must not exceed 150 lbs (68 kg), and should be
uniformly distributed over the luggage rack crossbars.
NOTE:If not equipped with crossbars, your authorized
dealer can order and install Mopar�crossbars built
specifically for this roof rack system.Distribute cargo weight evenly on the roof rack crossbars.
The roof rack does not increase the total load carrying
capacity of the vehicle. Be sure the total load of cargo
inside the vehicle plus that on the external rack does not
exceed the maximum vehicle load capacity.
The optional crossbars must be installed using the correct
orientation (the longer crossbar toward the front).
The optional crossbars must also be secured in one of the
seven detent positions marked with an arrow on the
siderails to prevent movement. To move the crossbars,
loosen the thumb screws located at the upper edge of
each crossbar approximately eight turns, then move the
crossbar to the desired position, keeping the crossbars
parallel to the rack frame. Once the crossbar is in one of
the seven detent positions, retighten the thumb screws to
lock the crossbar into position.
174 UNDERSTANDING THE FEATURES OF YOUR VEHICLE
Page 208 of 521
door. Refer to “Easy Entry/Exit Seat” under “Driver
Memory Seat” in Section 3 of this manual for more
information.
Key Off Power Delay
When this feature is selected, the power window
switches, radio, uconnect�phone (if equipped), DVD
video system (if equipped), power sunroof (if equipped),
and power outlets will remain active for up to 10 minutes
after the ignition switch is turned off. Opening a vehicle
door will cancel this feature. To make your selection,
press and release the FUNCTION SELECT button until
“Off,” “45 sec.,” “5 min.,” or “10 min.” appears.
Illuminated Approach
When this feature is selected, the headlights will activate
and remain on for up to 90 seconds when the doors are
unlocked with the RKE transmitter. To make your selec-
tion, press and release the FUNCTION SELECT button
until “OFF,” “30 sec.,” “60 sec.,” or “90 sec.” appears.
Hill Start Assist
To make your selection, press and release the FUNC-
TION SELECT button until YES (Y) or NO (N) appears.
Display Units of Measure In:
The EVIC, odometer, and uconnect�gps (if equipped)
can be changed between English and Metric units of
measure. To make your selection, press and release the
FUNCTION SELECT button until “US” or “METRIC”
appears.
System Status
Press and release the MENU button until one of the
following System Status messages displays in the EVIC:
•System OK
•System Warnings Displayed (will display all currently
active System Warnings.)
206 UNDERSTANDING YOUR INSTRUMENT PANEL
Page 217 of 521
Aspect Ratio — If Equipped
Selecting this item allows you to choose between wide
screen, pan scan, and letter box.
AutoPlay — If Equipped
When this is set to On and a DVD video is inserted, it will
bypass the DVD menu screen and automatically play the
movie. In some rare cases, the DVD player may not
auto-play the main title. In such cases, use the MENU
button on the remote control to select desired title to play.
NOTE:The user will have to set these defaults before
loading a disc. If changes are made to these settings after
a disc is loaded, changes will not be effective. Also, the
defaults are effective only if the disc supports the
customer-preferred settings.
AM and FM Buttons
Press the buttons to select AM or FM mode.
SET Button — To Set the Pushbutton Memory
When you are receiving a station that you wish to
commit to pushbutton memory, press the SET button.
The symbol SET 1 will now show in the display window.
Select the button (1-6) you wish to lock onto this station
and press and release that button. If a button is not
selected within five seconds after pressing the SET but-
ton, the station will continue to play but will not be
stored into pushbutton memory.
You may add a second station to each pushbutton by
repeating the above procedure with this exception: Press
the SET button twice and SET 2 will show in the display
window. Each button can be set for SET 1 and SET 2 in
both AM and FM. This allows a total of 12 AM, 12 FM,
and 12 Satellite (if equipped) stations to be stored into
pushbutton memory. The stations stored in SET 2
memory can be selected by pressing the pushbutton
twice.
UNDERSTANDING YOUR INSTRUMENT PANEL 215
4
Page 230 of 521
Push the rotary TUNE/SCROLL control knob a second
time and MID will display. Turn the TUNE/SCROLL
control knob to the right or left to increase or decrease the
mid-range tones.
Push the rotary TUNE/SCROLL control knob a third
time and TREBLE will display. Turn the TUNE/SCROLL
control knob to the right or left to increase or decrease the
treble tones.
Push the rotary TUNE/SCROLL control knob a fourth
time and BALANCE will display. Turn the TUNE/
SCROLL control knob to the right or left to adjust the
sound level from the right or left side speakers.
Push the rotary TUNE/SCROLL control knob a fifth time
and FADE will display. Turn the TUNE/SCROLL control
knob to the left or right to adjust the sound level between
the front and rear speakers.Push the rotary TUNE/SCROLL control knob again to
exit setting tone, balance, and fade.
AM/FM Button
Press the buttons to select either AM or FM mode.
SET/RND Button — To Set the Pushbutton
Memory
When you are receiving a station that you wish to
commit to pushbutton memory, press the SET/RND
button. The symbol SET 1 will now show in the display
window. Select the button (1 to 6) you wish to lock onto
this station and press and release that button. If a button
is not selected within five seconds after pressing the
SET/RND button, the station will continue to play but
will not be stored into pushbutton memory.
You may add a second station to each pushbutton by
repeating the above procedure with this exception: Press
the SET/RND button twice and SET 2 will show in the
display window. Each button can be set for SET 1 and
228 UNDERSTANDING YOUR INSTRUMENT PANEL