Page 36 of 439
Window Lockout Switch
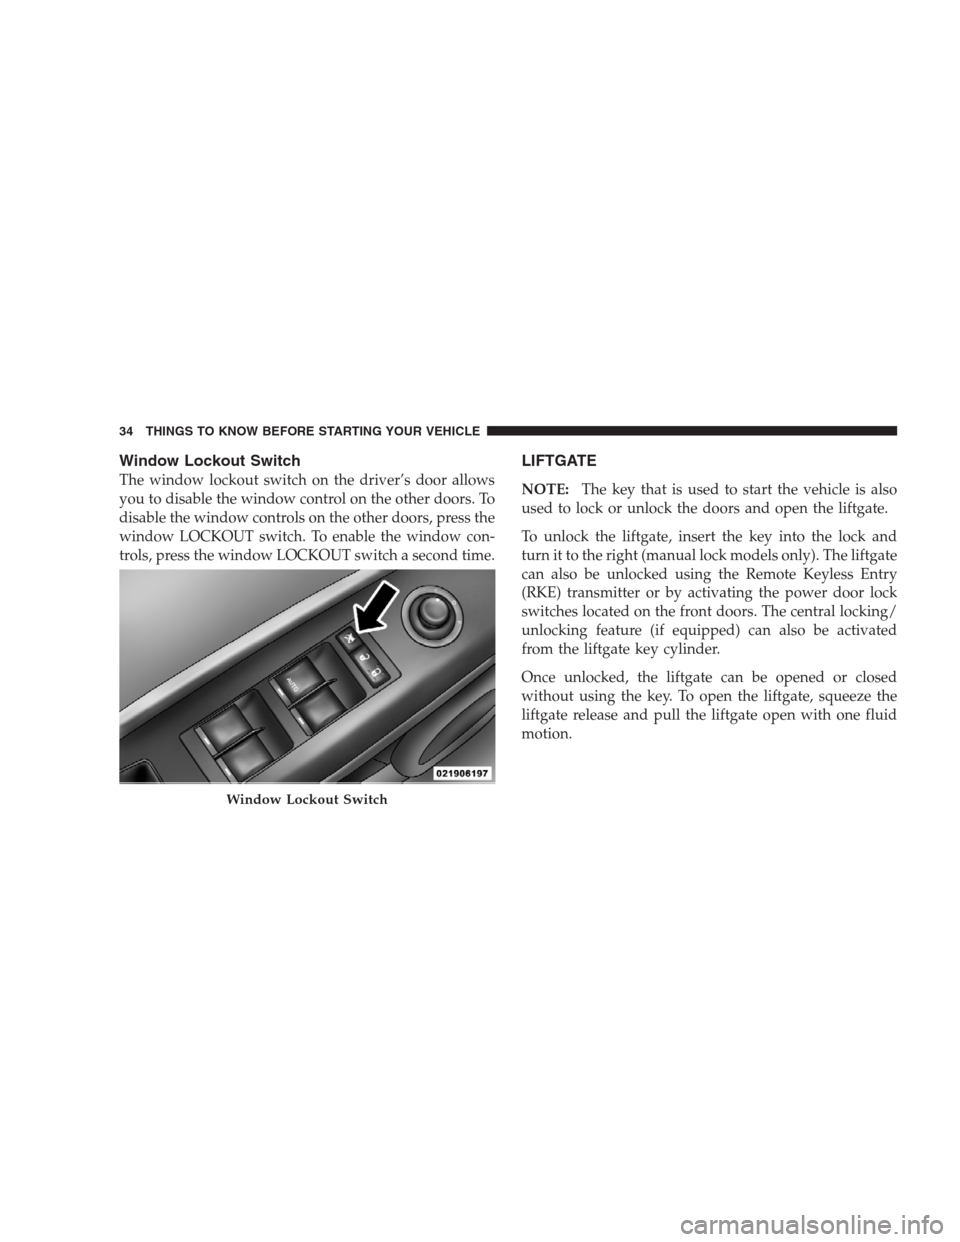
The window lockout switch on the driver’s door allows
you to disable the window control on the other doors. To
disable the window controls on the other doors, press the
window LOCKOUT switch. To enable the window con-
trols, press the window LOCKOUT switch a second time.
LIFTGATE
NOTE:The key that is used to start the vehicle is also
used to lock or unlock the doors and open the liftgate.
To unlock the liftgate, insert the key into the lock and
turn it to the right (manual lock models only). The liftgate
can also be unlocked using the Remote Keyless Entry
(RKE) transmitter or by activating the power door lock
switches located on the front doors. The central locking/
unlocking feature (if equipped) can also be activated
from the liftgate key cylinder.
Once unlocked, the liftgate can be opened or closed
without using the key. To open the liftgate, squeeze the
liftgate release and pull the liftgate open with one fluid
motion.
Window Lockout Switch
34 THINGS TO KNOW BEFORE STARTING YOUR VEHICLE
Page 55 of 439
Airbag System Components
The airbag system consists of the following:
•Occupant Restraint Controller (ORC)
•Side Remote Acceleration Sensors (if equipped)
•Airbag Warning Light
•Driver Airbag
•Front Passenger Airbag
•Supplemental Side Curtain Airbags above side win-
dows (if equipped)
•Steering Wheel and Column
•Instrument Panel
•Interconnecting Wiring
•Seat Belt Reminder Light
•Knee Impact Bolsters
•Front Acceleration Sensors
•Driver and Front Passenger Seat Belt Pretensioners
How The Airbag System Works
•
TheOccupant Restraint Controller (ORC)determines
if a frontal collision is severe enough to require the
airbags to inflate. The front airbag inflators are de-
signed to provide different rates of airbag inflation
from direction provided by the ORC. This ORC will
detect rollover.
•The ORC also monitors the readiness of the electronic
parts of the system whenever the ignition switch is in
the START or ON positions. These include all of the
items listed above except the knee impact bolster, the
instrument panel, and the steering wheel and column.
If the key is in the LOCK position, in the ACC position,
or not in the ignition, the airbags are not on and will
not inflate.
THINGS TO KNOW BEFORE STARTING YOUR VEHICLE 53
2
Page 136 of 439
GARAGE DOOR OPENER — IF EQUIPPED
HomeLink�replaces up to three remote controls (hand-
held transmitters) that operate devices such as garage
door openers, motorized gates, lighting, or home security
systems. The HomeLink�unit operates off your vehicle’s
battery.
The HomeLink�buttons that are located in the headliner
or sun visor designate the three different HomeLink�
channels.
NOTE:HomeLink�is disabled when the Vehicle Secu-
rity Alarm is active.
HomeLink�Buttons
134 UNDERSTANDING THE FEATURES OF YOUR VEHICLE
Page 162 of 439
�Remote Sound System Controls —
If Equipped........................... 235
▫Radio Operation..................... 235
▫CD Player.......................... 236
�CD/DVD Maintenance.................. 236
�Radio Operation And Cellular Phones....... 237�Climate Controls...................... 237
▫Manual Heating, Ventilation And Air
Conditioning (HVAC) System............ 237
▫Air Conditioning (A/C)................ 241
▫Air Filtration System — If Equipped....... 242
▫Operating Tips...................... 243
160 UNDERSTANDING YOUR INSTRUMENT PANEL
Page 193 of 439
SETUP Button
Pressing the SETUP button allows you to select between
the following items:
NOTE:Turn the TUNE/SCROLL control knob to scroll
through the entries. Push the AUDIO/SELECT button to
select an entry and make changes.
•DVD Enter -When the disc is in DVD Menu mode,
selecting DVD Enter will allow you to play the current
highlighted selection. Use the remote control to scroll
up and down the menu (if equipped).
•DISC Play/Pause -You can toggle between
playing the DVD and pausing the DVD by
pushing the SELECT button (if equipped).
•DVD Play Options -Selecting the DVD Play Options
will display the following:
•Subtitle – Repeatedly pressing SELECT will switch
subtitles to different subtitle languages that are
available on the disc (if equipped).
•Audio Stream – Repeatedly pressing SELECT will
switch to different audio languages (if supported on
the disc) (if equipped).
•Angle – Repeatedly pressing SELECT will change
the viewing angle if supported by the DVD disc (if
equipped).
NOTE:
•The available selections for each of the above entries
varies depending upon the disc.
•These selections can only be made while playing a
DVD.
•VES™ Power -Allows you to turn VES™ ON and
OFF (if equipped).
UNDERSTANDING YOUR INSTRUMENT PANEL 191
4
Page 194 of 439
•VES™ Lock -Locks out rear VES™ remote controls (if
equipped).
•VES™ CH1/CH2 -Allows the user to change the
mode of either the IR1 or IR2 wireless headphones by
pressing the AUDIO/SELECT button (if equipped).
•Set Home Clock -Pressing the SELECT button allows
you to set the clock. Turn the TUNE/SCROLL control
knob to adjust the hours and then press and turn the
TUNE/SCROLL control knob to adjust the minutes.
Press the TUNE/SCROLL control knob again to save
changes.
•Player Defaults -Selecting this item will allow the
user to scroll through the following items and set
defaults according to customer preference.
Menu Language — If Equipped
Selecting this item will allow the user to choose the
default startup DVD menu language (effective only iflanguage supported by disc). If you want to select a
language not listed, then scroll down and select�other.�
Enter the four-digit country code using the TUNE/
SCROLL control knob to scroll up and down to select the
number and then push to select.
Audio Language — If Equipped
Selecting this item allows you to choose a default audio
language (effective only if the language is supported by
the disc). You can select a language not listed by scrolling
down and selecting�other.�Enter the country code using
the TUNE/SCROLL control knob to scroll up and down
to select the number and then push to select.
Subtitle Language — If Equipped
Selecting this item allows you to choose a default subtitle
language (effective only if the language is supported by
the disc). You can select a language not listed by scrolling
down and selecting�other.�Enter the country code using
192 UNDERSTANDING YOUR INSTRUMENT PANEL
Page 195 of 439
the TUNE/SCROLL control knob to scroll up and down
to select the number and then push to select.
Subtitles — If Equipped
Selecting this item allows you to choose between subtitle
Off or On.
Audio DRC — If Equipped
Selecting this item allows you to limit maximum audio
dynamic range. The default is set to�High,�and under
this setting, dialogues will play at 11 db higher than if the
setting is�Normal.�
Aspect Ratio — If Equipped
Selecting this item allows you to choose between wide
screen, pan scan, and letter box.
AutoPlay — If Equipped
When this is set to On and a DVD video is inserted, it will
bypass the DVD menu screen and automatically play the
movie. In some rare cases, the DVD player may notauto-play the main title. In such cases, use the MENU
button on the remote control to select desired title to play.
NOTE:The user will have to set these defaults before
loading a disc. If changes are made to these settings after
a disc is loaded, changes will not be effective. Also, the
defaults are effective only if the disc supports the
customer-preferred settings.
AM and FM Buttons
Press the buttons to select AM or FM mode.
SET Button — To Set the Pushbutton Memory
When you are receiving a station that you wish to
commit to pushbutton memory, press the SET button.
The symbol SET 1 will now show in the display window.
Select the button (1-6) you wish to lock onto this station
and press and release that button. If a button is not
selected within five seconds after pressing the SET but-
ton, the station will continue to play but will not be
stored into pushbutton memory.
UNDERSTANDING YOUR INSTRUMENT PANEL 193
4
Page 237 of 439
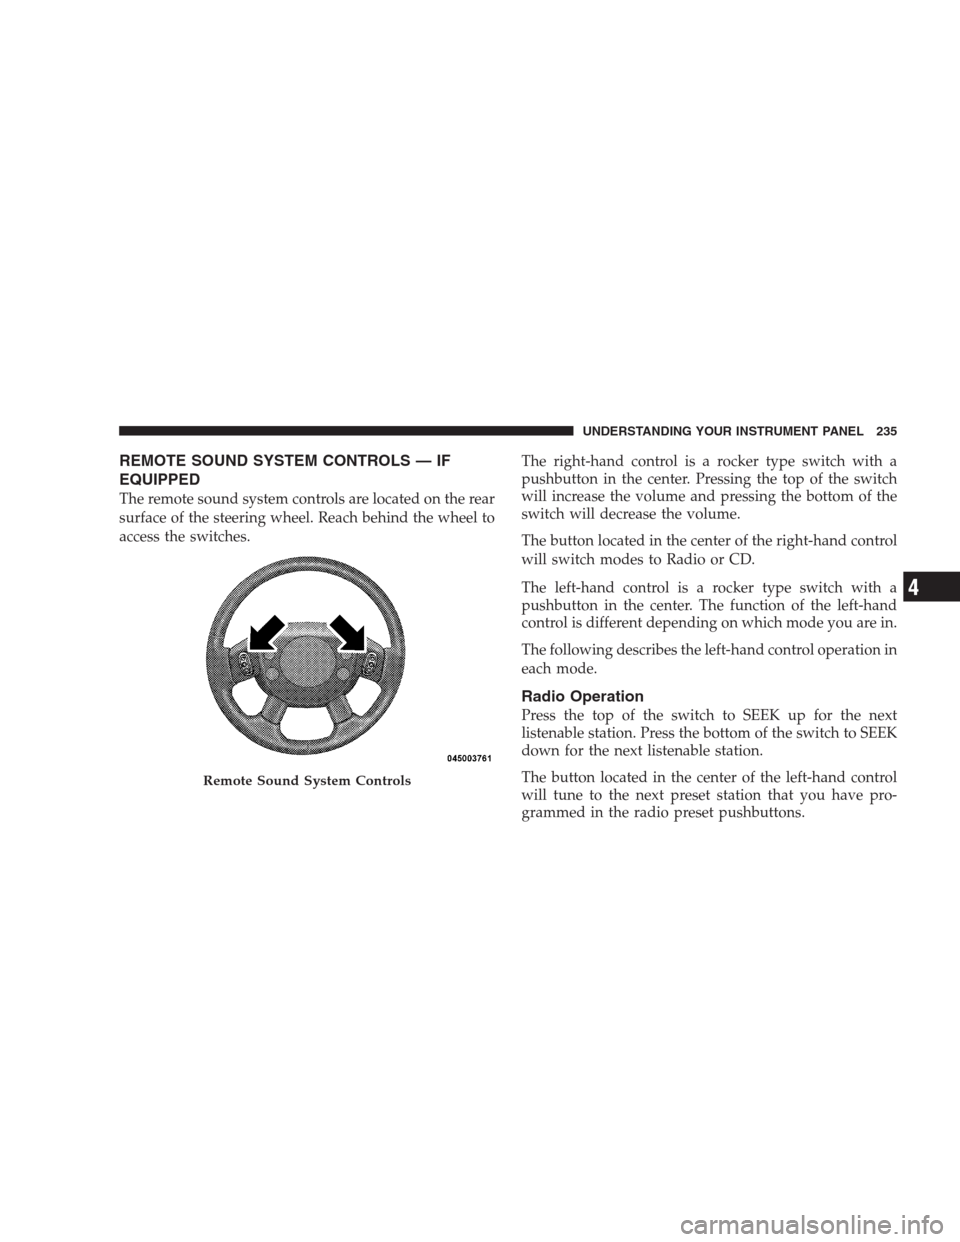
REMOTE SOUND SYSTEM CONTROLS — IF
EQUIPPED
The remote sound system controls are located on the rear
surface of the steering wheel. Reach behind the wheel to
access the switches.The right-hand control is a rocker type switch with a
pushbutton in the center. Pressing the top of the switch
will increase the volume and pressing the bottom of the
switch will decrease the volume.
The button located in the center of the right-hand control
will switch modes to Radio or CD.
The left-hand control is a rocker type switch with a
pushbutton in the center. The function of the left-hand
control is different depending on which mode you are in.
The following describes the left-hand control operation in
each mode.
Radio Operation
Press the top of the switch to SEEK up for the next
listenable station. Press the bottom of the switch to SEEK
down for the next listenable station.
The button located in the center of the left-hand control
will tune to the next preset station that you have pro-
grammed in the radio preset pushbuttons.
Remote Sound System Controls
UNDERSTANDING YOUR INSTRUMENT PANEL 235
4