2009 JAGUAR XF 16 pin connector
[x] Cancel search: 16 pin connectorPage 232 of 391

Wheels and tyres
232
Using the Jaguar tyre repair kit
Note: All vehicle drivers and occupants should
be made aware that a temporary repair has
been made to a tyre fitted to the vehicle. They
should also be made aware of the special
driving conditions im posed when using a
repaired tyre.
Repair procedure
1. Open the tyre repair kit and peel off the
maximum speed label. Attach the label to
the fascia in the driver's field of vision.
Take care not to obstruct any of the
instruments or warning lights.
2. Uncoil the compressor power cable and
the inflation hose.
3. Unscrew the orange cap from the sealant
bottle receiver and the sealant bottle cap.
4. Screw the sealant bottle into the receiver
(clockwise) until tight.
•Screwing the bottle onto the receiver will
pierce the bottle's se al. Do not unscrew
a full, or partly us ed bottle from the
receiver. Doing so will result in sealant
leaking from the bottle.
5. Remove the valve cap from the damaged
tyre.
6. Remove the protective cap from the
inflation hose and connect the inflation
hose to the tyre valve. Ensure that the hose
is screwed on firmly.
7. Ensure that the compressor switch is in
the off (0) position.
8. Insert the power cable connector into the
auxiliary power socket. See AUXILIARY
POWER SOCKETS (page 125).
WARNINGS
Avoid skin contact with the sealant
which contains natu ral rubber latex.
If the tyre inflati on pressure does not
reach 1.8 bar (26 lbf/in², 180 kPa)
within seven minutes, the tyre may
have suffered excessive damage. A temporary
repair will not be poss ible, and the vehicle
should not be driven until the tyre has been
replaced.
CAUTIONS
Before attempting a ty re repair, ensure
that the vehicle is parked safely, as far
away from passing traffic as possible.
Ensure that the parki ng brake is applied
and P (Park) is selected.
Do not attempt to remove foreign
objects such as nails, screws, etc. from
the tyre.
Always run the engine when using the
compressor, unless the vehicle is in an
enclosed or poorly ventil ated space, as this
may cause asphyxiation.
To prevent overheating, do not operate
the compressor continuously for longer
than ten minutes.
WARNING
Check the tyre sidewall prior to
inflation. If there are any cracks,
bumps or similar damage, do not
attempt to inflate the tyre. Do not stand
directly beside the tyre while the compressor
is pumping. Watch the ty re sidewall. If any
cracks, bumps or simila r damage appear, turn
off the compressor and let the air out by
means of the pressure relief valve. Do not
continue to use the tyre.
Page 233 of 391

233
Wheels and tyres
9.Unless the vehicle is in an enclosed area,
start the engine.
10. Set the compressor switch to the on ( I)
position.
11. Inflate the tyre to a minimum of 1.9 bar
(26 lbf/in²) and a maximum of 3.5 bar
(51 lbf/in²).
•When pumping the sealant through the
tyre valve, the pressure may rise up to 6
bar (87 lbf/in²). The pressure will drop
again after approximately 30 seconds.
12. During the inflation, switch the
compressor off briefly, to check the tyre
pressure using the gauge mounted on the
compressor.
• It should not take longer than seven
minutes to inflate the tyre. If, after seven
minutes, the tyre has not yet reached
minimum pressure, the tyre should not
be used.
13. Once the tyre has been inflated, switch off
the compressor. If desired, the engine may
be turned off after the compressor has
been turned off.
14. Remove the power connector from the
auxiliary power socket.
15. Remove the inflation hose from the tyre
valve, by unscrewing it as quickly as
possible (count er-clockwise).
16. Replace the inflation hose protective cap
and the tyre valve cap.
17. Do not remove the sealant bottle from the
receiver.
18. Ensure that the tyre repair kit (including
the bottle and receiver caps) are placed
securely in the vehicle. You will need to
use the kit to check the tyre pressure after
approximately 3 km (2 miles), so ensure
they are easily accessible. 19.
Immediately drive the vehicle for
approximately 3 km (2 miles), to allow the
sealant to coat the inner surface of the tyre
and form a seal at the puncture.
Checking the tyre pressure after a repair
1.Drive the vehicle for 3 km (2 miles) then
stop in a safe place. Carry out a visual
examination of the tyres condition.
2. Make sure that the sealant container
section is in its original position.
3. Screw the inflation hos e connector firmly
onto the tyre valve.
4. Read the tyre pressure from the gauge.
5. If the pressure of the sealant filled tyre is
above 1.3 bar (19 lb/in²) adjust the
pressure to the correct value. See TYRE
CARE (page 217).
6. Ensure that the compressor switch is in
the off (O ) position and insert the power
cable connector into the auxiliary power
socket.
If the vehicle is in a well ventilated area,
start the engine.
WARNINGS
When driving the vehicle, if you
experience vibr ations, abnormal
steering, or noises, reduce speed
immediately. Drive with extreme caution and
reduced speed, to the first safe place to stop
the vehicle. Visually examine the tyre and
check its pressure. If there are any signs of
damage or deformity to the tyre, or the tyre
pressure is below 1.3 bar (19 lb/in²), do not
continue driving.
Consult a tyre repair centre or your
Dealer/Authorised Repairer, for
advice concerning the replacement of
a tyre after using a tyre repair kit.
Page 248 of 391

Fuses
248
Luggage compartment fuse box
F31 15A Blue Sunroof.
F32 5A Tan Jaguar Smart Key docking station.
F33 5A Tan Diagnostic connector.
F34 5A Tan Instrument pack.
F35 15A Blue Interior lamps.
F36 10A Red Suspension system.
Fuse No Rating
(amps) Fuse
Colour Circuit
Fuse No Rating
(amps) Fuse
Colour Circuit
F1 30A Pink Air blower.
F2 30A Pink Electric parking brake.
F3 - - Not used.
F4 - - Not used.
F5 - - Not used.
F6 - - Not used.
F7 30A Pink Heated rear screen.
F8 30A Pink Audio system (Premium audio only).
F9 50A Red RBD link.
F10 40A Green Rear electronic differential (e-Diff).
F11 - - Not used.
F12 - - Not used.
F13 - - Not used.
F14 5A Tan Telephone.
F15 10A Red TV. DVD. DAB radio.
F16 - - Not used.
F17 - - Not used.
F18 - - Not used.
F19 - - Not used.
F20 - - Not used.
F21 - - Not used.
F22 - - Not used.
Page 300 of 391

Portable audio
300
Connecting an iPod
On the audio Home screen, select Audio/TV,
then Portable audio , then iPod.
Note: You can also press the SOURCE button
repeatedly to select Portable audio device .
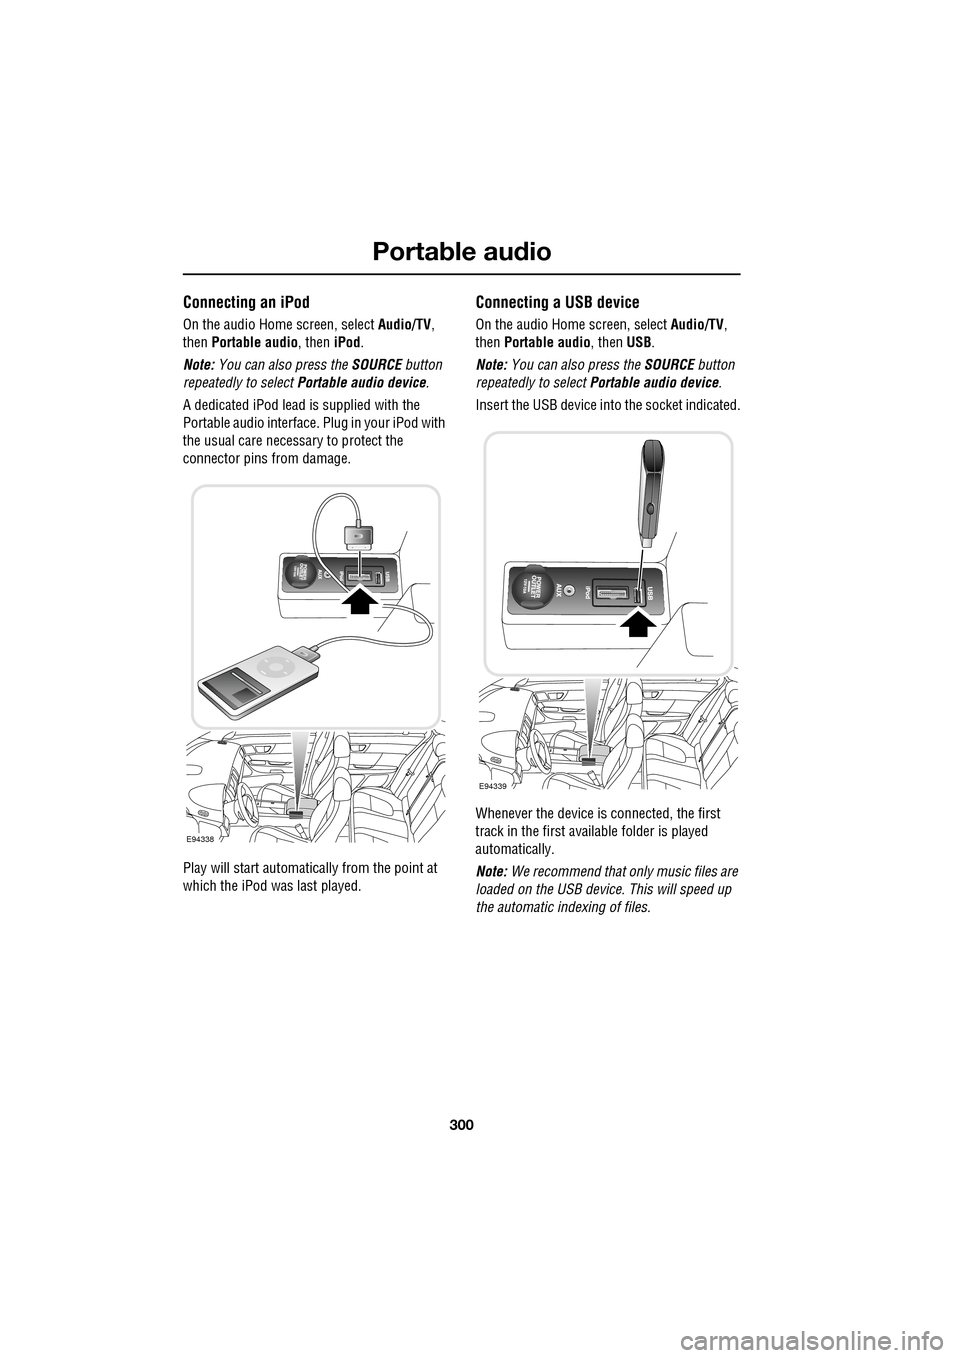
A dedicated iPod lead is supplied with the
Portable audio interface. Plug in your iPod with
the usual care necess ary to protect the
connector pins from damage.
Play will start automatically from the point at
which the iPod was last played.
Connecting a USB device
On the audio Home screen, select Audio/TV,
then Portable audio, then USB.
Note: You can also press the SOURCE button
repeatedly to select Portable audio device .
Insert the USB device into the socket indicated.
Whenever the device is connected, the first
track in the first available folder is played
automatically.
Note: We recommend that only music files are
loaded on the USB devi ce. This will speed up
the automatic i ndexing of files.
E94338
E94339