Page 122 of 425
441
Features of your vehicle
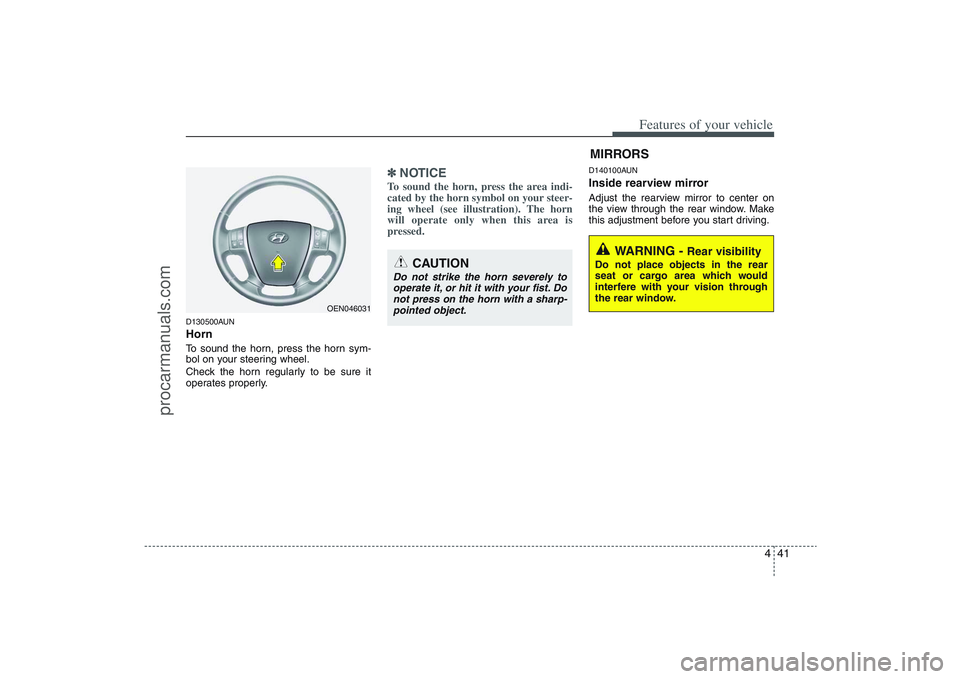
D130500AUNHornTo sound the horn, press the horn sym-
bol on your steering wheel.
Check the horn regularly to be sure it
operates properly.
✽ ✽
NOTICETo sound the horn, press the area indi-
cated by the horn symbol on your steer-
ing wheel (see illustration). The horn
will operate only when this area is
pressed.
D140100AUNInside rearview mirrorAdjust the rearview mirror to center on
the view through the rear window. Make
this adjustment before you start driving.
CAUTION
Do not strike the horn severely to
operate it, or hit it with your fist. Do
not press on the horn with a sharp-
pointed object.
MIRRORS
WARNING -
Rear visibility
Do not place objects in the rear
seat or cargo area which would
interfere with your vision through
the rear window.
OEN046031
procarmanuals.com
Page 129 of 425

Features of your vehicle48 4FCC ID: NZLZTVHL3
IC: 4112A-ZTVHL3
This device complies with Part 15 of
the FCC Rules.
Operation is subject to the following two
conditions:
1. this device may not cause harmful
interference, and
2. This device must accept any interfer-
ence received, including interference
that may cause undesired operation.
NVS
®is a registered trademark and Z-
Nav™ is a trademark of the Gentex
Corporation, Zeeland, Michigan.
HomeLink
®is a registered trademark
owned by Johnson Controls,
Incorporated, Milwaukee, Wisconsin.
D140300AENConversation mirror (if equipped)The mirror is a convenient feature to help
the front passenger talk with rear pas-
sengers without turning the head or body
rearward.
To use the mirror, push the cover and
open it.
Adjust mirror angle to the desired posi-
tion.
Close the cover after use.
D140200AUN-EUOutside rearview mirror Be sure to adjust mirror angles before
driving.
Your vehicle is equipped with both left-
hand and right-hand outside rearview
mirrors. The mirrors can be adjusted
remotely with the remote switch. The mir-
ror heads can be folded back to prevent
damage during an automatic car wash or
when passing in a narrow street.
WARNING
Do not adjust the mirror angle or
talk with rear passengers for a long
time while driving. You may lose
your steering control and cause an
accident that result in severe per-
sonal injury or death.
WARNING
The transceiver has been tested
and complies with FCC and
Industry Canada rules. Changes or
modifications not expressly
approved by the party responsible
for compliance could void the
user's authority to operate the
device.
OEN046146
WARNING -
Rearview mir-
rors
The right outside rearview mirror
is convex. Objects seen in the
mirror are closer than they
appear.
Use your interior rearview mirror
or direct observation to deter-
mine the actual distance of fol-
lowing vehicles when changing
lanes.
procarmanuals.com
Page 130 of 425

449
Features of your vehicle
CAUTION
The mirrors stop moving when
they reach the maximum adjust-
ing angles, but the motor contin-
ues to operate while the switch is
depressed. Do not depress the
switch longer than necessary, the
motor may be damaged.
Do not attempt to adjust the out-
side rearview mirror by hand.
Doing so may damage the parts.
D140201AENRemote controlThe electric remote control mirror switch
allows you to adjust the position of the
left and right outside rearview mirrors. To
adjust the position of either mirror, push
the switch (1) to R or L to select the right
side mirror or the left side mirror, then
press a corresponding point on the mirror
adjustment control to position the select-
ed mirror up, down, left or right.
After adjustment, put the switch into neu-
tral (center) position to prevent the inad-
vertent adjustment.
CAUTION
Do not scrape ice off the mirror
face; this may damage the surface
of the glass. If ice should restrict
movement of the mirror, do not
force the mirror for adjustment. To
remove ice, use a deicer spray, or a
sponge or soft cloth with very warm
water.
CAUTION
If the mirror is jammed with ice, do
not adjust the mirror by force. Use
an approved spray de-icer (not radi-
ator antifreeze) to release the
frozen mechanism or move the
vehicle to a warm place and allow
the ice to melt.
WARNING
Do not adjust or fold the outside
rearview mirrors while the vehicle
is moving. This could result in loss
of control, and an accident which
could cause death, serious injury
or property damage.
OEN047037
procarmanuals.com
Page 132 of 425
451
Features of your vehicle
INSTRUMENT CLUSTER
1. Tachometer
2. Turn signal indicators
3. Speedometer
4. Engine temperature gauge
5. Warning and indicator lights
6. Shift position indicator
7. Odometer/Trip computer*
8. Fuel gauge
* : if equipped
OEN049040N-1
D150000AUN-EU
* The actual cluster in the vehicle may differ from the illustration.
For more details refer to the "Gauges" in the next pages.
procarmanuals.com
Page 134 of 425
453
Features of your vehicle
D150203AUNEngine temperature gauge This gauge shows the temperature of the
engine coolant when the ignition switch
is ON.
Do not continue driving with an overheat-
ed engine. If your vehicle overheats, refer
to “If the engine overheats” in section 6.
OEN046047L
CAUTION
If the gauge pointer moves beyond
the normal range area toward the
“H” position, it indicates overheat-
ing that may damage the engine.
CAUTION
Do not operate the engine within
the tachometer's RED ZONE.
This may cause severe engine dam-
age.
WARNING
Never remove the radiator cap
when the engine is hot. The engine
coolant is under pressure and
could cause severe burns. Wait
until the engine is cool before
adding coolant to the reservoir.
procarmanuals.com
Page 135 of 425

Features of your vehicle54 4D150204AUNFuel gaugeThe fuel gauge indicates the approxi-
mate amount of fuel remaining in the fuel
tank.
The fuel tank capacity is given in sec-
tion 8.The fuel gauge is supplemented by
a low fuel warning light, which will illumi-
nate when the fuel tank is near empty.
On inclines or curves, the fuel gauge
pointer may fluctuate or the low fuel
warning light may come on earlier than
usual due to the movement of fuel in the
tank.
D150205AEN-EUOdometer/Tripmeter (if equipped)Odometer
The odometer indicates the total dis-
tance the vehicle has been driven.
You will also find the odometer useful to
determine when periodic maintenance
should be performed.✽ ✽
NOTICEFederal and state laws forbid alteration
of the odometer of any vehicle with the
intent to change the mileage registered
on the odometer. The alteration may
void your warranty coverage.
OEN046048L
WARNING
- Fuel gauge
Running out of fuel can expose
vehicle occupants to danger.
You must stop and obtain addition-
al fuel as soon as possible after the
warning light comes on or when the
gauge indicator comes close to the
E level.
OEN046200N
procarmanuals.com
Page 139 of 425

Features of your vehicle58 4Average fuel consumption
This mode calculates the average fuel
consumption from the total fuel used and
the distance since the last average con-
sumption reset. The total fuel used is cal-
culated from the fuel consumption input.
For an accurate calculation, drive more
than 0.03 miles (50 m).
Pressing the RESET button for more than
1 second, when the average fuel con-
sumption is being displayed, clears the
average fuel consumption to zero (----).
✽ ✽
NOTICE• If the vehicle is not on level ground or
the battery power has been interrupt-
ed, the “Distance to empty” function
may not operate correctly.
The trip computer may not register
additional fuel if less than 1.6 gallons (6
liters) of fuel are added to the vehicle.
• The fuel consumption and distance to
empty values may vary significantly
based on driving conditions, driving
habits, and condition of the vehicle.
• The distance to empty value is an esti-
mate of the available driving distance.
This value may differ from the actual
driving distance available.D150300AENWarnings and indicatorsAll warning lights are checked by turning
the ignition switch ON (do not start the
engine). Any light that does not illuminate
should be checked by an authorized
HYUNDAI dealer.
After starting the engine, check to make
sure that all warning lights are off. If any
are still on, this indicates a situation that
needs attention. When releasing the
parking brake, the brake system warning
light should go off. The fuel warning light
will stay on if the fuel level is low.
D150302AENAir bag warning lightThis warning light will illuminate for
approximately 6 seconds each time you
turn the ignition switch to the ON posi-
tion.
This light also comes on when the
Supplemental Restraint System (SRS) is
not working properly. If the AIR BAG
warning light does not come on, or con-
tinuously remains on after operating for
about 6 seconds when you turned the
ignition switch to the ON position or start-
ed the engine, or if it comes on while
driving, have the SRS inspected by an
authorized HYUNDAI dealer.
OEN046186N
AIR
BAG
procarmanuals.com
Page 140 of 425

459
Features of your vehicle
D150303AENAnti-lock brake system
(ABS) warning light This light illuminates if the ignition switch
is turned ON and goes off in approxi-
mately 3 seconds if the system is operat-
ing normally.
If the ABS warning light remains on,
comes on while driving, or does not
come on when the ignition switch is
turned to the ON position, this indicates
that there may be a malfunction with the
ABS.
If this occurs, have your vehicle checked
by an authorized HYUNDAI dealer as
soon as possible. The normal braking
system will still be operational, but with-
out the assistance of the anti-lock brake
system.
Electronic brake force distri-
bution (EBD) system warning
light
If two warning lights illumi-
nate at the same time while
driving, your vehicle may
have a malfunction with the
ABS and EBD system.In this case, your ABS and regular brake
system may not work normally. Have the
vehicle checked by an authorized
HYUNDAI dealer as soon as possible.
✽ ✽
NOTICEIf the ABS warning light or EBD warn-
ing light is on and stays on, the
speedometer or odometer/tripmeter
may not work. In this case, have your
vehicle checked by an authorized
HYUNDAI dealer as soon as possible.
D150304AEN-EUSeat belt warning As a reminder to the driver, the seat belt
warning light will blink for approximately
6 seconds each time you turn the ignition
switch ON regardless of belt fastening.
The warning light will blink again for
approximately 6 seconds when starting
the engine.
If the driver’s seat belt is not fastened
when the ignition switch is turned ON
and/or START or if it is disconnected
after the ignition switch is turned ON, the
seat belt warning light and the seat belt
warning chime will operate for approxi-
mately 6 seconds until the belt is fas-
tened. If the driver's seat belt is not fas-
tened when the vehicle speed exceeds 6
mph (10 km/h), the seat belt warning light
and chime will operate for approximately
11 times with a pattern of 6 seconds on
and 24 seconds off until the belt is fas-
tened or the vehicle speed decreases
below 3 mph (5 km/h).
WARNING
If the both ABS and brake warning
lights are on and stay on, your vehi-
cle’s brake system will not work
normally during sudden braking. In
this case, avoid high speed driving
and abrupt braking. Have your vehi-
cle checked by an authorized
HYUNDAI dealer as soon as possi-
ble.
procarmanuals.com