2009 Hyundai Sonata clock
[x] Cancel search: clockPage 9 of 340
23
Your vehicle at a glance
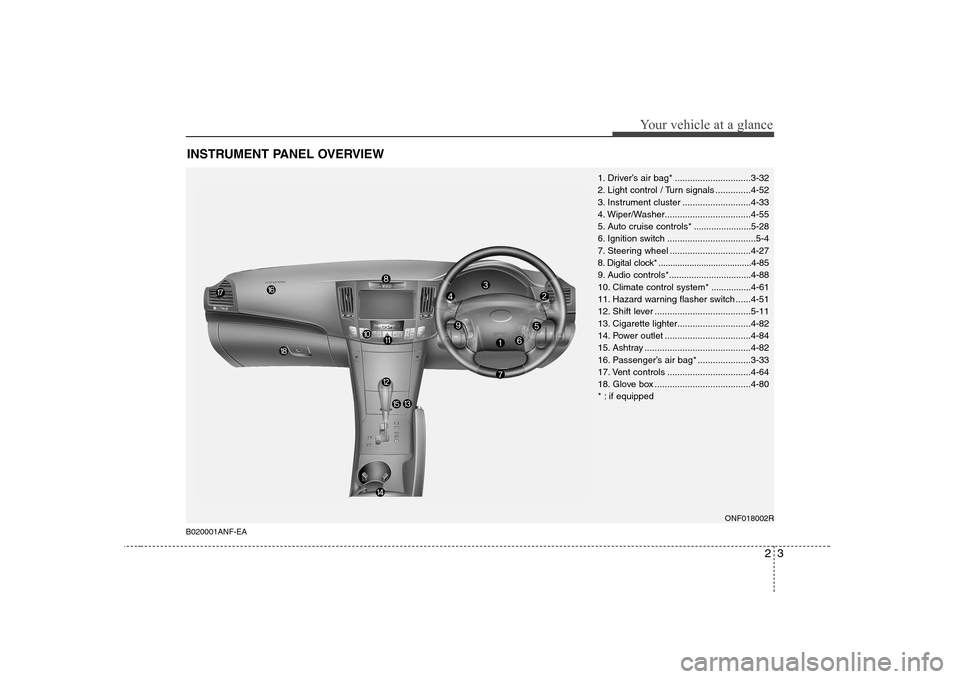
INSTRUMENT PANEL OVERVIEW
1. Driver’s air bag* ..............................3-32
2. Light control / Turn signals ..............4-52
3. Instrument cluster ...........................4-33
4. Wiper/Washer..................................4-55
5. Auto cruise controls * .......................5-28
6. Ignition switch ...................................5-4
7. Steering wheel ................................4-27
8. Digital clock* .......................................4-85
9. Audio controls *.................................4-88
10. Climate control system*................4-61
11. Hazard warning flasher switch ......4-51
12. Shift lever ......................................5-11
13. Cigarette lighter.............................4-82
14. Power outlet ..................................4-84
15. Ashtray ..........................................4-82
16. Passenger’s air bag* .....................3-33
17. Vent controls .................................4-64
18. Glove box ......................................4-80
* : if equipped
ONF018002R
B020001ANF-EA
Page 70 of 340

Features of your vehicle
12
4
D070100ANF-EA Opening the boot
With remote boot lid release
To open the boot lid without using the
key, pull up the boot lid release lever.
With the key
To open the boot lid, insert the key and
turn it clockwise to unlock. The boot com-
partment light will illuminate when theboot lid is opened. D070200ANF-EA Closing the boot
To close, lower the boot lid, then press
down on it until it locks. To be sure the
boot lid is securely fastened, always
check by trying to pull it up again.
BOOT
ONF048010RHNF2012-E
WARNING
The boot lid should be always kept
completely closed while the vehicle
is in motion. If it is left open or ajar,
poisonous exhaust gases mayenter the car and serious illness or
death may result. See additional
warnings concerning exhaust
gases in section 5, “Engine exhaust
can be dangerous!”.
Page 78 of 340
Features of your vehicle
20
4
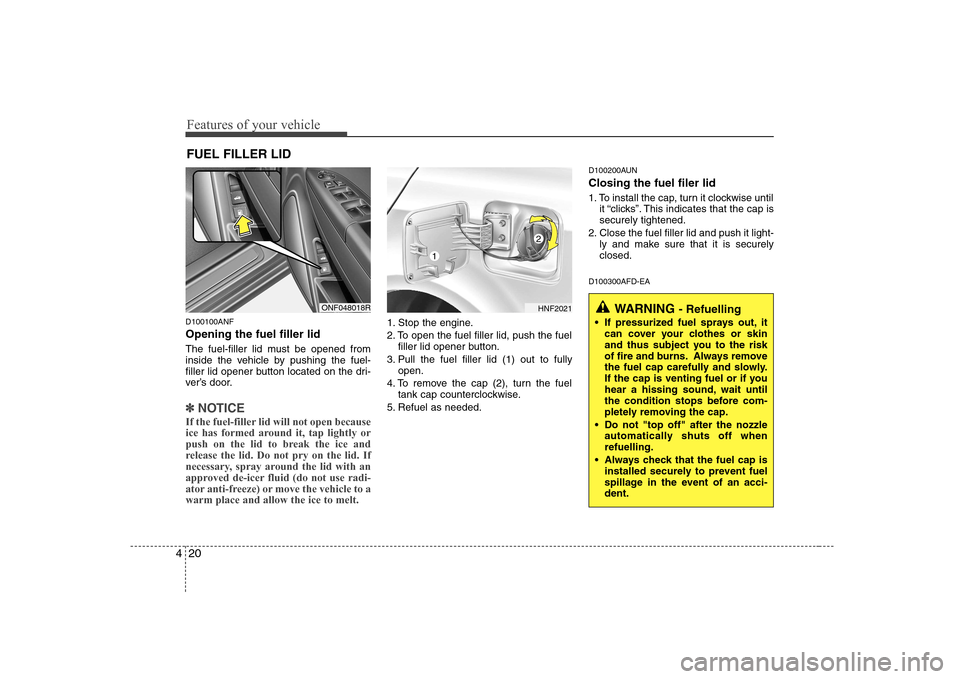
D100100ANF Opening the fuel filler lid
The fuel-filler lid must be opened from
inside the vehicle by pushing the fuel-
filler lid opener button located on the dri-
ver’s door.
✽✽
NOTICE
If the fuel-filler lid will not open because
ice has formed around it, tap lightly or
push on the lid to break the ice and
release the lid. Do not pry on the lid. If
necessary, spray around the lid with an
approved de-icer fluid (do not use radi-
ator anti-freeze) or move the vehicle to awarm place and allow the ice to melt.
1. Stop the engine.
2. To open the fuel filler lid, push the fuel filler lid opener button.
3. Pull the fuel filler lid (1) out to fully open.
4. To remove the cap (2), turn the fuel tank cap counterclockwise.
5. Refuel as needed. D100200AUN Closing the fuel filer lid
1. To install the cap, turn it clockwise until
it “clicks”. This indicates that the cap is securely tightened.
2. Close the fuel filler lid and push it light- ly and make sure that it is securelyclosed.
D100300AFD-EA
FUEL FILLER LID
ONF048018RHNF2021
1
2
WARNING
- Refuelling
If pressurized fuel sprays out, it can cover your clothes or skin
and thus subject you to the risk
of fire and burns. Always remove
the fuel cap carefully and slowly.
If the cap is venting fuel or if you
hear a hissing sound, wait until
the condition stops before com-
pletely removing the cap.
Do not "top off" after the nozzle automatically shuts off whenrefuelling.
Always check that the fuel cap is installed securely to prevent fuel
spillage in the event of an acci-dent.
Page 143 of 340
485
Features of your vehicle
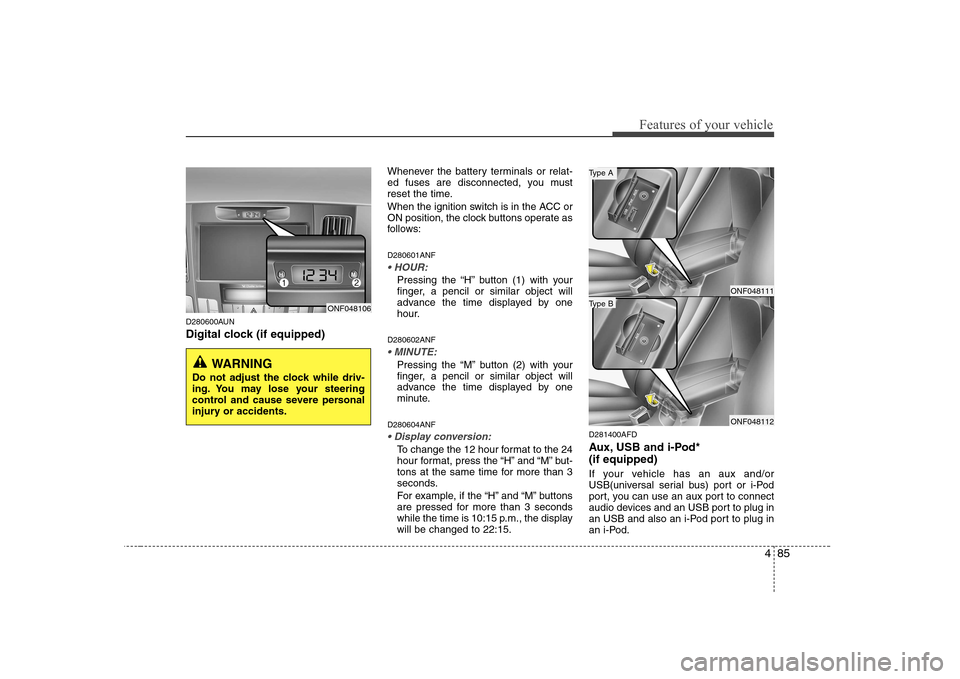
D280600AUN
Digital clock (if equipped)Whenever the battery terminals or relat-
ed fuses are disconnected, you must
reset the time.
When the ignition switch is in the ACC or
ON position, the clock buttons operate as
follows: D280601ANF
Pressing the “H” button (1) with your
finger, a pencil or similar object will
advance the time displayed by one
hour.
D280602ANF
Pressing the “M” button (2) with your
finger, a pencil or similar object will
advance the time displayed by one
minute.
D280604ANF
To change the 12 hour format to the 24
hour format, press the “H” and “M” but-
tons at the same time for more than 3
seconds.
For example, if the “H” and “M” buttons
are pressed for more than 3 seconds
while the time is 10:15 p.m., the displaywill be changed to 22:15. D281400AFD
Aux, USB and i-Pod* (if equipped)
If your vehicle has an aux and/or
USB(universal serial bus) port or i-Pod
port, you can use an aux port to connect
audio devices and an USB port to plug in
an USB and also an i-Pod port to plug in
an i-Pod.
ONF048106
WARNING
Do not adjust the clock while driv-
ing. You may lose your steering
control and cause severe personal
injury or accidents.
ONF048111
ONF048112
Type B
Type A
Page 152 of 340
Features of your vehicle
94
4
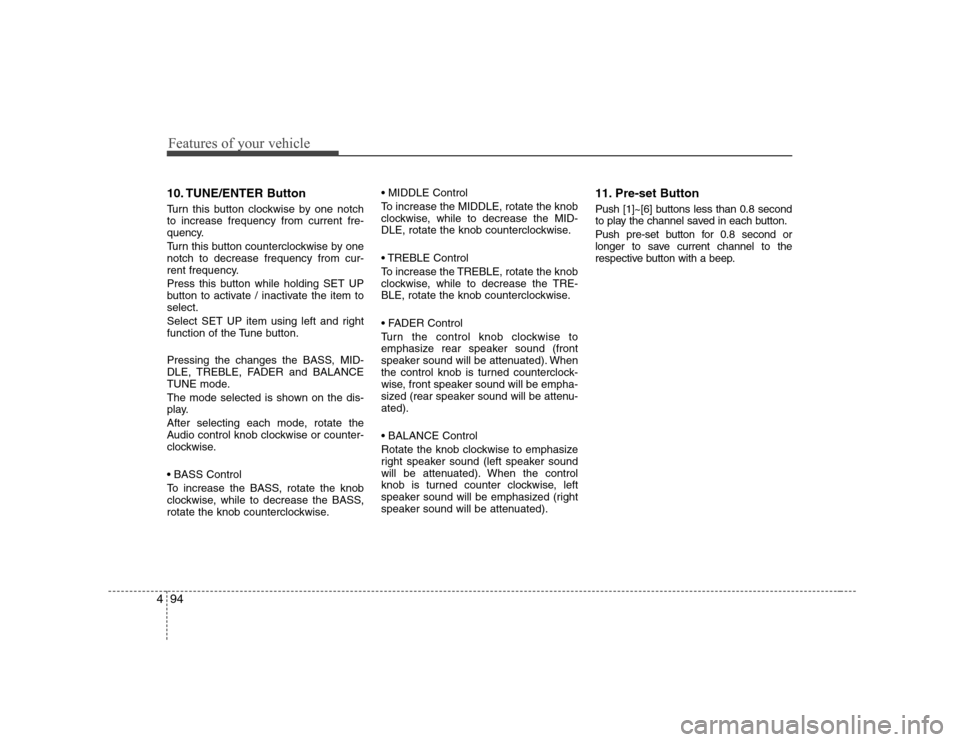
10. TUNE/ENTER Button
Turn this button clockwise by one notch to increase frequency from current fre-
quency.
Turn this button counterclockwise by one notch to decrease frequency from cur-
rent frequency.
Press this button while holding SET UP
button to activate / inactivate the item toselect.
Select SET UP item using left and right
function of the Tune button.
Pressing the changes the BASS, MID-
DLE, TREBLE, FADER and BALANCE
TUNE mode.
The mode selected is shown on the dis-
play.
After selecting each mode, rotate the
Audio control knob clockwise or counter-
clockwise.
To increase the BASS, rotate the knob
clockwise, while to decrease the BASS,
rotate the knob counterclockwise.
To increase the MIDDLE, rotate the knob
clockwise, while to decrease the MID-
DLE, rotate the knob counterclockwise.
Control
To increase the TREBLE, rotate the knob
clockwise, while to decrease the TRE-
BLE, rotate the knob counterclockwise.
Turn the control knob clockwise to
emphasize rear speaker sound (front
speaker sound will be attenuated). When
the control knob is turned counterclock-
wise, front speaker sound will be empha-
sized (rear speaker sound will be attenu-ated).
Rotate the knob clockwise to emphasize
right speaker sound (left speaker sound
will be attenuated). When the control
knob is turned counter clockwise, left
speaker sound will be emphasized (right
speaker sound will be attenuated).
11. Pre-set Button
Push [1]~[6] buttons less than 0.8 second
to play the channel saved in each button.
Push pre-set button for 0.8 second or
longer to save current channel to the
respective button with a beep.
Page 154 of 340
Features of your vehicle
96
4
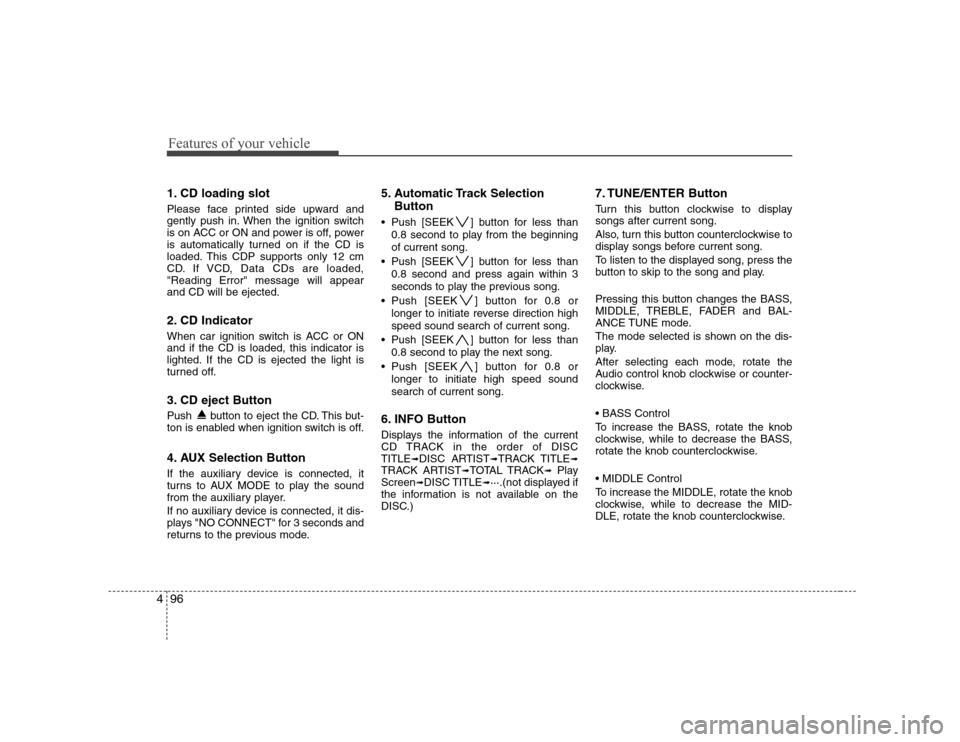
1. CD loading slot
Please face printed side upward and
gently push in. When the ignition switch
is on ACC or ON and power is off, power
is automatically turned on if the CD is
loaded. This CDP supports only 12 cm
CD. If VCD, Data CDs are loaded,"Reading Error" message will appearand CD will be ejected.
2. CD Indicator
When car ignition switch is ACC or ON and if the CD is loaded, this indicator is
lighted. If the CD is ejected the light is
turned off.
3. CD eject Button
Push button to eject the CD. This but-
ton is enabled when ignition switch is off.
4. AUX Selection Button
If the auxiliary device is connected, it
turns to AUX MODE to play the sound
from the auxiliary player.
If no auxiliary device is connected, it dis-
plays "NO CONNECT" for 3 seconds and
returns to the previous mode. 5. Automatic Track Selection
Button
Push [SEEK ] button for less than 0.8 second to play from the beginning of current song.
Push [SEEK ] button for less than 0.8 second and press again within 3
seconds to play the previous song.
Push [SEEK ] button for 0.8 or longer to initiate reverse direction highspeed sound search of current song.
Push [SEEK ] button for less than 0.8 second to play the next song.
Push [SEEK ] button for 0.8 or longer to initiate high speed soundsearch of current song.
6. INFO Button
Displays the information of the current
CD TRACK in the order of DISCTITLE ➟DISC ARTIST ➟TRACK TITLE ➟
TRACK ARTIST ➟TOTAL TRACK ➟Play
Screen ➟DISC TITLE ➟···.(not displayed if
the information is not available on the
DISC.) 7. TUNE/ENTER Button
Turn this button clockwise to display songs after current song.
Also, turn this button counterclockwise to
display songs before current song.
To listen to the displayed song, press the
button to skip to the song and play.
Pressing this button changes the BASS,
MIDDLE, TREBLE, FADER and BAL-
ANCE TUNE mode.
The mode selected is shown on the dis-
play.
After selecting each mode, rotate the
Audio control knob clockwise or counter-
clockwise.
To increase the BASS, rotate the knob
clockwise, while to decrease the BASS,
rotate the knob counterclockwise.
To increase the MIDDLE, rotate the knob
clockwise, while to decrease the MID-
DLE, rotate the knob counterclockwise.
Page 155 of 340
497
Features of your vehicle
Control
To increase the TREBLE, rotate the knob
clockwise, while to decrease the TRE-
BLE, rotate the knob counterclockwise.
Turn the control knob clockwise to
emphasize rear speaker sound (front
speaker sound will be attenuated). When
the control knob is turned counterclock-
wise, front speaker sound will be empha-
sized (rear speaker sound will be attenu-ated).
Rotate the knob clockwise to emphasize
right speaker sound (left speaker sound
will be attenuated). When the control
knob is turned counter clockwise, left
speaker sound will be emphasized (right
speaker sound will be attenuated).
8. REPEAT Button
Repeats current song when the button is
pressed for less than 0.8 second.
Repeats the current folder when the but-
ton is pressed for 0.8 second or longer.
(If there is no folder, entire disc will be repeated.)9. RANDOM Play Button
Turns on/off the randomization of the play
list of files in the currently played DISC.
To cancel the mode, press the key once again.
10. SCAN Play Button
Plays first 10 seconds of each song in the
DISC.
To cancel the mode, press the key once again.CAUTION IN USING
USB DEVICE
To use the external USB device, make sure the device is notmounted when starting up the
vehicle and mount the deviceafter starting up.
If you start the vehicle when the USB device is mounted, it maydamage the USB device. (USB is
not ESA)
If the vehicle is started up or turned off while the external USBdevice is connected, the external
USB device may not work.
It may not play inauthentic MP3 or WMA files.
1) It can only play MP3 files with the compression rate between8Kbps~320Kbps.
2) It can only play WMA music files with the compression ratebetween 8Kbps~320Kbps.
Take cautions for static electricity when mounting or dismountingthe external USB device.
Encoded MP3 PLAYER is not rec- ognizable.
(Continued)
Page 158 of 340
Features of your vehicle
100
4
In case USB is connected to the multiple
terminal inside the console on the left
hand side of the driver’s seat. When USB
is connected, the ‘USB’ icon will be dis-
played on the top right corner of the dis-
play screen.
1.AUX Selection Button
If USB is not connected, it switches to the USB mode from the Radio and CD mode
to play the song files stored in the USB.
If AUX is not connected, it is invalid key.
2. Track Moving Button
Press the [SEEK ] button for less
than 0.8 second to play from the
beginning of the song currently played.
Press the button for less than 0.8 sec- ond and press it again within 1 second
to move and play the previous track.
Press the button for 0.8 second or
longer to play the song in reverse
direction in fast speed.
Press the [SEEK ] button but ton for
less than 0.8 second to move to the
next track. Press the button for 0.8 sec-
ond or longer to play the song in for-
ward direction in fast speed. 3. INFO Button
Displays the information of the file cur-
rently played in the order of FILE NAME➟
TITLE ➟ARTIST ➟ALBUM ➟FOLDER ➟
TOTAL FILE ➟normal display ➟FILE
NAME ➟… (Displays no information if
the file has no song information.)
4. Folder moving Button
Moves [FLDR ] button child folder of
the current folder and displays the first
song in the folder. Press TUNE/ENTER
button to move to the folder displayed.
It will play the first song in the folder.
Moves [FLDR ] button parent folder and displays the first song in the folder.
Press TUNE/ENTER button to move to
the folder displayed. It will play the first
song in the folder.
5. TUNE/ENTER Button
Turn this button clockwise to display the
songs next to the currently played song.
Turn the button counterclockwise to dis-
play the songs before the currently
played song.
Press the button to skip to and play the selected song. Pressing this button changes the BASS,
MIDDLE, TREBLE, FADER and BAL-
ANCE TUNE mode.
The mode selected is shown on the dis-
play.
After selecting each mode, rotate the
Audio control knob clockwise or counter-
clockwise.
To increase the BASS, rotate the knob
clockwise, while to decrease the BASS,
rotate the knob counterclockwise.
To increase the MIDDLE, rotate the knob
clockwise, while to decrease the MID-
DLE, rotate the knob counterclockwise.
Control
To increase the TREBLE, rotate the knob
clockwise, while to decrease the TRE-
BLE, rotate the knob counterclockwise.