2009 Hyundai Sonata change time
[x] Cancel search: change timePage 14 of 340
35
Safety features of your vehicle
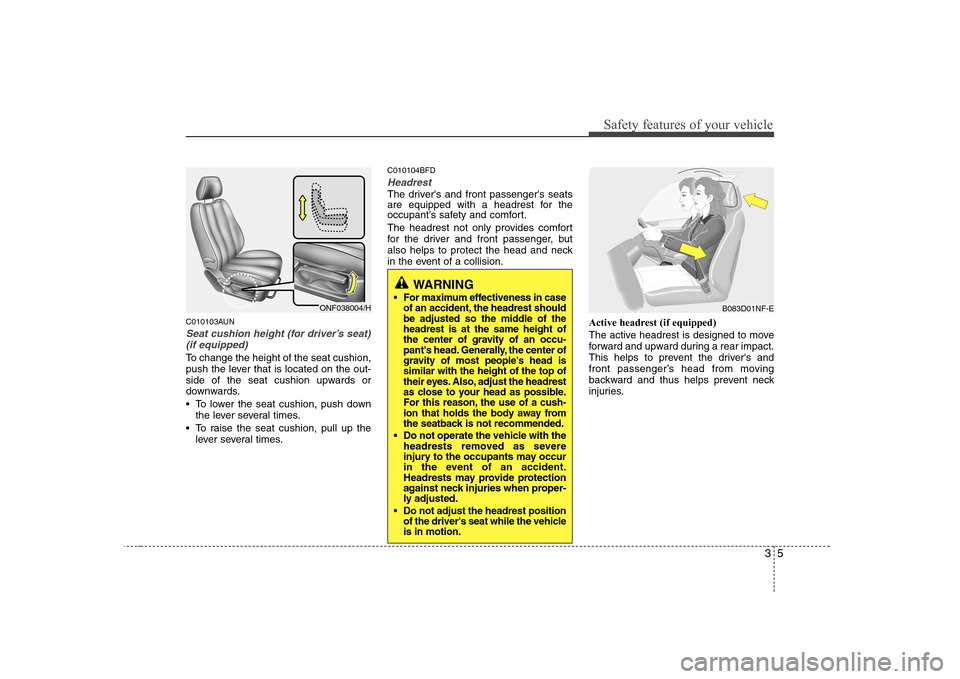
C010103AUN
Seat cushion height (for driver’s seat)(if equipped)
To change the height of the seat cushion,
push the lever that is located on the out-
side of the seat cushion upwards or
downwards.
• To lower the seat cushion, push down the lever several times.
To raise the seat cushion, pull up the lever several times. C010104BFD
Headrest
The driver's and front passenger's seats
are equipped with a headrest for the
occupant's safety and comfort.
The headrest not only provides comfort
for the driver and front passenger, but
also helps to protect the head and neck
in the event of a collision.
Active headrest (if equipped)
The active headrest is designed to move
forward and upward during a rear impact.
This helps to prevent the driver's and
front passenger’s head from moving
backward and thus helps prevent neck
injuries.
ONF038004/HB083D01NF-E
WARNING
For maximum effectiveness in caseof an accident, the headrest should
be adjusted so the middle of theheadrest is at the same height of
the center of gravity of an occu-
pant's head. Generally, the center of
gravity of most people's head issimilar with the height of the top of
their eyes. Also, adjust the headrest
as close to your head as possible.
For this reason, the use of a cush-
ion that holds the body away from
the seatback is not recommended.
Do not operate the vehicle with theheadrests removed as severe
injury to the occupants may occur
in the event of an accident.
Headrests may provide protection
against neck injuries when proper-
ly adjusted.
Do not adjust the headrest position
of the driver's seat while the vehicleis in motion.
Page 95 of 340
437
Features of your vehicle
✽✽NOTICE
It is forbidden that alteration of the
odometer of any vehicle with the intent
to change the mileage registered on the
odometer. The alteration may void yourwarranty coverage.
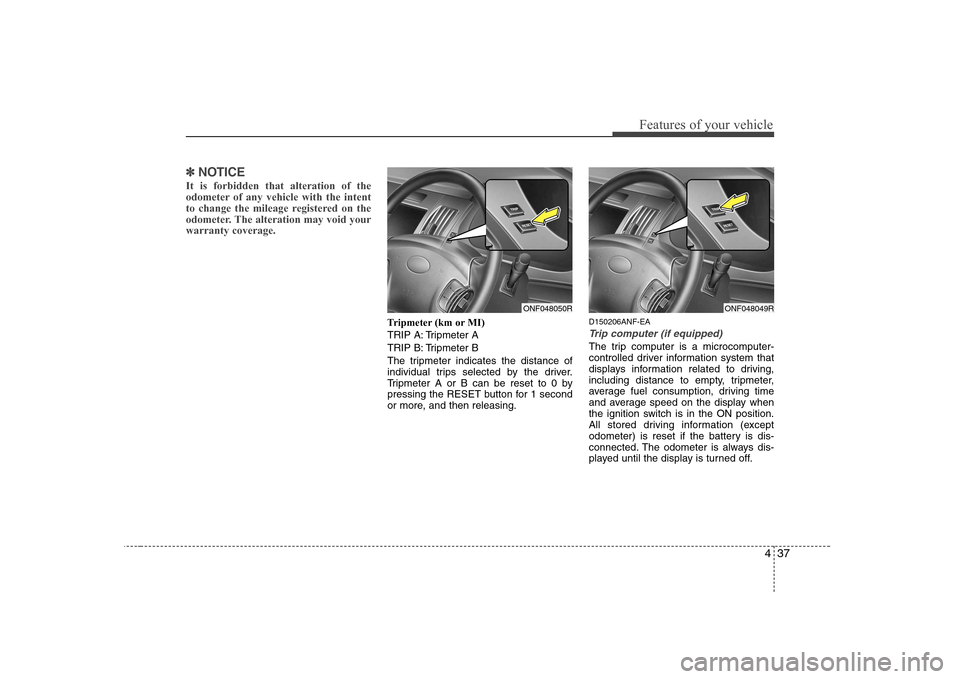
Tripmeter (km or MI)
TRIP A: Tripmeter A
TRIP B: Tripmeter B
The tripmeter indicates the distance of
individual trips selected by the driver.
Tripmeter A or B can be reset to 0 by
pressing the RESET button for 1 second
or more, and then releasing. D150206ANF-EA
Trip computer (if equipped)
The trip computer is a microcomputer-
controlled driver information system that
displays information related to driving,
including distance to empty, tripmeter,
average fuel consumption, driving time
and average speed on the display when
the ignition switch is in the ON position.
All stored driving information (except
odometer) is reset if the battery is dis-
connected. The odometer is always dis-
played until the display is turned off.
ONF048050RONF048049R
Page 112 of 340
Features of your vehicle
54
4
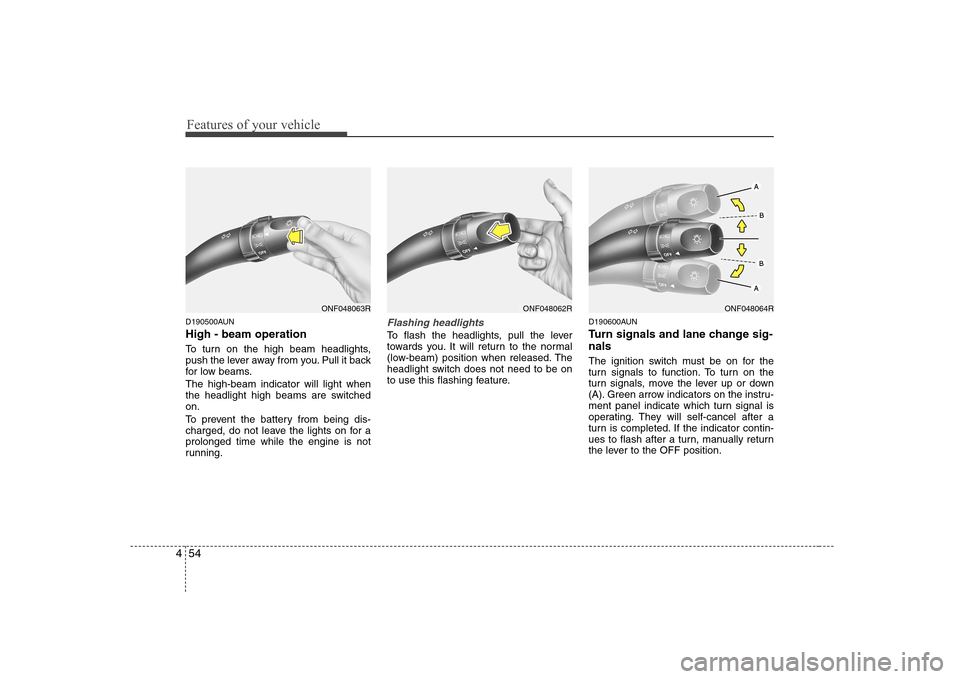
D190500AUN High - beam operation
To turn on the high beam headlights,
push the lever away from you. Pull it back
for low beams. The high-beam indicator will light when
the headlight high beams are switchedon.
To prevent the battery from being dis-
charged, do not leave the lights on for aprolonged time while the engine is not
running.Flashing headlights
To flash the headlights, pull the lever
towards you. It will return to the normal
(low-beam) position when released. The
headlight switch does not need to be on
to use this flashing feature. D190600AUN
Turn signals and lane change sig- nals
The ignition switch must be on for the
turn signals to function. To turn on the
turn signals, move the lever up or down
(A). Green arrow indicators on the instru-
ment panel indicate which turn signal is
operating. They will self-cancel after a
turn is completed. If the indicator contin-
ues to flash after a turn, manually return
the lever to the OFF position.
ONF048063RONF048062RONF048064R
Page 126 of 340
Features of your vehicle
68
4
Air conditioning system operation tips
If the vehicle has been parked in direct
sunlight during hot weather, open the
windows for a short time to let the hot
air inside the vehicle escape.
To help reduce moisture inside of win- dows on rainy or humid days, decrease
the humidity inside the vehicle by oper-ating the air conditioning system.
During air conditioning system opera- tion, you may occasionally notice aslight change in engine speed as the
air conditioning compressor cycles.
This is a normal system operation
characteristic.
Use the air conditioning system every month if only for a few minutes to
ensure maximum system performance.
When using the air conditioning sys- tem, you may notice clear water drip-
ping (or even puddling) on the ground
under the passenger side of the vehi-
cle. This is a normal system operation
characteristic.
Operating the air conditioning system in the recirculated air position provides
maximum cooling, however, continual
operation in this mode may cause the
air inside the vehicle to become stale.
During cooling operation, you may occasionally notice a misty air flow
because of rapid cooling and humid air
intake. This is a normal system opera-
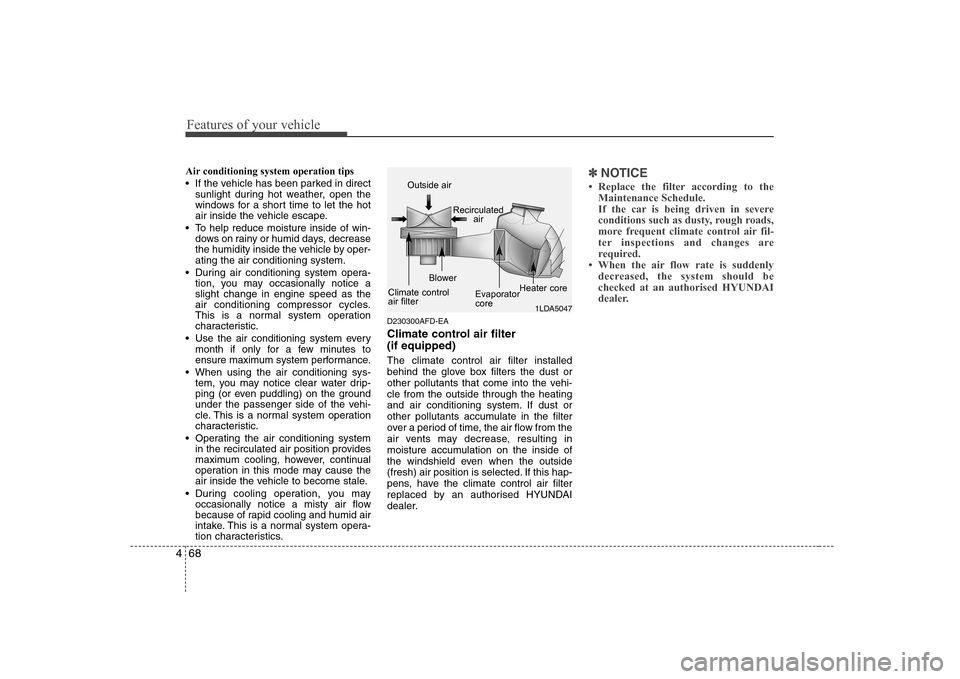
tion characteristics. D230300AFD-EA
Climate control air filter (if equipped) The climate control air filter installed
behind the glove box filters the dust or
other pollutants that come into the vehi-cle from the outside through the heating
and air conditioning system. If dust or
other pollutants accumulate in the filter
over a period of time, the air flow from the
air vents may decrease, resulting in
moisture accumulation on the inside of
the windshield even when the outside
(fresh) air position is selected. If this hap-
pens, have the climate control air filter
replaced by an authorised HYUNDAI
dealer.✽✽
NOTICE
Page 143 of 340
485
Features of your vehicle
D280600AUN
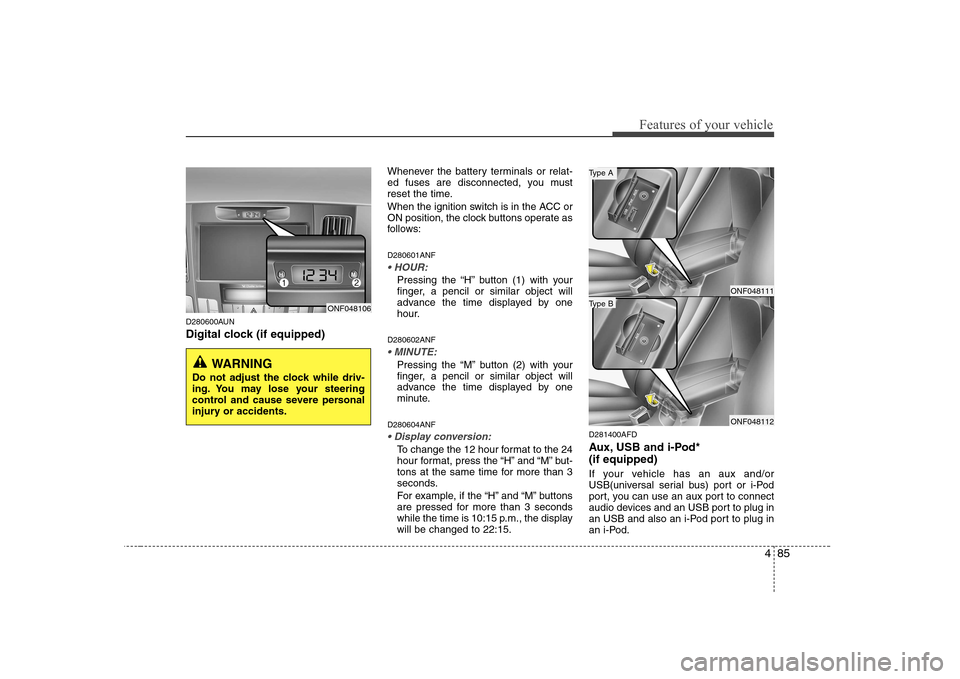
Digital clock (if equipped)Whenever the battery terminals or relat-
ed fuses are disconnected, you must
reset the time.
When the ignition switch is in the ACC or
ON position, the clock buttons operate as
follows: D280601ANF
Pressing the “H” button (1) with your
finger, a pencil or similar object will
advance the time displayed by one
hour.
D280602ANF
Pressing the “M” button (2) with your
finger, a pencil or similar object will
advance the time displayed by one
minute.
D280604ANF
To change the 12 hour format to the 24
hour format, press the “H” and “M” but-
tons at the same time for more than 3
seconds.
For example, if the “H” and “M” buttons
are pressed for more than 3 seconds
while the time is 10:15 p.m., the displaywill be changed to 22:15. D281400AFD
Aux, USB and i-Pod* (if equipped)
If your vehicle has an aux and/or
USB(universal serial bus) port or i-Pod
port, you can use an aux port to connect
audio devices and an USB port to plug in
an USB and also an i-Pod port to plug in
an i-Pod.
ONF048106
WARNING
Do not adjust the clock while driv-
ing. You may lose your steering
control and cause severe personal
injury or accidents.
ONF048111
ONF048112
Type B
Type A
Page 151 of 340
493
Features of your vehicle
1. FM Selection Button
Turns to FM mode and toggles FM1 and
FM2 when the button is pressed each
time.
2. AM Selection Button
Pressing the AM button selects the AM
band. AM Mode is displayed on the LCD.
3. CD Selection Button
If there is a cd in the CDP DECK it plays
the CD.
Press CD button to automatically insert CD when the disc is ejected from the
deck by pressing CD EJECT.
4. AUX Selection Button
If the auxiliary device is connected, it
turns to AUX MODE to play the sound
from the auxiliary player.
If no Disc and auxiliary device is connected,
it displays “NO Media” for 5 seconds and
returns to the previous mode.5. Automatic Channel Selection
Button
When the [SEEK ]button is pressed, it reduces the band frequency by 0.1Mhz to automatically select channel.
Stops at the previous frequency if no
channel is found.
When the [SEEK ]button is pressed, it increases the band frequency by0.1Mhz to automatically select channel.
Stops at the previous frequency if no
channel is found.
6. Power ON/OFF & Volume Control Button
Turns on/off the set when the IGNITION
SWITCH is on ACC or ON. If the button
is turned to the right, it increases the
volume and left, decreases the volume.
7. SCAN Button
If this button is pressed, the frequencies
will become increased and receive the
corresponding broadcasts.
This function will play the frequencies for 5 seconds each and find other broad-
casts as the frequency increases.
Press the button again when desiring to
continue listening to the currently playingbroadcast. 8. AUTO STORE Button
When the button is pressed, it automati-
cally selects and saves channels with
high reception rate to PRESET buttons
(1~6) and plays the channel saved inPRESET1.
If no channel is saved after AST, it will
play the previous channel.
9. SET UP Button
Press this button to turn to the TEXT
SCROLL, AVC, and audio adjustment
mode.
If no action is taken for 5 seconds after
pressing the button, it will return to the
play mode.(After entering SET UP mode,
move between items using the left, right
and PUSH functions of the TUNE button.)
The set up item changes from TEXT
SCROLL
➟
AVC...
Page 165 of 340
4107
Features of your vehicle
1. FM Selection Button
Turns to FM mode and toggles FM1 and
FM2 when the button is pressed each
time.
2. AM Selection Button
Pressing the AM button selects the AM
band. AM Mode is displayed on the LCD.
3. CD Selection Button
If there is a cd in the CDP DECK it plays
the CD.
Press CD button to automatically insert CD when the disc is ejected from the
deck by pressing CD EJECT.
4. AUX Selection Button
If the auxiliary device is connected, it
turns to AUX MODE to play the sound
from the auxiliary player.
If no Disc and auxiliary device is connected,
it displays “NO Media” for 5 seconds and
returns to the previous mode.5. Automatic Channel Selection
Button
When the [SEEK ]button is pressed, it reduces the band frequency by 0.1Mhz to automatically select channel.
Stops at the previous frequency if no
channel is found.
When the [SEEK ]button is pressed, it increases the band frequency by0.1Mhz to automatically select channel.
Stops at the previous frequency if no
channel is found.
6. Power ON/OFF & Volume Control Button
Turns on/off the set when the IGNITION
SWITCH is on ACC or ON. If the button
is turned to the right, it increases the
volume and left, decreases the volume.
7. SCAN Button
If this button is pressed, the frequencies
will become increased and receive the
corresponding broadcasts.
This function will play the frequencies for 5 seconds each and find other broad-
casts as the frequency increases.
Press the button again when desiring to
continue listening to the currently playingbroadcast. 8. AUTO STORE Button
When the button is pressed, it automati-
cally selects and saves channels with
high reception rate to PRESET buttons
(1~6) and plays the channel saved inPRESET1.
If no channel is saved after AST, it will
play the previous channel.
9. SET UP Button
Press this button to turn to the TEXT
SCROLL, AVC, and audio adjustment
mode.
If no action is taken for 5 seconds after
pressing the button, it will return to the
play mode.(After entering SET UP mode,
move between items using the left, right
and PUSH functions of the TUNE button.)
The set up item changes from TEXT
SCROLL
➟
AVC...
Page 179 of 340
Driving your vehicle
2
5
E010000ANF-EA
WARNING - ENGINE EXHAUST CAN BE DANGEROUS!
Engine exhaust fumes can be extremely dangerous. If, at any time, you smell exhaust fumes inside the vehicle, open the win-
dows immediately.
• Do not inhale exhaust fumes.
Exhaust fumes contain carbon monoxide, a colourless, odourless gas that can cause unconsciousness and death by asphyx- iation.
The exhaust system should be checked whenever the vehicle is raised to change the oil or for any other purpose. If you hear
a change in the sound of the exhaust or if you drive over something that strikes the underneath side of the car, have the
exhaust system checked as soon as possible by an authorised HYUNDAI dealer.
Letting the engine idle in your garage, even with the garage door open, is a hazardous practice. Never run the engine in your
garage any longer than it takes to start the engine and back the car out.
If it is necessary to idle the engine for a prolonged period with people inside the car, be sure to do so only in an open area
with the air intake set at "Fresh" and fan operating at one of the higher speeds so fresh air is drawn into the interior.
If you must drive with the trunk open because you are carrying objects that make this necessary:
1. Close all windows.
2. Open side vents.
3. Set the air intake control at "Fresh", the air flow control at "Floor" or "Face" and the fan at one of the higher speeds.
To assure proper operation of the ventilation system, be sure the ventilation air intakes located just in front of the windshie ld are
kept clear of snow, ice, leaves or other obstructions.