Page 248 of 340

75
Maintenance
G020200AFD-EA Owner maintenance precautions
Improper or incomplete service may
result in problems. This section gives
instructions only for the maintenance
items that are easy to perform.
As explained earlier in this section, sev-
eral procedures can be done only by an
authorised HYUNDAI dealer with special
tools.
✽✽NOTICE
Improper owner maintenance during the warranty period may affect warran-
ty coverage. For details, read the sepa-
rate Service Passport provided with the
vehicle. If you're unsure about any serv-
icing or maintenance procedure, have itdone by an authorised HYUNDAI deal-
er.
WARNING - Maintenance
work
Performing maintenance work on a vehicle can be dangerous. You
can be seriously injured while
performing some maintenance
procedures. If you lack sufficient
knowledge and experience or the
proper tools and equipment to do
the work, have it done by an
authorised HYUNDAI dealer.
Working under the bonnet with the engine running is dangerous.
It becomes even more dangerous
when you wear jewelry or loose
clothing. These can become
entangled in moving parts and
result in injury. Therefore, if you
must run the engine while work-
ing under the bonnet, make cer-
tain that you remove all jewelry
(especially rings, bracelets,
watches, and necklaces) and all
neckties, scarves, and similar
loose clothing before gettingnear the engine or cooling fans.WARNING - Diesel Engine
Never work on injection system with engine running or within 30
seconds after shutting off engine.
High-pressure pump, rail, injectorsand high-pressure pipes are sub-
ject to high pressure even after the
engine stopped. The fuel jet pro-
duced by fuel leaks may cause seri-
ous injury, if it touches the body.
People using pacemakers shouldnot be within 30cm of the ECU orwiring harness within the engine
room while engine is running, since
the high currents in the electronic
engine control system produce
considerable magnetic fields.
Page 250 of 340

77
Maintenance
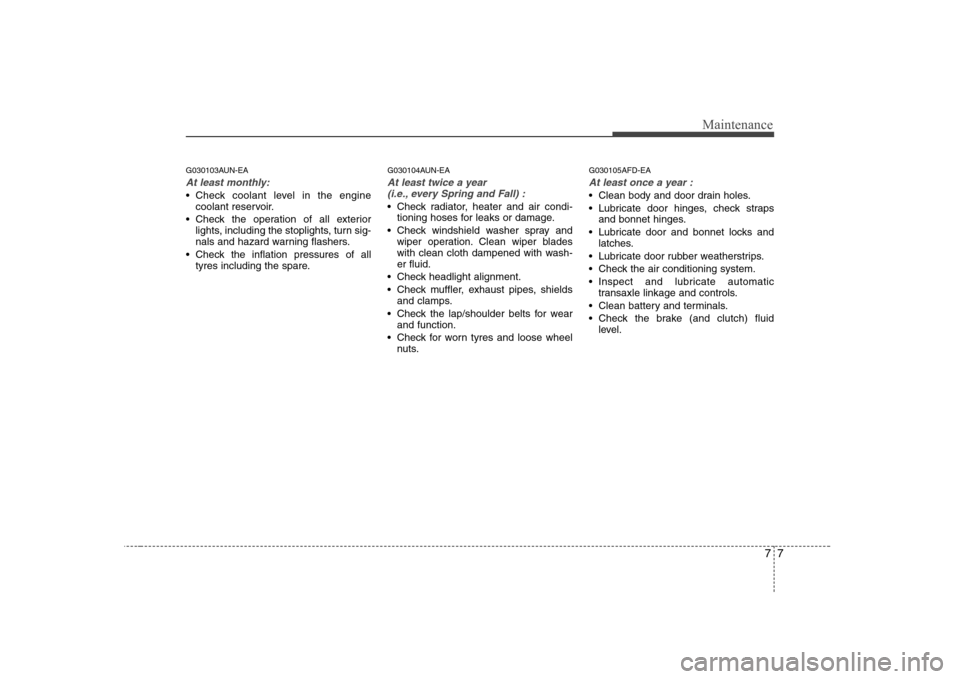
G030103AUN-EA
At least monthly:
Check coolant level in the enginecoolant reservoir.
Check the operation of all exterior lights, including the stoplights, turn sig-
nals and hazard warning flashers.
Check the inflation pressures of all tyres including the spare. G030104AUN-EA
At least twice a year
(i.e., every Spring and Fall) :
Check radiator, heater and air condi- tioning hoses for leaks or damage.
Check windshield washer spray and wiper operation. Clean wiper blades
with clean cloth dampened with wash-er fluid.
Check headlight alignment.
Check muffler, exhaust pipes, shields and clamps.
Check the lap/shoulder belts for wear and function.
Check for worn tyres and loose wheel nuts. G030105AFD-EA
At least once a year :
Clean body and door drain holes.
Lubricate door hinges, check straps
and bonnet hinges.
Lubricate door and bonnet locks and latches.
Lubricate door rubber weatherstrips.
Check the air conditioning system.
Inspect and lubricate automatic transaxle linkage and controls.
Clean battery and terminals.
Check the brake (and clutch) fluid level.
Page 307 of 340

Maintenance
64
7
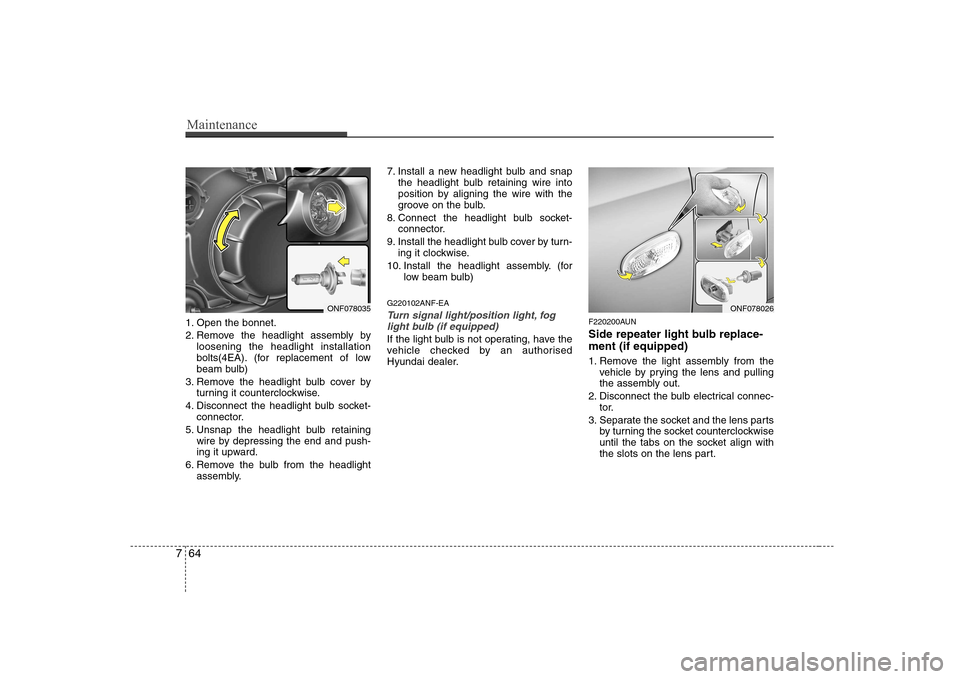
1. Open the bonnet.
2. Remove the headlight assembly by
loosening the headlight installation
bolts(4EA). (for replacement of low
beam bulb)
3. Remove the headlight bulb cover by turning it counterclockwise.
4. Disconnect the headlight bulb socket- connector.
5. Unsnap the headlight bulb retaining wire by depressing the end and push-
ing it upward.
6. Remove the bulb from the headlight assembly. 7. Install a new headlight bulb and snap
the headlight bulb retaining wire into
position by aligning the wire with the
groove on the bulb.
8. Connect the headlight bulb socket- connector.
9. Install the headlight bulb cover by turn- ing it clockwise.
10. Install the headlight assembly. (for low beam bulb)
G220102ANF-EATurn signal light/position light, fog light bulb (if equipped)
If the light bulb is not operating, have the
vehicle checked by an authorised
Hyundai dealer. F220200AUN
Side repeater light bulb replace- ment (if equipped)
1. Remove the light assembly from the
vehicle by prying the lens and pulling
the assembly out.
2. Disconnect the bulb electrical connec- tor.
3. Separate the socket and the lens parts by turning the socket counterclockwise
until the tabs on the socket align with
the slots on the lens part.
ONF078035ONF078026
Page 311 of 340

Maintenance
68
7
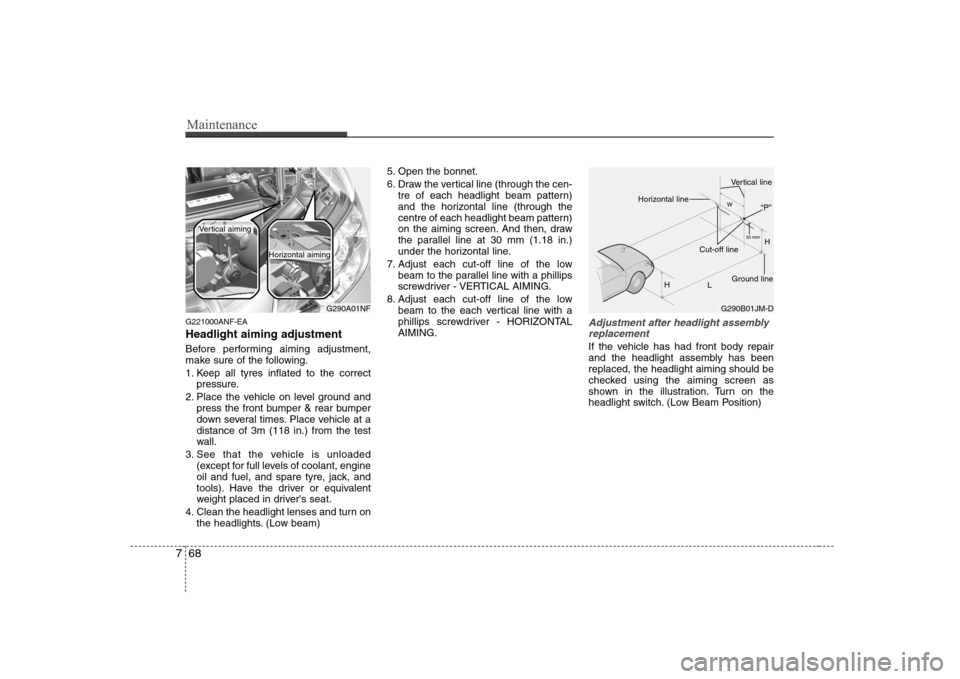
G221000ANF-EA Headlight aiming adjustment
Before performing aiming adjustment,
make sure of the following.
1. Keep all tyres inflated to the correct
pressure.
2. Place the vehicle on level ground and press the front bumper & rear bumper
down several times. Place vehicle at adistance of 3m (118 in.) from the test
wall.
3. See that the vehicle is unloaded (except for full levels of coolant, engine
oil and fuel, and spare tyre, jack, and
tools). Have the driver or equivalent
weight placed in driver's seat.
4. Clean the headlight lenses and turn on the headlights. (Low beam) 5. Open the bonnet.
6. Draw the vertical line (through the cen-
tre of each headlight beam pattern)
and the horizontal line (through the
centre of each headlight beam pattern)
on the aiming screen. And then, draw
the parallel line at 30 mm (1.18 in.)
under the horizontal line.
7. Adjust each cut-off line of the low beam to the parallel line with a phillips
screwdriver - VERTICAL AIMING.
8. Adjust each cut-off line of the low beam to the each vertical line with a
phillips screwdriver - HORIZONTALAIMING.Adjustment after headlight assembly
replacement
If the vehicle has had front body repair
and the headlight assembly has beenreplaced, the headlight aiming should be
checked using the aiming screen as
shown in the illustration. Turn on the
headlight switch. (Low Beam Position)
G290A01NF
Vertical aiming
Horizontal aiming
G290B01JM-D H
H L30 mm
W
Horizontal line
Vertical line
“P”
Ground line
Cut-off line
Page 338 of 340

Index
2
I
Air cleaner ··································································· 7-34
Airbag-supplemental restraint system ························· 3-29
Appearance care ·························································· 7-70
Audio system ······························································· 4-87
Automatic climate control system ······························· 4-70
Automatic transaxle ····················································· 5-11
Automatic transaxle fluid ············································ 7-30
Battery ········································································· 7-40
Before driving ································································ 5-3
Bonnet ·········································································· 4-18
Boot ············································································· 4-12
Brake and clutch fluid ················································· 7-28
Brake system ······························································· 5-17
Bulb wattage ·································································· 9-2
Child restraint system ·················································· 3-23
Climate control air filter ·············································· 7-36
Cruise control system ·················································· 5-28 Defroster ······································································ 4-59
Dimensions ···································································· 9-2
Door locks ····································································· 4-8
Economical operation ·················································· 5-32
Emergency starting ························································ 6-4
Emission control system ·············································· 7-76
Engine compartment ······················································ 7-2
Engine coolant ····························································· 7-25
Engine number ······························································· 8-3
Engine oil ····································································· 7-24
Explanation of scheduled maintenance items ············· 7-21
Fuel filler lid ································································ 4-20
Fuel filter ····································································· 7-33
Fuel requirements ·························································· 1-2
Fuses ············································································ 7-53
A
B
C
D
E
F