Page 112 of 340
Features of your vehicle
54
4
D190500AUN High - beam operation
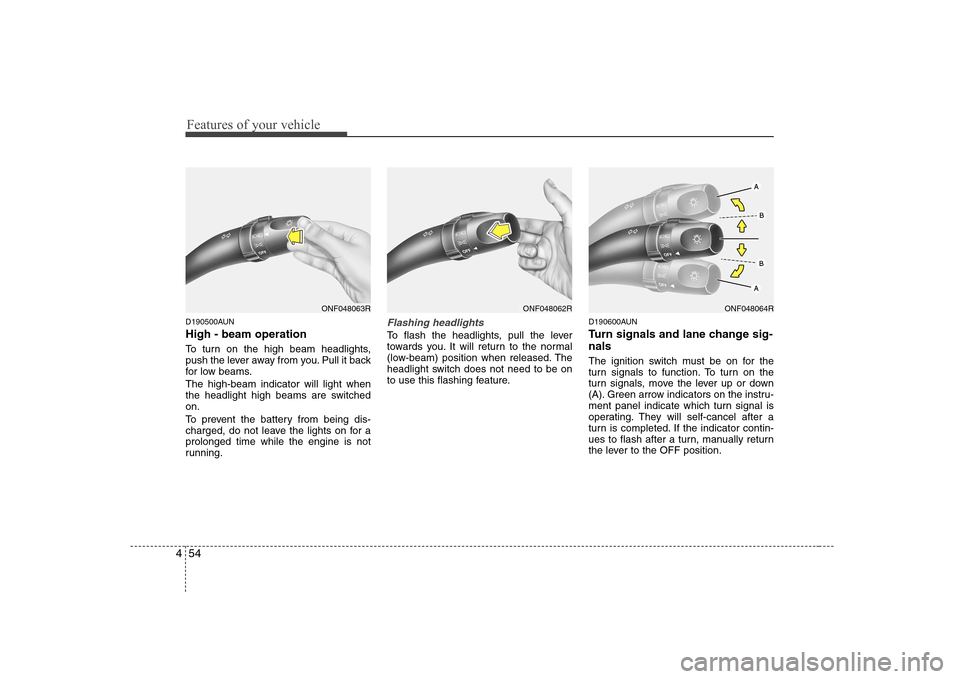
To turn on the high beam headlights,
push the lever away from you. Pull it back
for low beams. The high-beam indicator will light when
the headlight high beams are switchedon.
To prevent the battery from being dis-
charged, do not leave the lights on for aprolonged time while the engine is not
running.Flashing headlights
To flash the headlights, pull the lever
towards you. It will return to the normal
(low-beam) position when released. The
headlight switch does not need to be on
to use this flashing feature. D190600AUN
Turn signals and lane change sig- nals
The ignition switch must be on for the
turn signals to function. To turn on the
turn signals, move the lever up or down
(A). Green arrow indicators on the instru-
ment panel indicate which turn signal is
operating. They will self-cancel after a
turn is completed. If the indicator contin-
ues to flash after a turn, manually return
the lever to the OFF position.
ONF048063RONF048062RONF048064R
Page 115 of 340
457
Features of your vehicle
D210000AUND210100ANF Map lamp
Push in the map lamp button to turn the
light on or off. This light produces a spot
beam for convenient use as a map lamp
at night or as a personal lamp for the
driver and the passenger.D210200ANF Dome lamp
In the ON position, the light stays on at all
times.
INTERIOR LIGHT
HNF2109
CAUTION
Do not use the interior lights for
extended periods when engine is
not running.
It may cause battery discharge.
CAUTION
Do not leave the switch in this posi-tion for an extended period of time
when the vehicle is not running.
HNF2110
Page 132 of 340
Features of your vehicle
74
4
Temperature conversion
If the battery has been discharged or dis-
connected, the temperature mode dis-
play will reset to Centigrade.
This is normal condition. You can switch
the temperature mode between
Centigrade to Fahrenheit as follows;
While depressing the AUTO button,
depress the OFF button for 3 seconds or
more. The display will change from
Centigrade to Fahrenheit, or from
Fahrenheit to Centigrade.
D240203AFD
Air intake control
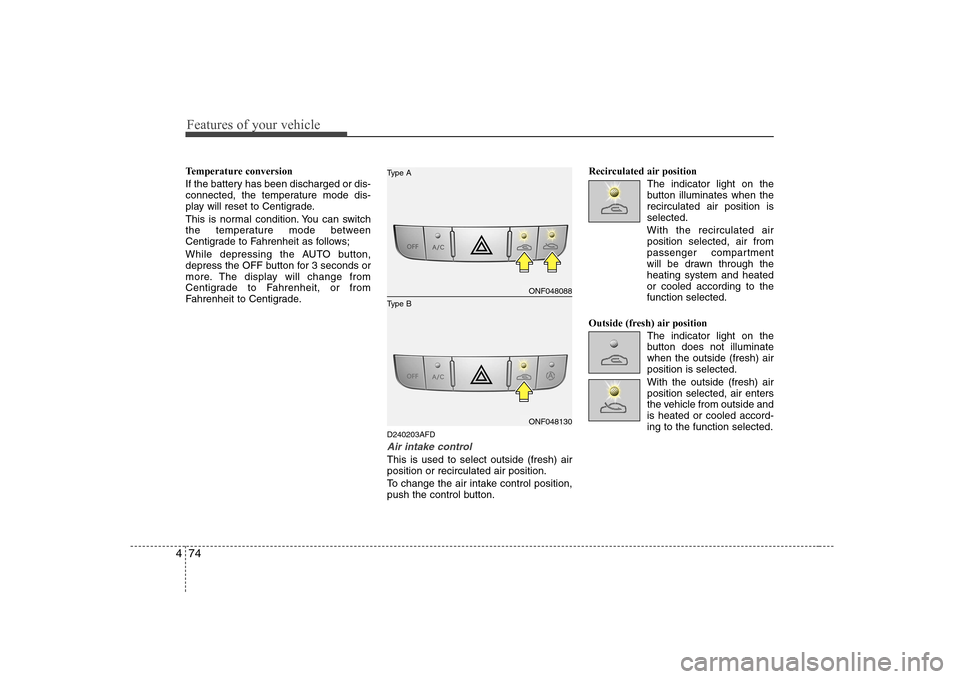
This is used to select outside (fresh) air position or recirculated air position.
To change the air intake control position,
push the control button.Recirculated air position
The indicator light on the
button illuminates when therecirculated air position isselected.
With the recirculated air position selected, air from
passenger compartment
will be drawn through theheating system and heatedor cooled according to thefunction selected.
Outside (fresh) air position The indicator light on the
button does not illuminatewhen the outside (fresh) airposition is selected. With the outside (fresh) air position selected, air enters
the vehicle from outside andis heated or cooled accord-ing to the function selected.
ONF048088
ONF048130
Type B
Type A
Page 137 of 340
479
Features of your vehicle
D250301AFD
Manual climate control system
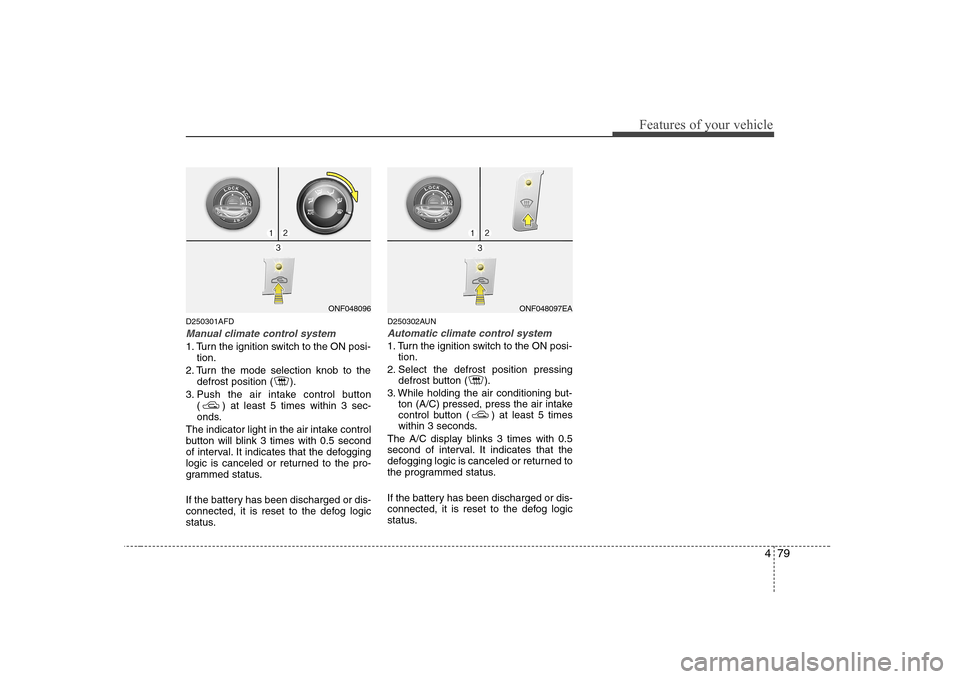
1. Turn the ignition switch to the ON posi-tion.
2. Turn the mode selection knob to the defrost position ( ).
3. Push the air intake control button ( ) at least 5 times within 3 sec-
onds.
The indicator light in the air intake control
button will blink 3 times with 0.5 second
of interval. It indicates that the defogging
logic is canceled or returned to the pro-
grammed status.
If the battery has been discharged or dis-
connected, it is reset to the defog logic
status. D250302AUN
Automatic climate control system
1. Turn the ignition switch to the ON posi-
tion.
2. Select the defrost position pressing defrost button ( ).
3. While holding the air conditioning but- ton (A/C) pressed, press the air intake
control button ( ) at least 5 times
within 3 seconds.
The A/C display blinks 3 times with 0.5
second of interval. It indicates that the
defogging logic is canceled or returned to
the programmed status.
If the battery has been discharged or dis-
connected, it is reset to the defog logic
status.
ONF048096ONF048097EA
Page 142 of 340
Features of your vehicle
84
4
D280500AUN
Power outlet
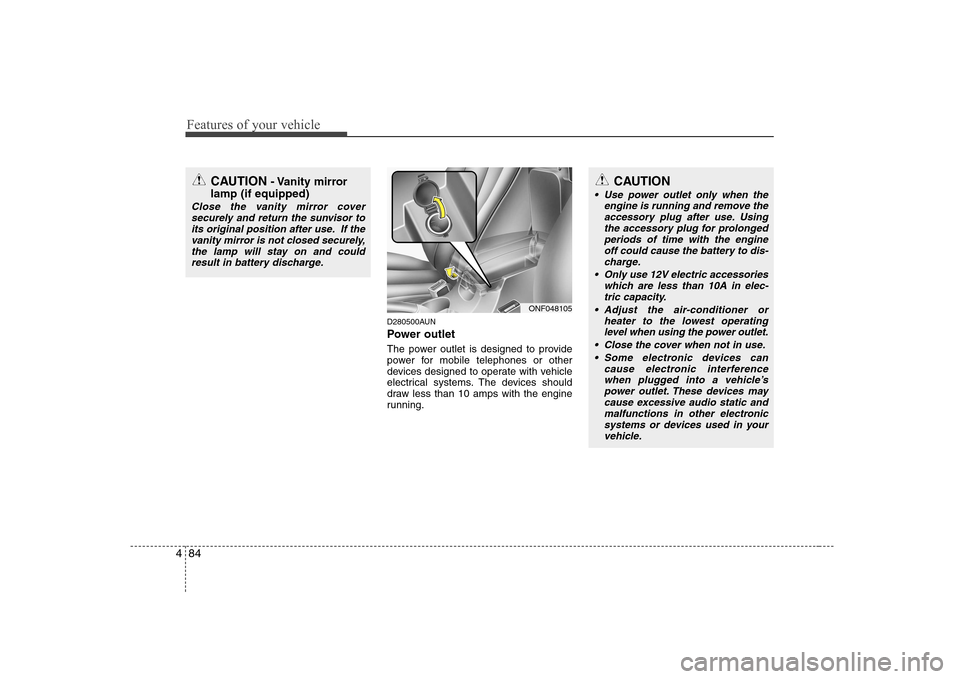
The power outlet is designed to provide
power for mobile telephones or other
devices designed to operate with vehicle
electrical systems. The devices should
draw less than 10 amps with the engine
running.
CAUTION - Vanity mirror
lamp (if equipped)
Close the vanity mirror cover securely and return the sunvisor toits original position after use. If the vanity mirror is not closed securely,
the lamp will stay on and couldresult in battery discharge.
CAUTION
Use power outlet only when the
engine is running and remove theaccessory plug after use. Using the accessory plug for prolonged
periods of time with the engineoff could cause the battery to dis- charge.
Only use 12V electric accessories which are less than 10A in elec-
tric capacity.
Adjust the air-conditioner or heater to the lowest operatinglevel when using the power outlet.
Close the cover when not in use. Some electronic devices can cause electronic interferencewhen plugged into a vehicle’s power outlet. These devices maycause excessive audio static and
malfunctions in other electronicsystems or devices used in yourvehicle.
ONF048105
Page 143 of 340
485
Features of your vehicle
D280600AUN
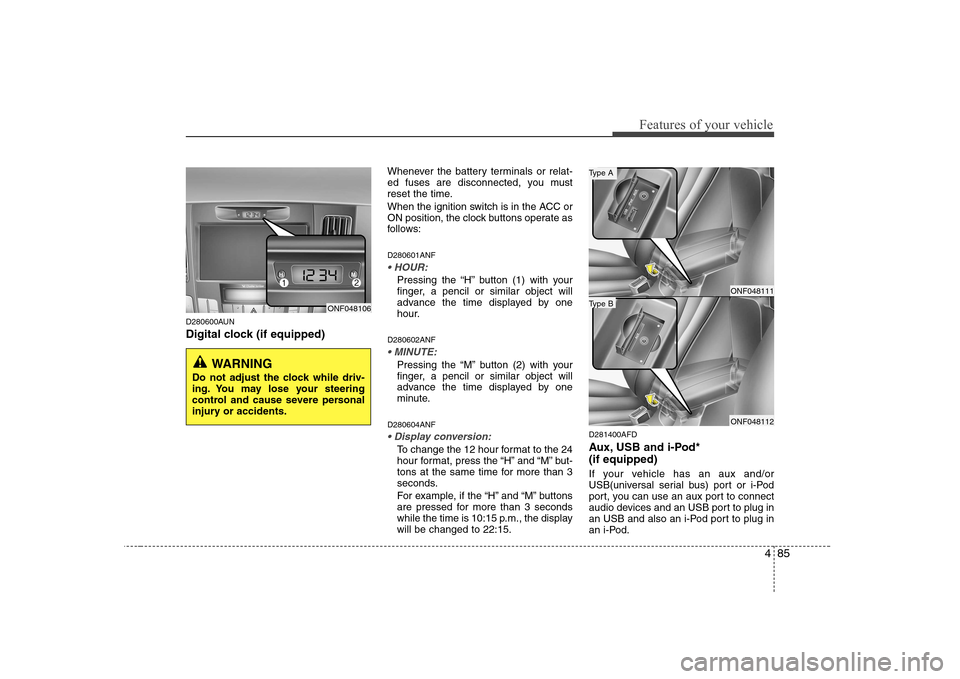
Digital clock (if equipped)Whenever the battery terminals or relat-
ed fuses are disconnected, you must
reset the time.
When the ignition switch is in the ACC or
ON position, the clock buttons operate as
follows: D280601ANF
Pressing the “H” button (1) with your
finger, a pencil or similar object will
advance the time displayed by one
hour.
D280602ANF
Pressing the “M” button (2) with your
finger, a pencil or similar object will
advance the time displayed by one
minute.
D280604ANF
To change the 12 hour format to the 24
hour format, press the “H” and “M” but-
tons at the same time for more than 3
seconds.
For example, if the “H” and “M” buttons
are pressed for more than 3 seconds
while the time is 10:15 p.m., the displaywill be changed to 22:15. D281400AFD
Aux, USB and i-Pod* (if equipped)
If your vehicle has an aux and/or
USB(universal serial bus) port or i-Pod
port, you can use an aux port to connect
audio devices and an USB port to plug in
an USB and also an i-Pod port to plug in
an i-Pod.
ONF048106
WARNING
Do not adjust the clock while driv-
ing. You may lose your steering
control and cause severe personal
injury or accidents.
ONF048111
ONF048112
Type B
Type A
Page 181 of 340
Driving your vehicle
4
5
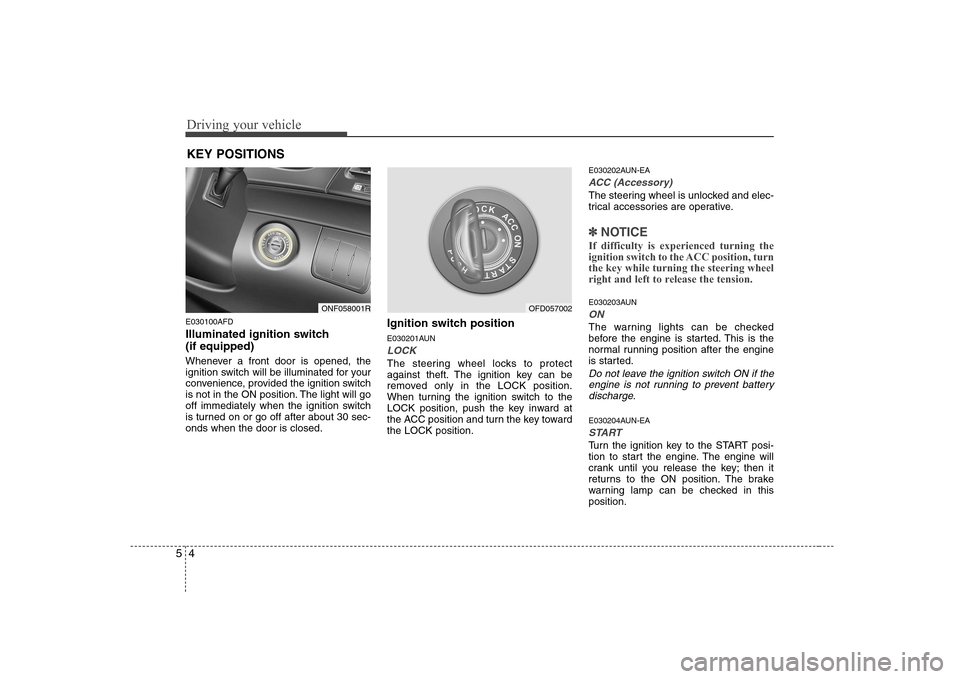
E030100AFD
Illuminated ignition switch (if equipped)
Whenever a front door is opened, the
ignition switch will be illuminated for your
convenience, provided the ignition switch
is not in the ON position. The light will go
off immediately when the ignition switch
is turned on or go off after about 30 sec-onds when the door is closed. Ignition switch position
E030201AUN
LOCK
The steering wheel locks to protect
against theft. The ignition key can be
removed only in the LOCK position.
When turning the ignition switch to the
LOCK position, push the key inward at
the ACC position and turn the key towardthe LOCK position.E030202AUN-EA
ACC (Accessory)
The steering wheel is unlocked and elec-
trical accessories are operative.
✽✽
NOTICE
If difficulty is experienced turning the
ignition switch to the ACC position, turnthe key while turning the steering wheel
right and left to release the tension.
E030203AUN
ON
The warning lights can be checked
before the engine is started. This is the
normal running position after the engine
is started.
Do not leave the ignition switch ON if the engine is not running to prevent batterydischarge.
E030204AUN-EA
START
Turn the ignition key to the START posi-
tion to start the engine. The engine will
crank until you release the key; then it
returns to the ON position. The brake
warning lamp can be checked in thisposition.
KEY POSITIONS
ONF058001ROFD057002
Page 189 of 340
Driving your vehicle
12
5
E060100ANF-EA
Automatic transaxle operation
The highly efficient automatic transaxle
has 4 (or 5) forward gears and one
reverse gear. The individual gears are
selected automatically, depending on the
position of the shift lever.
All normal forward driving is done with
the shift lever in the D (Drive) position.
To move the shift lever from the P (Park)
position, the brake pedal must be
depressed with the ignition switch ON.
✽✽
NOTICE
The first few shifts on a new vehicle, or if the battery has been disconnected,
may be somewhat abrupt. This is a nor-mal condition, and the shifting sequence
will adjust after shifts are cycled a few
times by the TCM (Transaxle Control
Module) or PCM (Powertrain ControlModule).
For smooth operation, depress the brake pedal when shifting from N (Neutral) to a forward or reverse gear.
E060101ANF
Transaxle ranges
The indicator lights in the instrument
cluster displays the shift lever position
when the ignition switch is in the ONposition.
P (Park)
Always come to a complete stop before
shifting into P (Park). This position locks
the transaxle and prevents the frontwheels from rotating.
WARNING - Automatic
transaxle
Always check the surrounding areas near your vehicle for peo-
ple, especially children, beforeputting a car into D (Drive) or R
(Reverse).
Before leaving the driver’s seat, always make sure the shift lever
is in the P (Park) position; then
set the parking brake fully and
shut the engine off. Unexpected
and sudden vehicle movementcan occur if these precautions
are not followed in the order iden-tified.
CAUTION
To avoid damage to your
transaxle, do not accelerate theengine in R (Reverse) or any for- ward gear position with the
brakes on.
When stopped on an upgrade, do not hold the vehicle stationarywith engine power. Use the serv-ice brake or the parking brake.
Do not shift from N (Neutral) or P (Park) into D (Drive), or R(Reverse) when the engine is above idle speed.